

Sometimes you get stuck, you come to a roadblock that you can't blow through with ease, something that stymies you for a good long time. That was the canopy for the blasta bommer for me. I've had time since I primed this beast and each time I looked at the canopy and was just blind as to how I was going to pull it off. Now, almost a year later later, I've got some precious time to devote to my hobby and damned if I was going to let it get away again!
I threw a bunch of ideas at the wall the last four or five days and finally decided upon a path to finish the build. Here's the overly explained steps in creating my canopy. Sure, there might have been easier ways to do it but I'm a fan of beating myself up until I figure something out on my own.
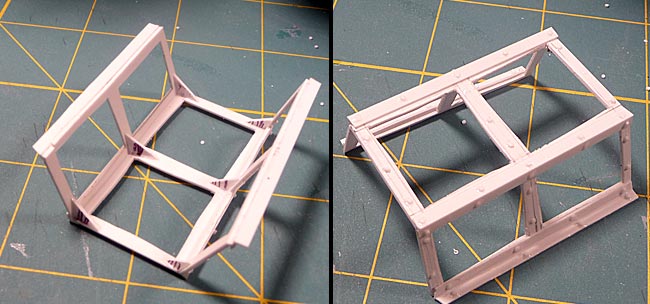
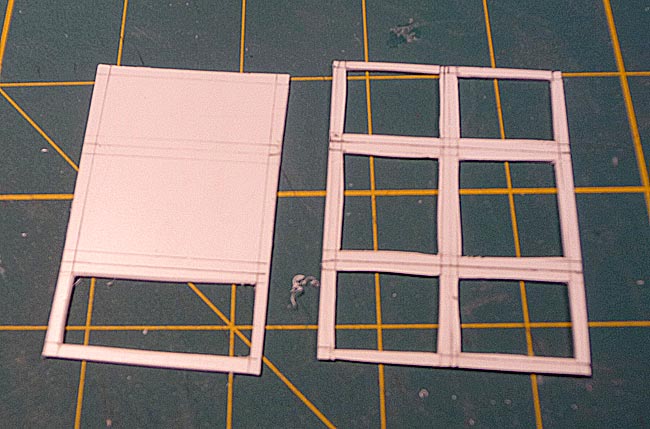
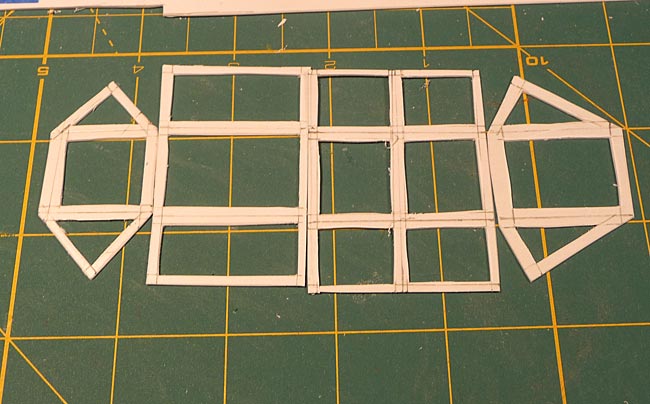
I used file card paper to construct a template (after many tries) and used it to make my canopy frames. Canopies are typically spindly, fragile pieces of metal held together by glass. Because of this fragility, I choose to lay each peice out flat and cut the window pieces out seperately, then score them where they should angle down. This gave the entire piece more rigidity while cutting out the windows.
Here is each frame all cut out ready for scoring and bending.
I cut little angled supports to add some structural support and to help keep the correct angle.
I added some channel to the edges for support and looks, which also adds detail - a place to put RIVITS!
BoLS Lounge : Wargames, Warhammer & Miniatures Forum
Results 471 to 480 of 503
Thread: Sukigod's Ork Waaagh! Log
-
12-08-2013, 07:49 PM #471Chaplain

- Join Date
- Aug 2009
- Location
- Central MN, USA
- Posts
- 370
 http://www.bigshoota.com
http://www.waaaghfest.com/
-
12-08-2013, 07:50 PM #472Chaplain
- Join Date
- Aug 2009
- Location
- Central MN, USA
- Posts
- 370
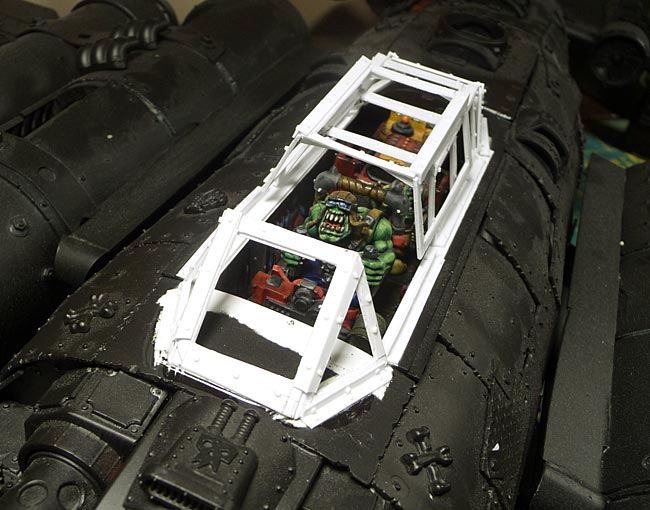
I've already glued the front windshield into place as I can reach the interior of it to add the glass after painting. Here's the other assembled pieces.

And the pieces in place on the fuselage.
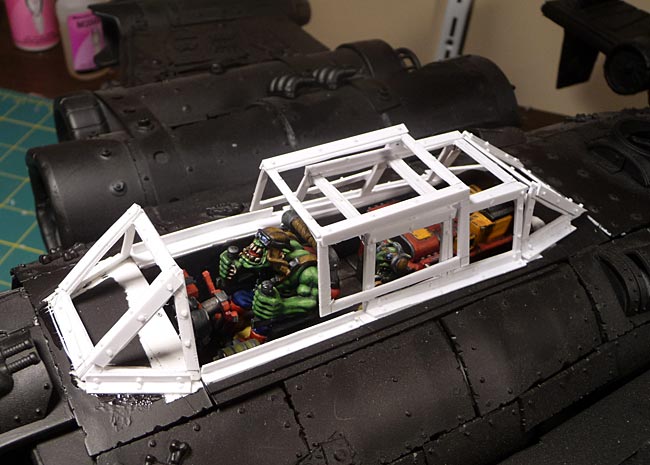
I'll be painting these parts by hand and when I'm finished, I'll be adding glass panes using white glue (it dries transparent without crazing) to finish up.
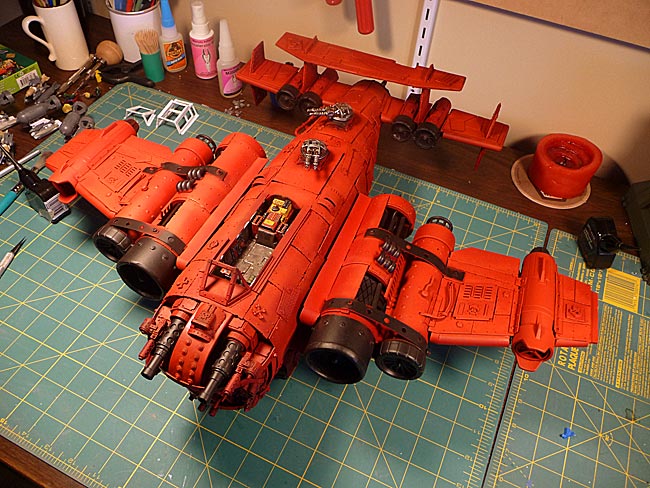
At this point, I can actually call the build on this pig done! On to some other color than primer black.
Later!
Sukigodhttp://www.bigshoota.com
http://www.waaaghfest.com/
-
12-09-2013, 04:46 AM #473Chapter-Master
- Join Date
- Jul 2009
- Location
- Aldershot, Hampshire, United Kingdom
- Posts
- 2,154

Great to see you getting back on the horse... or Bomma in this case! My hobby time disappeared with taking on a second job as well
 Still, excellent work so far. Looking forward to a productive holiday period from you
Always thinking 2 projects ahead of anything I've yet to finish
Still, excellent work so far. Looking forward to a productive holiday period from you
Always thinking 2 projects ahead of anything I've yet to finish
http://instinctuimperator.blogspot.co.uk/
-
12-10-2013, 09:19 PM #474Chaplain
- Join Date
- Aug 2009
- Location
- Central MN, USA
- Posts
- 370
Thanks Sotun, it's great to BE back
Paint. Paint. Paint!
Sadly, only enough for the little grotty gunners
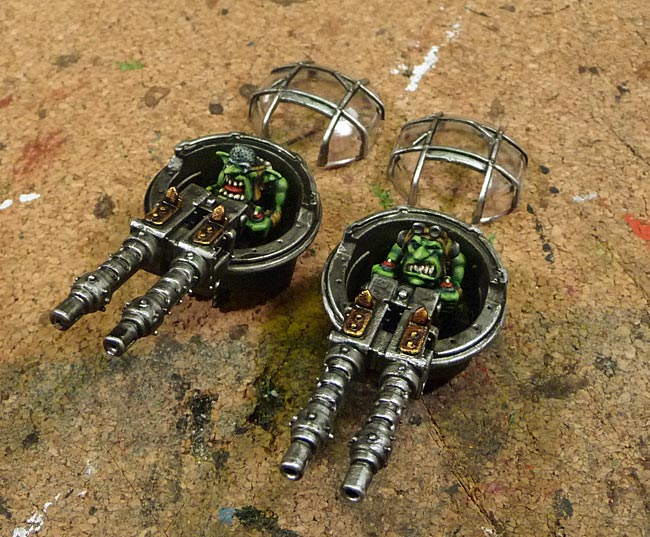
Finished up the grot big shoota gunner turrets and realized I've run out of Evil Sunz Red so the main painting of the bomma will have to wait until I have a chance to get to the hobby shop (hopefully tomorrow).
 http://www.bigshoota.com
http://www.waaaghfest.com/
-
12-10-2013, 09:20 PM #475Chaplain
- Join Date
- Aug 2009
- Location
- Central MN, USA
- Posts
- 370
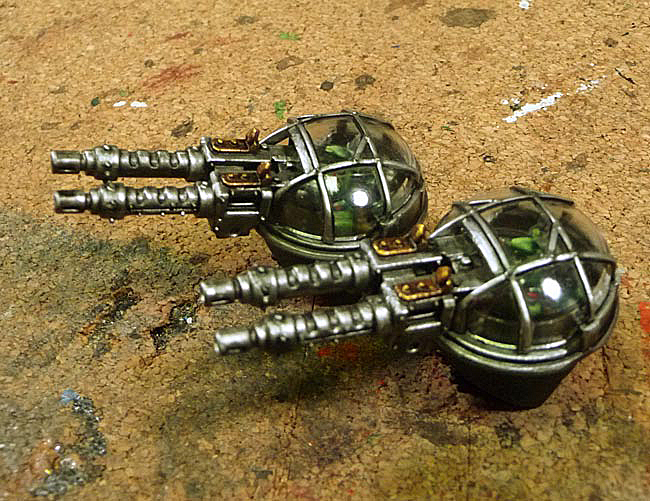
Not that I don't have other things I can paint - wait, I do! Three dakkajets I started ages ago are sitting there waiting to be finished. I've reached a point where I'm individually detail painting each jet to make them unique. There are two rites of passage for any ork player worth his/her salt when it comes to modeling and painting. Rivets and checks. I started the checks a while back but finished cleaning them up and did the base weathering tonight.
Cleaned up and ready for weathering.
Black sponged wear areas...
Metallics picked out out on wear edges...
An application of watered down Gryphone Sepia over the checks - the brownish wash looks better over the white than the black og Nuln Oil, which was washed over the rest of the plane.
While waiting for the washes to dry, I started the pilots for each plane - easier since they'll be painted primarily the same. Pics to come when I've got more than three coats of green on them.
Later!http://www.bigshoota.com
http://www.waaaghfest.com/
-
12-15-2013, 02:30 PM #476Chaplain
- Join Date
- Aug 2009
- Location
- Central MN, USA
- Posts
- 370
Wrapped up the pilots for each of my three dakkajets last night, presented here:
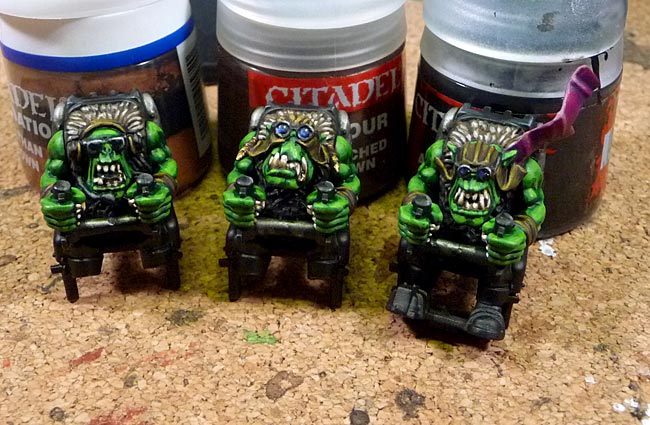
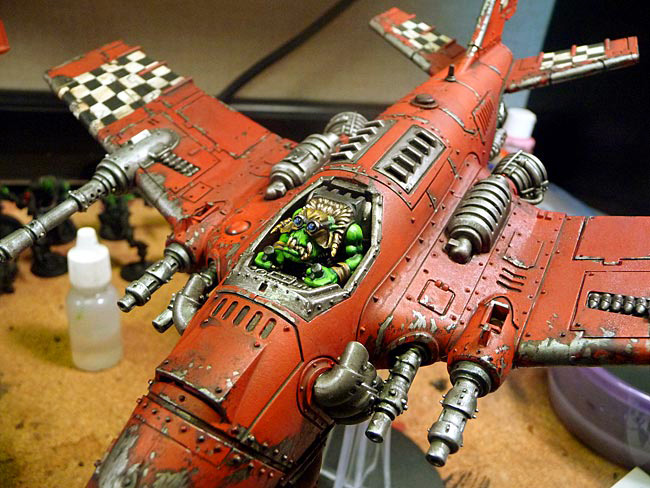
And he doesn't look too bad nestled in the cockpit. Just need to finish the windscreen and base it.
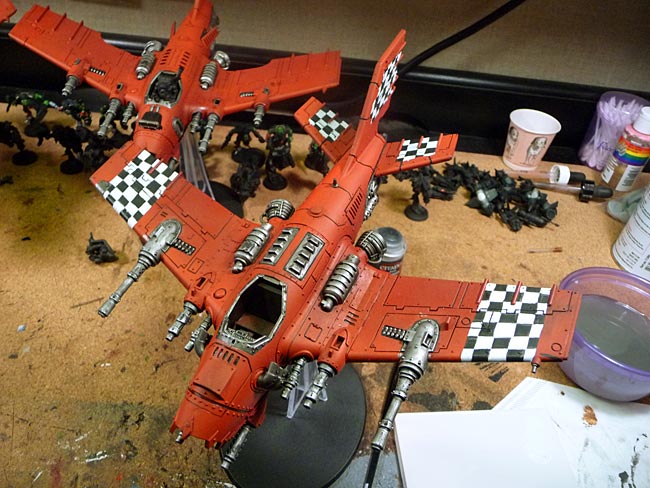
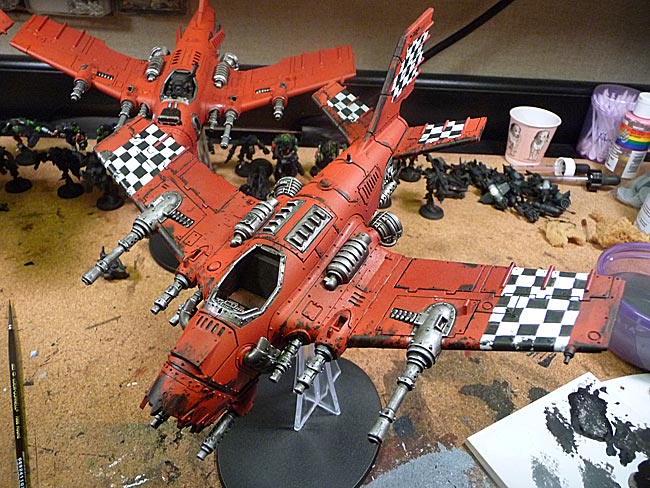
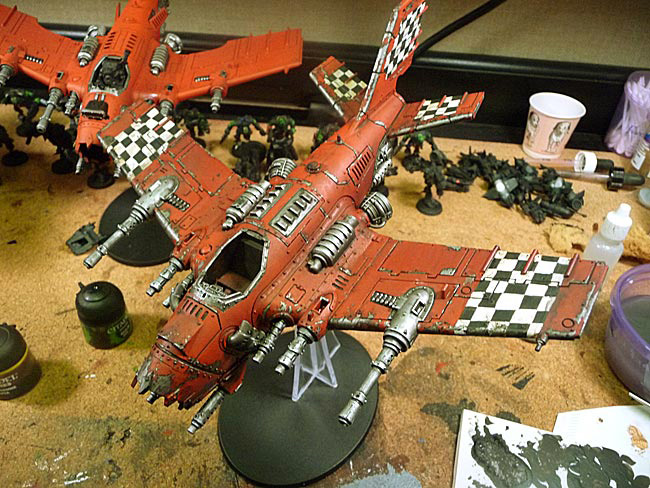
In other news, the blasta bomma, "Moar Dakka!!!" is no longer black and appropriately fasta!
And a "Barry" shot for scale, it's s little wider than two dakkajets
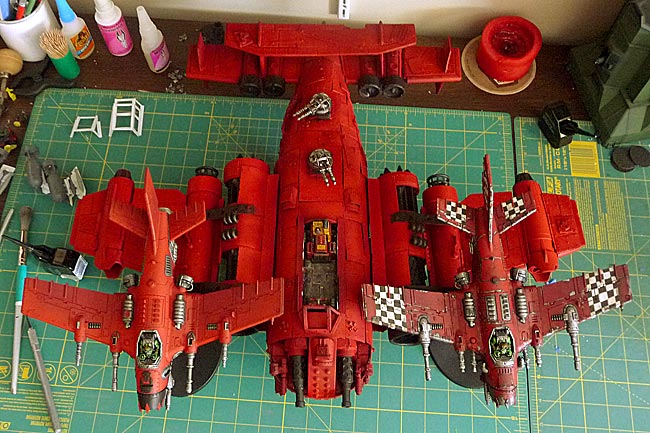
Not sure how quick this will proceed but I know the next step is blocking out all the black/metallics as I didn't do a perfect masking job and there's lots of smaller details thatneed to be picked out.
Later!http://www.bigshoota.com
http://www.waaaghfest.com/
-
12-16-2013, 02:52 AM #477Chapter-Master
- Join Date
- Jul 2009
- Location
- Aldershot, Hampshire, United Kingdom
- Posts
- 2,154
That's put a grin on my face like a speed freak who discovered Nitro!
Always thinking 2 projects ahead of anything I've yet to finish
http://instinctuimperator.blogspot.co.uk/
-
12-16-2013, 01:02 PM #478Veteran-Sergeant
- Join Date
- Aug 2013
- Location
- Charadon
- Posts
- 112
My WAAAGH! weeps with happiness at such a thing of beauty. Fine work!
-
12-18-2013, 02:15 AM #479Brother-Sergeant
- Join Date
- Oct 2013
- Location
- Holy Terra - Australasia
- Posts
- 68
I love HUGE Ork projects, this reminds me of a stompa I was following some years ago, also all scratch built. WWAAAGGGGHHHHH!!!*
*(Superb and truly excellent)
Also very thankful for your painting walk-throughs
Keep it up!
~PaulyMy log below
http://www.lounge.belloflostsouls.net/showthread.php?36025-The-Addams-Factory
-
12-30-2013, 02:40 PM #480Chaplain
- Join Date
- Aug 2009
- Location
- Central MN, USA
- Posts
- 370
Thanks all.
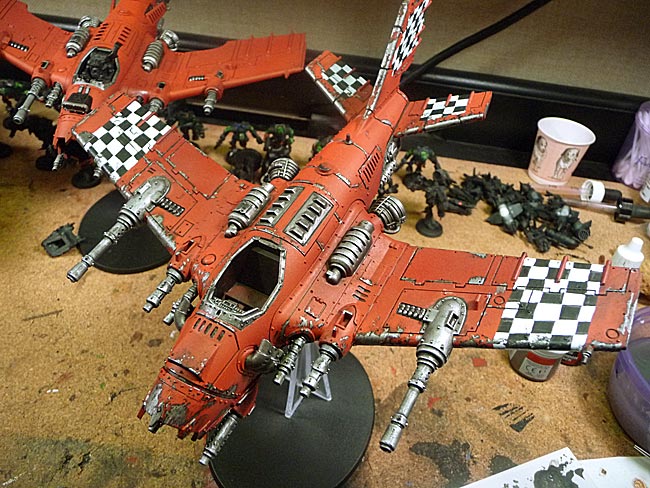
Just proving I'm not sittin' on my haunches this break...
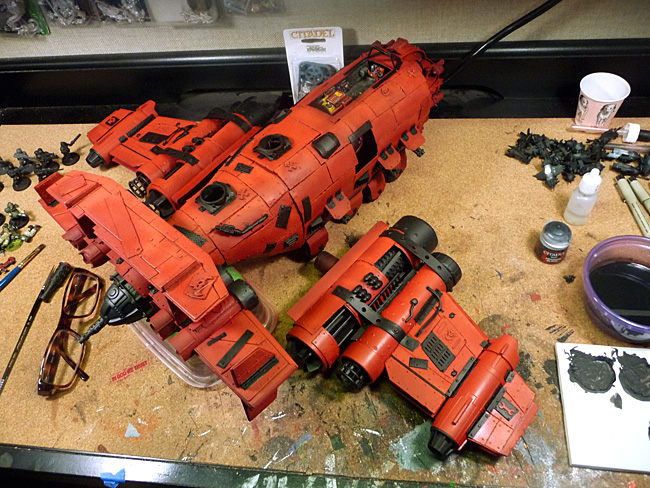
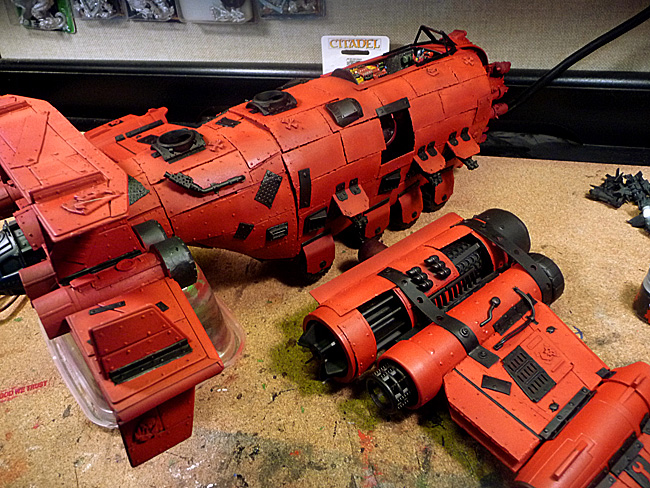
Blocking out the metals by going over them with Badab black first - always base your metals with black, there's a very good and scientific/optical reason why they look better that way. If you're curious, let me know and I'll do a tutorial!
This takes a long time to block everything out so be patient. I'm hoping to be doing stenciling and checks by weeks end.
Later!http://www.bigshoota.com
http://www.waaaghfest.com/


 Reply With Quote


 Posting Permissions
Powered by vBulletin® Version 4.2.5
Copyright © 2024 vBulletin Solutions Inc. All rights reserved.
Copyright © 2024 vBulletin Solutions Inc. All rights reserved.
All times are GMT -6. The time now is 11:40 PM.
vBulletin 4.0 skin by CompleteVB