

These are awesome. You are a true ork, supposed to be taken as a compliment!
BoLS Lounge : Wargames, Warhammer & Miniatures Forum
Results 11 to 20 of 503
Thread: Sukigod's Ork Waaagh! Log
-
08-31-2009, 07:06 PM #11Chaplain

- Join Date
- Jul 2009
- Posts
- 332

-
09-01-2009, 12:55 PM #12Scout
- Join Date
- Aug 2009
- Posts
- 6
When I saw your Orks the first thing that popped into my head was "cos red wunz go fasta!!!"
Keep up the awesome work!
-
09-01-2009, 01:01 PM #13Scout
- Join Date
- Aug 2009
- Location
- Kent, England
- Posts
- 5

I absolutely love that red! Can I ask, how did you do it?
-
09-01-2009, 01:36 PM #14Brother-Sergeant
- Join Date
- Sep 2009
- Location
- Norfolk, VA
- Posts
- 70
Those are pretty impressive. Not just the excellent modelling, but the painting as well.
I am wondering if you do all of your plasticard work from scratch or do you plan them in advance. Maybe using hand drafting or some sort of CAD program?
I know the orky bitz are scratch built, but I have to admit it might be awhile before I am confident enough with my conversion talents to tear apart a $40 vehicle.
You seem to have it down though!
War is an ugly thing, but not the ugliest of things. The decayed and degraded state of moral and patriotic feeling which thinks that nothing is worth war is much worse. The person who has nothing for which he is willing to fight, nothing which is more important than his own personal safety, is a miserable creature and has no chance of being free unless made and kept so by the exertions of better men than himself.
John Stuart Mill (1806 - 1873)
-
09-01-2009, 02:04 PM #15Battle-Brother
- Join Date
- Jul 2009
- Posts
- 39

Great red! How'd you get it that rich?
-
09-01-2009, 02:43 PM #16Chaplain
- Join Date
- Aug 2009
- Location
- Central MN, USA
- Posts
- 370
Hi Everyone. Thanks for the compliments. much appreciated, it's what keeps me motiviated.
@rsheridan5: The plascticard work is a combination of on the fly and sketched out on paper. Sometimes just poking my fingers around in the bitz box a couple of time will inspire me as well. I usually sketch out the basic shapes/outlines on paper first, then start cuttin' and glueing. There are times where I have to backtrack to "fix" something that wasn't working but not to often (I've been lucky I guess).
As for the reds... a common question (you'll ask for my greens later too - you watch )
)
Primer black > Mechrite Red > Scab Red > Red Gore > Red Gore/Blood Red (50/50) > Badab Black wash > Blood Red > The final Blood Red is toned down by sealing with Testors Dulcote.
Yeah, it's a lot, but it works well enough. I think this will be the last time I do it this way on a vehicle though. I need to find a faster way to do large surface areas. I'll see what I come up with on my next vehicle (looted something, most likely).
Later!
-
09-01-2009, 09:55 PM #17Battle-Brother
- Join Date
- Sep 2009
- Location
- moorpark
- Posts
- 32
This may not have the best game results but I think a big gun sticking out of the small hatch on the side of the wagon would look good, just has to be big and look like it was smashed in place by an angry mek.
-
09-02-2009, 09:08 AM #18Chaplain
- Join Date
- Aug 2009
- Location
- Central MN, USA
- Posts
- 370
Spent a little time last night and wrapped up the build on the Kill Kannon - thanks Oddballs for the idea, it seems to have done the trick.
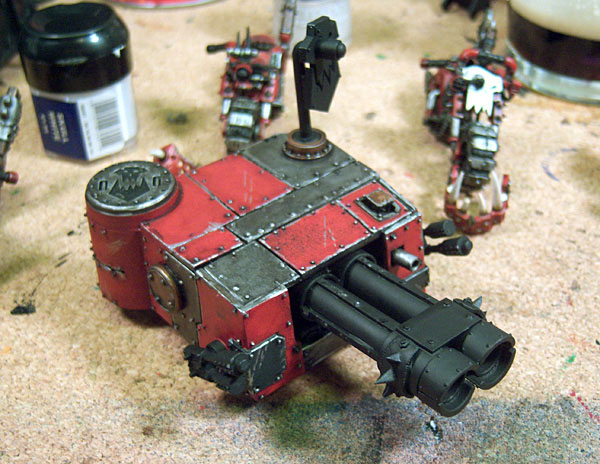
The banding did tie everything back together, might have been the lack of rivets, who knows. I like it much better this way.
I started to paint the Kannon for the front and someone, somewhere, asked me to show the steps in painting my reds - well, I remembered to take pictures! Yay!
The first pic is the coverage for the Mechrite Red (after priming, of course).
I know it's a bit sloppy, but I go back over it with Chaos Black to clean up the messes before doing the metallics. The Foundation paints are quite thick and prefer to not thin it down very much, especially when there isn't very much detail involved.
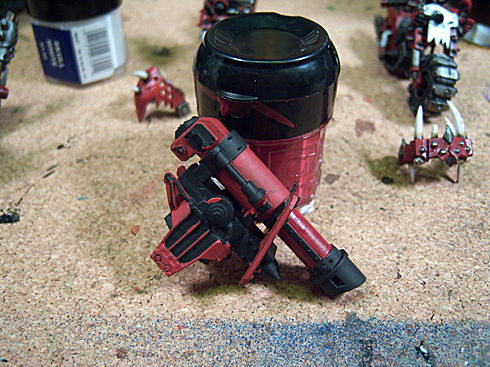
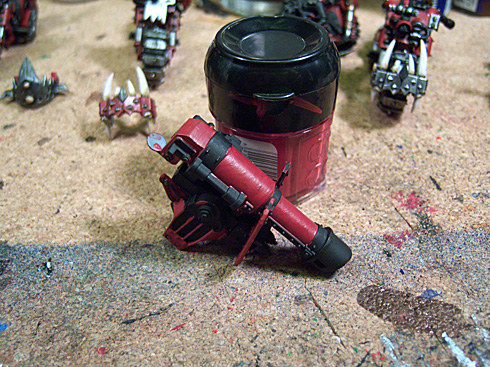
Here's the next step, Scab Red.
I'l just have to tease ya and leave ya hanging at this point, it's as far as I got last night.
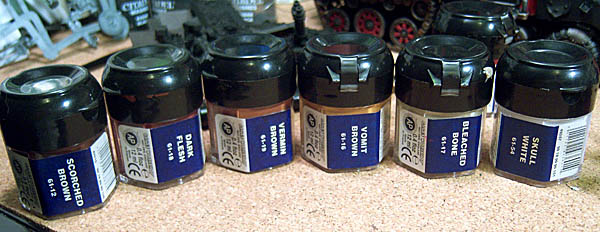
I'm also beginning to do the detail work on the bikes, starting with the bones/horns. Here's what I'll use in my progression and I'll take pics for each step of this as well.
Later!
-
09-02-2009, 09:08 AM #19Chaplain
- Join Date
- Aug 2009
- Location
- Central MN, USA
- Posts
- 370
terricon4: This is from earlier in the provess - a very good idea! Originally Posted by terricon4


There's a Zzap gun I can use too, magnetized.
-
09-04-2009, 08:19 AM #20Chaplain
- Join Date
- Aug 2009
- Location
- Central MN, USA
- Posts
- 370
Just look at tha BONES!
This is typically how I do all bones - teef, spiked decorations, etc. I use a brush that's in kinda rough shape and "point" or push the bristles down along the bones toward the dark areas using the splitting bristles add to the straition effect at the bottoms. I also don't mind the streaks caused by the bad brushes as it adds subtle grooves in the paint that becomes a bit more pronounced when the wash is applied. The photos below don't quite show it but they're apparent enough in the final beauty shots.
This show the first step painted over black primer.
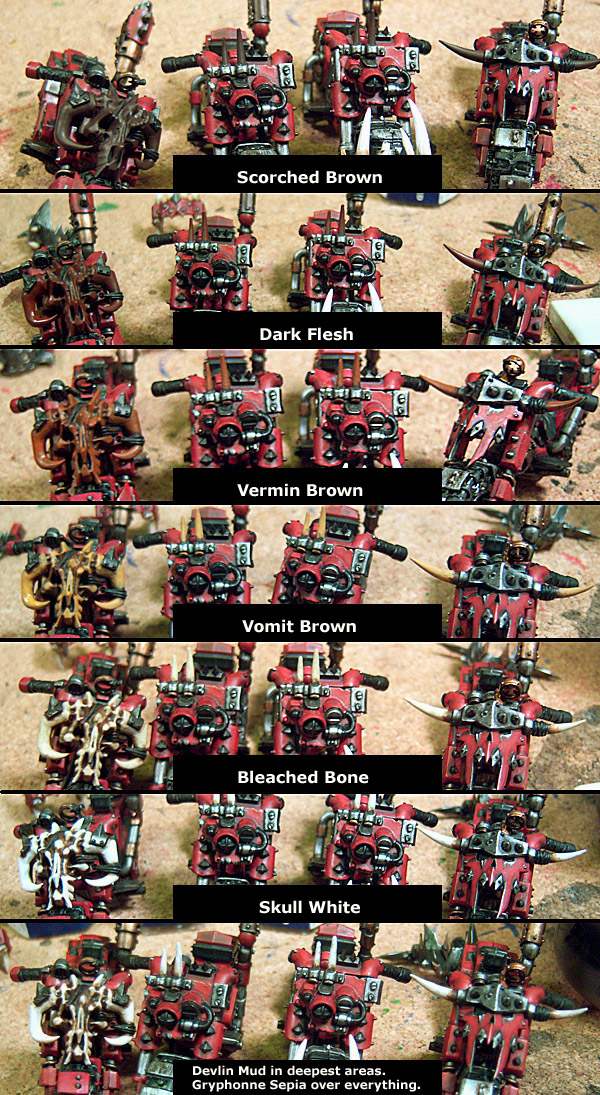
Hope this helps anyone interested in painting bone.
Later!

 Reply With Quote


