
I was actually quite pleased with how this turned out. It should be quite a nice unit when it's surrounded by a ton of rats...
Enjoy!
BoLS Lounge : Wargames, Warhammer & Miniatures Forum
Results 11 to 20 of 35
Thread: Dipped skaven
-
07-18-2011, 09:10 AM #11Veteran-Sergeant

- Join Date
- Mar 2011
- Location
- Belgium
- Posts
- 157

-
07-19-2011, 02:55 PM #12Veteran-Sergeant
- Join Date
- Mar 2011
- Location
- Belgium
- Posts
- 157
Some better pictures:


Macro photography is killing me...
-
07-19-2011, 04:56 PM #13Librarian
- Join Date
- Aug 2009
- Location
- Minneapolis, MN
- Posts
- 565
Awesome.

Hey, question - what was your base skin color for the Skaven?
-
07-19-2011, 06:23 PM #14Librarian
- Join Date
- Jul 2009
- Location
- Midwest, USA
- Posts
- 848
I have to say that I usually hate dipping models. Yours on the other hand make me want to try it out on my own rat hordes (well, that and the fact that I have around 900 models in my ever-growing horde).
Good job!Armies - Skaven, Tomb Kings, Eldar, Iron Snakes, Dark Eldar, Retribution, & Legion
Blog - http://chronowraith.blogspot.com
-
07-20-2011, 02:11 AM #15Veteran-Sergeant
- Join Date
- Mar 2011
- Location
- Belgium
- Posts
- 157
It was vallejo model color sand brown (arena brown in spanish I think). The trick is to use very light colors. It's silly how much darker that quickshade will make them. Everything will end up as if you had mixed some mid-dark brown color in the original color. It works for skaven though. Originally Posted by Lexington

That's what made me grab the quickshade in the first place. I tend to use the "traditional painting" methods on all my other armies, but I wasn't going to do that with a horde like skaven. A lot comes down to color choice and a good varnish in the end. Dipped models shine like crazy before you hit them with the varnish (I used model masters dullcote, a brushed on variant of the infamous testor's dullcoat). Originally Posted by Chronowraith
The models aren't actually dipped either. The quickshade was just applied with a big, old brush... That did give me more control on the spread of "the goop" all over the miniature.
I took some extra pictures btw, again... purely to experiment with lighting and camera settings:


I know it's the same model all over again... But it's fascinating in it's own right to see how much pf a difference the picture quality can make...
-
07-20-2011, 04:14 AM #16Librarian
- Join Date
- Jul 2009
- Location
- Midwest, USA
- Posts
- 848
I assume you did your lighting effects before applying the varnish?
I only ask because you seriously have me considering this for my skaven.Armies - Skaven, Tomb Kings, Eldar, Iron Snakes, Dark Eldar, Retribution, & Legion
Blog - http://chronowraith.blogspot.com
-
07-20-2011, 10:27 AM #17Veteran-Sergeant
- Join Date
- Mar 2011
- Location
- Belgium
- Posts
- 157
The lighting effects were added after the dip was applied. The basic colors are aplied (grey, browns, beiges, metallics (who are given a coat of vallejo rust pigments),...) and then the model gets covered in the quickshade (aplied by brush).
Then everything that needs that typical high green contrast (scorpion green), is given a basecoat (this means all the warpstone and all the eyes). Then, it's covered in a green wash, and progressively highlighted by adding pure white to the scorpion green. I use my airbrush to aply the basecoat of the scorpion green. You'll often get some green onto the surrounding areas, but that's the point of the OLS to begin with...
After the green has been aplied, the whole model gets covered in the brush on dullcote. I don't see these models ever getting damaged while playing. The quickshade itself is a woodvarnish with supergloss finsih and it's given a rather thick coat of matt varnish (thicker then you'd get with a spray varnish anyway).
-
07-28-2011, 08:04 AM #18Veteran-Sergeant
- Join Date
- Mar 2011
- Location
- Belgium
- Posts
- 157
Hello folks,
time for a rather big update. It's been one month since I first purchased my Island of Blood set to get back into fantasy, and I thought it was time to show what I managed to complete in exactly 1 month's time.
So I took a few shots of minor additions, like the packmaster to accompany the ratogres:

And, slightly more work, was the second regiment of clanrats. These guys will be pushing the screaming bell. The unit consists of 45 clanrats with hand weapon and shield, deployed with the bell in a 10 wide, 6 deep formation.


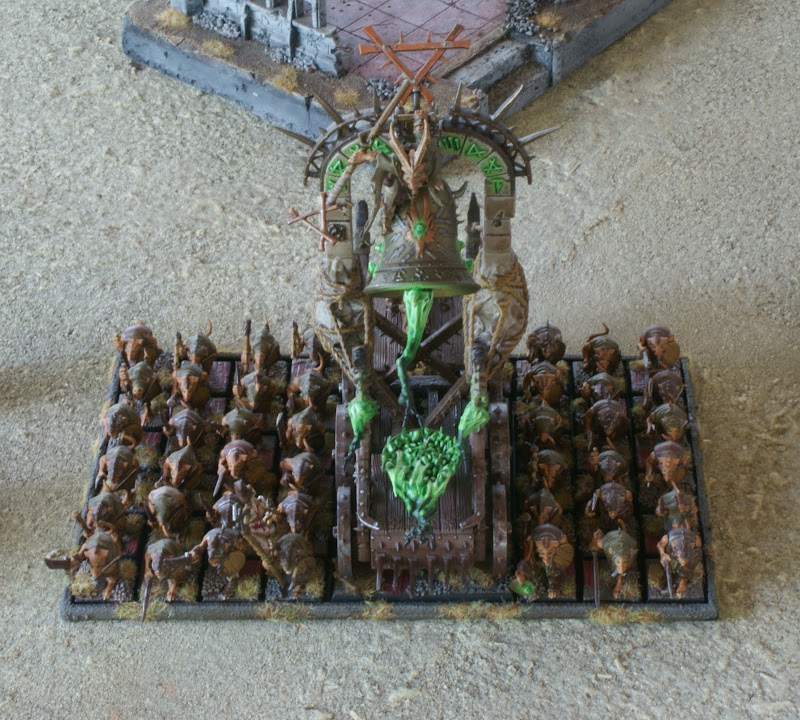
I also found the time to make custom movement trays out of 2mm thick plasticard and some strips of balsa wood as you can see. I also made some for my first regiment.
-
07-28-2011, 08:11 AM #19Veteran-Sergeant
- Join Date
- Mar 2011
- Location
- Belgium
- Posts
- 157
The first regiment was also spruced up a bit with another banner and by adding some glow effects to the musician. Seeing the second regiment, I thought it could do with a bit more "warpstone green".

It's starting to look rather good when deployed as an entire army, there seems to be good consistency within the regiments, and the bright green is there to "distract" from the basic paintjob of the hordes of dull ratmen. So far, it works imo.

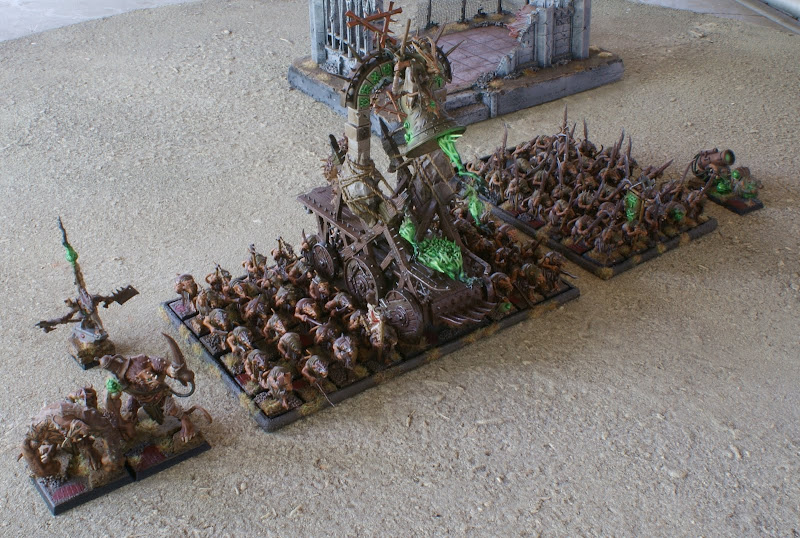

Next up are 2 warplighting cannons and my first block of slaves. The warplighting cannons should be fun with lots of glow effects, but the slaves might turn out to be a bit "boring" because they don't have banners or anything flashy. I plan on using some gnoblar fighters as slaves however. Hopefully, that'll bring a bit more life to the regiments.
-
07-31-2011, 12:59 PM #20Veteran-Sergeant
- Join Date
- Mar 2011
- Location
- Belgium
- Posts
- 157
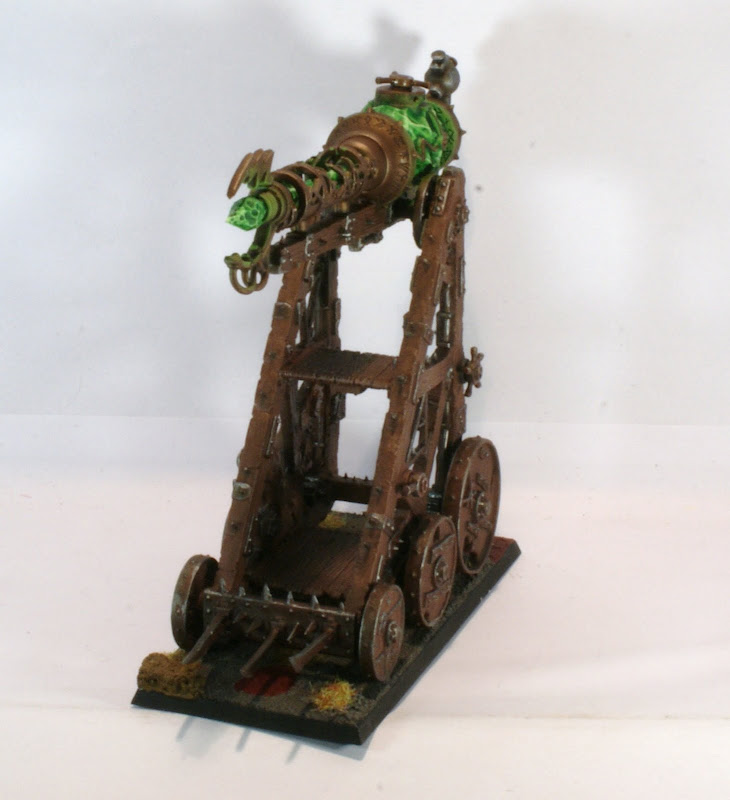
And I'm already working on the other expansions: I'm currently doing the 2 warplightning cannons. The frame and cannon of one of them is done. All that remains now, is to to finish the crew. I took a few pictures of how the cannon turned out however for your viewing pleasure:


 Reply With Quote

