
Hey guys! I picked up the new Tervigon/Tyrannofex kit on Sunday. After a brief messing about with some of the bits, I determined that I could build the kit in such a way that I could have a Tervigon and a Tyrannofex at my disposal (just not at the same time).
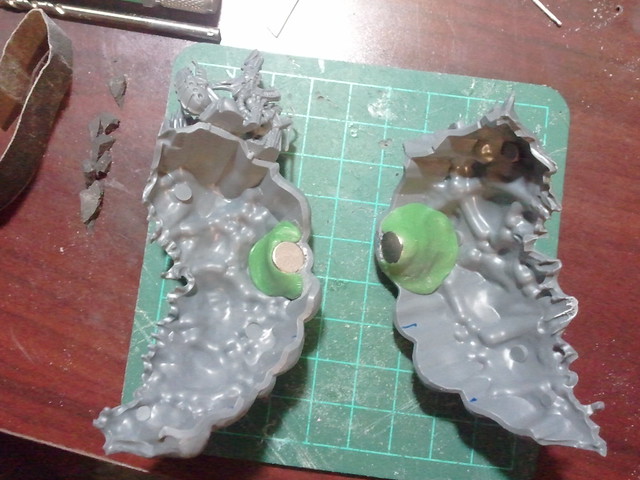
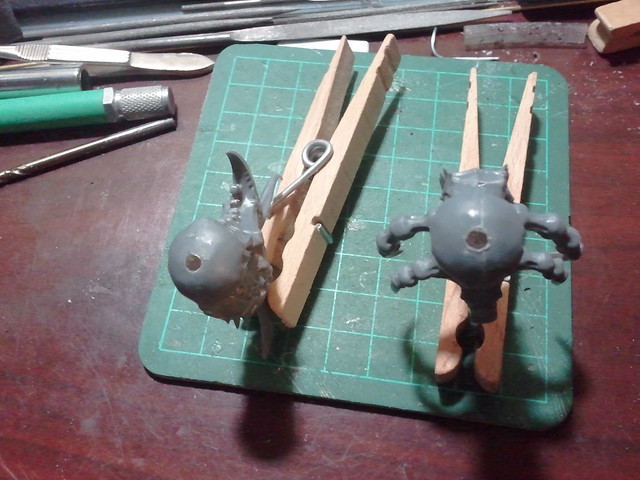
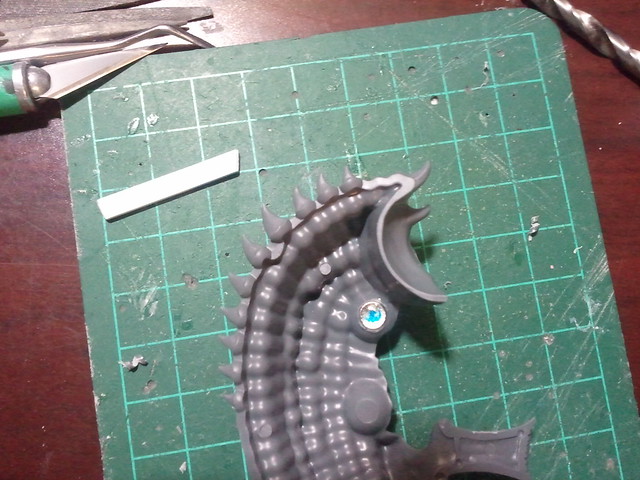
The first step is to drill out the front limbs to accept magnets. I used some N52 3/16" x 1/16" from K&J Magnetics, so I used a 3/16" bit. The backside of the limb socket is nice and flat so it was no problem getting the bit centered and started.
Don't drill the socket all the way through, leave a bit of a lip for the magnet to rest in.
All of my Tyranids arms are magnetized with the same polarity, so I can swap talons to either side of the model. Here I've marked which side needs to go to the inside in blue sharpie. The magnet is glued in place with super glue from the back side.
Repeat these steps for the other half of the torso.
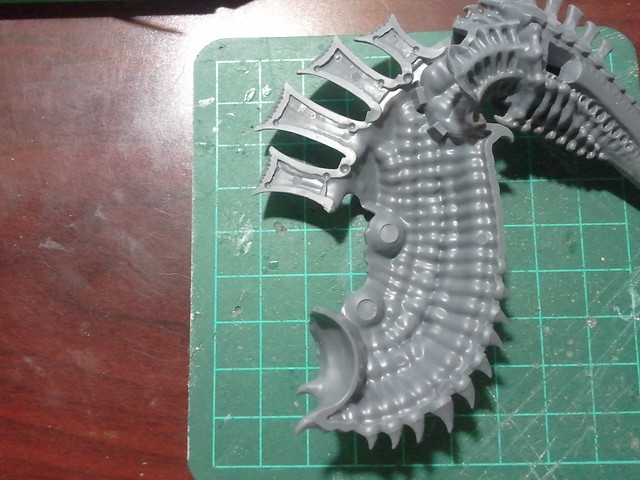
The next step is to prepare the Tervigon egg sac.
I used some larger 5/8" x 3/16" magnets for this, I think I got them at Hobby Lobby. I tacked the magnets in place with more superglue and then reinforced them with green stuff once the glue was dry. Don't try to glue them in place at the same time, unless you have very thick superglue that you can keep from flowing between the magnets or the other side of the egg sac. I just marked the magnets polarity and did them separately. The location on the egg sac shown in the pictures was perfect for the magnet diameter I used, plus it lines up with the edge of the part.
BoLS Lounge : Wargames, Warhammer & Miniatures Forum
Results 1 to 10 of 14
-
03-06-2012, 07:48 PM #1Scout

- Join Date
- Mar 2010
- Posts
- 11
 Magnetizing the new Tervigon/Tyrannofex kit
-
03-06-2012, 07:49 PM #2Scout
- Join Date
- Mar 2010
- Posts
- 11
Glue the two emerging Termigants to one side of the egg sac. I chose the side with the Termigant arm.
Once dry, you can check the fit.
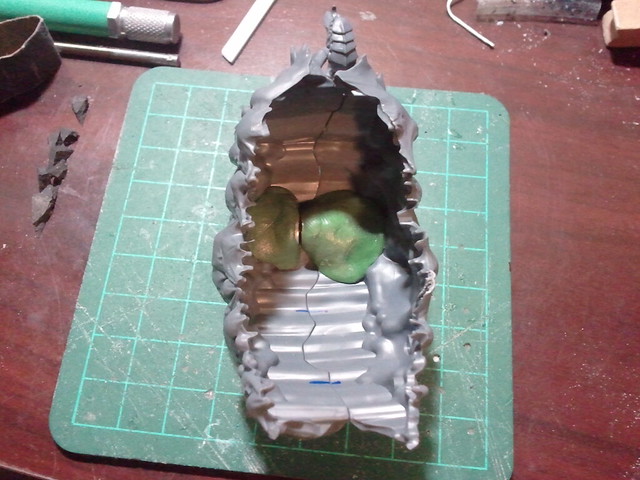
I thought about adding additional magnets, but once I had it assembled the large pair seems like more than enough.
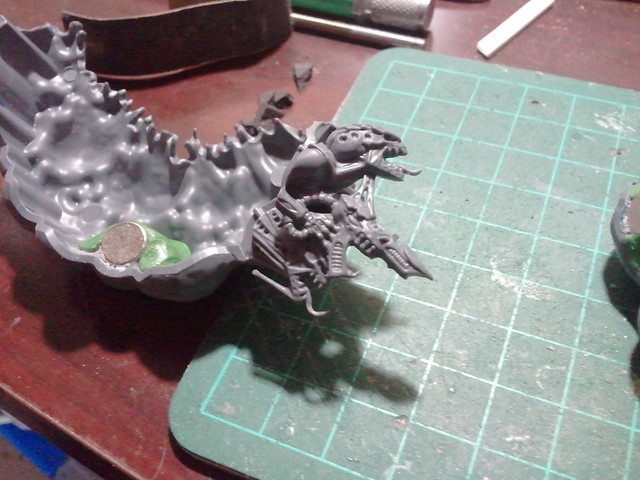
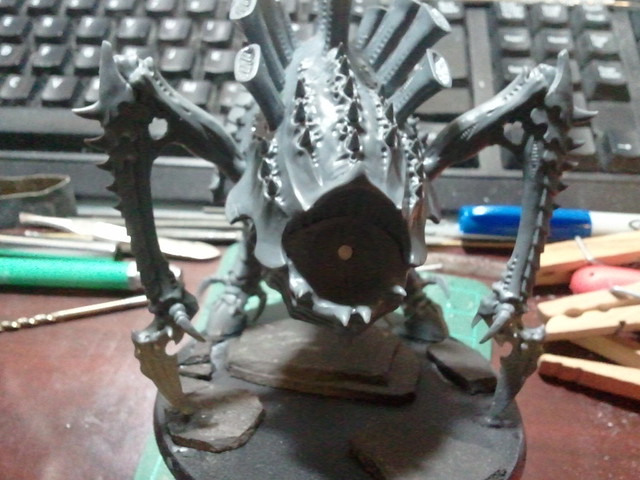
Next, assemble the model up to Step X in the instructions. Assembly Notes: Parts 40 & 41 seem to be swapped in the assembly instructions. The same is also true with parts 46 & 47. In the image below you can see the forelimb magnet. You will probably want to base the model at this time, but even if you don't the middle legs are a bit problematic. You need to position them so that they do not interfere with adding removing the Tyrannofex guns, but still provide some support for the body. I pinned mine at the back feet to provide more support and so that the model wasn't relying on the mid-limbs for much support. Also, unless you want the bottom Termigant on the egg sac to be licking the ground, you should attach the sac when you are positioning the model on the base. This will also keep the Acid Spray gun cables from dragging on the ground as well. Also note that we are not going to attach the body spikes (parts 48-53) as they will interfere with the Tervigon egg sac. You could probably magnetize those too, but I did not.
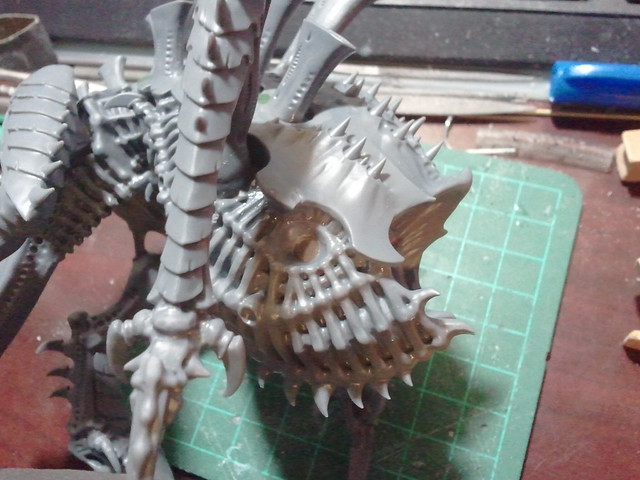
Assemble both heads as per the instructions. Add a magnet to the back of each head, making sure the polarity is the same on both and that they are centered. I used 1/8" x 1/16" from K&J.
-
03-06-2012, 07:49 PM #3Scout
- Join Date
- Mar 2010
- Posts
- 11
Add another magnet to the head socket on the body, making sure the polarity is compatible with the heads. This magnet is going to look a bit high in the body socket if you have magnetized any Carnifex heads. If you get it too low, the head will either be looking up too much or wont fit. As a rough guide, the bottom of the magnet should be in-line with the bottom ears of the spiked armor plate.
Now build all the arm options and magnetize them, paying attention to polarity once again. You can glue the gun arms to the ammo arms if you like, but you have to be careful slipping them on and off the model. I did this for the Acid Spray since it connects in several places on the gun. I just magnetized the sockets and tubes for the Rupture Cannon as well as the shoulder bits.
The Tyrannofex with Acid Spray
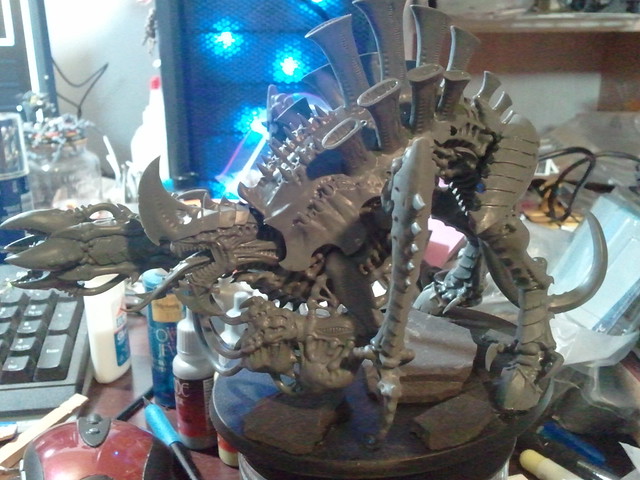
The Tervigon with Scything Talons (borrowed from a Carnifex)
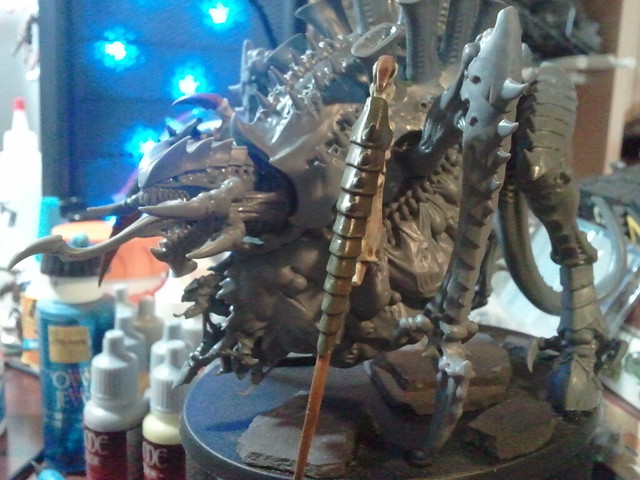
C&C welcome. Time to paint!
-
03-07-2012, 05:23 AM #4Battle-Brother
- Join Date
- Mar 2012
- Posts
- 31
Nice one, if I get this kit I'll definitely be doing this!
-
03-07-2012, 06:00 AM #5Librarian
- Join Date
- Sep 2009
- Posts
- 682
Very cool!
http://miteyheroes.blogspot.com/ - My 40k Blog: Adeptus Mechanicus, Imperial Guard Grots, Conversions, Battle Reports and more.
-
03-07-2012, 11:49 AM #6Scout
- Join Date
- Mar 2012
- Posts
- 11
Great tutorial! Thanks.
-
03-07-2012, 06:39 PM #7Brother-Sergeant
- Join Date
- Dec 2010
- Posts
- 86
Very cool, It's interesting to see that this is possible, makes this kit much more tempting!
-
03-07-2012, 11:48 PM #8Battle-Brother
- Join Date
- Mar 2012
- Location
- Chicago
- Posts
- 26
How strong is the connection of the egg sac to the body? Would setting up magnets in the 'body spike' slots be useful for ensuring a good connection?
Also, how well do the guns stay pointed forward? All of my carnifex's heavy weapons tend to sag big time.
-
03-07-2012, 11:57 PM #9Scout
- Join Date
- Mar 2012
- Posts
- 17
Fantastic! anything with magnets is ace
-
03-08-2012, 09:45 PM #10Scout
- Join Date
- Mar 2010
- Posts
- 11
The magnets I used for the egg sac are fairly large and strong, It is not going to just fall off, it has to be pried apart. The guns don't sag too badly, the worst ones are the fleshborer hives because they are so front heavy. I glued the arms of the Acid Spray together because it just wouldn't line up well otherwise; the extra tubes on the left arm keep it from sagging. I magnetized the tubes and sockets of the Rupture Cannon as well as the shoulders and it seems to keep fairly straight. The biggest problem is making sure the midlimbs are set wide enough to not interfere with weapon swaps. Originally Posted by Inquiring M1nd


 Reply With Quote
