

Well, almost 2 weeks ago a client offered me a commission to build and paint a Forge World Warhound Scout Titan for him. Since the [URL="http://s276.photobucket.com/albums/kk25/Sinsinatus/Painted%20Miniatures/Warhammer%2040k/Chaos%20Demons/Chaos%20Daemon%20Army%20for%20JS%20-%20completed/"]Chaos Daemon Army[/URL] was finished and in the hands of that customer, I decided to give it a go.
I've done 2 of these FW titan kits before and they are a lot of fun. This will be a bit of a thematic challenge. The client wants the titan to be part of his crusading Black Templars force. Knowing that Marine chapters don't officially have titan components organic to them, I took a few days to work on the theme and ask around the forums to see what kind of fluff reasoning we could come up with (check out the discussion [URL="http://www.lounge.belloflostsouls.net/showthread.php?t=20860&highlight=sinsinatus"]here[/URL]).
There are already some good videos on YouTube that cover the Forge World titan models. Many of them do a good job of showing off the details and giving you a sense of scale. I am going to cover here my process for assembly as well as the customization. When I say that there a lot of fiddly bits to this kit - I mean it. There are several ways to screw up large investment and leave you with a passable (yet still scary) superheavy when the piece can and should be the centerpiece of your army when on display or at war.
Well, talking aside, let's get started.
Sinsinatus
BoLS Lounge : Wargames, Warhammer & Miniatures Forum
Results 1 to 10 of 69
-
03-31-2012, 05:29 AM #1Brother-Sergeant

- Join Date
- Jul 2009
- Location
- Sarasota, FL
- Posts
- 62
 How to build a Black Templar's Warhound Titan
Last edited by Sinsinatus; 03-31-2012 at 06:41 AM.
-
03-31-2012, 05:44 AM #2Brother-Captain
- Join Date
- Dec 2010
- Location
- Belgium
- Posts
- 1,058
Cool. I'll be looking forward to lots of pics of that awesome beastie.
 Blood Angels Army Project
http://www.lounge.belloflostsouls.net/showthread.php?t=12017
-
03-31-2012, 05:57 AM #3Brother-Sergeant
- Join Date
- Jul 2009
- Location
- Sarasota, FL
- Posts
- 62
First things first... this is a complex kit. No joking here. I have been building and painting GW figs and models since the 80's and I have been working with Forge World resin since the year they came out. Take your time, plan your process, think things through twice, and apply every lesson you've learned. The value of preparation with this kind of model cannot be overstated.
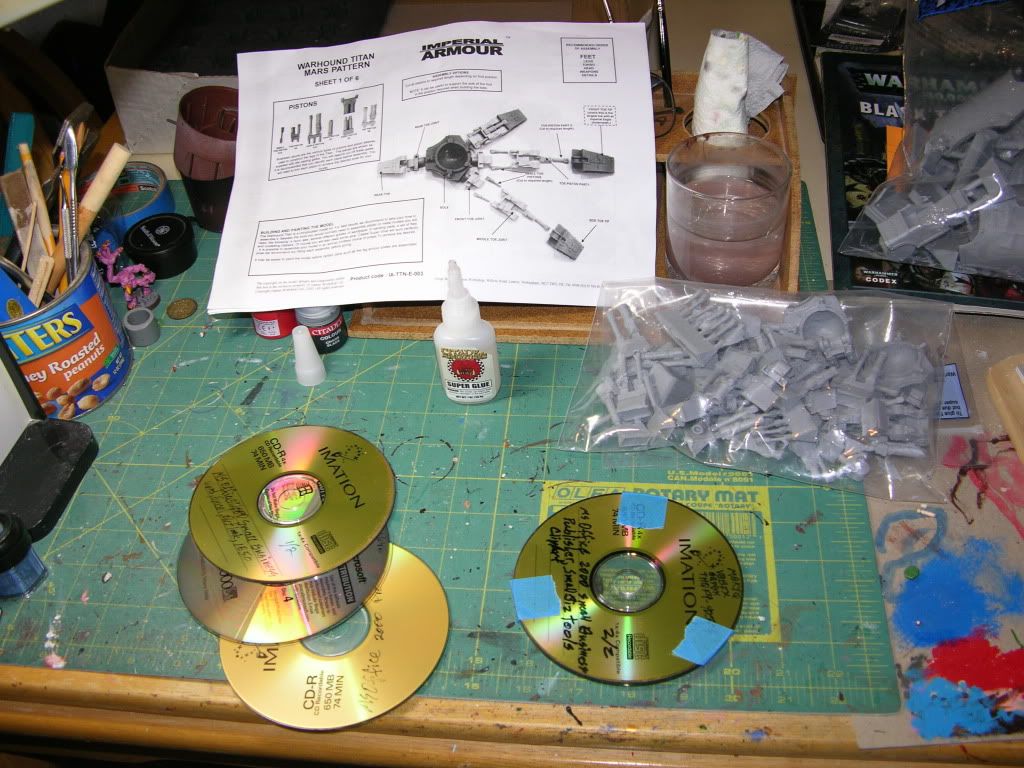
So; here's how it comes... titan in a box.
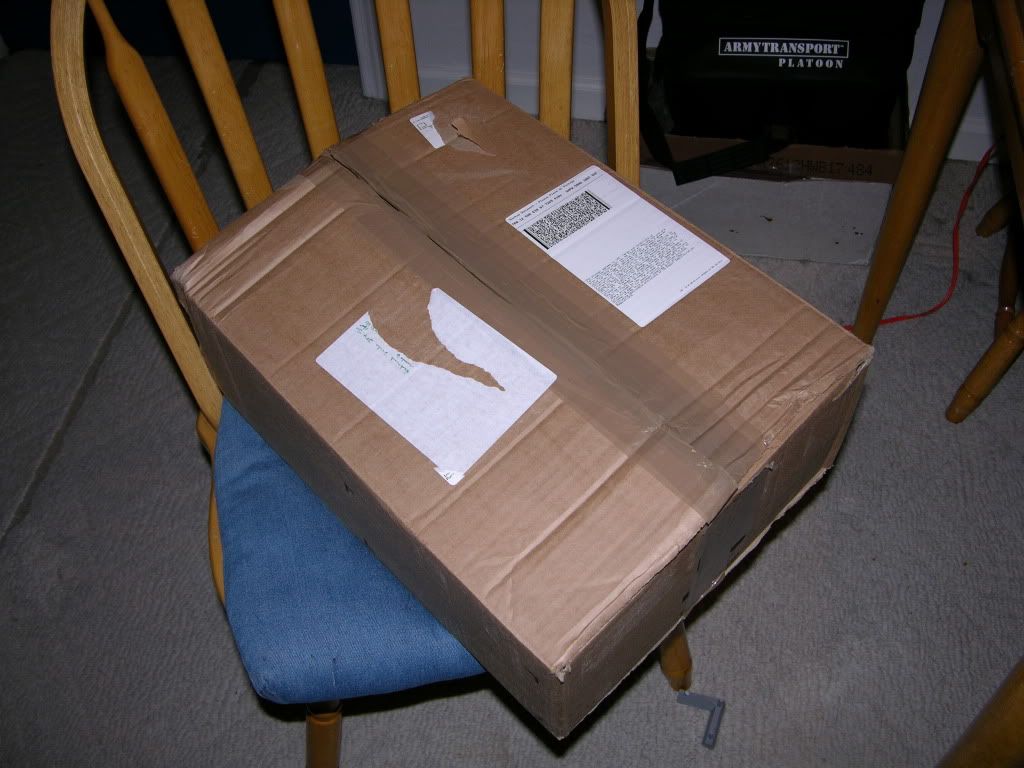
To steal a quote from Dave Bowman in 2001, "My God! It's full of BITS."
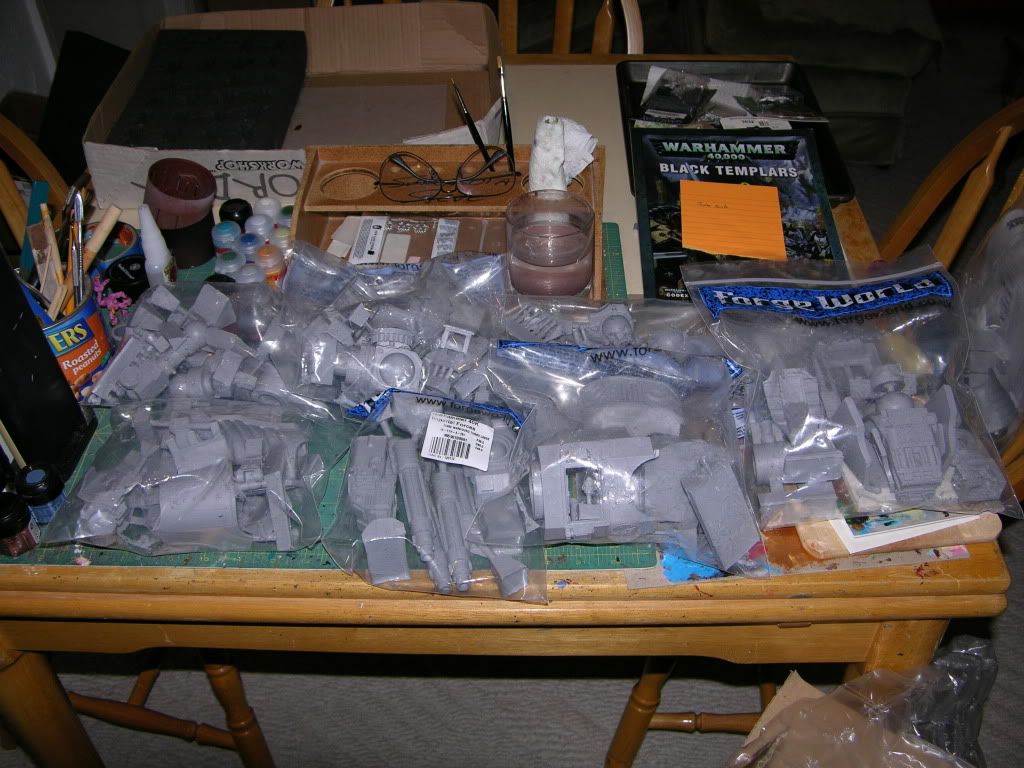
Take a step back and have a few deep breaths. I know you can't resist so... when you take the pieces out to fondle them, do it one bag at a time. You'll thank me later if you can manage to keep the pieces with the relavent subassemblies. If you can get past the "where will I start" panic, touch every piece and inventory as you go. It's better to know that you have a bad or missing piece now instead of right in the middle of construction. Forge World is great about fixing deficiencies so don't be afraid to e-mail them if you have a question or issue.
I'll skip the tedious part about washing the entire model. I'll just mention that every piece gets washed in luke-warm water with mild dish soap and scrubbed with a soft to medium tooth brush. Mould release and slippage are not nearly as big a problem as they were a few years ago. However, skin oils, releasing agent, and accumulated resin dust will play hell on your painting efforts. Save yourself the hassle of trying to degrease a piece in an assembly surrounded by other bits. That always sucks.
Sinsinatus
-
03-31-2012, 06:04 AM #4Brother-Sergeant
- Join Date
- Jul 2009
- Location
- Sarasota, FL
- Posts
- 62
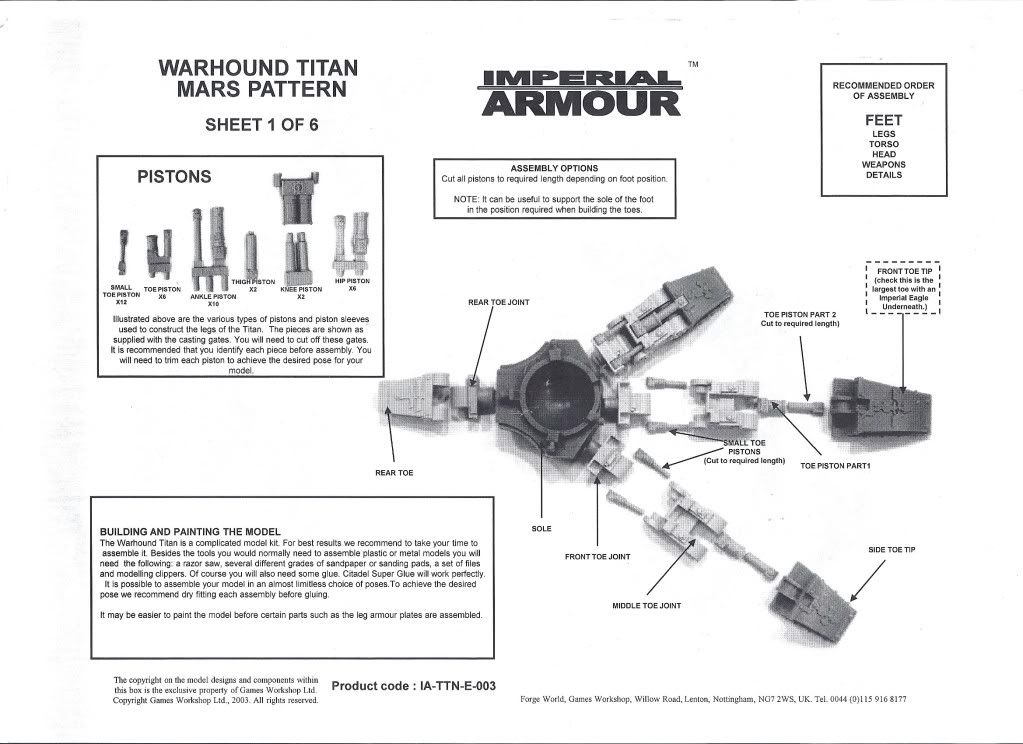
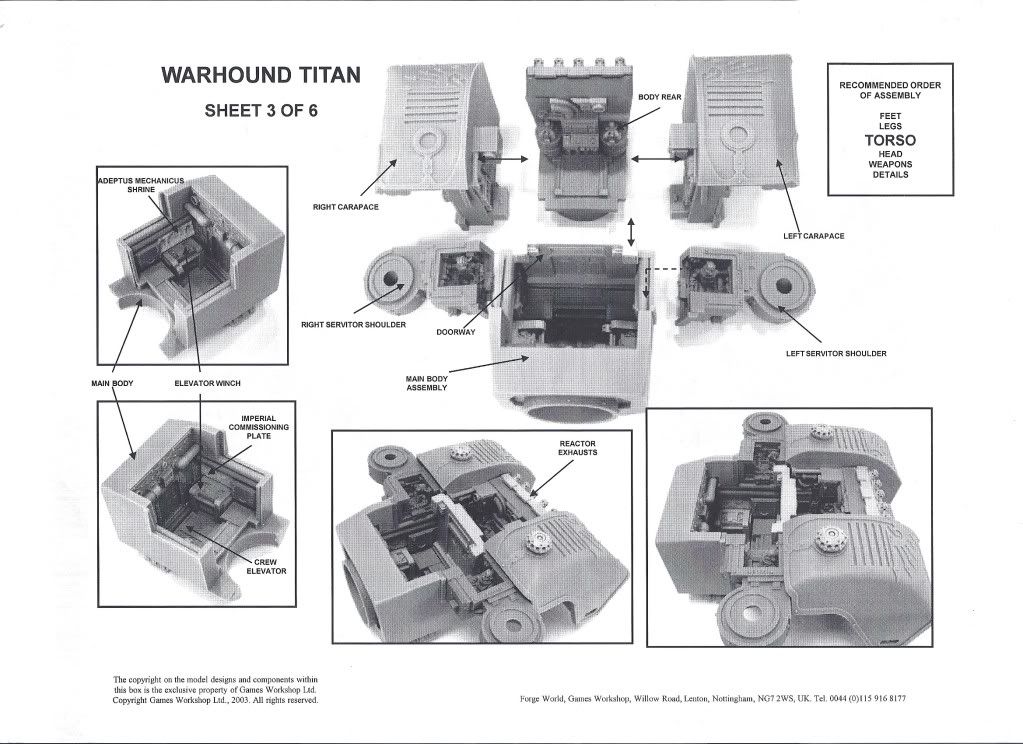
For the curious, here are scans of the first three instruction pages from the kit.
page 1
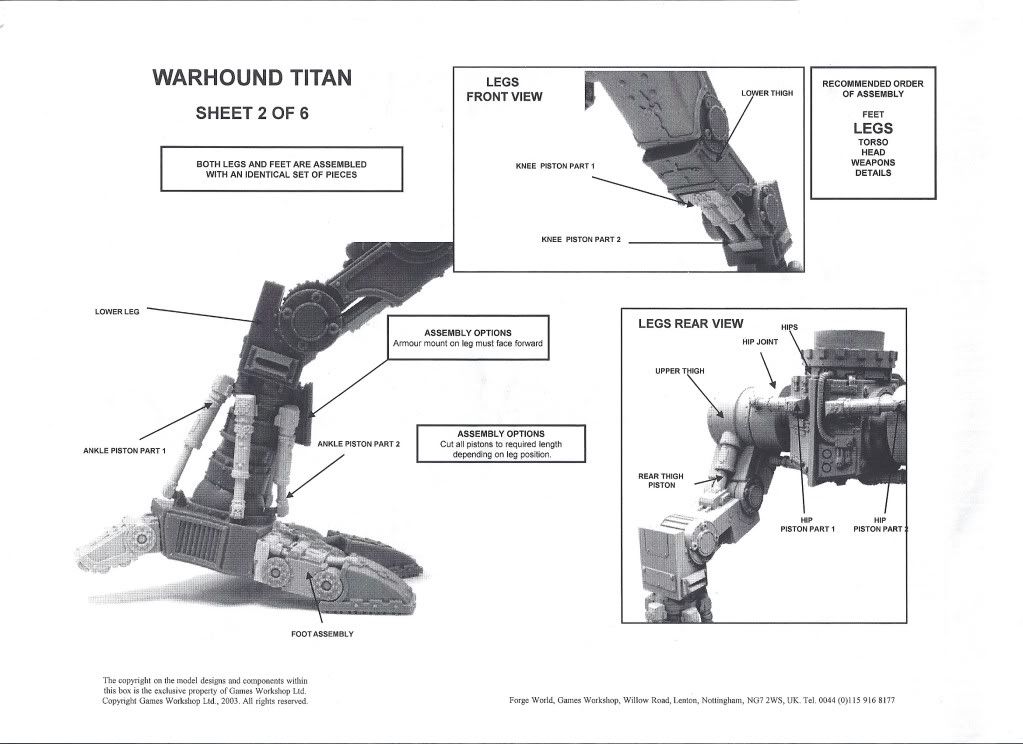
page 2
page 3
More to come...
Sinsinatus
-
03-31-2012, 06:05 AM #5Brother-Sergeant
- Join Date
- Jul 2009
- Location
- Sarasota, FL
- Posts
- 62
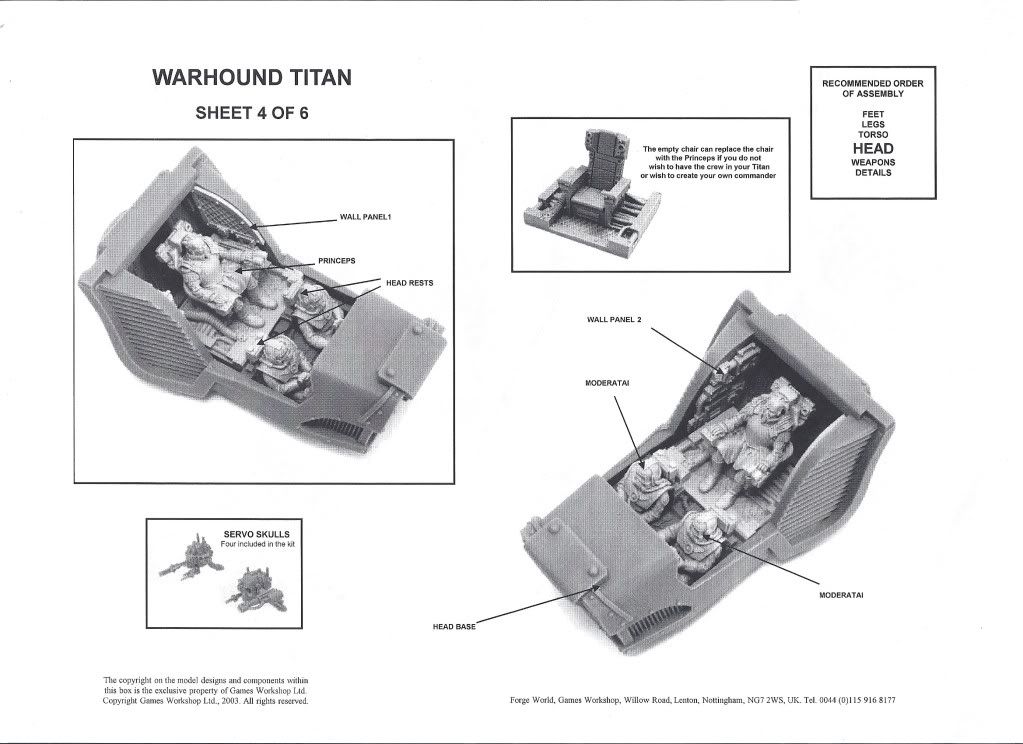
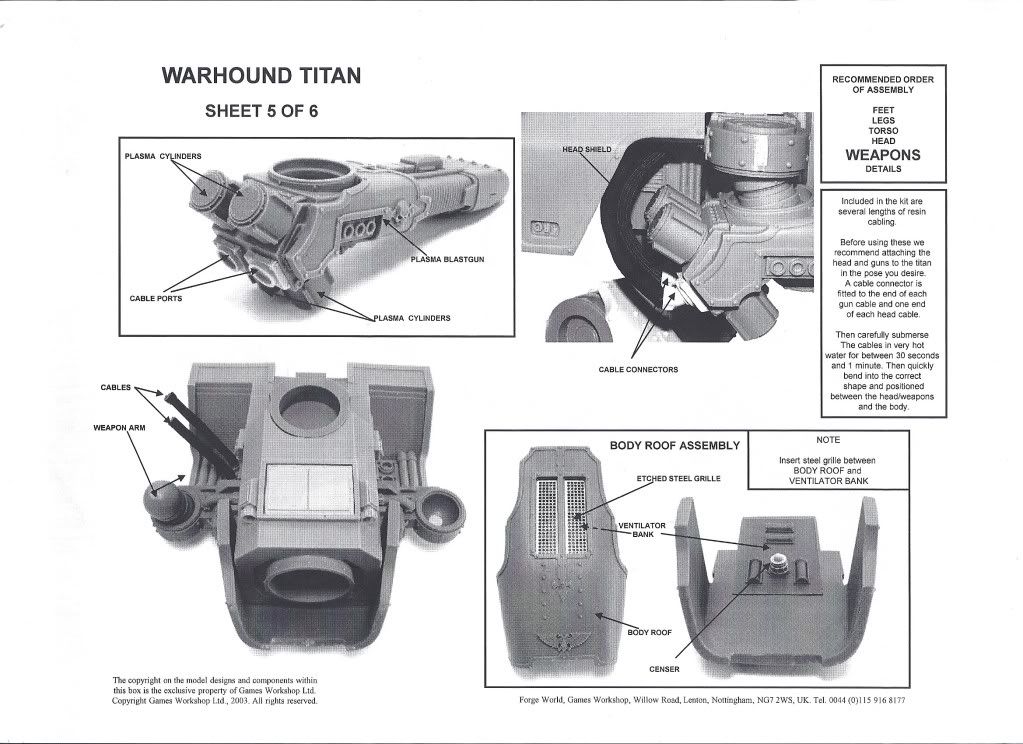
Here are the remaining three pages...
page 4
page 5
page 6
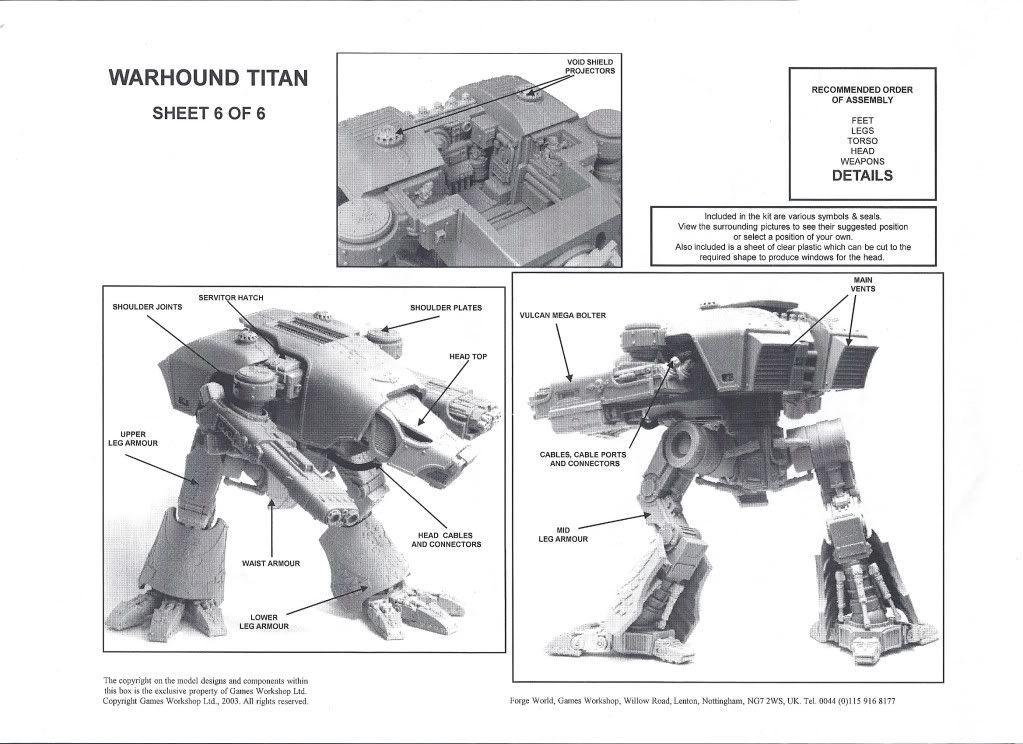
Despite these being the "official" instructions. I disagree with the order in which they do their assembly. Also, IMHO, they don't really give adequate guidance or direction for a kit with this level of complexity. It is better than the original set though.
Sinsinatus
-
03-31-2012, 06:18 AM #6Brother-Captain
- Join Date
- Dec 2010
- Location
- Belgium
- Posts
- 1,058
My, my, that is a frightening amount of parts...
 Blood Angels Army Project
http://www.lounge.belloflostsouls.net/showthread.php?t=12017
-
03-31-2012, 06:25 AM #7Brother-Sergeant
- Join Date
- Jul 2009
- Location
- Sarasota, FL
- Posts
- 62
Just like any major construction, the titan model will need a good foundation. With the wide range of dynamic poses offered by this kit, and the extremely top-heavy nature of the model itself, a solid base is crucial. Don't even consider having the model go on the tabletop "bare-footed". You'll hate yourself - been there, done that.
Generally I would cut out an oval or "rounded hour glass" shaped piece of 1/4" thick medium density fiberboard (MDF, hardiboard). This way the space between the feet gives you additional opportunities to add weights (as needed) and to add some thematic basing. Unfortunately, this client wants as low profile basing as possible. So, what we are going to do is build snowshoes. These are individual bases that will go under each foot. As the feet alone comprise of over 50 pieces, they need the support.
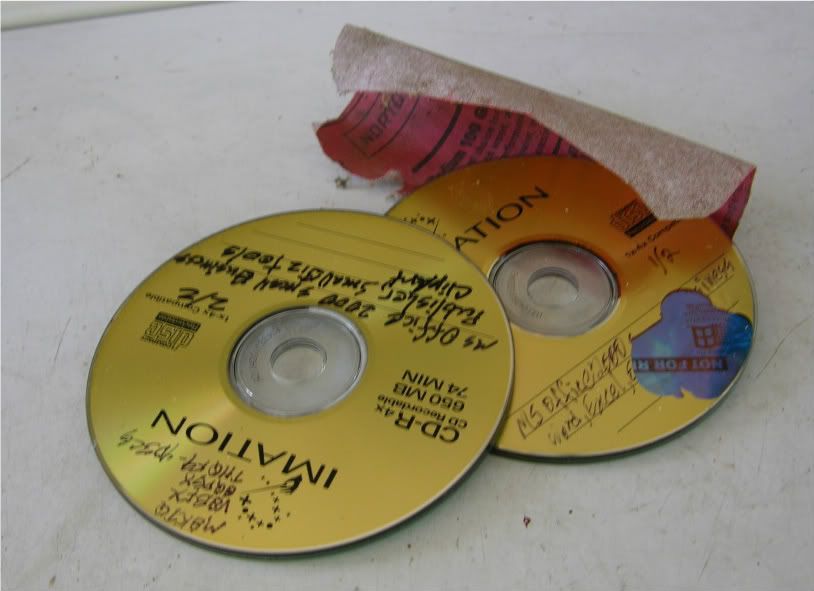
So, instead of going to my scroll saw, I decided to use an old standby material for basing largish kits - old compact discs. To get the proper thickness, I will laminate 3 of them together using super glue (CA, cyano-acrilate). 3 will give you a thickness not too far off from that of a standard GW base while bing rigid enough to give good support. If the discs have lables on them, be sure that they are removed before gluing them together or the edge of your base will have unsightly gaps.
After the assembles have dried, use coarse sandpaper (I used 100 grit) to rough up both faves of each base. The surfaces are too slick for your basing material to adhere to. Also, the slick underside will make the model more prone to accidental shifting or tipping.
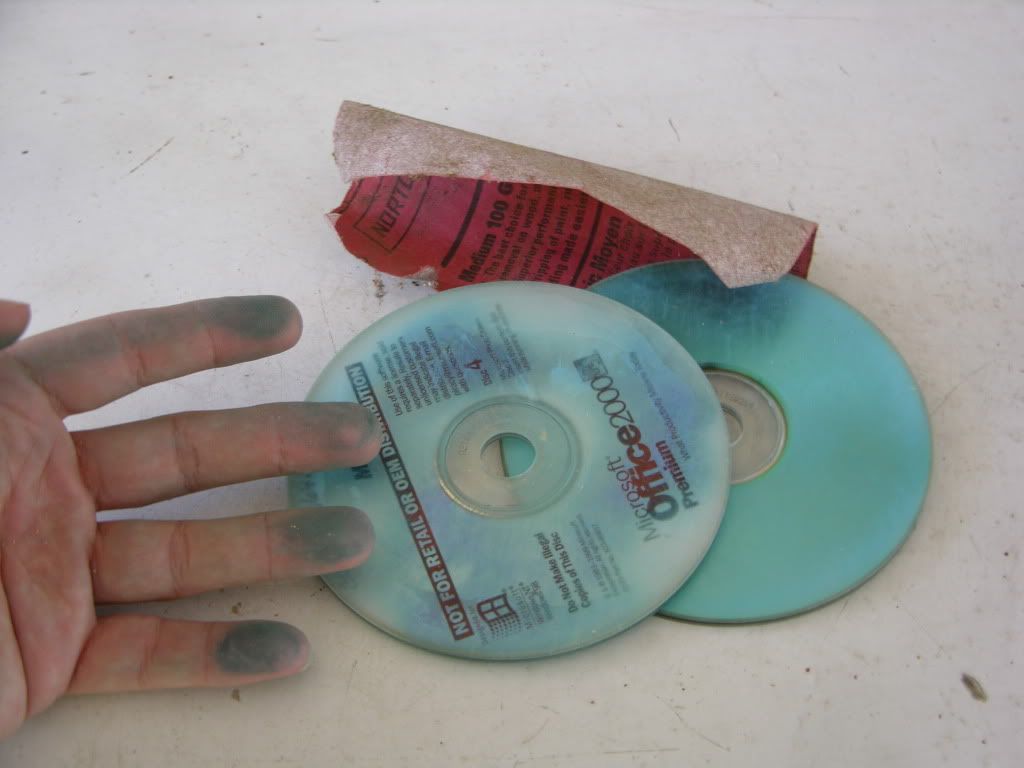
Be sure to wear a mask while sanding. See the pics below and you will see why.
Sinsinatus
Assembling CD bases...
After assembly and pre-sanding...
After sanding - remember to wear a mask.
Sinsinatus
-
03-31-2012, 06:29 AM #8Brother-Sergeant
- Join Date
- Jul 2009
- Location
- Sarasota, FL
- Posts
- 62
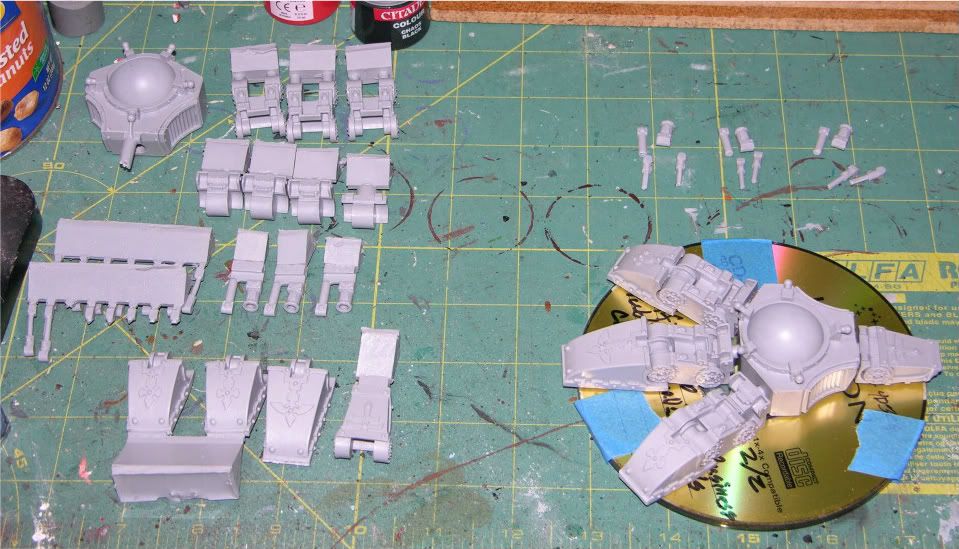
Herea is a foot laid out on one of the bases for size comparison. The pile of bits on the left in the second photo is for just one foot.
Sinsinatus
Foot laid out on CD to check fit.
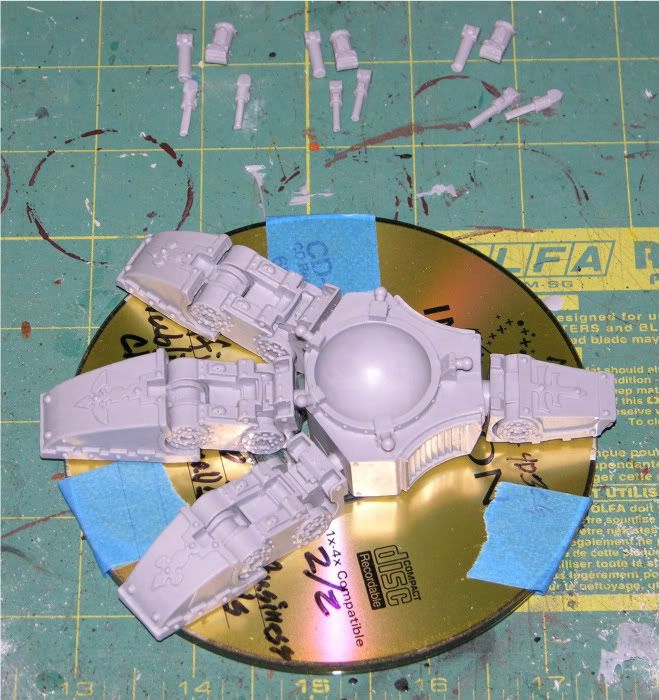
Foot layout and one complete set of foot bits.
SinsinatusLast edited by Sinsinatus; 03-31-2012 at 02:55 PM.
-
03-31-2012, 08:25 AM #9Brother-Captain
- Join Date
- Nov 2011
- Location
- The Phalanx
- Posts
- 1,442

Subscribed to this thread because I've always been curious to see how the Forge World mega kits are put together, and to be honest if I was to get one, it would probably be a Warhound.
Either there is life in the universe more intelligent than us, or we are the most intelligent form of life in the universe. Either way, it's a worrying thought!
-
03-31-2012, 09:06 AM #10Chapter-Master
- Join Date
- Sep 2009
- Location
- scotland
- Posts
- 2,105
looking forward to seeing this finished
visit my blog: www.fuzzbuket.blogspot.com I do cheap commsion work
And COME TO BOLSCON UK and yell about my font!

 Reply With Quote


