

Sorry for the dearth of posting lately. My photobucket account maxed out on bandwidth so I decided to just hold off until it reset.
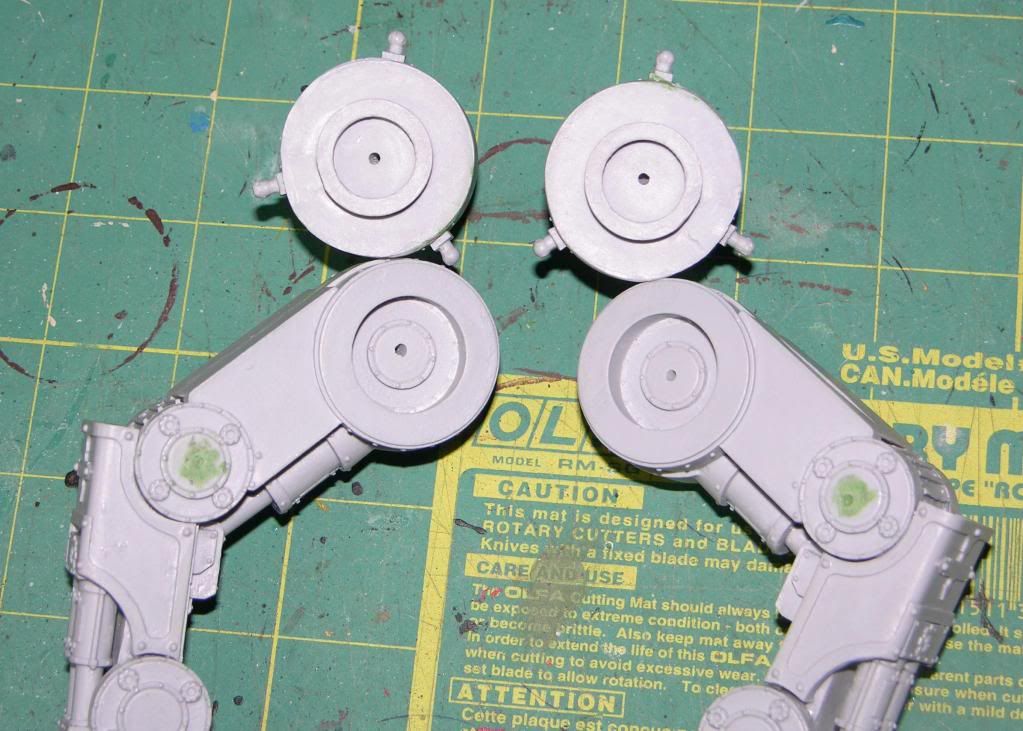
Anyway, adding the hip ball to the legs it easy but you want to take a moment to ensure that the attachment points for the pistons are aligned correctly. You should make sure that these points are at the 2-6-10 o'clock postitions in relation to the tabletop if you want the torso/body of the titan level to the floor. A slight rotation (a half-an-hour or so) will give the model a sense of a little more forward motion without unbalancing the Warhound too much.
Even though the leg-to-ball socket is deep, get a pin in there anyway.
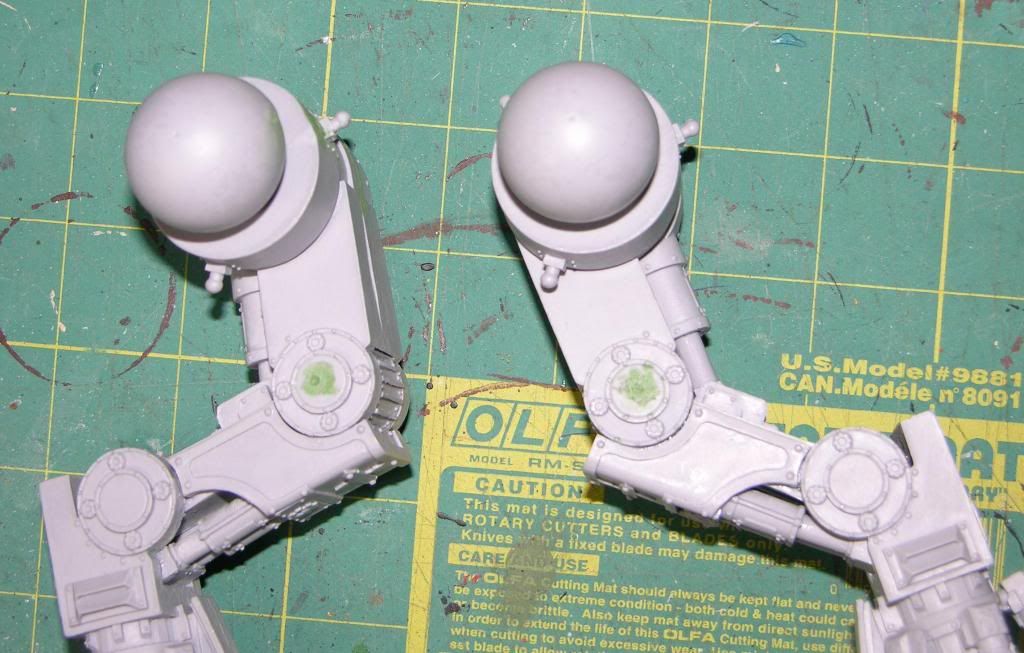
Glue the socket and the plug as well as the pin and hole. Align the pieces and assemble.
Leg assembly is complete for now. You will want to get some preliminary painting done before you look at attaching the legs and pistons to the pelvis. Next we will start work on the torso and head assemblies.
BoLS Lounge : Wargames, Warhammer & Miniatures Forum
Results 41 to 50 of 69
-
04-29-2012, 09:57 AM #41Brother-Sergeant

- Join Date
- Jul 2009
- Location
- Sarasota, FL
- Posts
- 62
 Ball-joints for hips
Sinsinatus
Ball-joints for hips
Sinsinatus
"Go ahead. Roll the dice and see if I get to eat your spleen."
-
04-29-2012, 10:10 AM #42Brother-Sergeant
- Join Date
- Jul 2009
- Location
- Sarasota, FL
- Posts
- 62
Prep-work for the torso and head
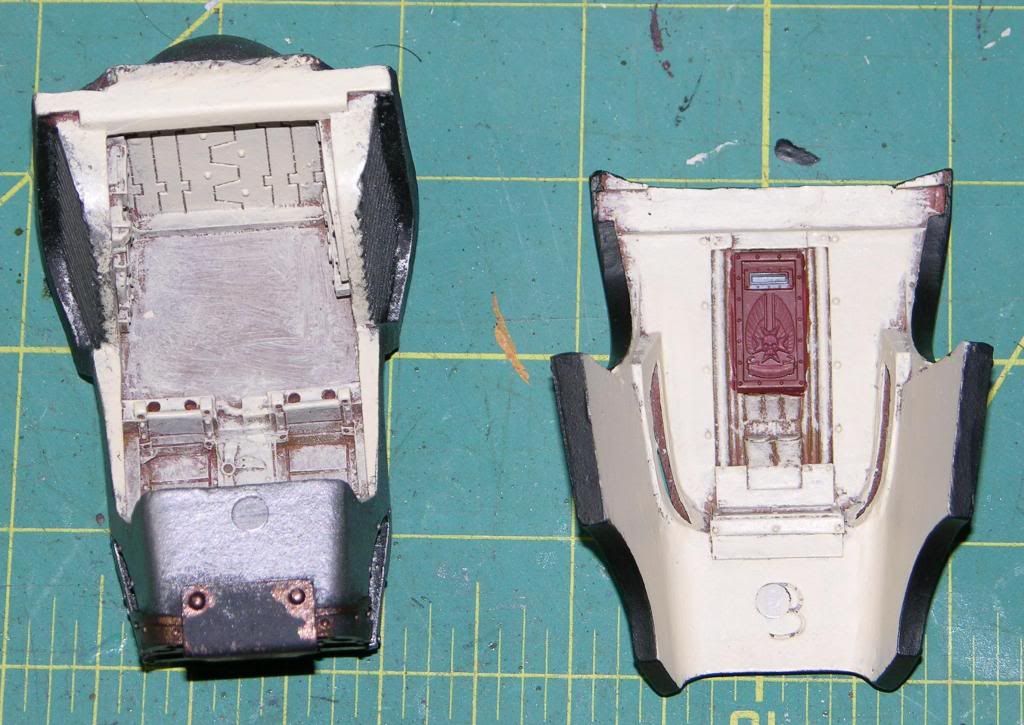
The next steps are optional depending on how much work you are going to want to do on the interior of the titan. If you won't be painting the inside, you will probobly just skip through the next few posts. If you want the interior finished to show off the detail (and there is TONS of it), don't even think of trying to paint after assembly. Just kick yourself in the n#ts now and be done with it.
Here is a layout of the torso and interior pieces arranged as they will be assembled. This is another area in which the instruction flyer is sorely lacking.
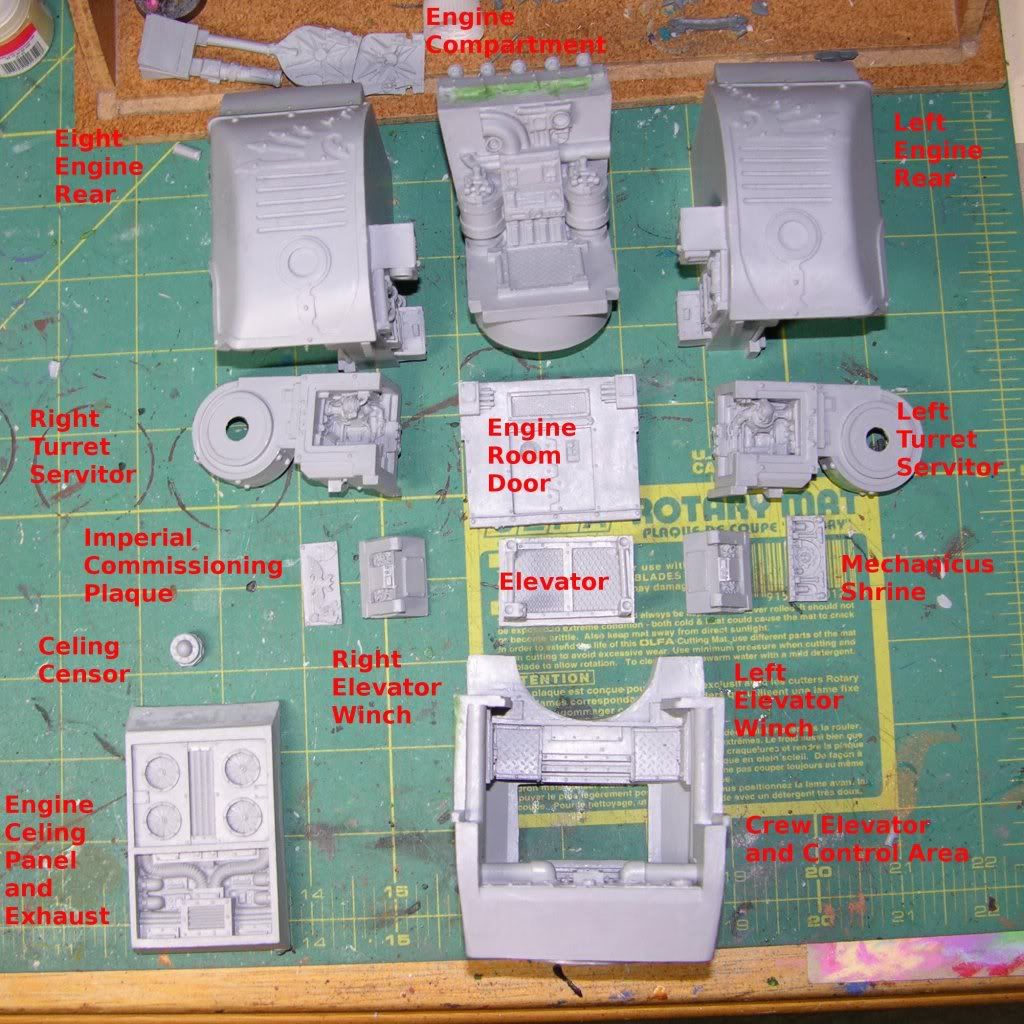
And here are the pieces that need advance painting with their initial priming complete.
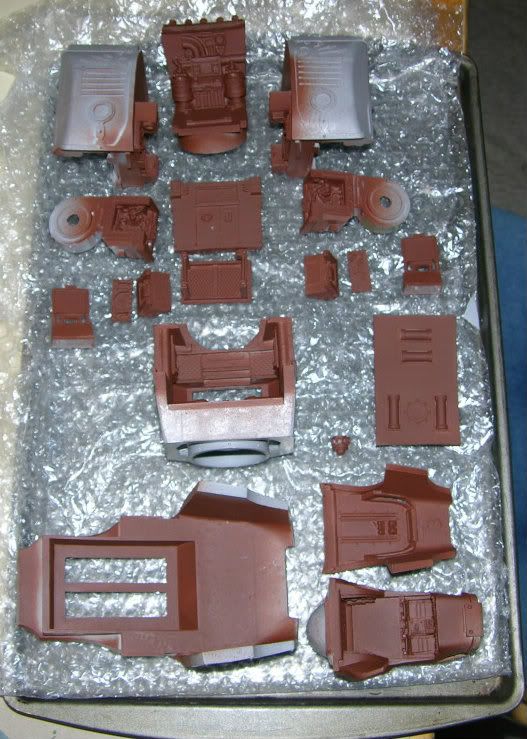
I'll post some progress pics of the painting soon.Sinsinatus
"Go ahead. Roll the dice and see if I get to eat your spleen."
-
04-29-2012, 11:07 AM #43Brother-Captain
- Join Date
- Dec 2010
- Location
- Belgium
- Posts
- 1,058
Woah, that's some awesome detailing indeed. I'm looking forward to the paint job.
Blood Angels Army Project
http://www.lounge.belloflostsouls.net/showthread.php?t=12017
-
06-15-2012, 06:49 PM #44Brother-Sergeant
- Join Date
- Jul 2009
- Location
- Sarasota, FL
- Posts
- 62
Once you get the preliminary interior painting done, you'll want to go ahead and mask those parts off. Now you can get around to priming the exterior area. I did this multi-step process because I knew with all of the handling required for completing the interior, my exterior primer would be rubbing off.
Here are tha masked-off parts...
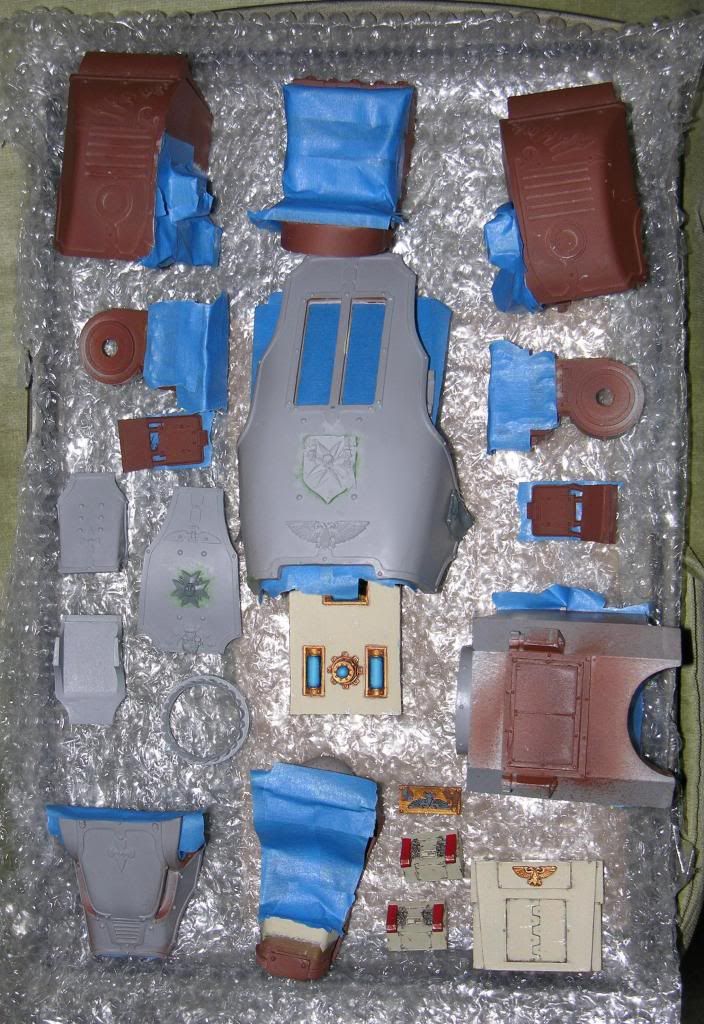
Here are the same parts after priming and tape removal...
Yes, there were a couple small spots where the tape lifted paint. That's why I made sure that no tape touched parts that wouldn't be covered in construction or needed more work after joining. Also, I haven't done the final weathering or washing on the interior. That was so that any repairs would disappear into the final step.Sinsinatus
"Go ahead. Roll the dice and see if I get to eat your spleen."
-
06-15-2012, 06:55 PM #45Brother-Sergeant
- Join Date
- Jul 2009
- Location
- Sarasota, FL
- Posts
- 62
Magnets?
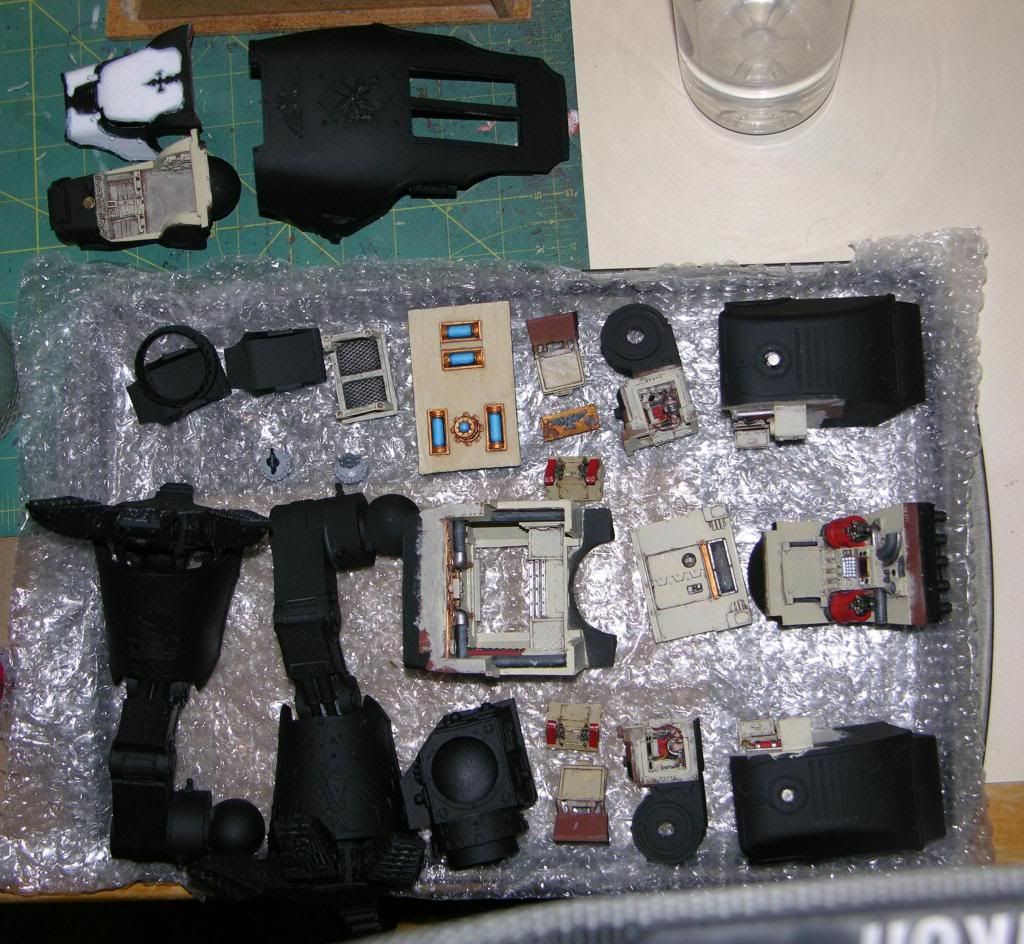
Yes, I am magnetizing parts of this kit. These parts will include the cockpit, the cables that connect it to the torso, cables from weapons to torso (weapons will be swappable by another method), and finally the void shield projectors. I bought my magnets in bulk from K&J Magnetics. Here are some pics of a couple magnet locations.
Warhound cockpit...
Void Shield Projectors...
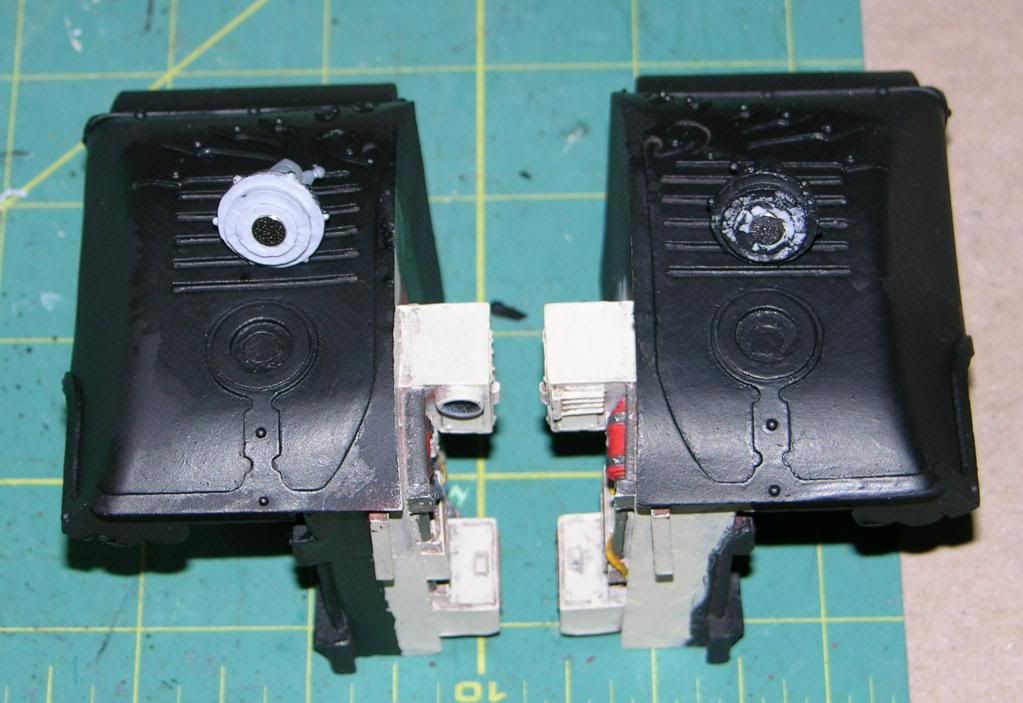
You can't see in this pic, but I have added a small reliquary to the top of each projector for a little Black Templar flavor as well as making it easier to remove the projectors as the titan takes damage. When she loses a shield to damage, one of the projectors gets removed. Just a little something to help during play.Sinsinatus
"Go ahead. Roll the dice and see if I get to eat your spleen."
-
06-15-2012, 08:22 PM #46Brother-Captain
- Join Date
- Aug 2009
- Posts
- 1,382
I like where this is going, you make painting this massive model look easy :P
One teeeeny nitpick, though - the vision slit on the Dreadnought plate on the thing's head looks kinda weird due to its pointlessness. Maybe fill it in before painting more?
-
06-15-2012, 09:34 PM #47Brother-Sergeant
- Join Date
- Jul 2009
- Location
- Sarasota, FL
- Posts
- 62
Was just going to paint it like an overhead display of some sort. Kind of another greenish CRT display. Originally Posted by Rev. Tiberius Jackhammer
 Sinsinatus
"Go ahead. Roll the dice and see if I get to eat your spleen."
-
06-16-2012, 05:06 AM #48Veteran-Sergeant
- Join Date
- May 2012
- Location
- Manchester, UK
- Posts
- 156
So glad you started posting again. I was was worried you'd given up!
I've had a Warhound sat around, unbuilt, for quite a while (years) because I've been unsure about how to tackle it properly and do a decent job of it.
Your in depth tips and words of wisdom have been extremely helpful and inspirational in actually making a start on the beast.
Thank you
-
06-16-2012, 06:25 AM #49Chapter-Master
- Join Date
- May 2010
- Location
- Isle of Man
- Posts
- 12,045
looking very impressive. I don't suppose you could give me a few dimensions could you? overall height, height to the top of the hip, shoulder width, depth from nose to rear engine, leg diameter? anything like that.
Twelve monkeys, eleven hats. One monkey is sad.
-
06-16-2012, 06:28 AM #50Brother-Captain
- Join Date
- Aug 2009
- Posts
- 1,382
Oh, okay, that'd probably work out. I'm just so used to seeing that bit on dreadnoughts, my first thought was "Why's there a Dreadnought face there?" :P Not really a big deal since it's on the underside, though. Originally Posted by Sinsinatus
Last edited by Rev. Tiberius Jackhammer; 06-16-2012 at 10:52 AM. Reason: D'oh, just realized the Dreadplate was on the underside of the headpiece!

 Reply With Quote


