

That's coming along nicely mate. Thumbs up!
BoLS Lounge : Wargames, Warhammer & Miniatures Forum
Results 51 to 60 of 69
-
06-16-2012, 09:33 AM #51Brother-Captain

- Join Date
- Dec 2010
- Location
- Belgium
- Posts
- 1,058
 Blood Angels Army Project
http://www.lounge.belloflostsouls.net/showthread.php?t=12017
-
06-21-2012, 04:12 PM #52Brother-Sergeant
- Join Date
- Jul 2009
- Location
- Sarasota, FL
- Posts
- 62
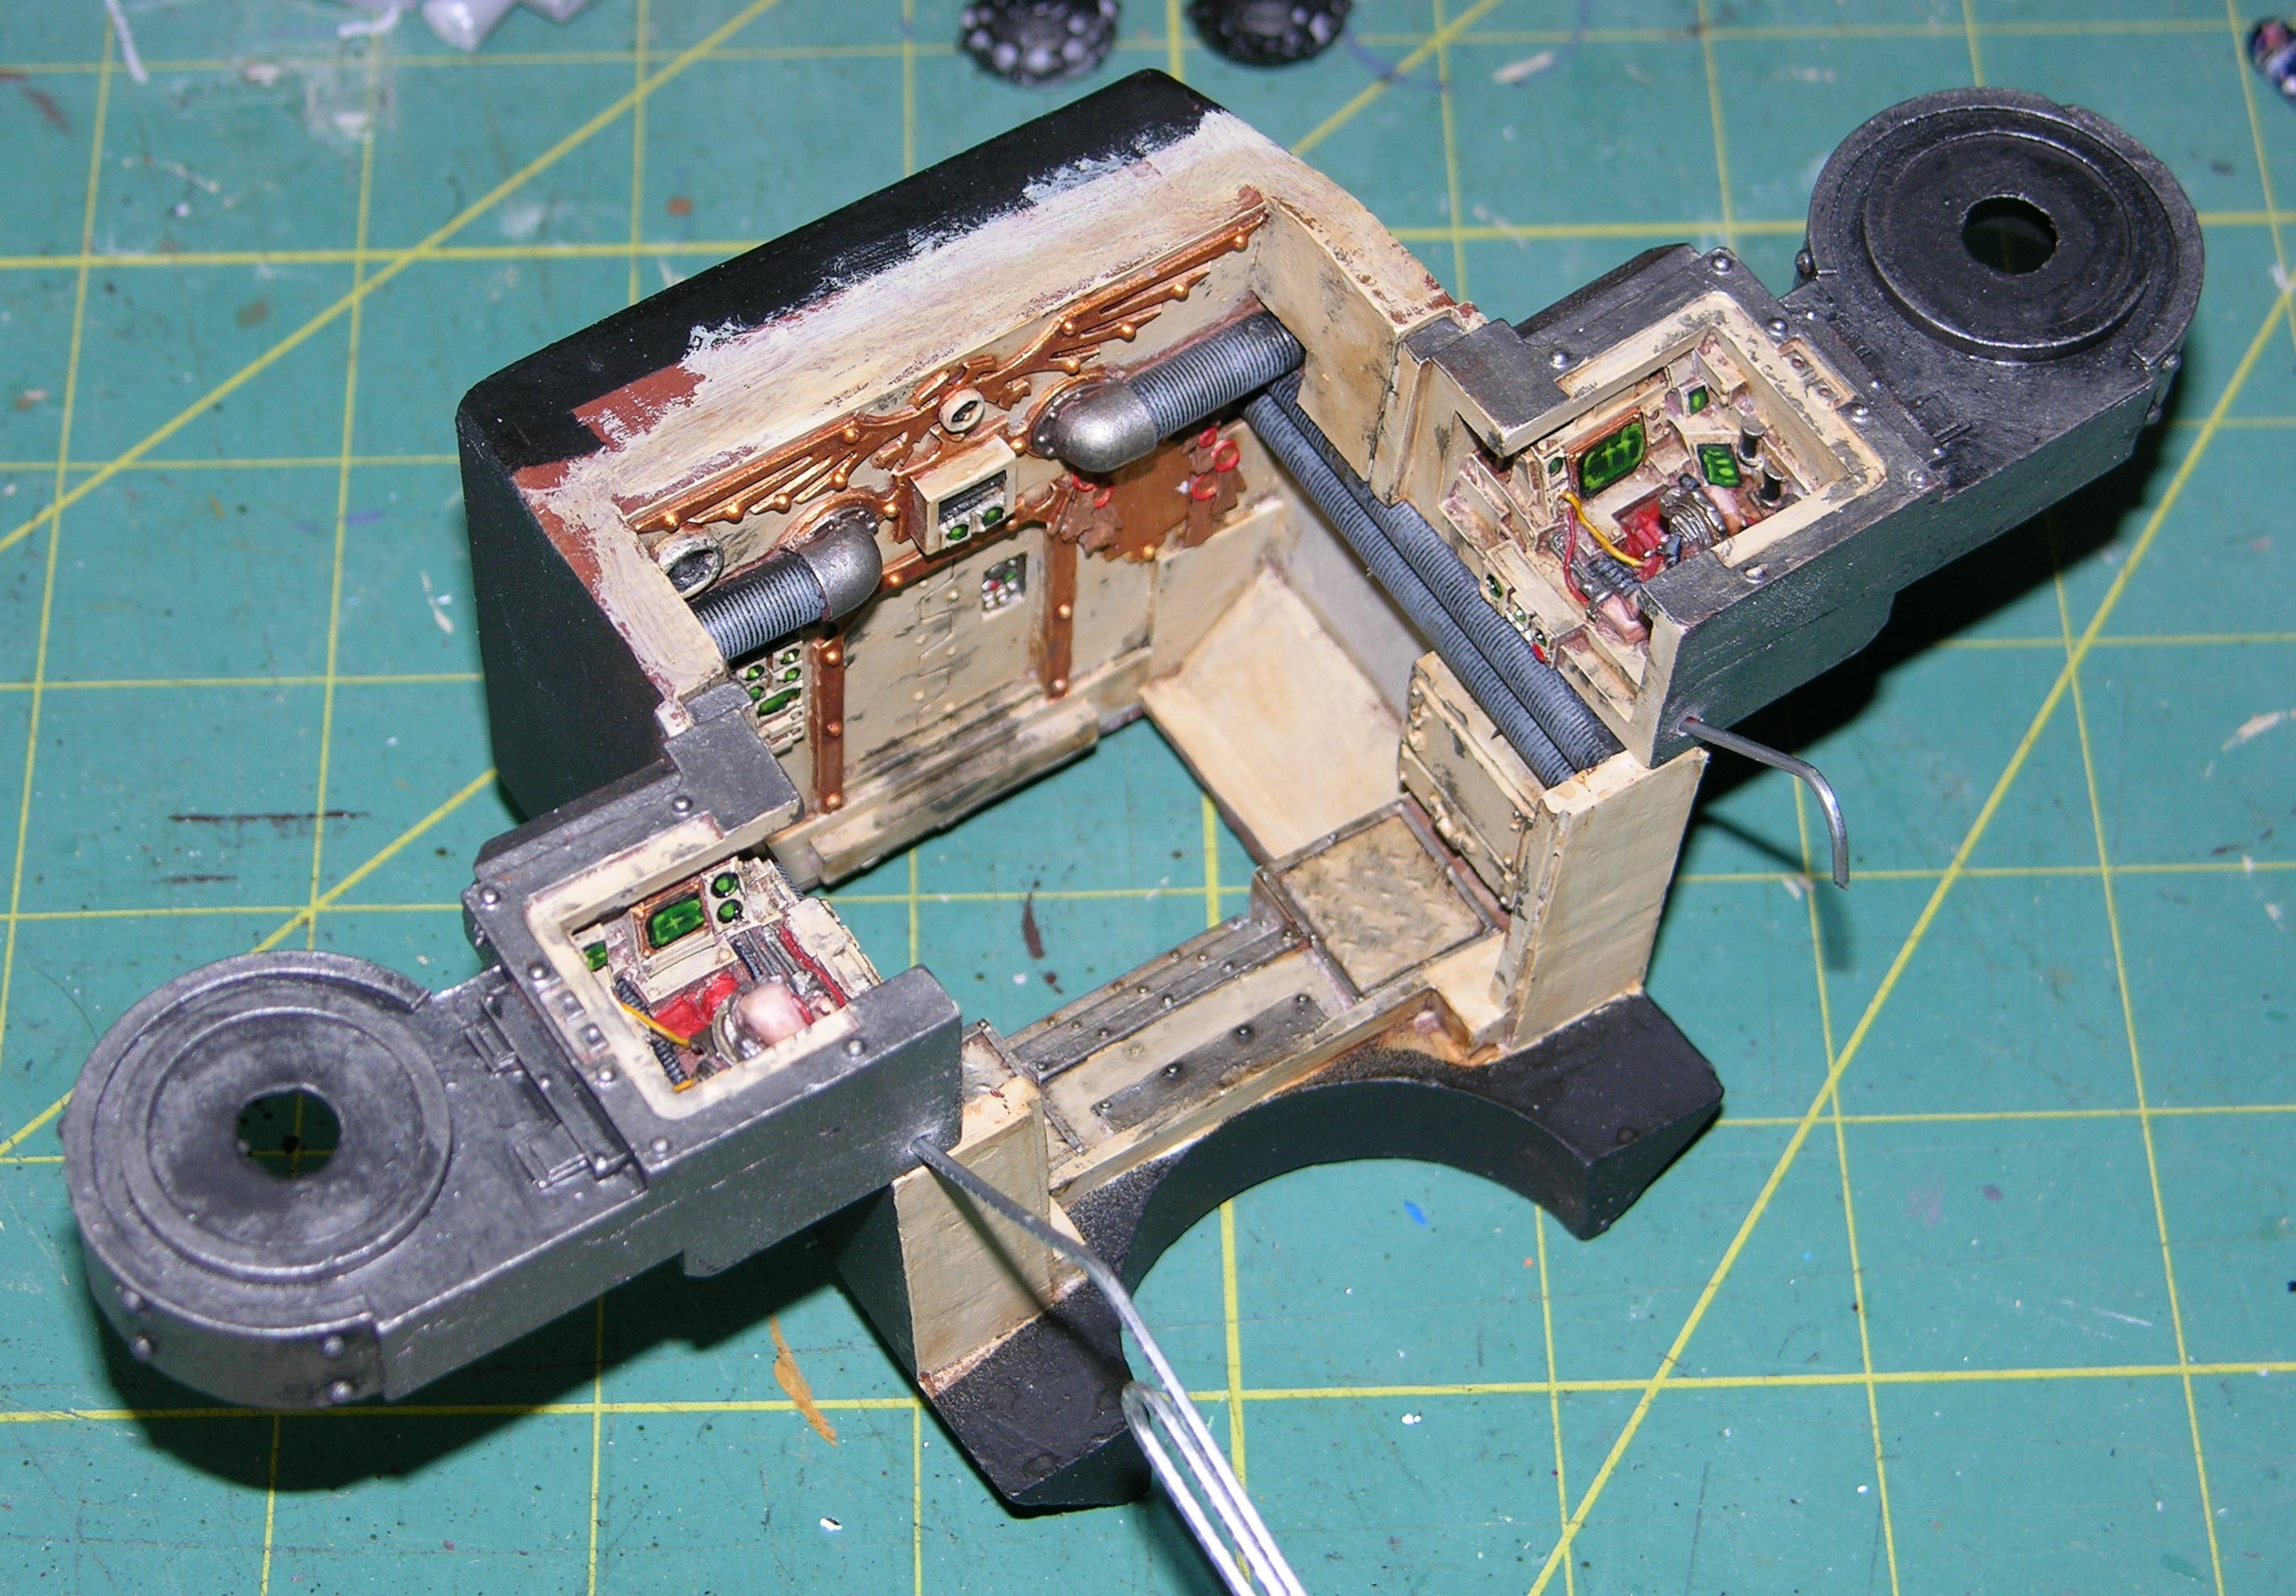
Interior of Body Sections Painted
Time for some pics of the finished interior sections. The next step after this will be to combine the sections into assemblies for exterior painting.
Pic one of the weapon servitors in their shoulder sponson control pods...
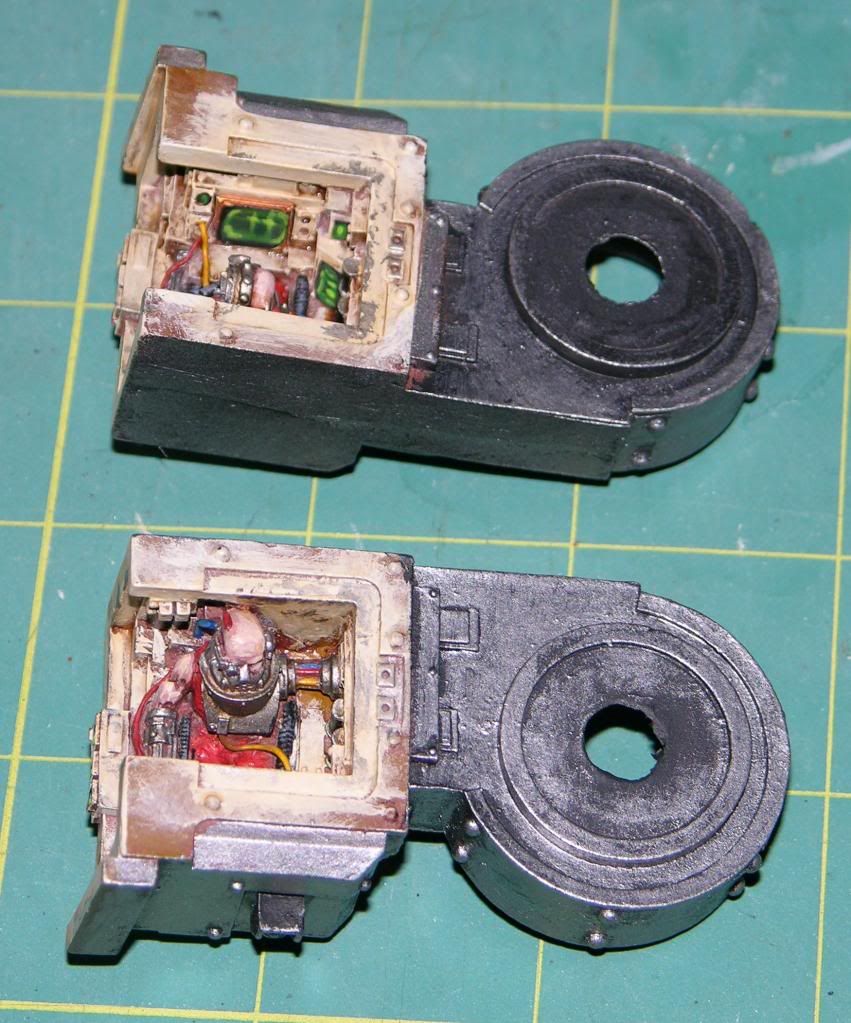
Another pic showing the reverse of the 2 servitors. They are different and you DON'T want to mix them up when assembling the titan.
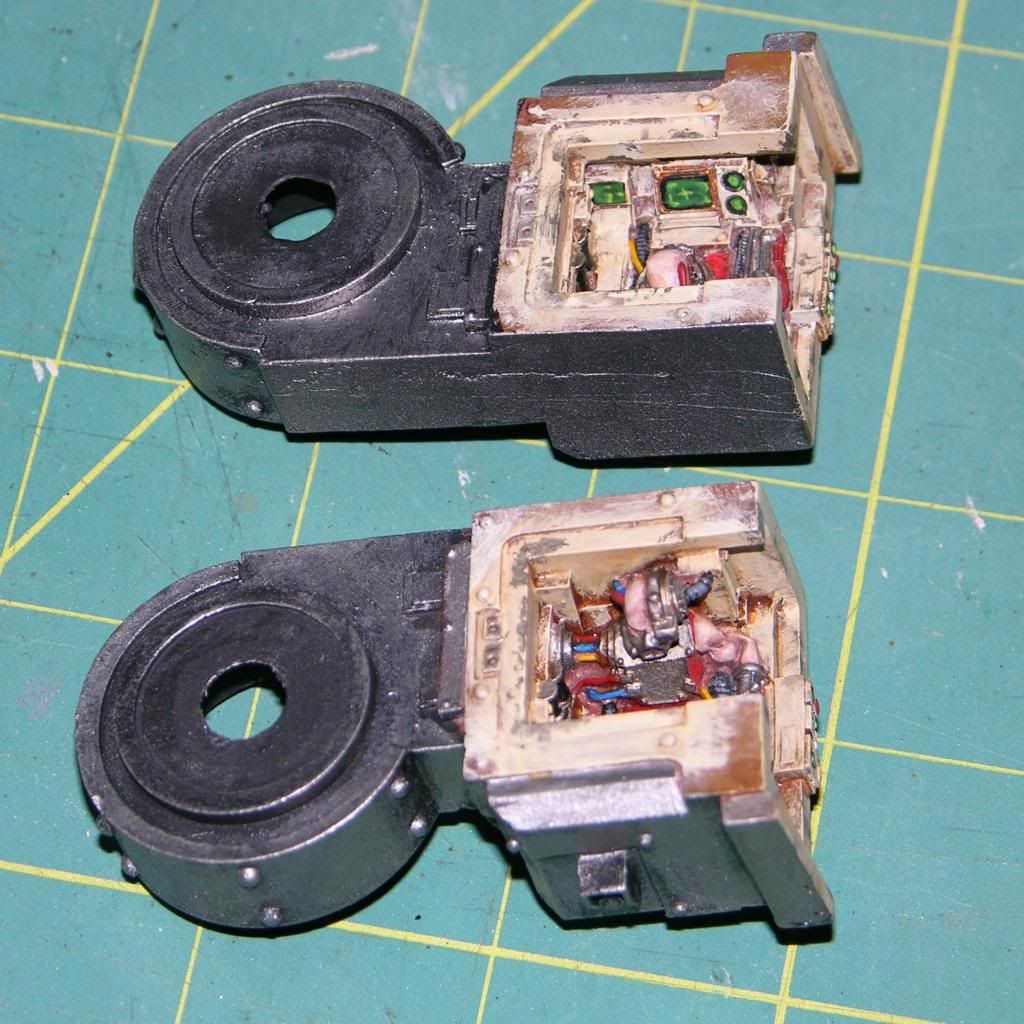
This is the section containing the crew elevator (hole in the floor ATM) and the door to the head/cockpit. Still some detail to do... purity seals, install the elevator pad, winches, commissioning plate, and mechanicus shrine. I'll show those when they get installed.
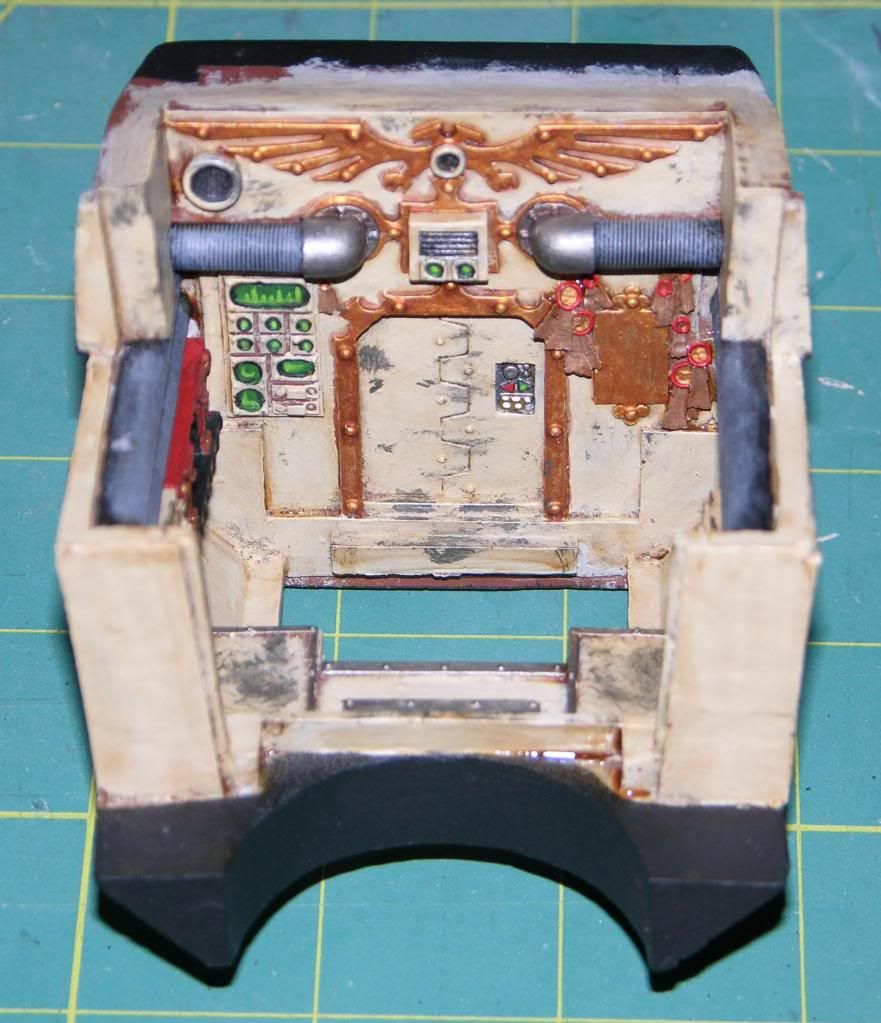
These are the three pieces that make up the reactor control room. These are by far the heaviest single pieces in the kit and will need major pinning to secure them. Also, they do not line up well in the back where the external cooling vents are. There will be some greenstuffing required. This is not a problem with my kit alone. Every Warhound that I have assembled has suffered from this flaw. No worries though. It is easily patched and isn't in a very visible spot.
Next post will cover assebly of these pieces into still workable sub-assemblies. Be prepared to mess up some of the pretty paint you have put on when we start drilling holes.Sinsinatus
"Go ahead. Roll the dice and see if I get to eat your spleen."
-
06-21-2012, 05:45 PM #53Chapter-Master
- Join Date
- Feb 2010
- Location
- Durham, NH
- Posts
- 5,547
sweet!
QUOTE Jwolf: "Besides, Tynskel isn't evil, he's just drawn that way. "
"
-
06-24-2012, 08:19 AM #54Brother-Sergeant
- Join Date
- Jul 2009
- Location
- Sarasota, FL
- Posts
- 62
Building Torso Subassemblies
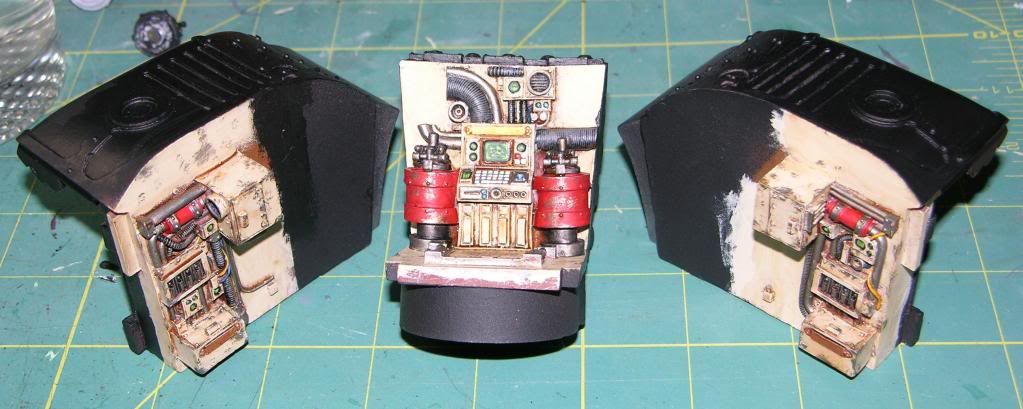
This should be one of those feel good payoff moments where you realize your planning and preparation were all worth it. However, if you skipped on the prep and cleaning and test fitting, there will be much wailing and gnashing of teeth.
As I said Earlier, these are the heaviest pieces in the kit. Without the carapace installed, theses sections will weigh over a pound. This means multiple pins from different directions. You dont have to use the same locations that I do. I just try to use spots that wont show after final assembly, will be easy to patch, or both. Oh, and this is going to be one of those areas where that Dremel tool will help avoid those bothersome hand cramps.
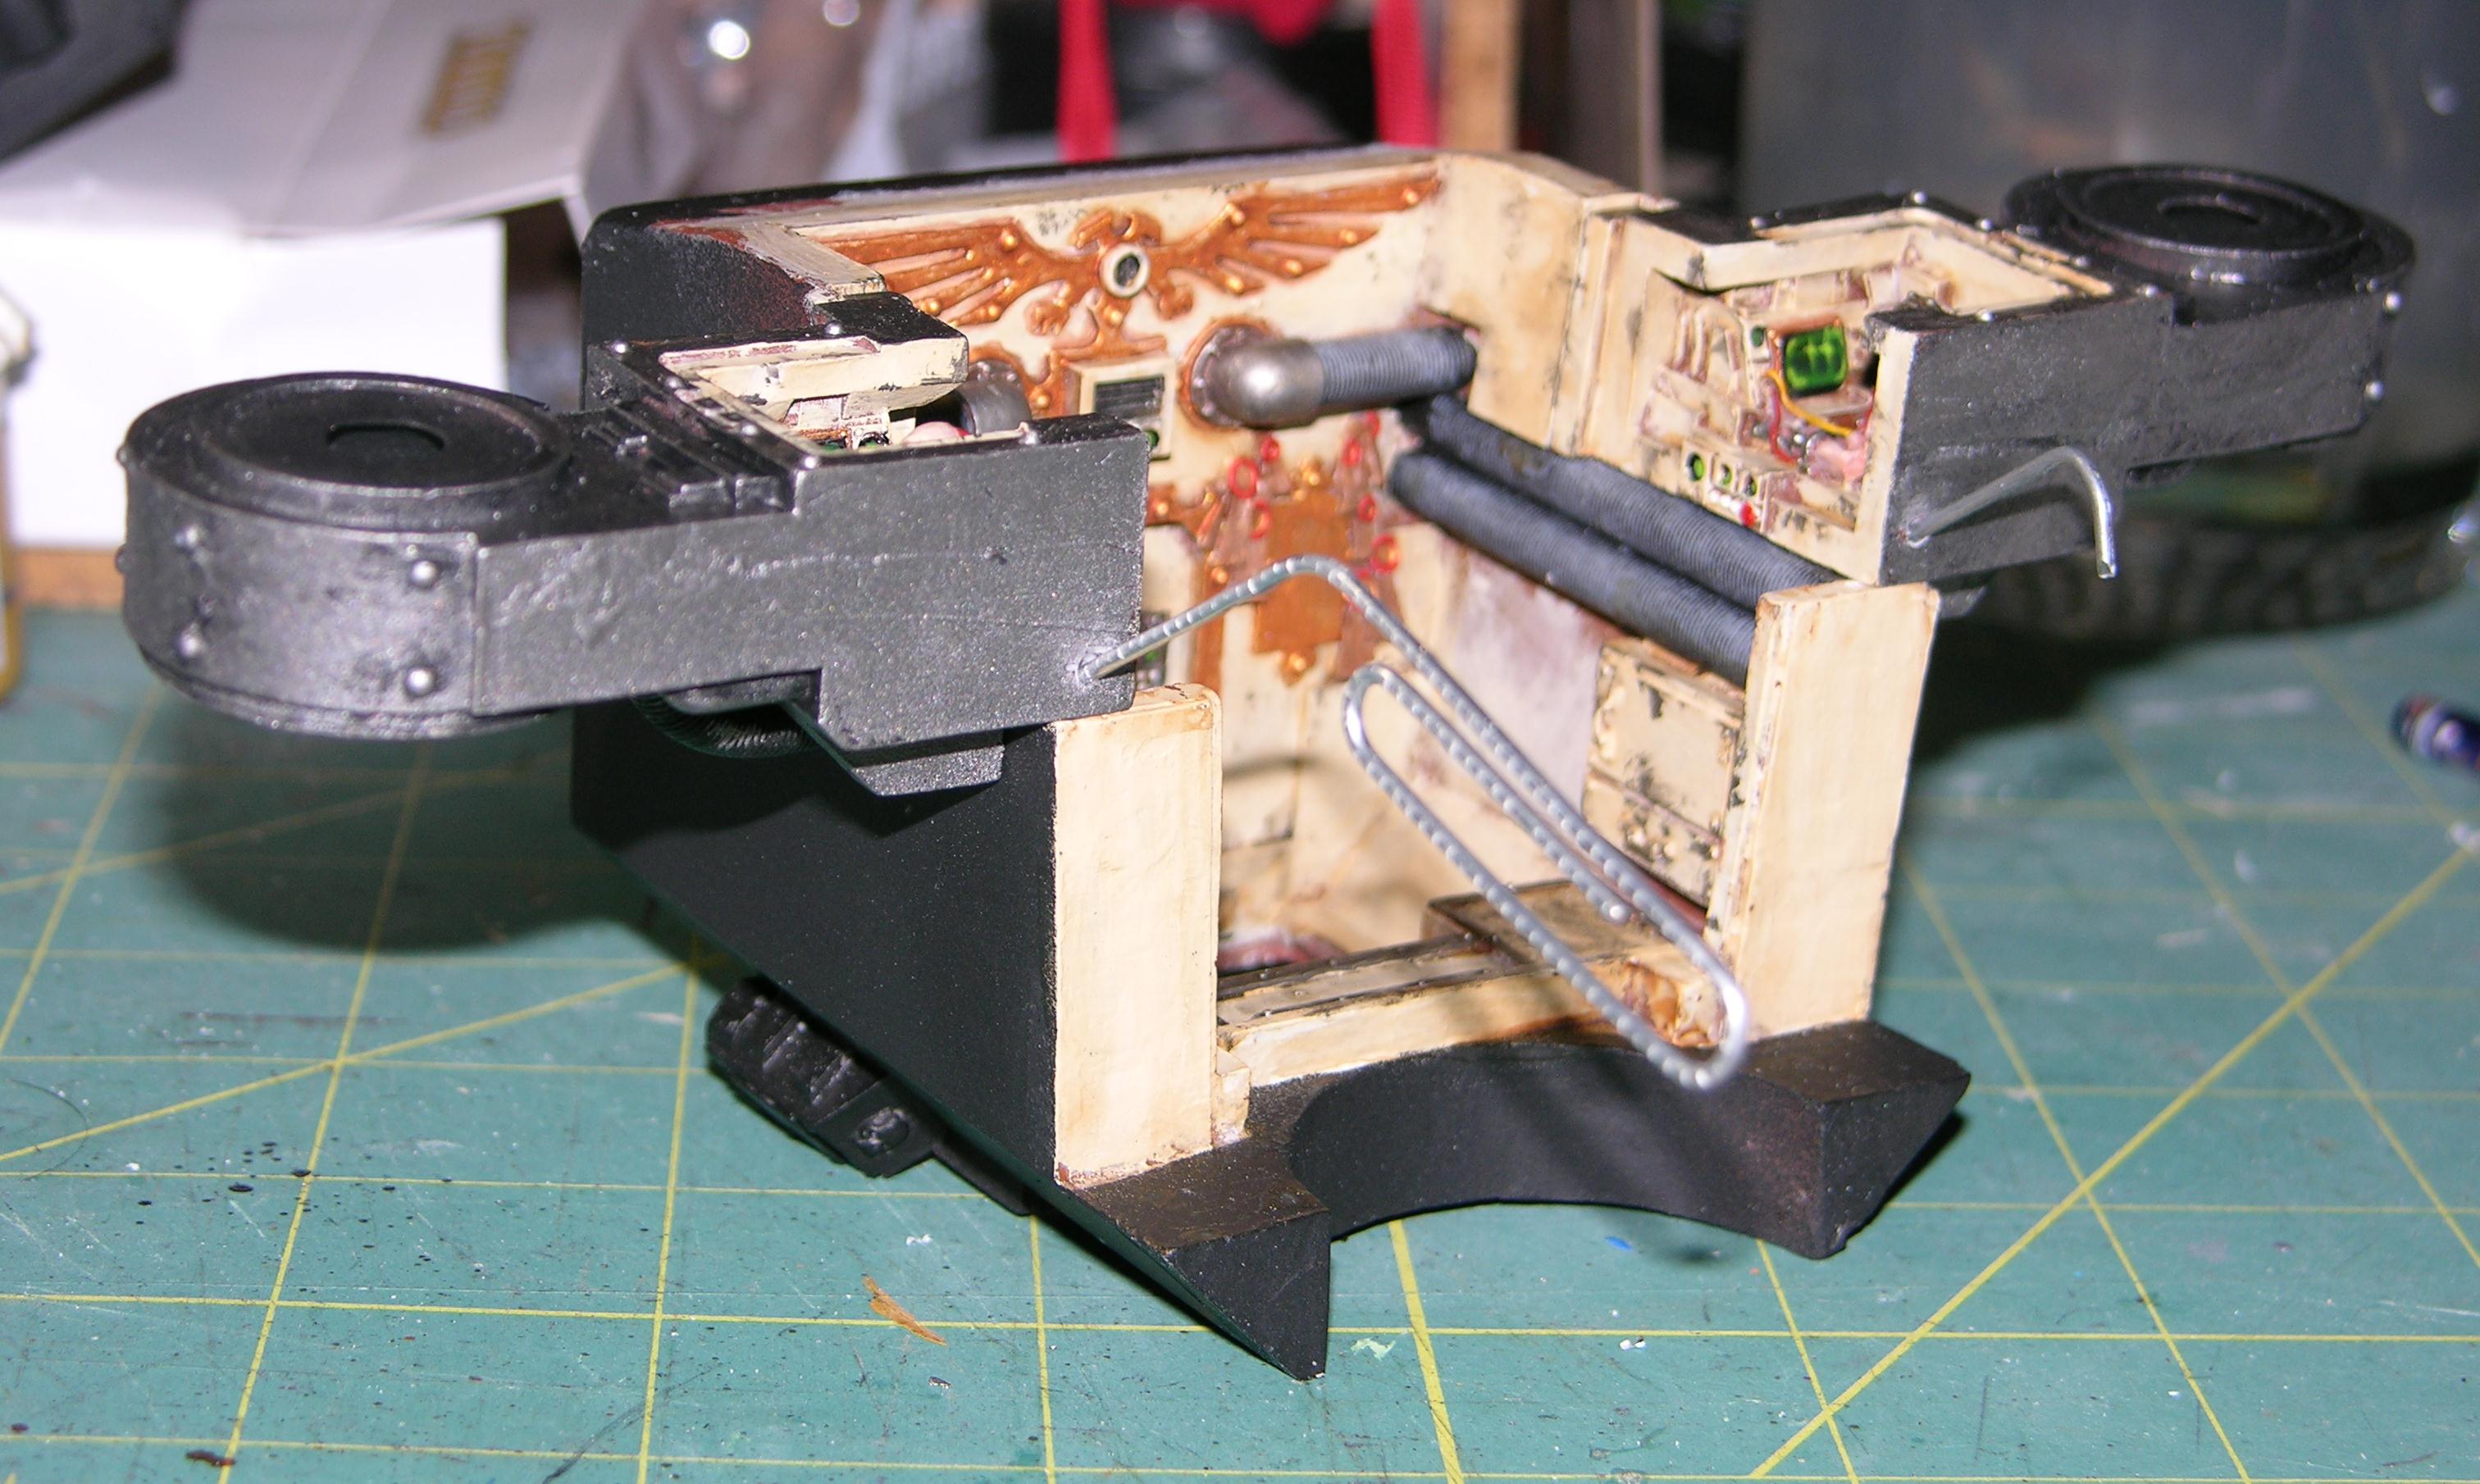
As you can see from the pictures above, the holes for the pins have been drilled at a downward angle through the gunners sponson and into the wall of the elevator control room. For the engine room and reactor pieces, we need a total of 4 pins. One pair are drilled at a similar downward angle through the floor toolbox and into the reactor housing. The other pair will go in perpendicularly through the reactor and into the floor plate of the engine room itself. Be careful not to drill too high or the bit will come through in the middle of all that nice detail you have been painting up. Remember, it is easiest to drill holes that line up with the pieces dryfitted together.
When the holes are drilled, insert a long piece of your pinning wire or rod and then back it out slightly. Cut the wire flush there so that the final piece will end below the surface of the piece. Trying to file the end of a metal pin without damaging the surrounding paint to resin is a task best suited to a fraternity hazing prank.
Glueing the pins in place is the same as earlier. Use a spare piece of wire to smear glue into the holes. Then you apply glue to the actual pin and slide it into place. Make sure to wipe off the extra CA glue with an absorbent tissue or paper towel to prevent it forming a lump that prevent a proper fit in the next stage.
The Dremel will kick out a lot more resin dust than the pin vice so keep a large, soft-bristle brush around to dust the whole thing off when you are done drilling. This picture should also serve as a reminder to WEAR A MASK whenever drilling, filing, or sanding resin parts.Sinsinatus
"Go ahead. Roll the dice and see if I get to eat your spleen."
-
06-24-2012, 08:22 AM #55Brother-Sergeant
- Join Date
- Jul 2009
- Location
- Sarasota, FL
- Posts
- 62
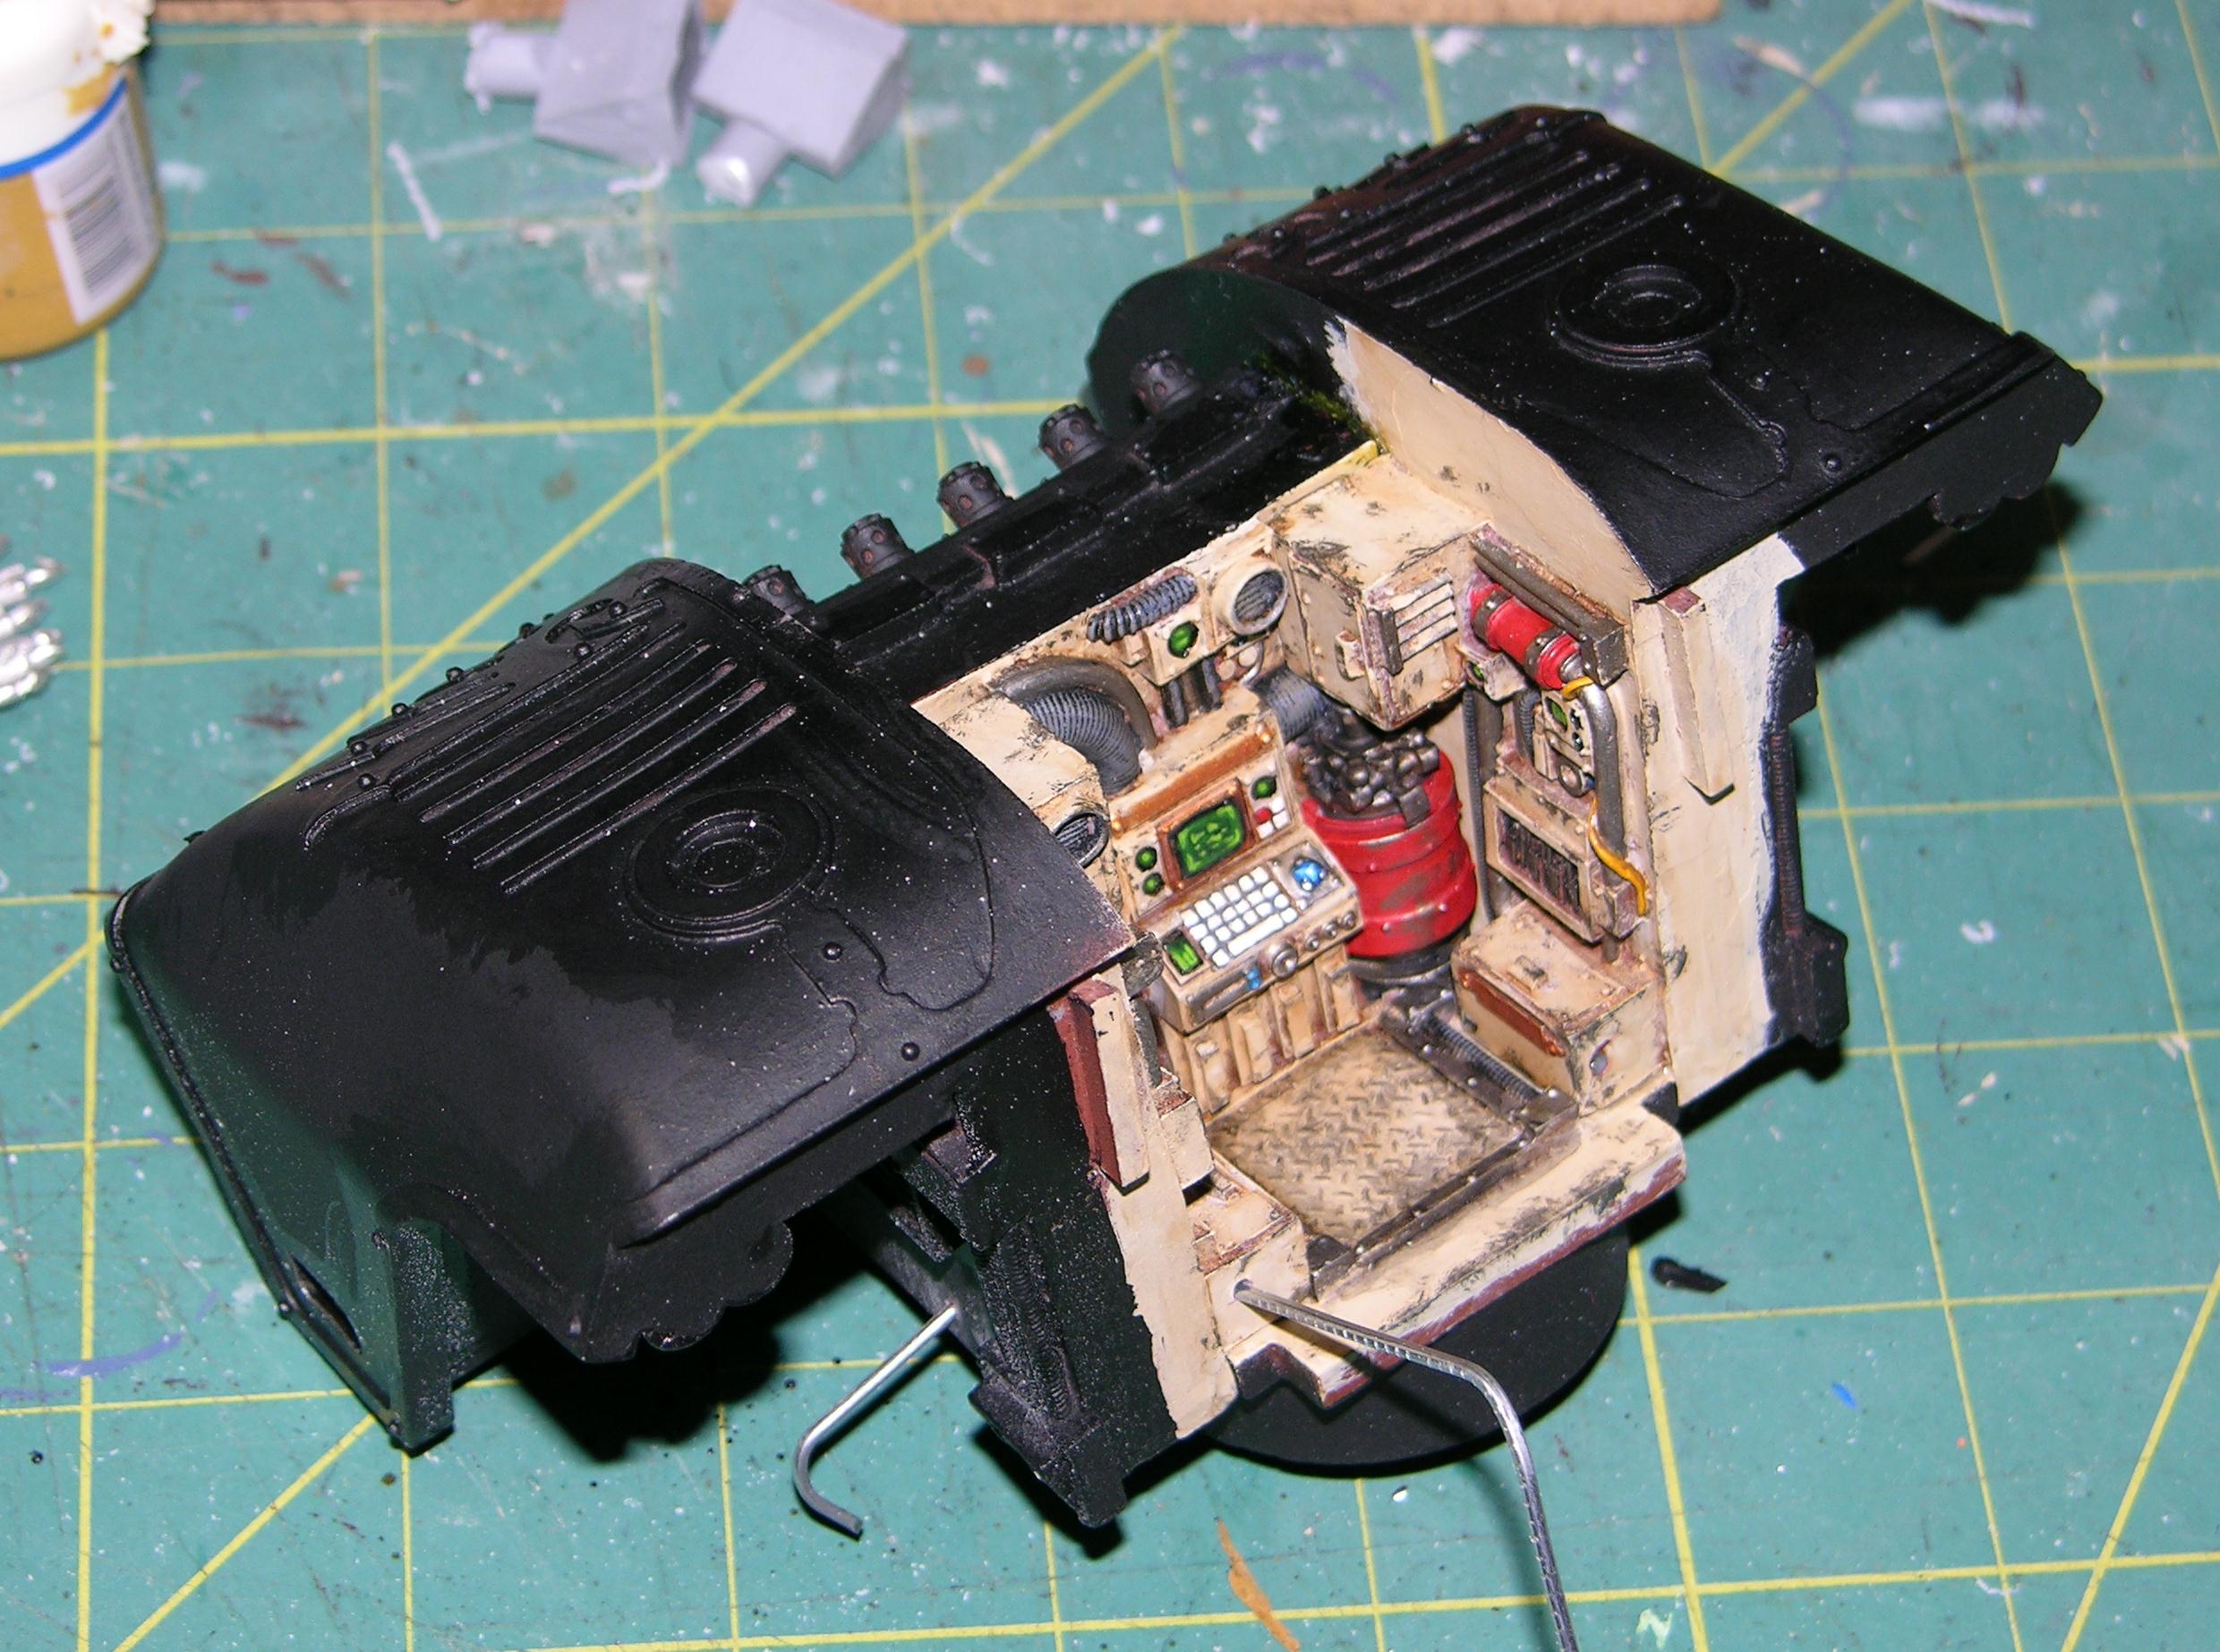
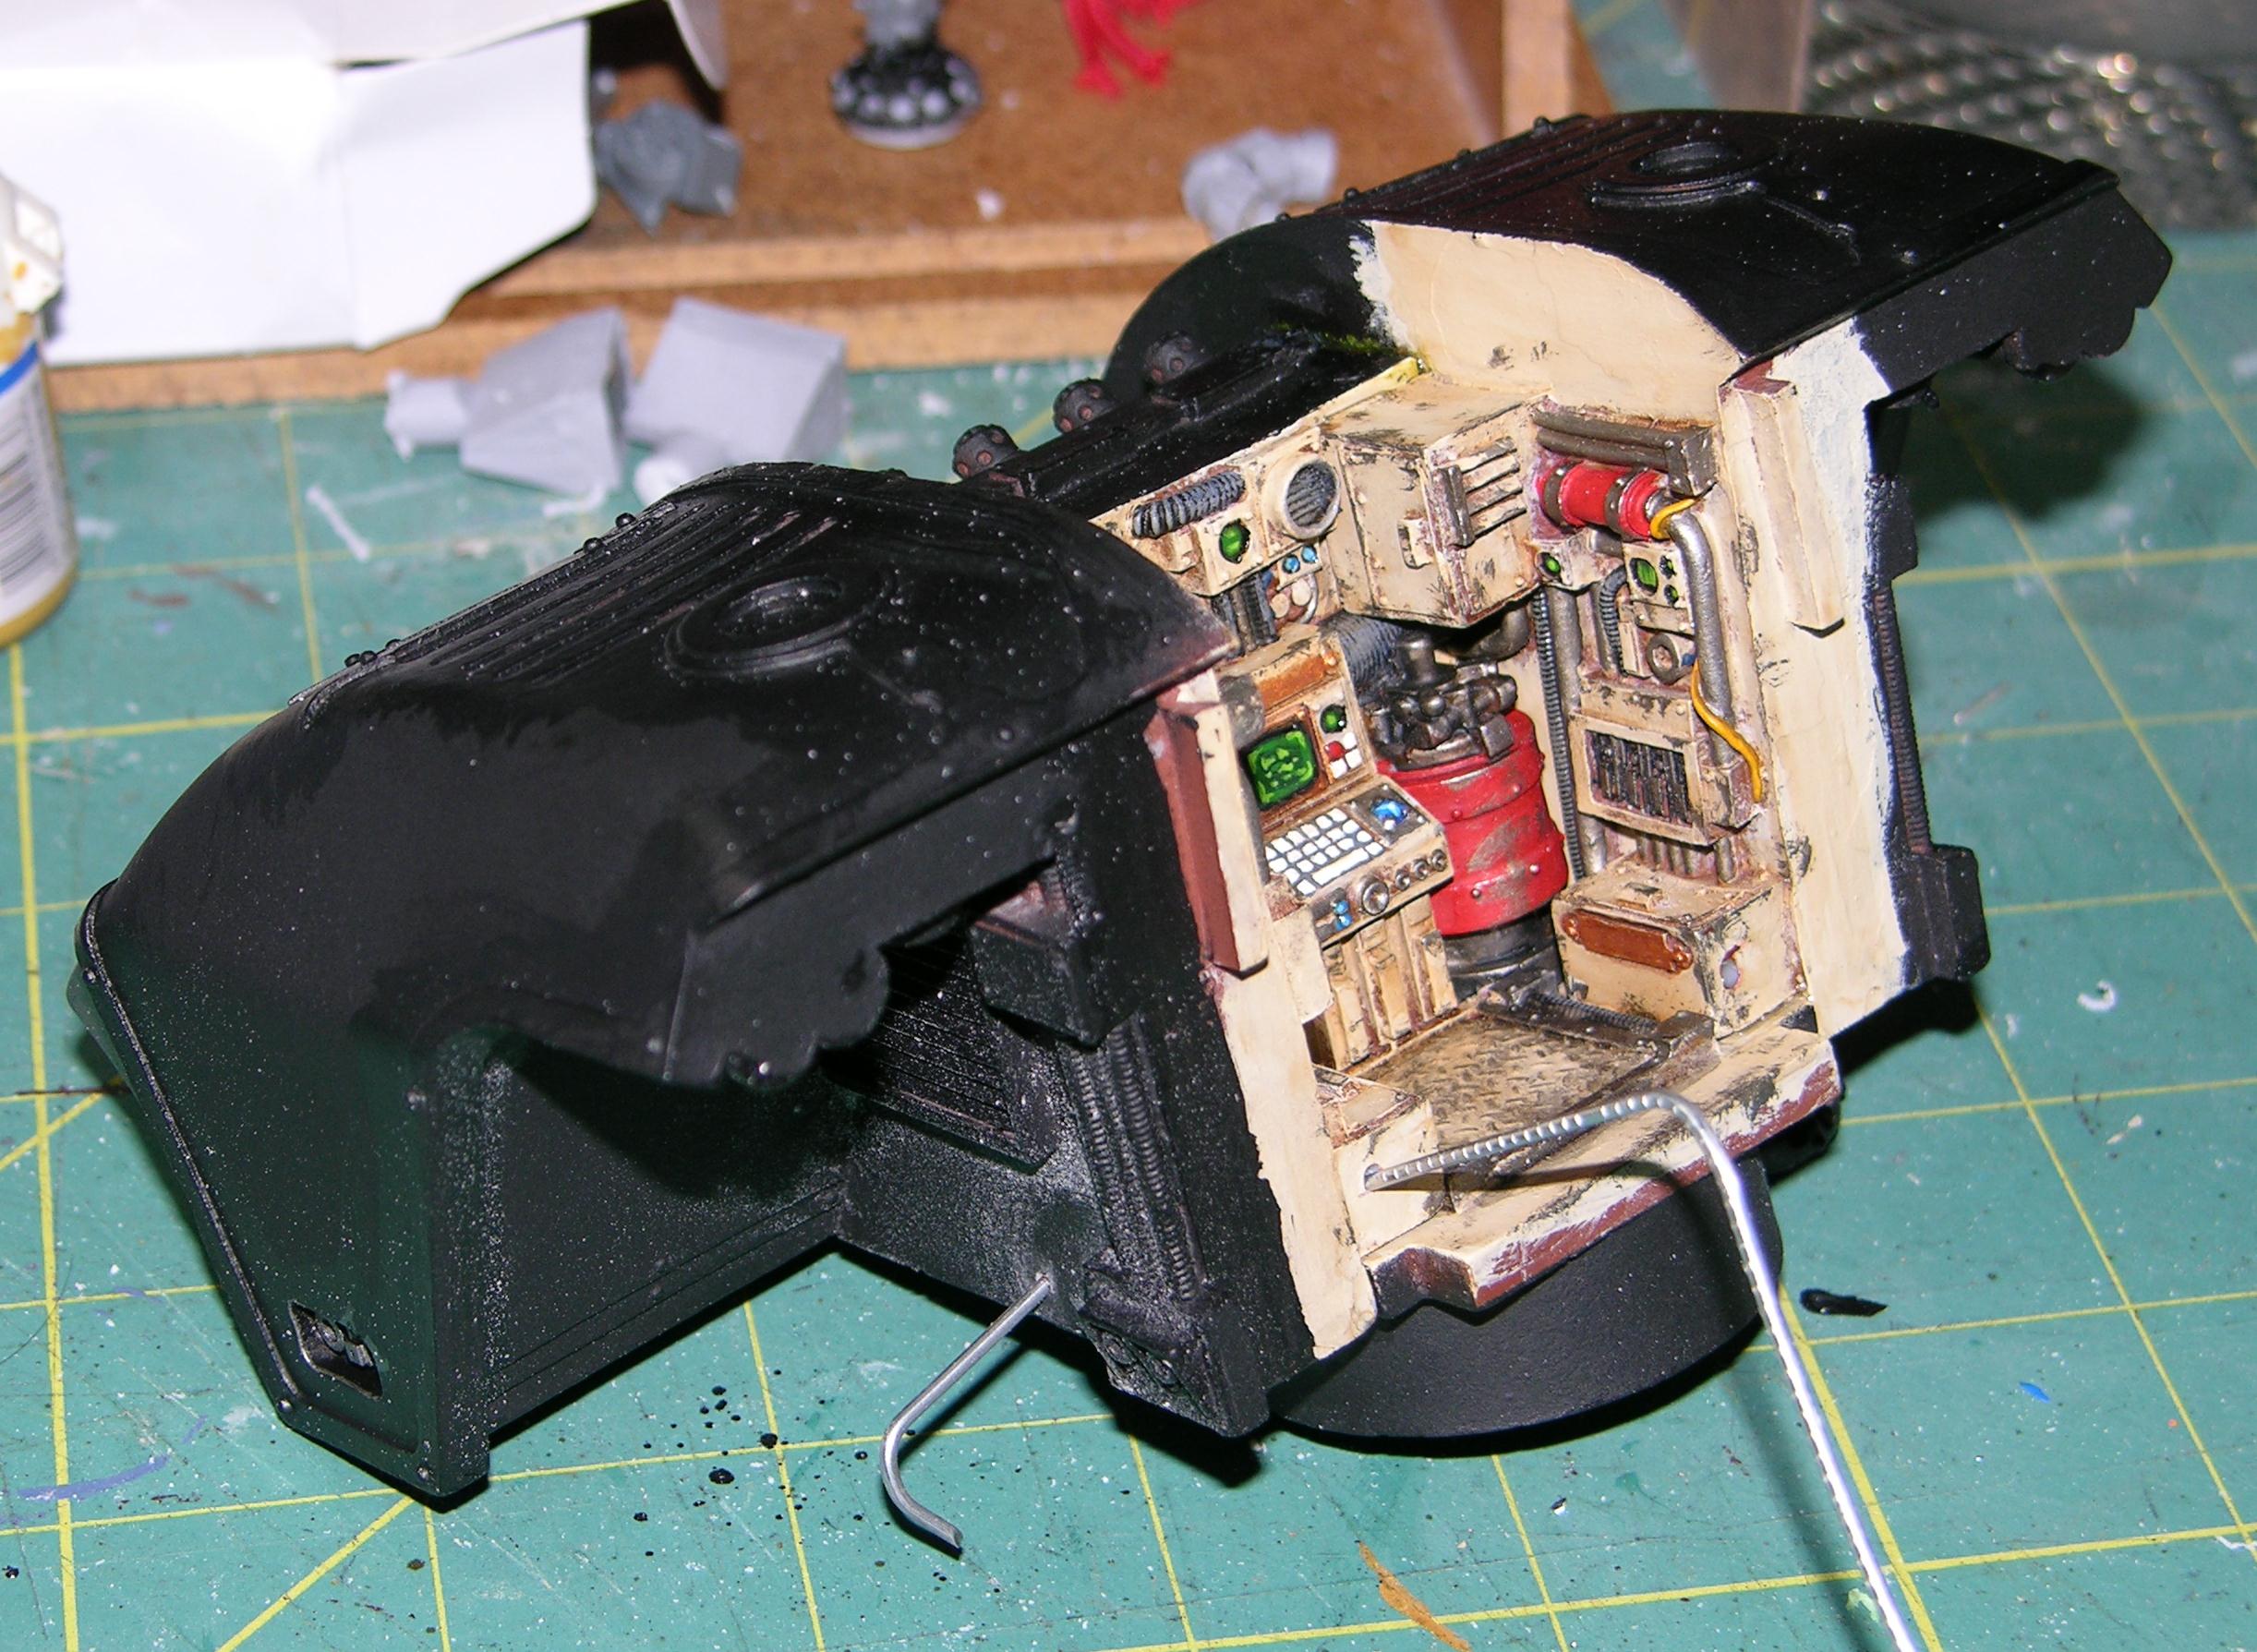
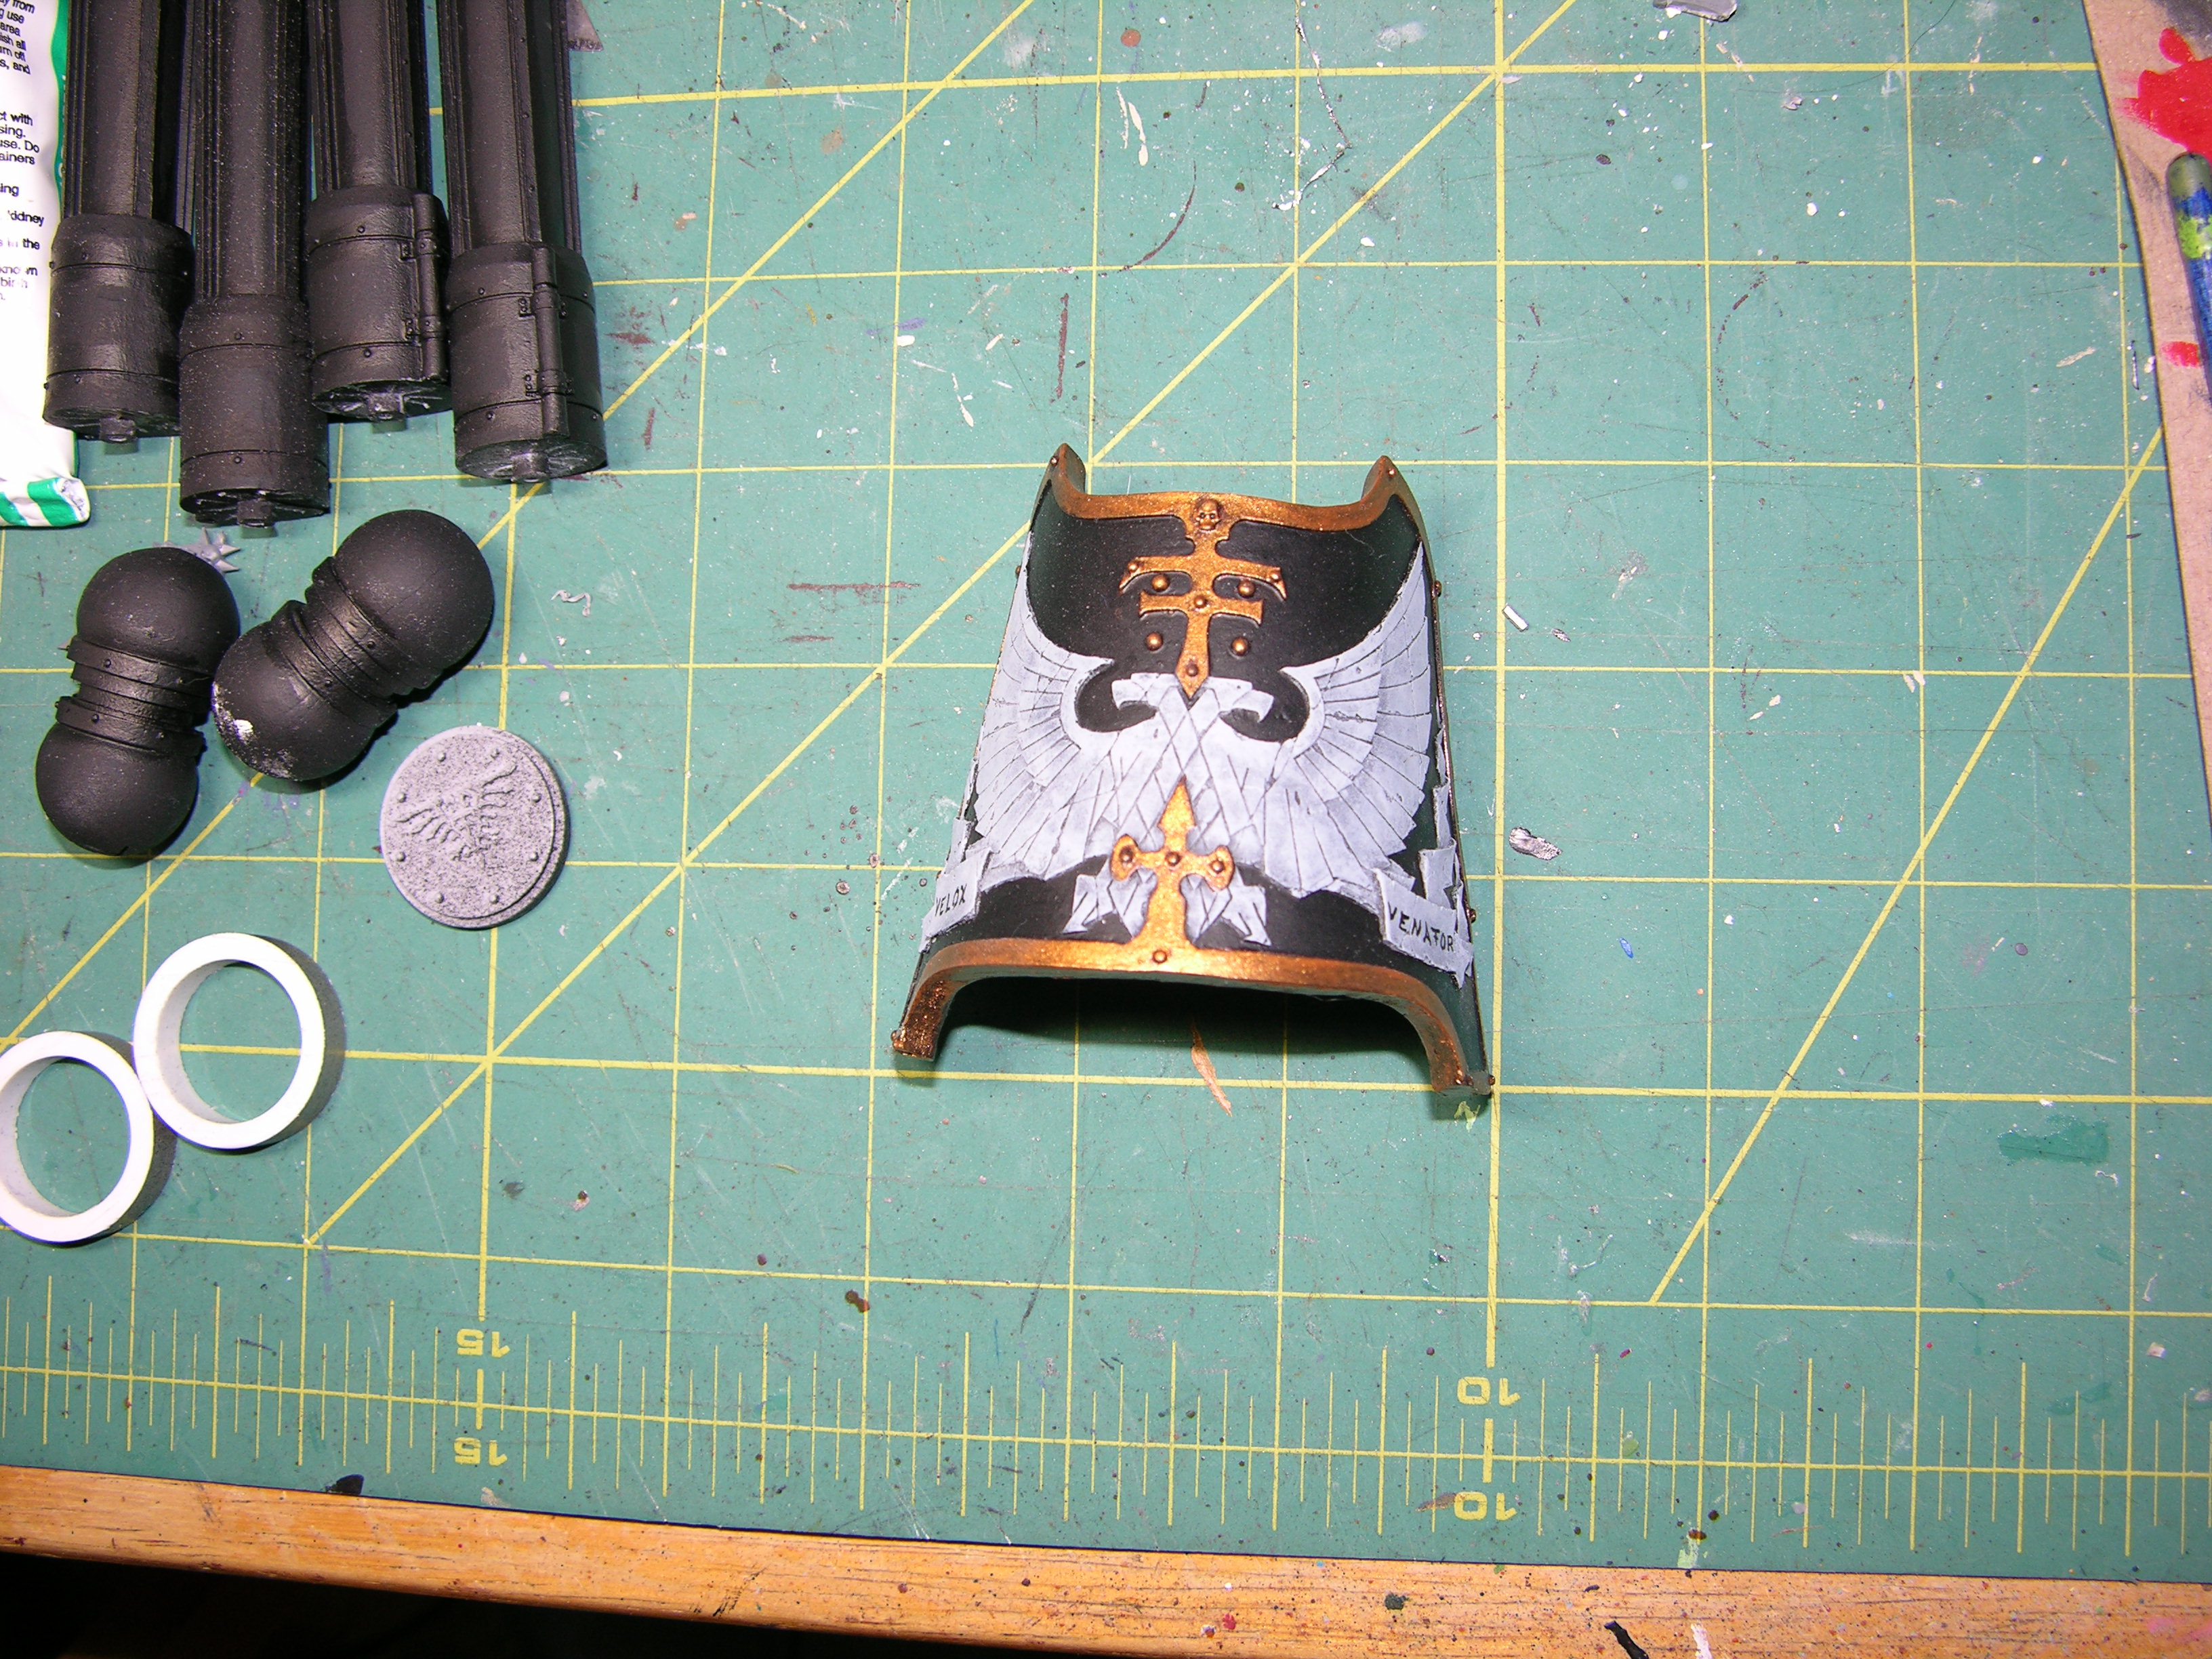
I started a little of the exterior paint while the other hull section was drying. This isn’t done, but I want the engine exhaust vents to have that super hot look. I find it easier to paint the lightest (hottest) and most recessed colors first and then work my way outward with increasingly darker (cooler) colors.
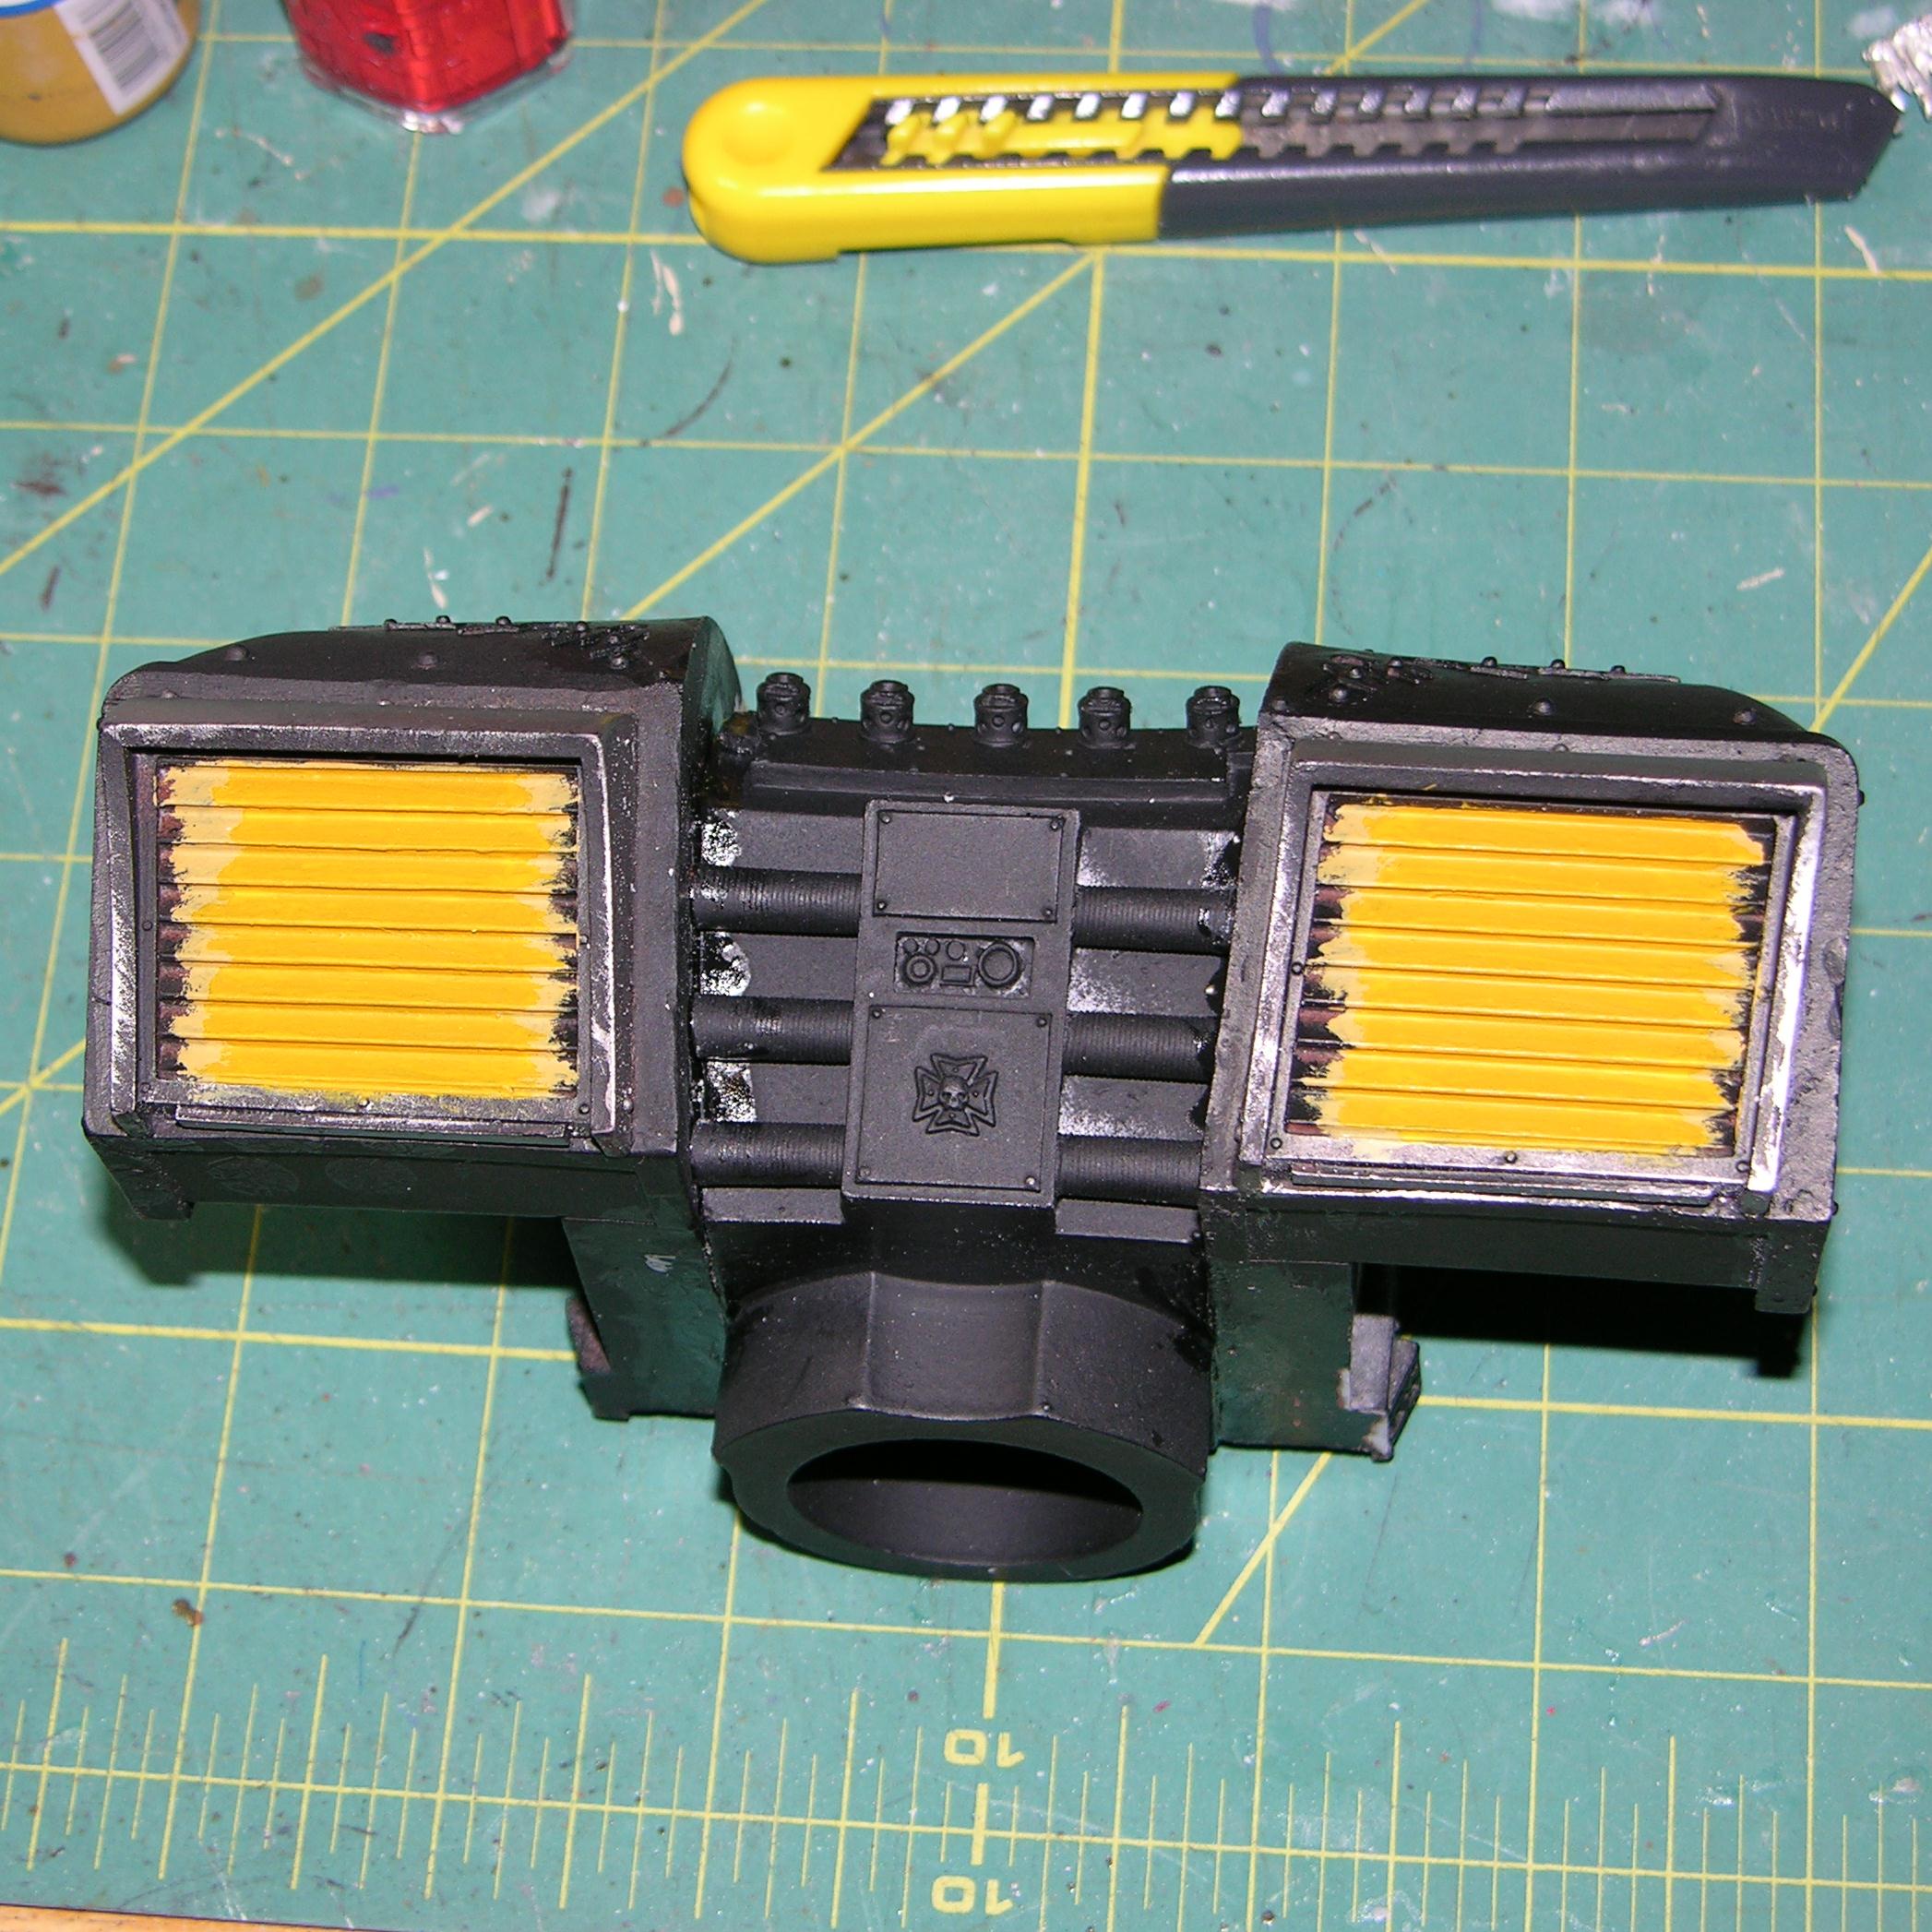
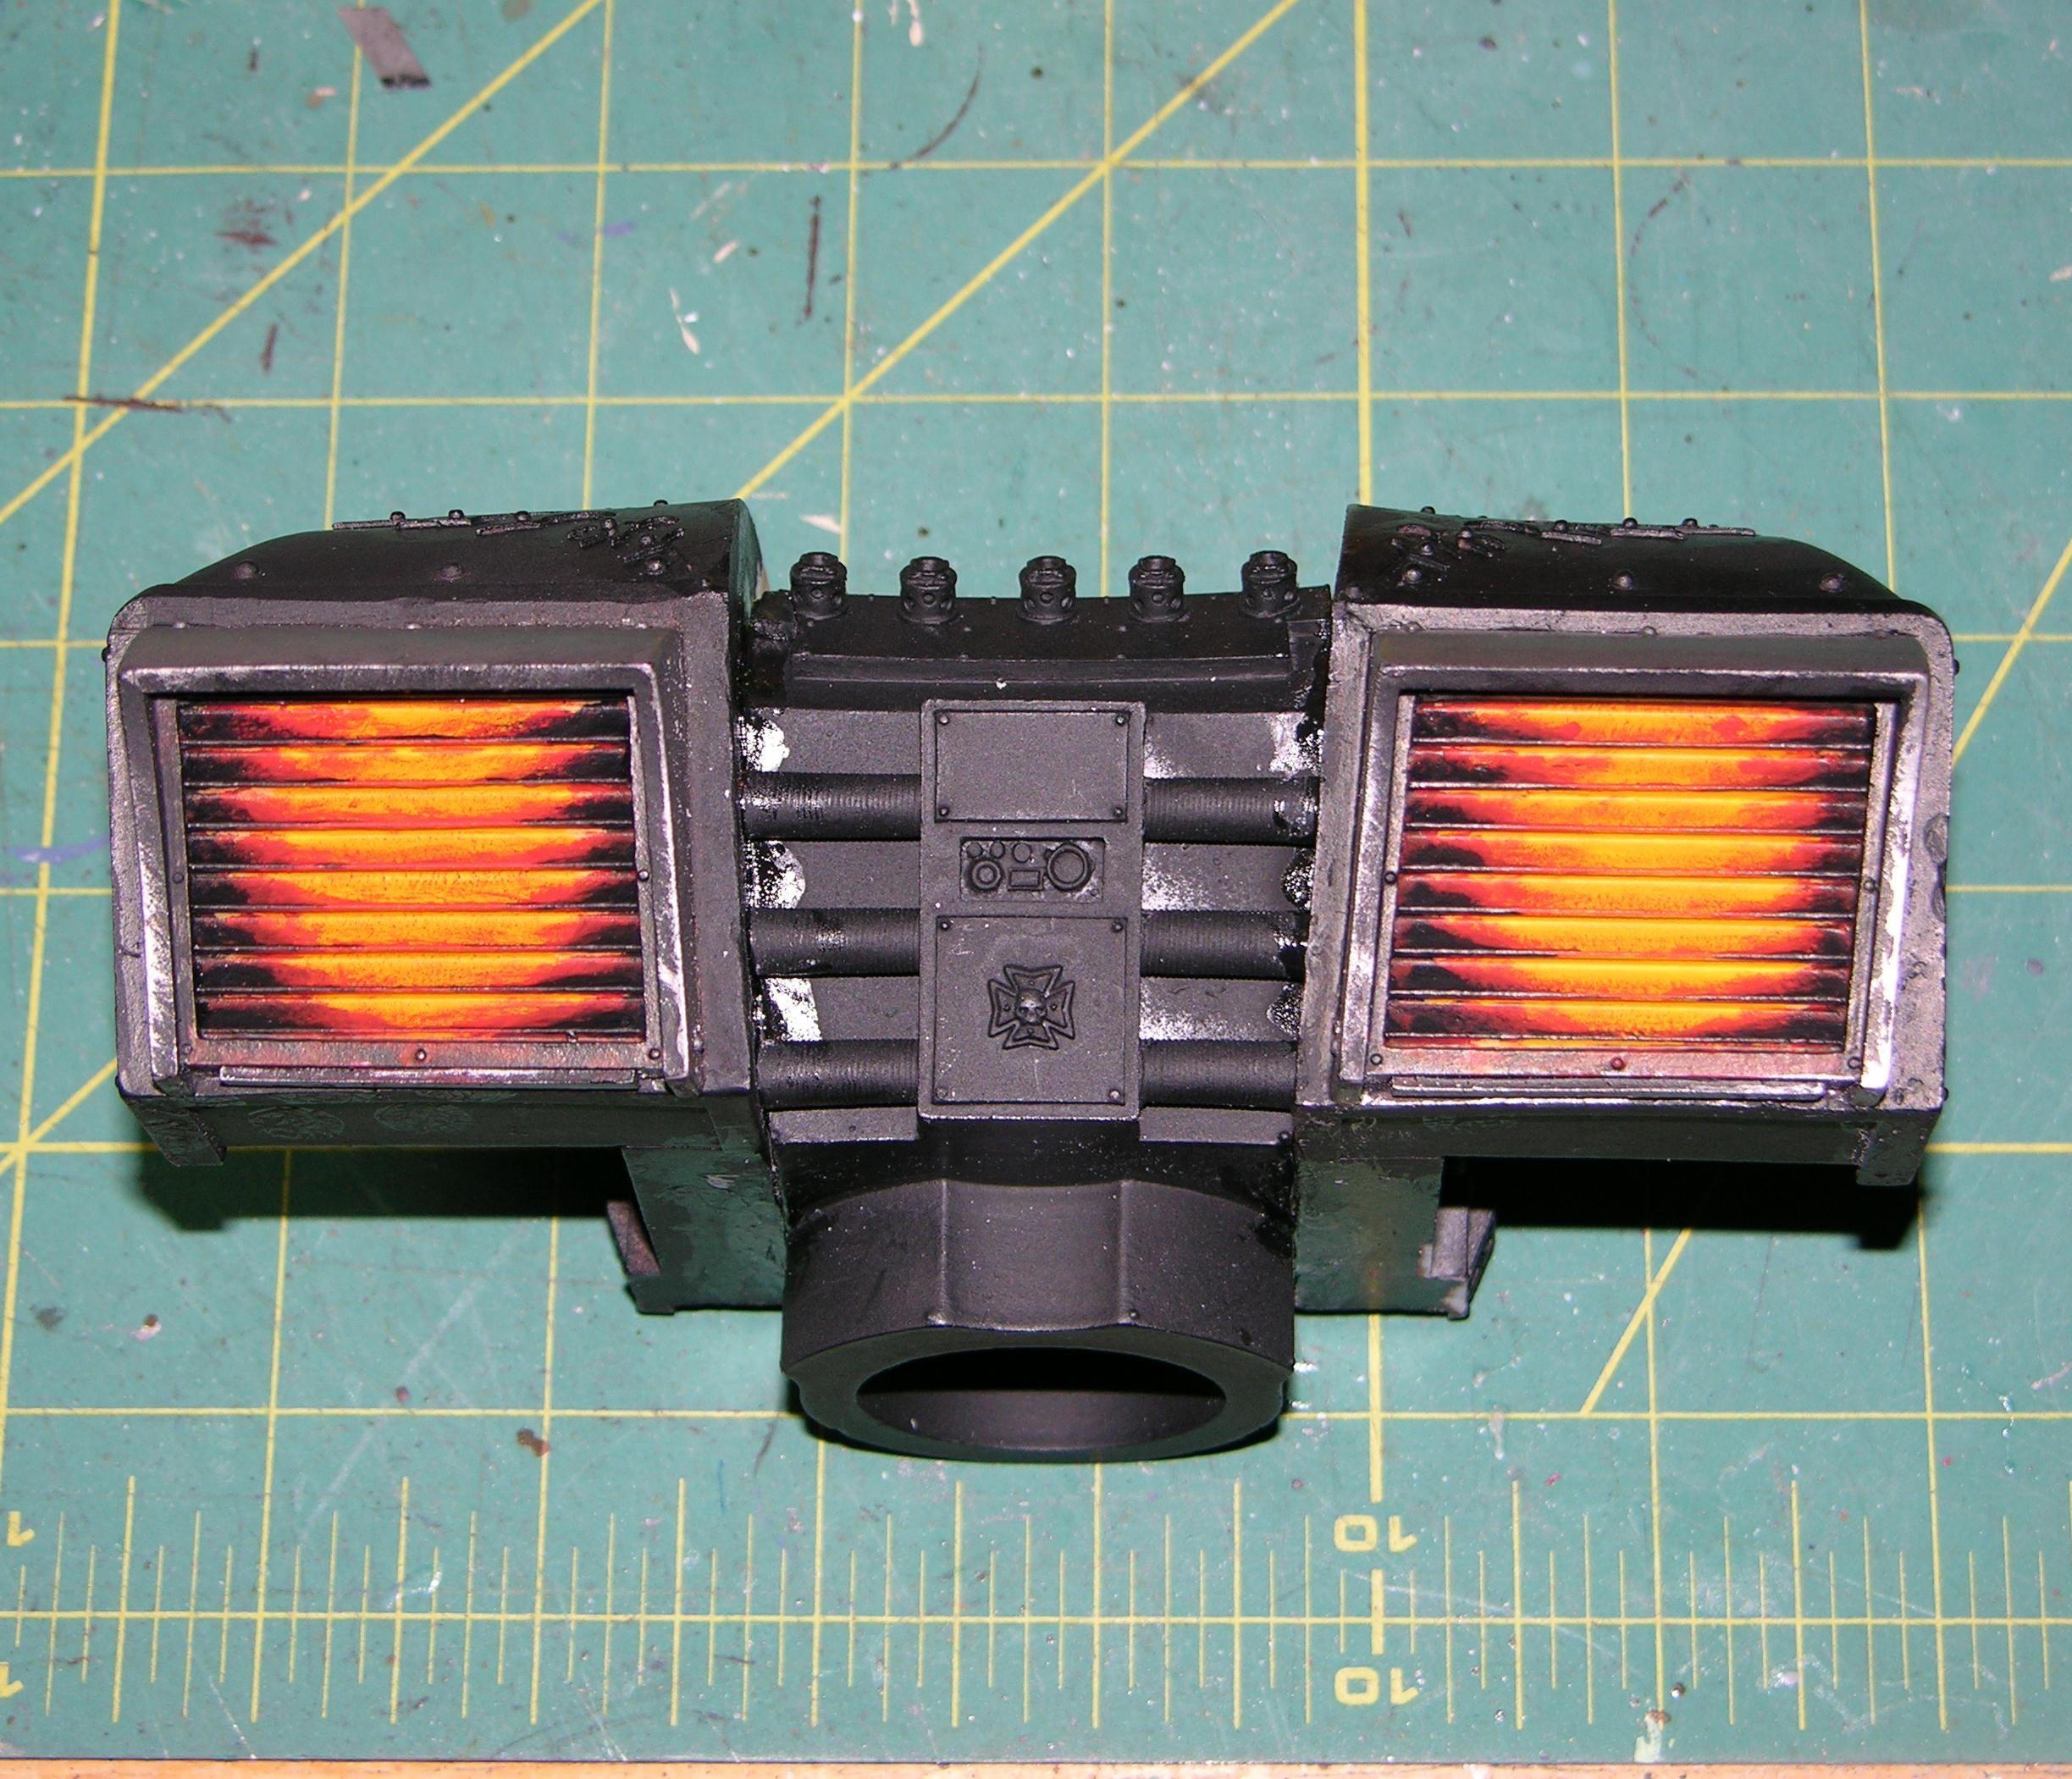
Coming soon will be weapon assembly, exterior detailing, and a whole lot more painting.Last edited by Sinsinatus; 07-21-2012 at 05:19 AM.
Sinsinatus
"Go ahead. Roll the dice and see if I get to eat your spleen."
-
06-24-2012, 04:36 PM #56Brother-Sergeant
- Join Date
- Jul 2009
- Location
- Sarasota, FL
- Posts
- 62
Because I am a junky for all things Forge World, my wonderful wife decided to get me a custom cake for my birthday. The folks at [URL="http://beautifulcakesbyron.com/"]Cakes by Ron[/URL] in Sarasota, Florida did a fantastic job getting the Adeptus Mechanicus imagery correct. But, besides looking great, it tasted fantastic – lemon cake with a raspberry filling. Birthday dreams do come true. Thanks babe.

More pics at my [URL="http://wildboarblog.wordpress.com/"]"still under construction" blog[/URL].Sinsinatus
"Go ahead. Roll the dice and see if I get to eat your spleen."
-
07-21-2012, 05:26 AM #57Brother-Sergeant
- Join Date
- Jul 2009
- Location
- Sarasota, FL
- Posts
- 62
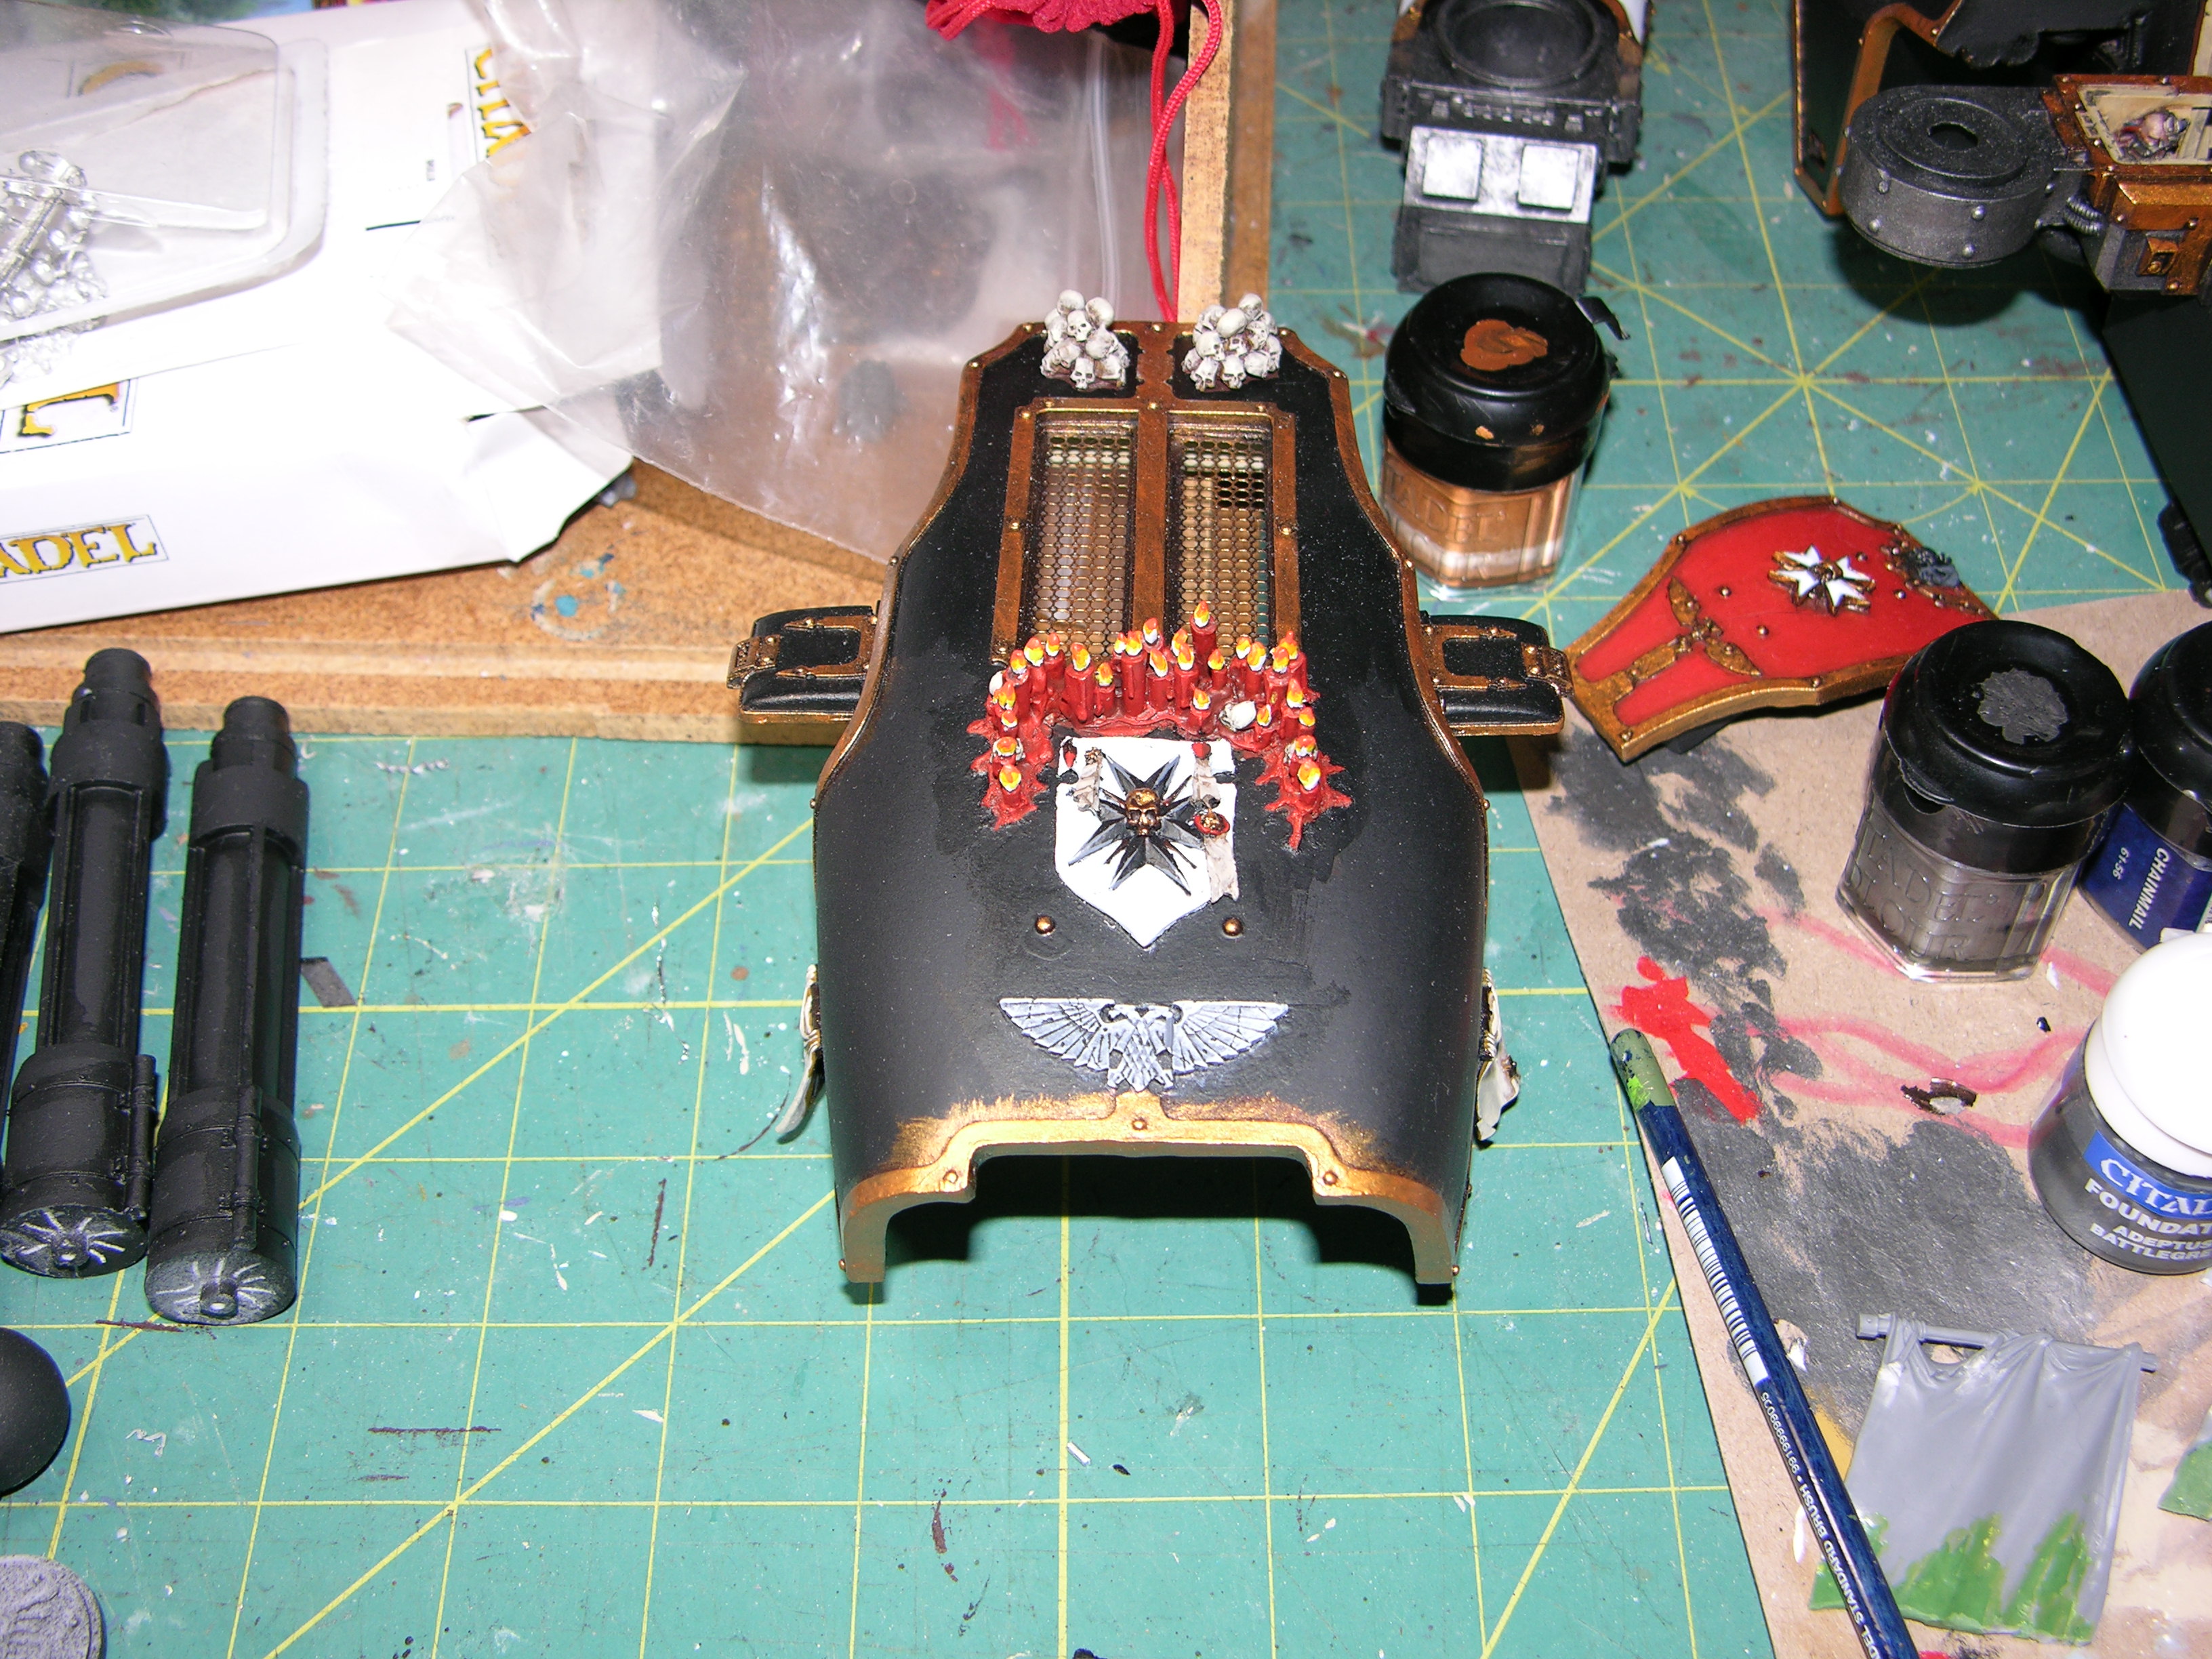
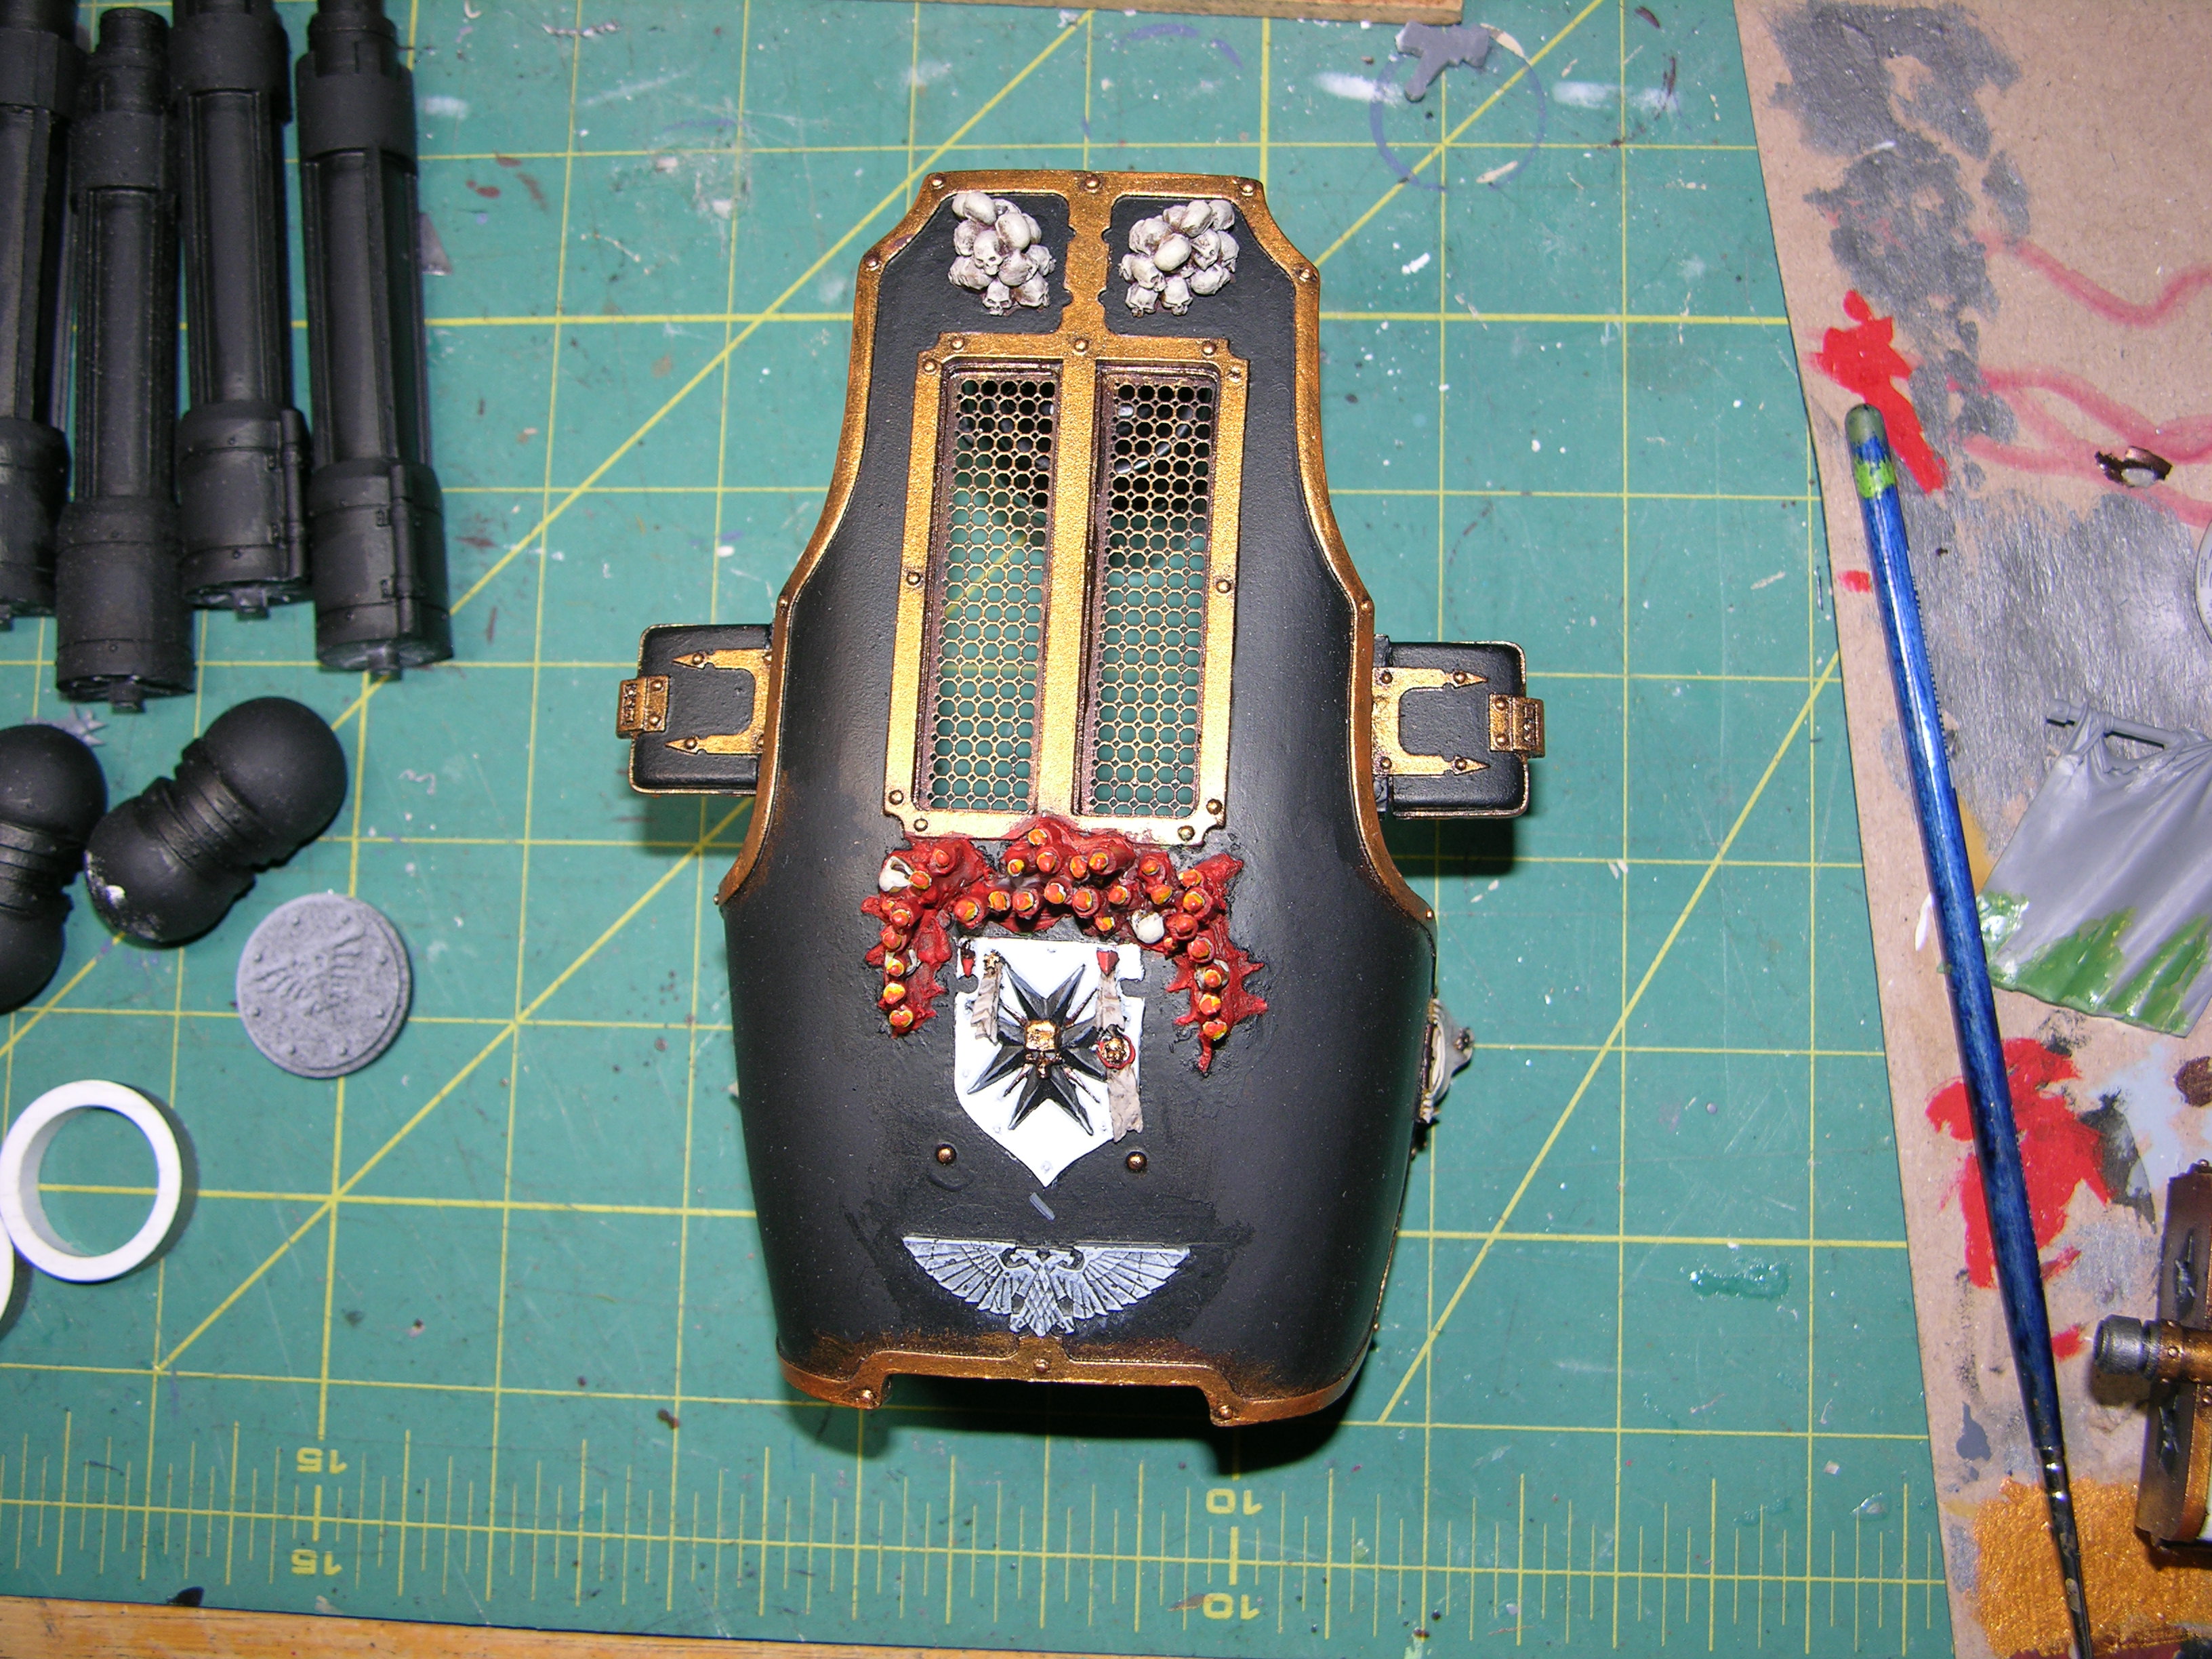
Bodywork and Primary painting
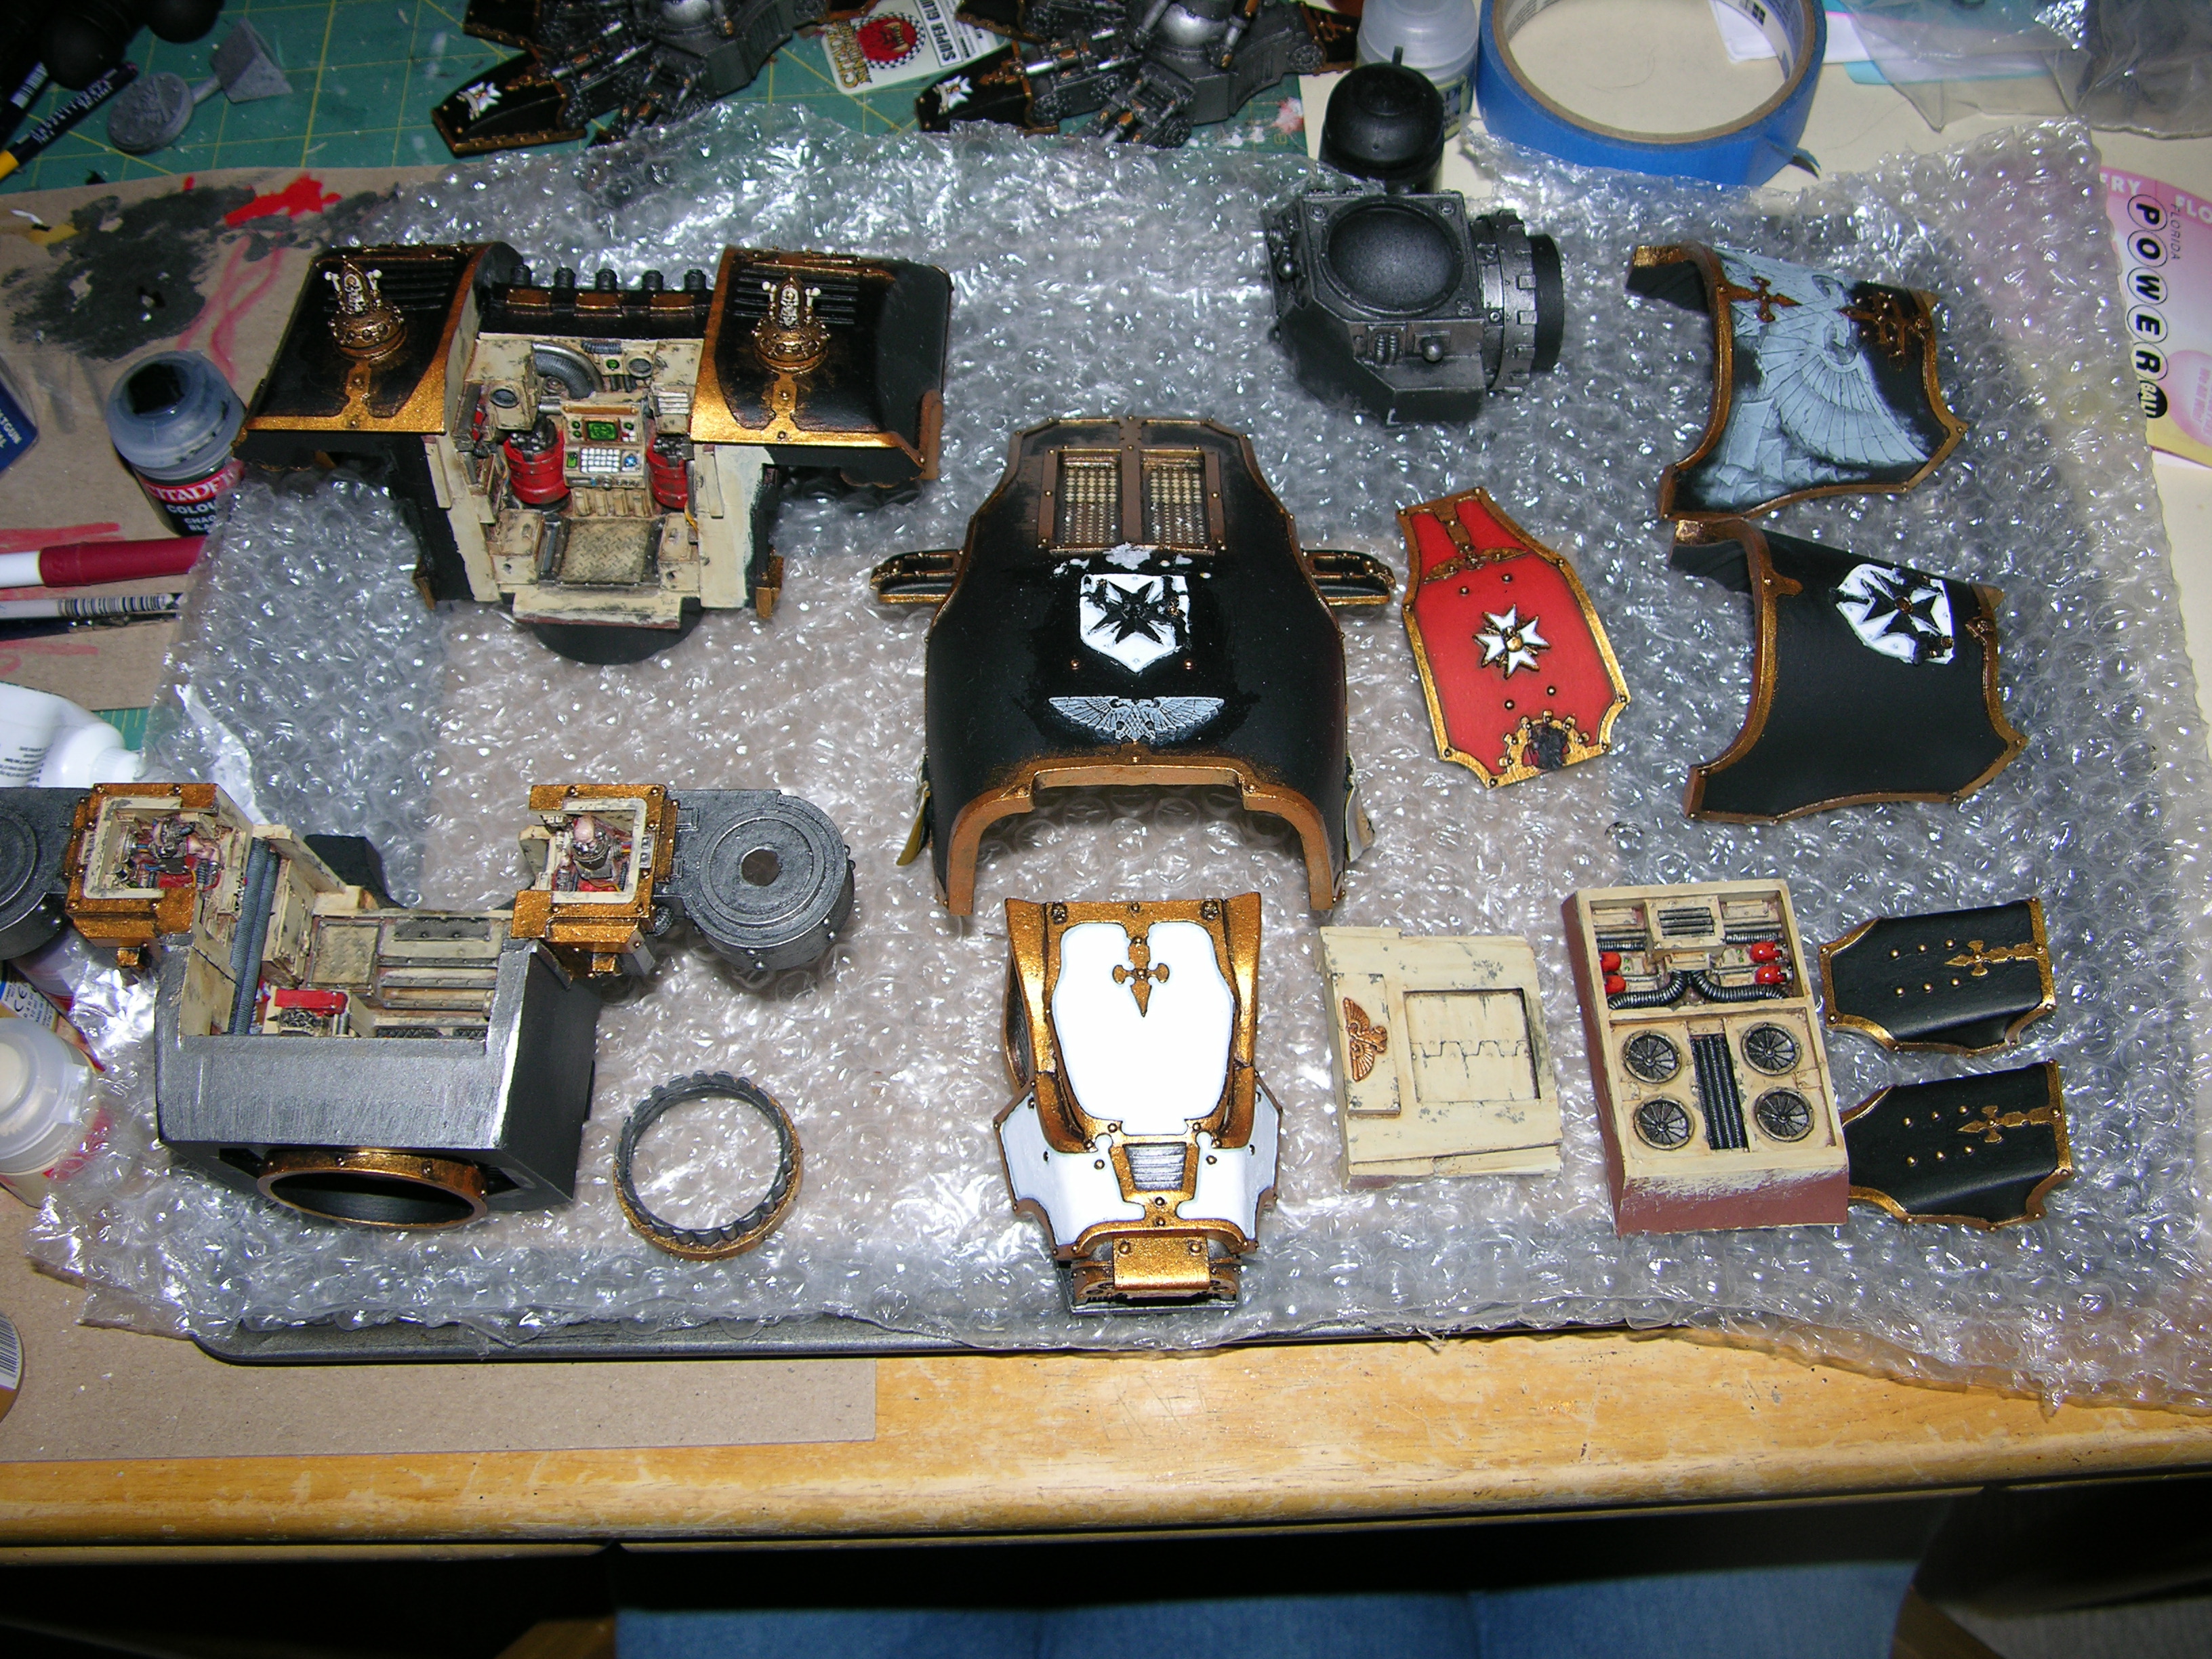
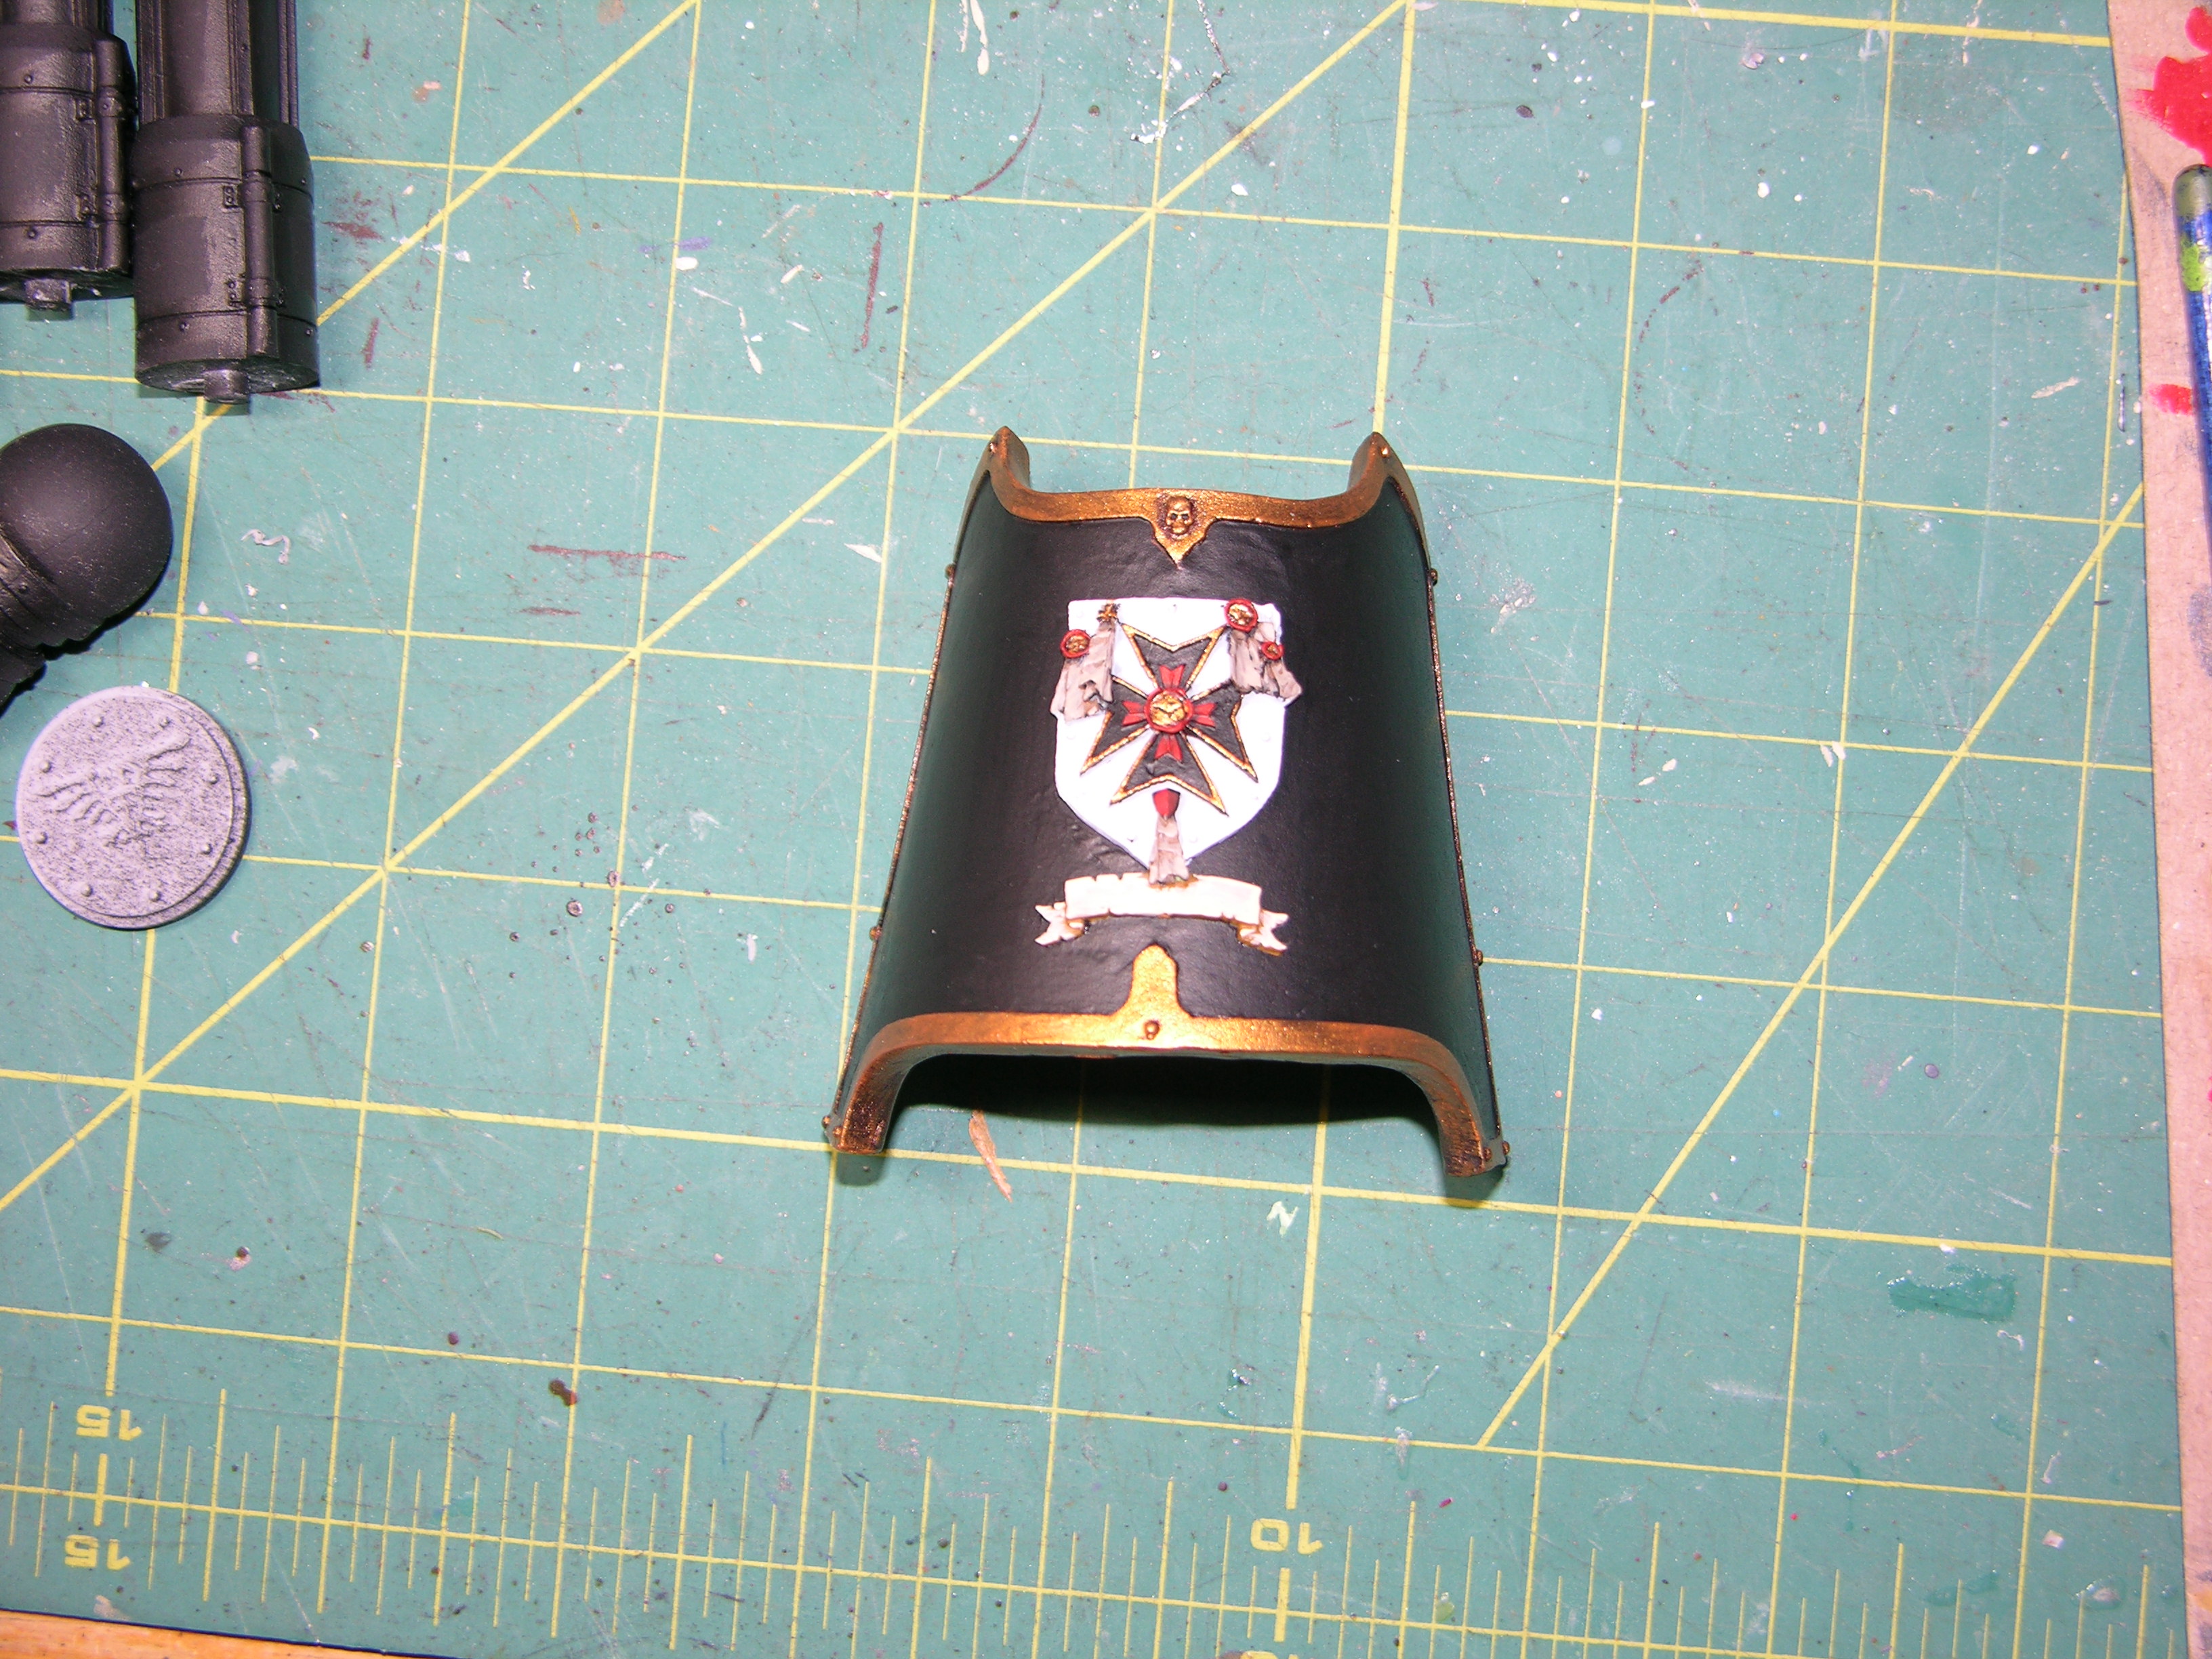
In the spirit of evoking the real feel of the Templars, the client and I sat down to refine our ideas how to customize the piece. One of the defining ideas was to try to capture the relic worship so ingrained in Space Marine lore. To this end, We have decided that the carapace of the titan should feel like an altar. Here is the piece as I arrange the layout of the candles surrounding the shield that bears the Maltese cross emblem of the chapter. Before they can be installed, I have to get some of the primary painting done on the exterior of the titan.

 Sinsinatus
"Go ahead. Roll the dice and see if I get to eat your spleen."
-
07-21-2012, 05:27 AM #58Brother-Sergeant
- Join Date
- Jul 2009
- Location
- Sarasota, FL
- Posts
- 62
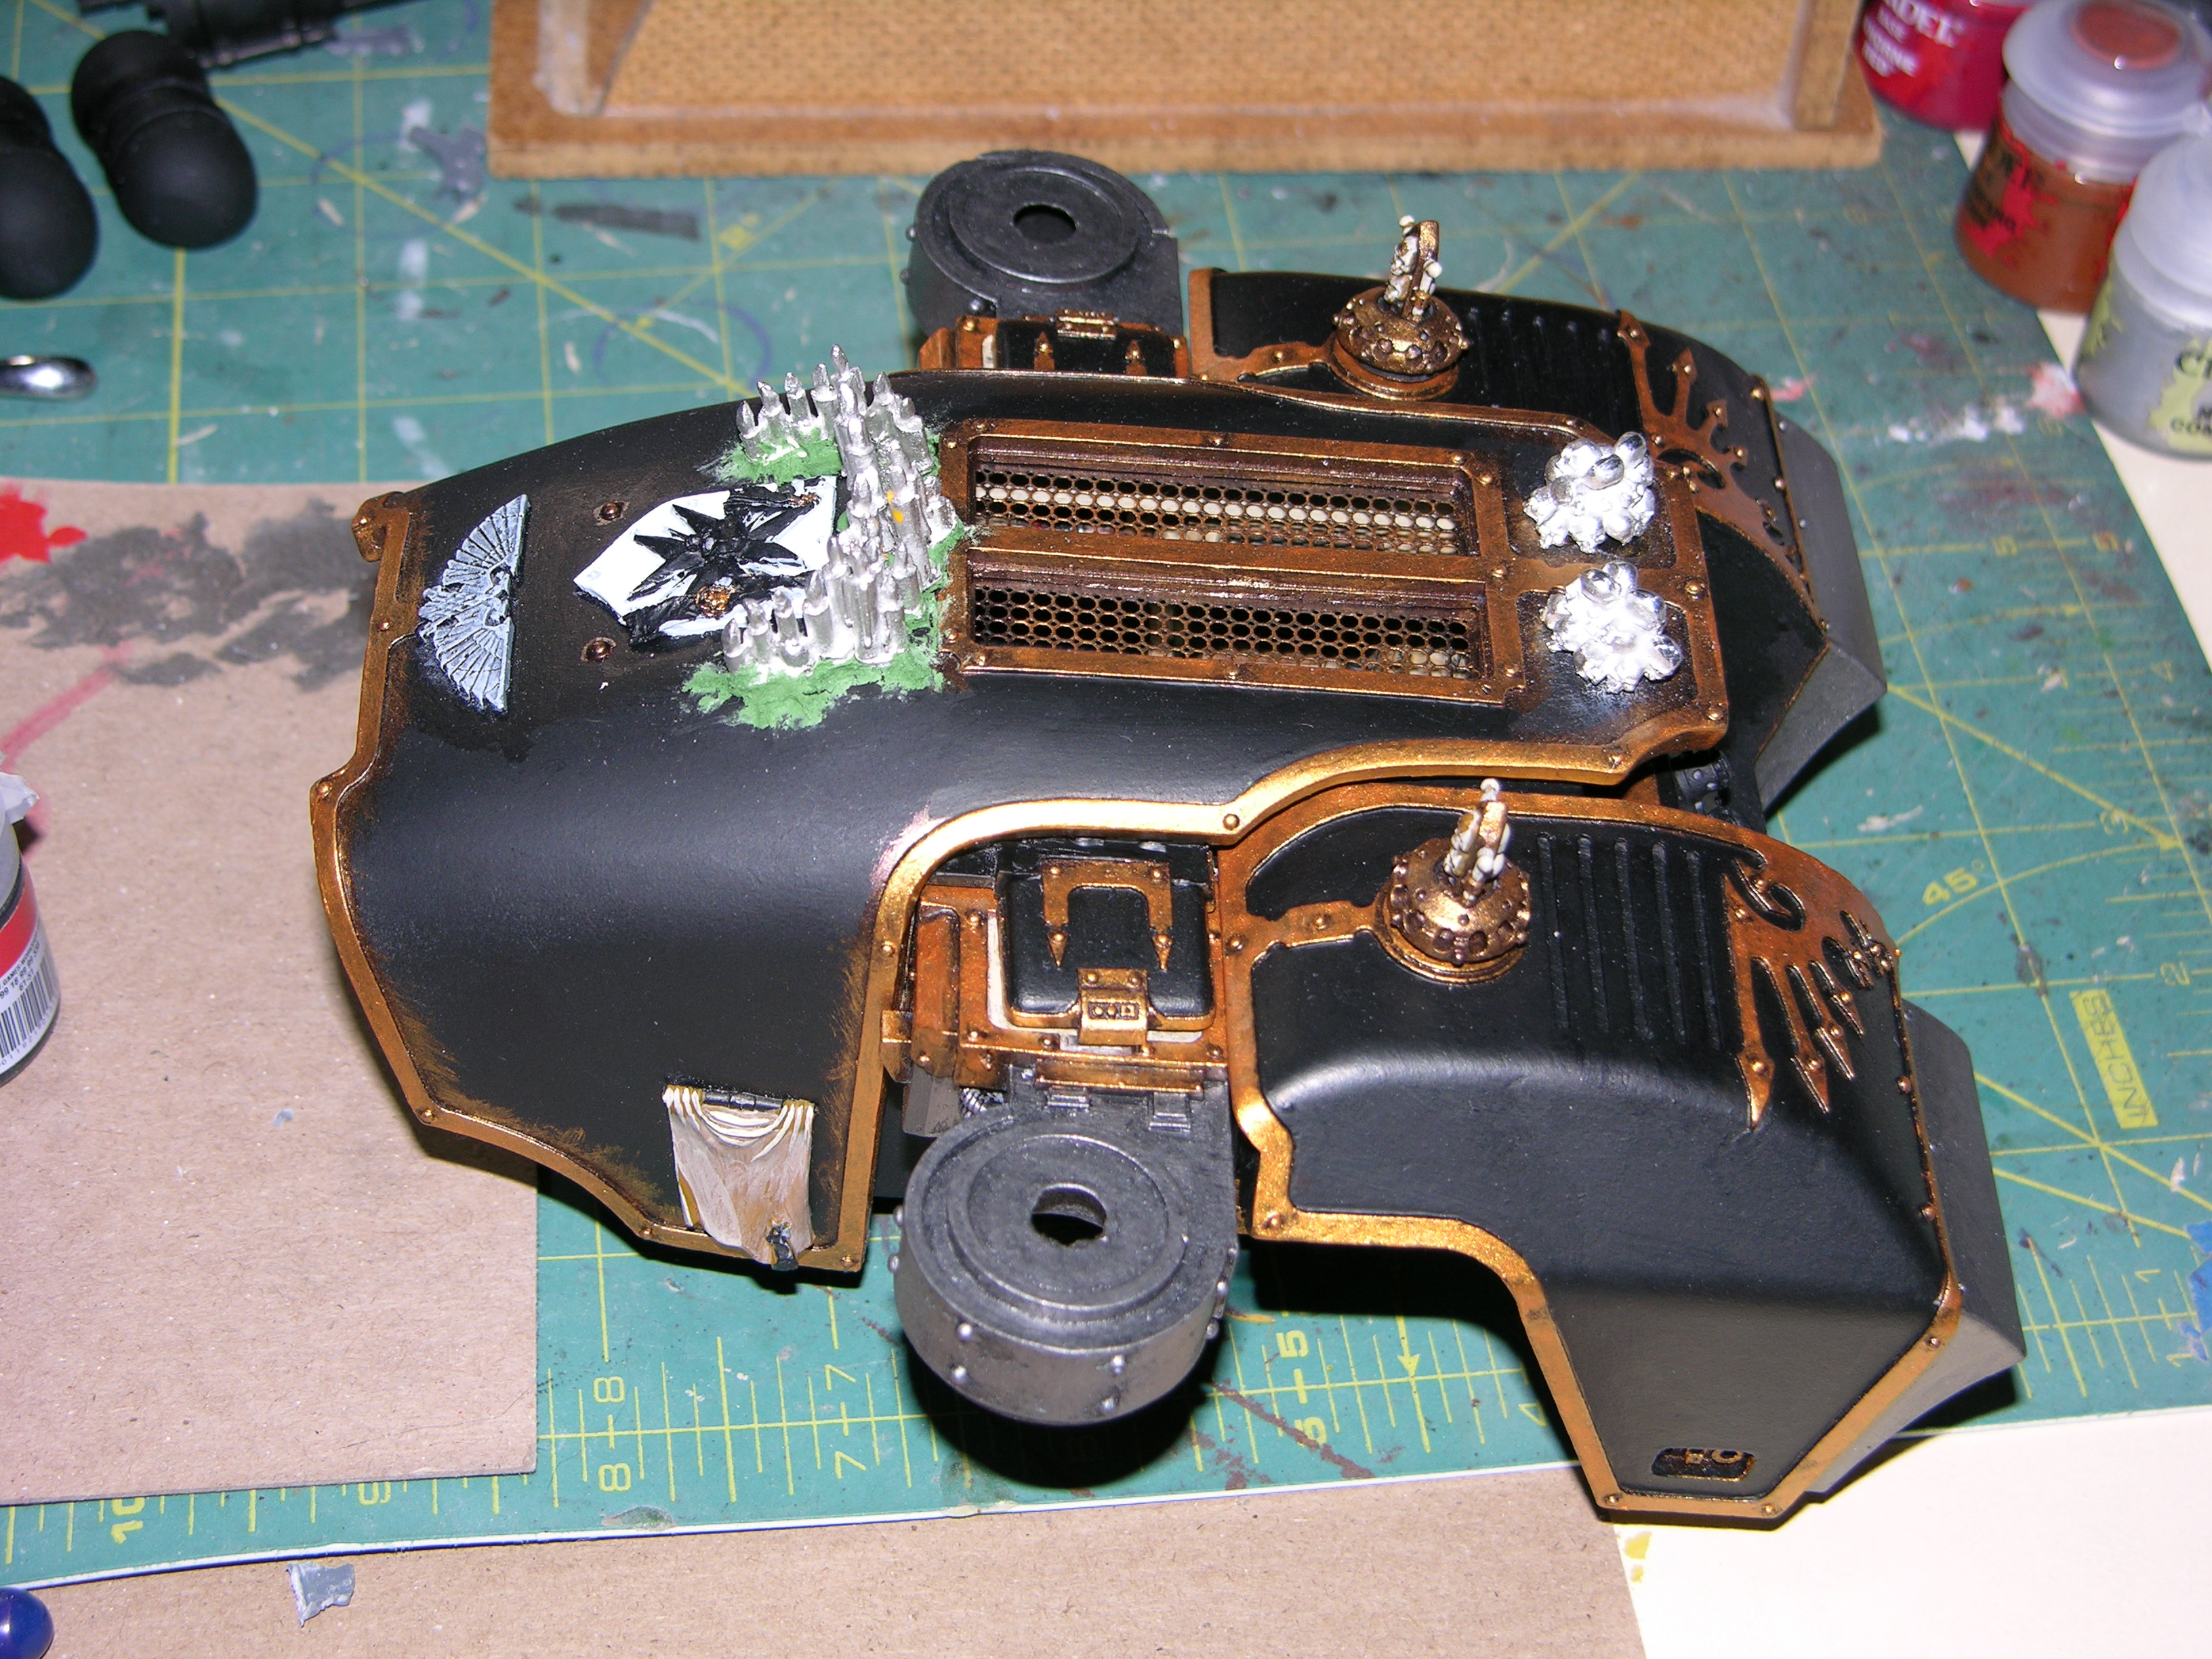
Primary Painting and Bodywork continued
With the primary paint now in place (it will be neatened up as we progress), I will actually attach the new detail pieces and integrate them into the model. Te candle clusters are all individually pinned to the carapace. Care is taken that we dont drill completely through the piece and mess up the finished paint on the interior. Green stuff is used to fill gaps and stabilize the candle clusters as well as to sculpt on puddled and dripping wax. Once the GS is dry, I brushed a brown basecoat onto the candles and the piles of skulls. Painting from there is pretty straight forward.

 Sinsinatus
"Go ahead. Roll the dice and see if I get to eat your spleen."
-
07-21-2012, 05:30 AM #59Brother-Sergeant
- Join Date
- Jul 2009
- Location
- Sarasota, FL
- Posts
- 62
Stepping It Up
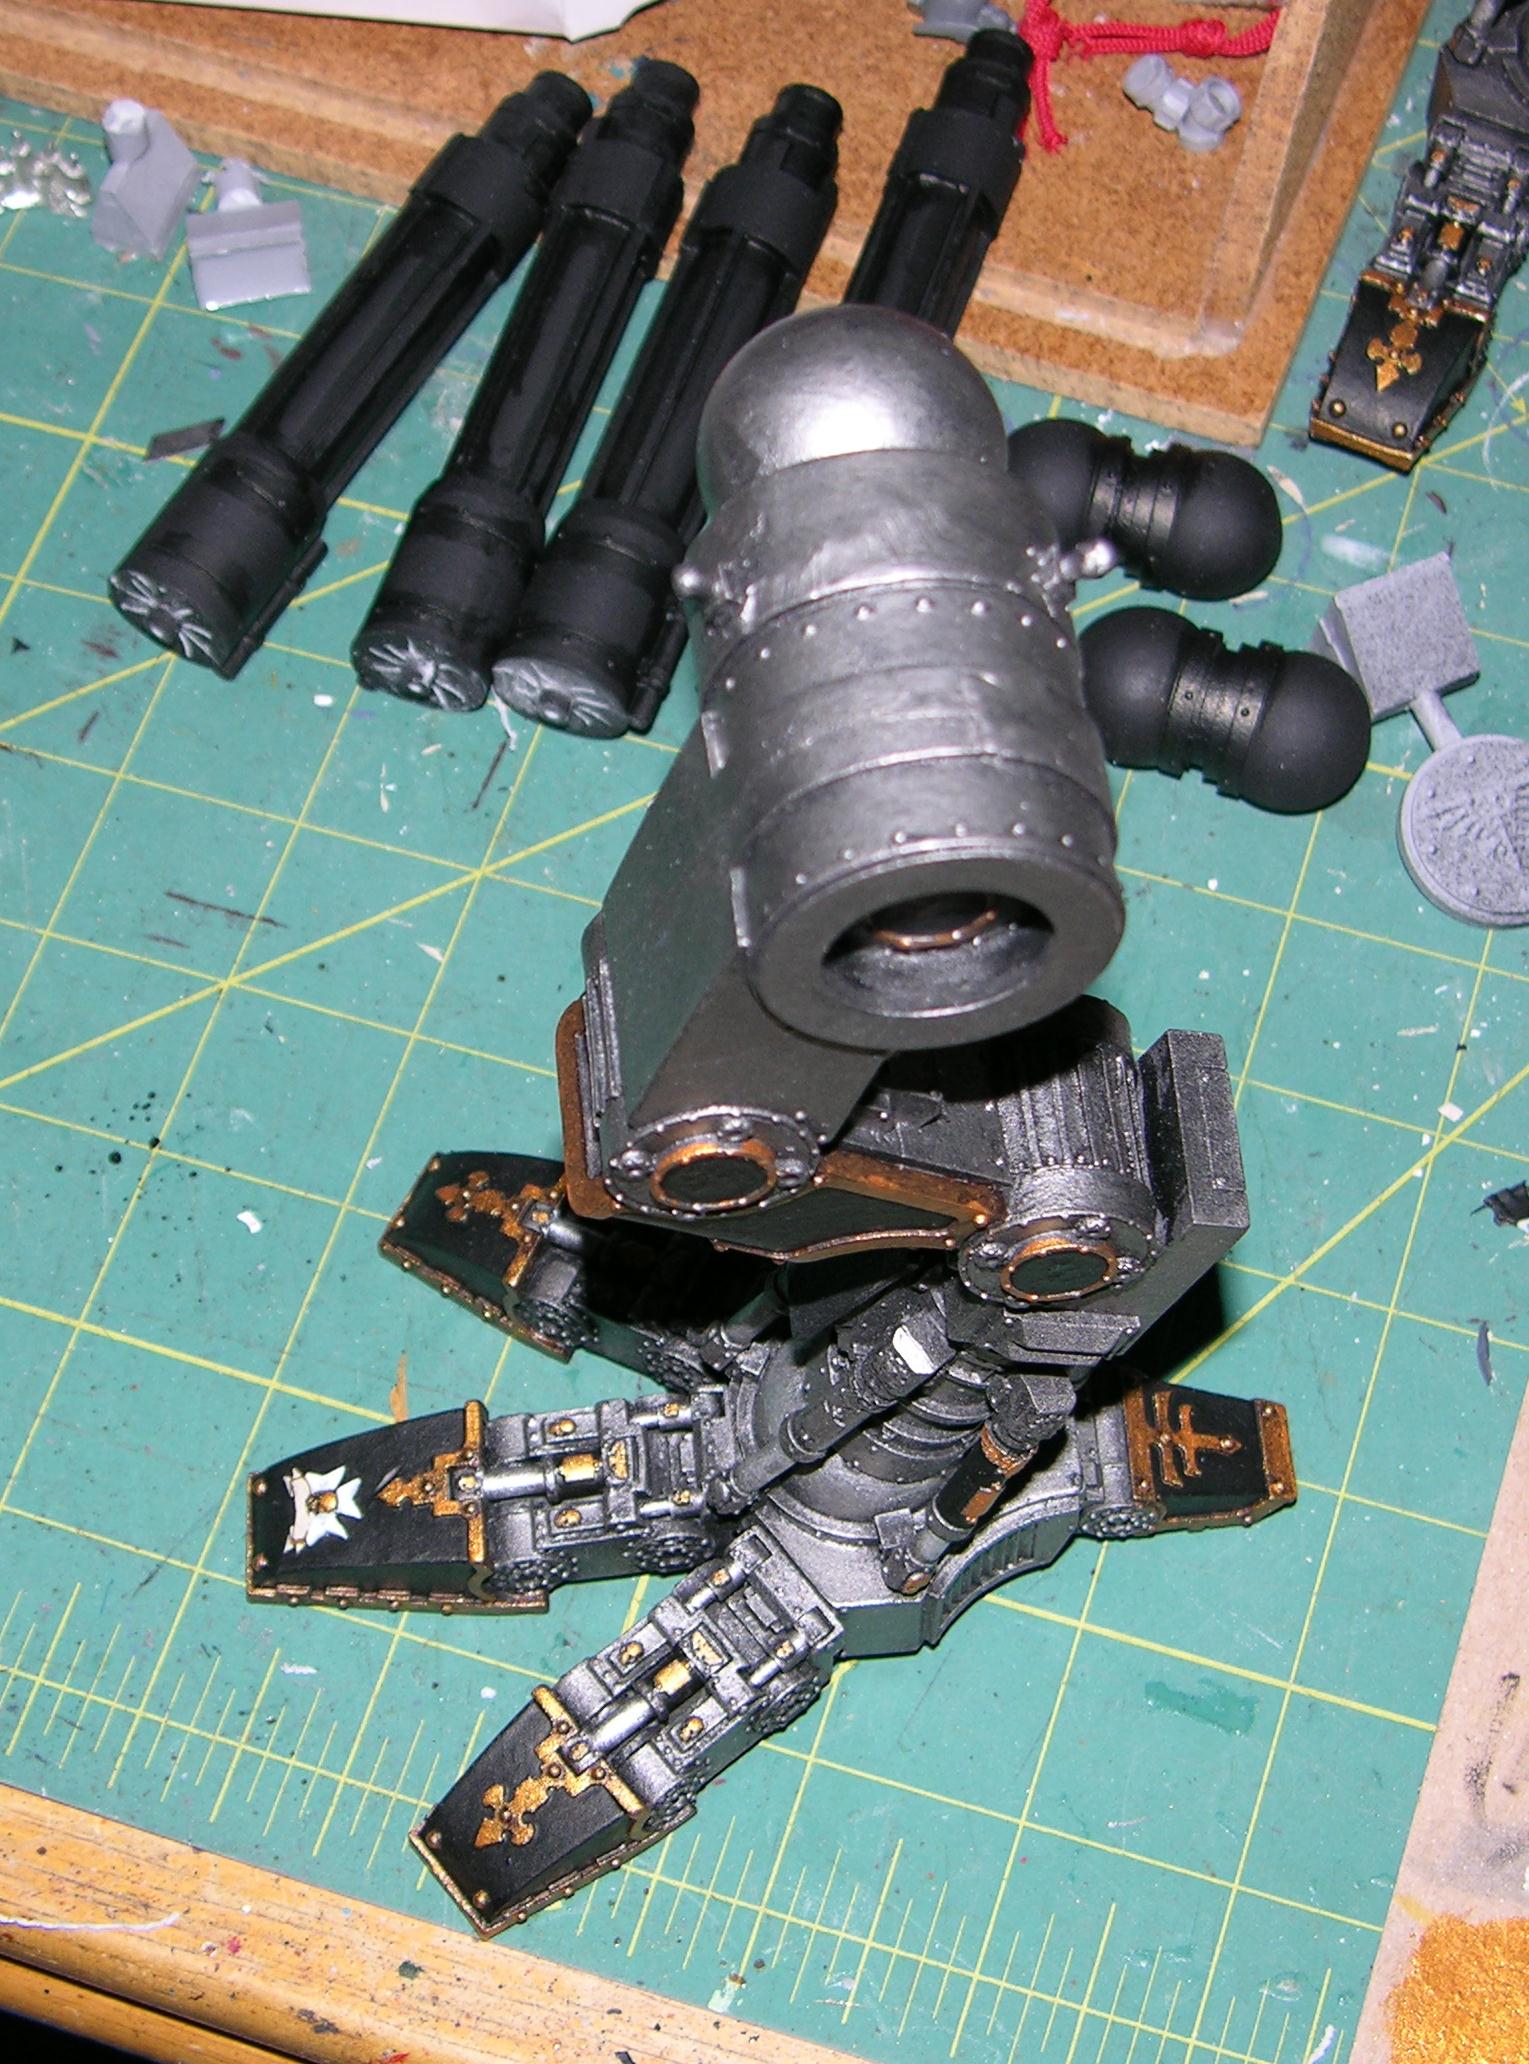
This is just a quick update to show some of the progress on the legs. Obviously still a lot of weathering and detail work to go. It's just nice to see how it's all coming together.
 Sinsinatus
"Go ahead. Roll the dice and see if I get to eat your spleen."
-
07-21-2012, 05:32 AM #60Brother-Sergeant
- Join Date
- Jul 2009
- Location
- Sarasota, FL
- Posts
- 62
Picture help
I've been trying how to scale down the pics to make this how-to easier to view. If you hadn't noticed, the pictures have gotten HUGE since I switched picture hosting sites. This is despite the fact that the pics are the same size that they used to be. Any suggestions?
ThanksSinsinatus
"Go ahead. Roll the dice and see if I get to eat your spleen."

 Reply With Quote
