

Hello again. Loooooong time no post; at least not on this thread.
I finally decided to do something about the orange varnish. It still wasn't setting and I was really unhappy with the colour. Having one of the first sunny days this year where I didn't have something to do that prevented me being in the garden, I got out the 5 boards, a washing up bowl full of terps and several brushes, sponges and scouring pads. Once again, everything did not go to plan as such.
Apparently the set varnish is completely impervious to terps, so I had to rip through the skin on the deeper bits before I could clean out the rest of the gunk. On the other hand, it also did nothing to the paint underneath, which was a blessing of sorts.
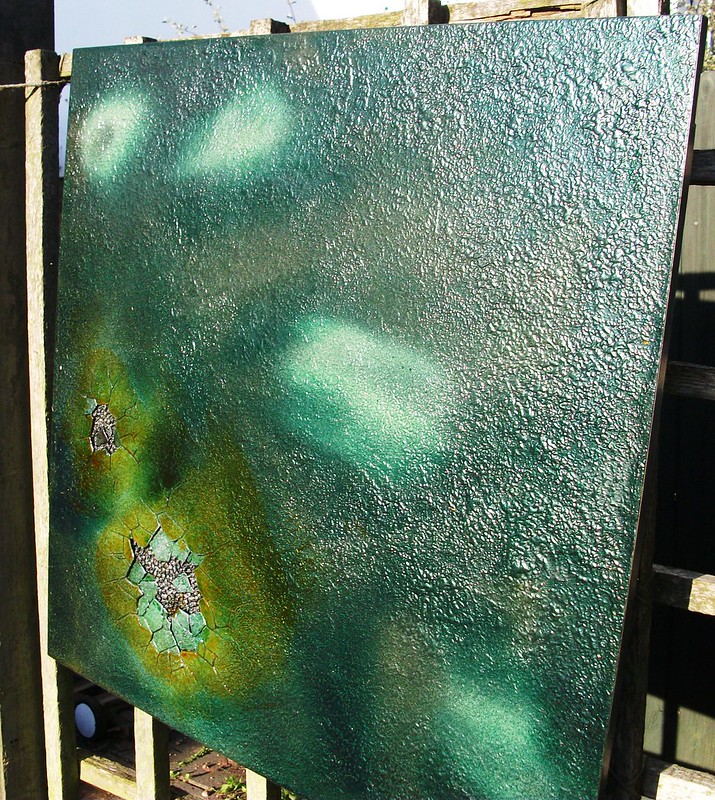
These two boards are fully cleaned up. As you can see, I didn't manage to get rid of all of the orange, but I am hoping that the remaining patches will just look like a floor covered with dead weeds or a different type of soil or something when it is all under the water layers.
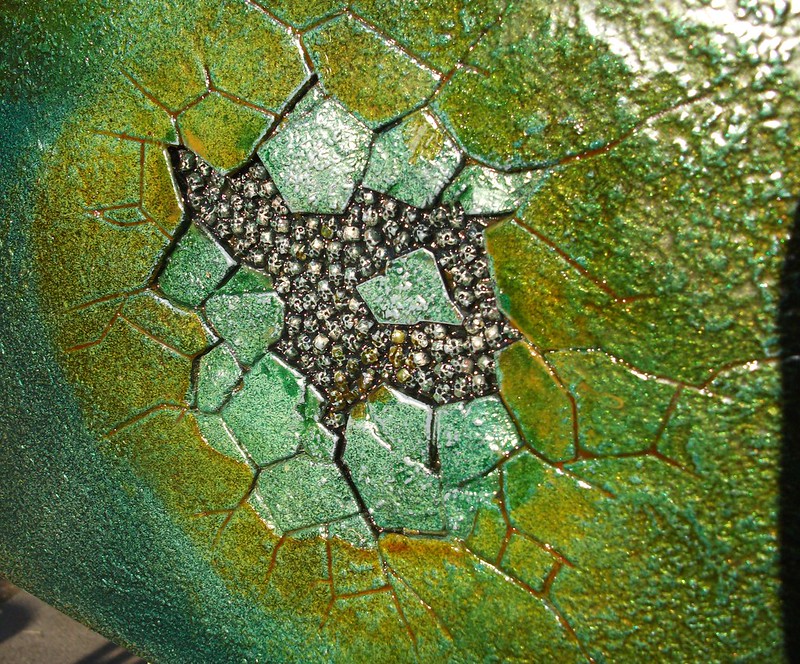
I just about managed to get all of the detail out. There are still some skulls with orange patches, but that isn't inconsistent with pictures of underwater human remains I used for reference when painting the skulls in the first place, so I'm not too worried about it. You can't quite tell from this picture, but there are a few patches where the scourer took off the layer of paint leaving grey patches on the skulls and a few of the rocks. As it turns out, they look a lot like highlights on the skulls anyway, so again, I'm not too fussed.
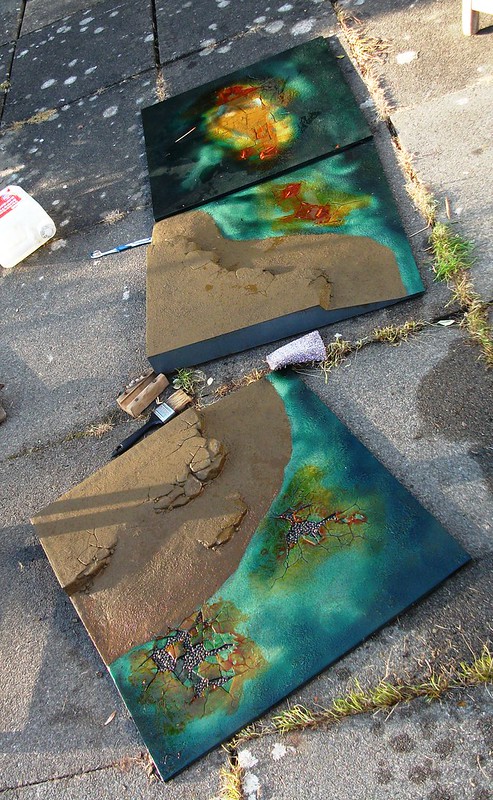
The other three boards I was working on. As I post this, they have all been taken up to the same level as the other two boards. With the top most board there I will probably add more brown paint/sand mix to cover up some of the remaining orange. Apart from that, I'm fairly happy with how the boards have cleaned up. What I'll be doing is using the 6th board as a tester for the new clear varnish (bought from a far more reputable store, so should actually be clear this time!) and see how much it looks like water.
TTFN
Shades
BoLS Lounge : Wargames, Warhammer & Miniatures Forum
Results 21 to 30 of 36
Thread: Realm of Battle Swamp Board
-
05-06-2013, 04:25 PM #21Chapter-Master

- Join Date
- Jul 2009
- Location
- Aldershot, Hampshire, United Kingdom
- Posts
- 2,154

 Always thinking 2 projects ahead of anything I've yet to finish
http://instinctuimperator.blogspot.co.uk/
-
05-07-2013, 02:07 PM #22Veteran-Sergeant
- Join Date
- Apr 2013
- Location
- Torbay, Devon
- Posts
- 143
Glad you got stuck back in matey, good job on getting rid of the varnish. What do you plan with the orange around the edges of the skull pits ? Are these the areas you plan on adding the sand to ?
Pack it up, pack it in, Let me begin, I came to win, Battle me that's a sin, I won't tear the sack up, Punk you'd better back up
-
05-07-2013, 03:00 PM #23Chapter-Master
- Join Date
- Jul 2009
- Location
- Aldershot, Hampshire, United Kingdom
- Posts
- 2,154
I'm going to see what I can do with a knife peeling it off, but probably most of what is left in the first three photos will stay. I might even add in a couple of other patches so it just looks like patches of sludge floating through the swamp water
Always thinking 2 projects ahead of anything I've yet to finish
http://instinctuimperator.blogspot.co.uk/
-
07-12-2013, 10:25 AM #24Chapter-Master
- Join Date
- Jul 2009
- Location
- Aldershot, Hampshire, United Kingdom
- Posts
- 2,154
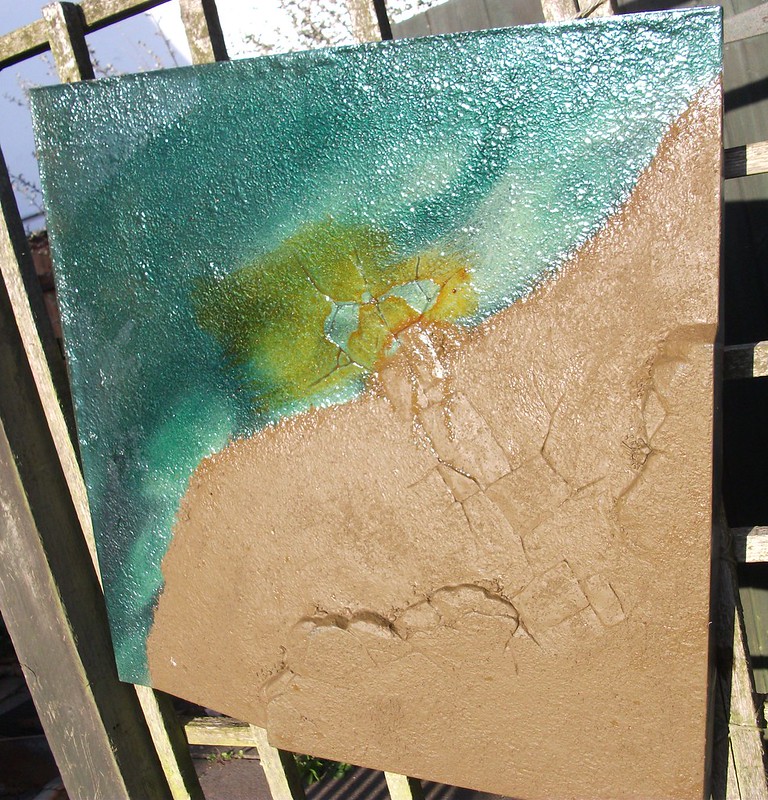
Making the most of the glorious weather I have today, I did my level best to clear off the last of the orange varnish... it did not go well. I decided that is wasn't going to be worth trying to blend it in, so instead covered all of those areas in a sand/paint mix. The results are below.
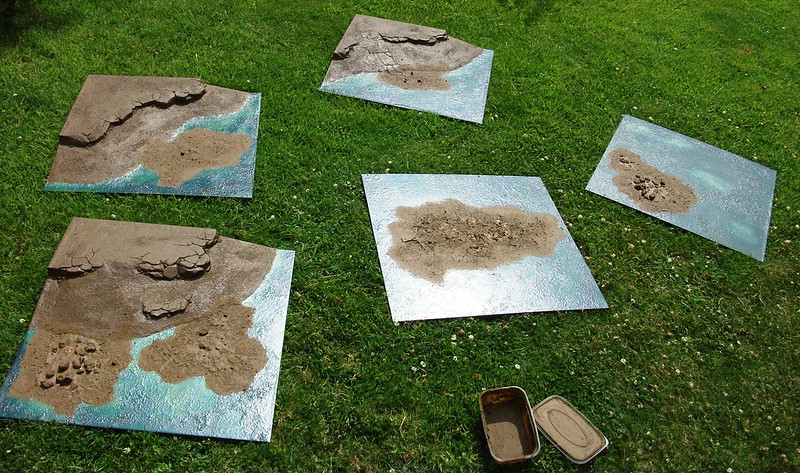
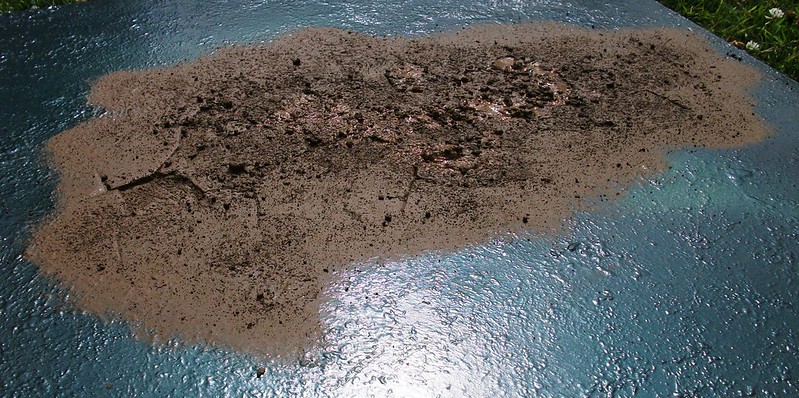
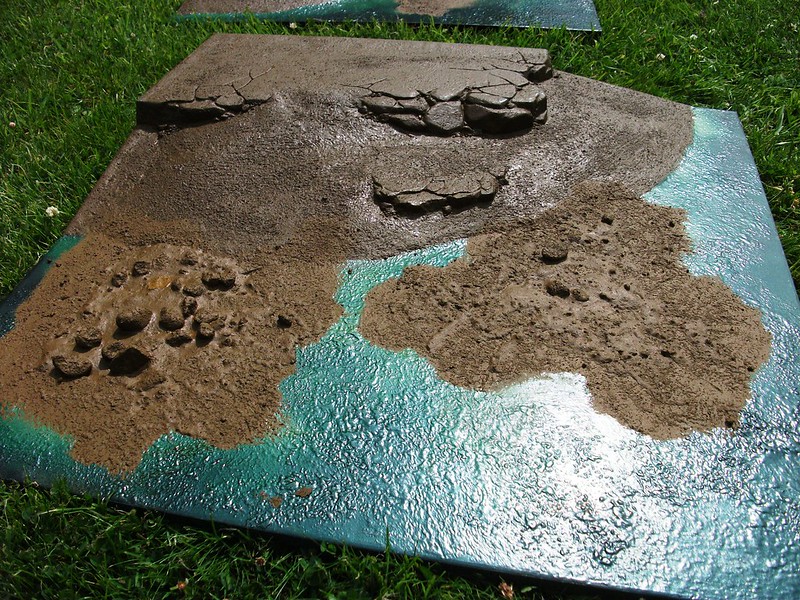
Some of the areas will need a second coat, particularly where it was fairly deep so the paint layer had formed a skin that was stopping the rest from drying underneath. To fix that, I used my hobby knife to pierce a load of holes in to let the moisture out. It also didn't have the best texture, even before I covered it in holes.Always thinking 2 projects ahead of anything I've yet to finish
http://instinctuimperator.blogspot.co.uk/
-
07-12-2013, 10:49 AM #25Battle-Brother
- Join Date
- Jul 2013
- Location
- Leeds
- Posts
- 21
Loving this swamp board, really nice work mate!
-
07-15-2013, 08:33 AM #26Chapter-Master
- Join Date
- Jul 2009
- Location
- Aldershot, Hampshire, United Kingdom
- Posts
- 2,154
Cheers much.
I am currently letting the second varnish coat dry, so I thought I'd share some terrain I planned to go with the swap board;
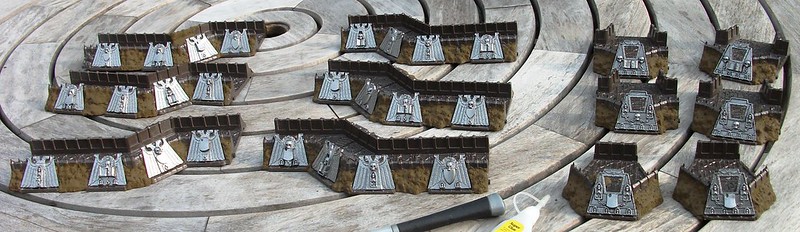
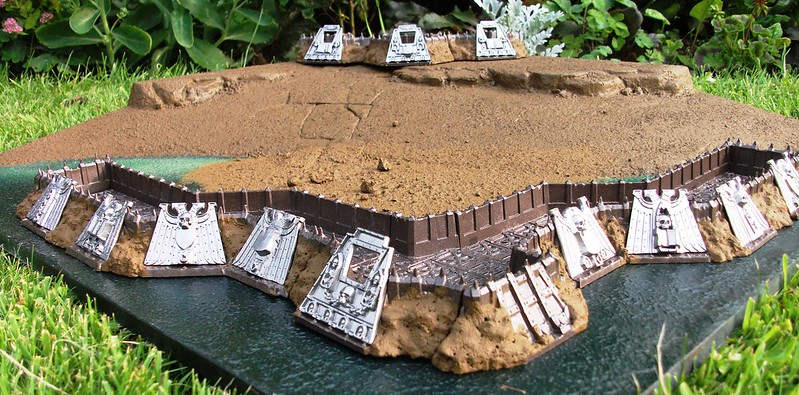
When it came out I did buy the full Wall of Martyrs box set. I do have everything painted up to this standard, aside from the bunker that is waiting on some steel-esque metallics on the skull and wings motif. As you can see, I did cover up most of the skeletal remains and junk piled up against the trench walls with a sand/paint mix. I'm quite chuffed with the result, especially as it provides a nice contrasting shade to the brown metallic bulk of the trench works, whilst still letting the steel colours pop.
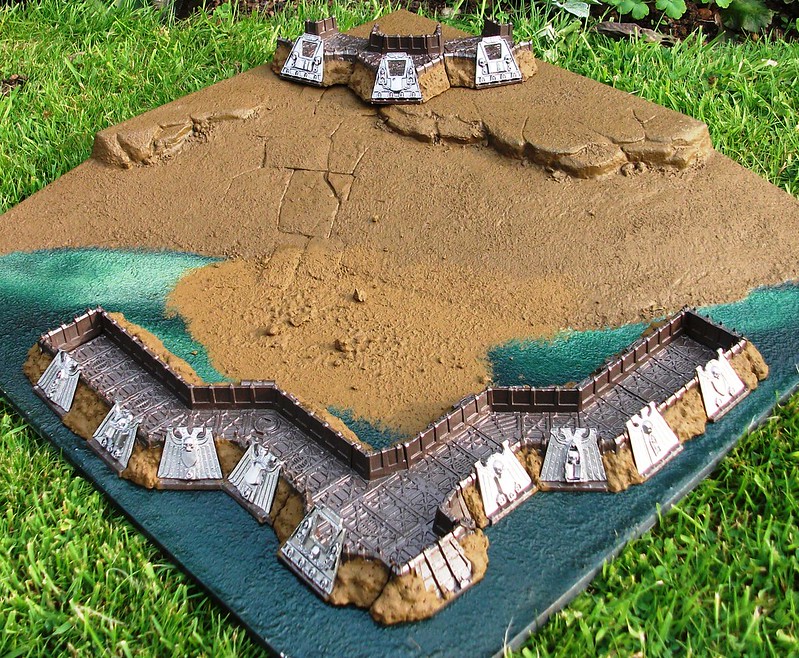
I'm also quite pleased with how the walls work out on the swampy areas of the boards and the land areas. Neither look too much like an artificial line (at least not compared to most other scatter terrain I've seen).
That will be it from me for today. As I said, I have two layers of varnish on the water parts of the swamp board, which has accidentally left a lovely foamy bit at the shore line. Unlike before, my new clear varnish is clear. Once that second coat is dry I shall see whether the boards need a further coat and/or if it is work sculpting some waves in to the varnish. I'll get some pictures then, possibly with a few models on as well.
ShadesAlways thinking 2 projects ahead of anything I've yet to finish
http://instinctuimperator.blogspot.co.uk/
-
07-15-2013, 09:08 AM #27First-Captain
- Join Date
- Mar 2010
- Posts
- 1,497
Excellent use of the wall of martyrs. Add in some free standing patches of aquarium reeds/plants etc. and this is going to look great. It currently looks like a sort opf D-day landing scenario which is also fun. Maybe some half buried tank traps and wire or artillery craters and you have some saving private ryan action going on.
If you can get a cheap (i.e. ruined by awful paintjob) tank off ebay such as a rhino or chimera you could saw it in half and have 2 bits of bogged down vehicle sinking into the water as terrain. I'm using this idea as a base for my soul grinder/brass scorpion, melting into a pool of lava.
-
07-16-2013, 04:49 PM #28Chapter-Master
- Join Date
- Jul 2009
- Location
- Aldershot, Hampshire, United Kingdom
- Posts
- 2,154
It's like you are reading my mind
 Although I am saving some of those ideas for my club's swamp board in the works as well
Always thinking 2 projects ahead of anything I've yet to finish
Although I am saving some of those ideas for my club's swamp board in the works as well
Always thinking 2 projects ahead of anything I've yet to finish
http://instinctuimperator.blogspot.co.uk/
-
07-19-2013, 09:34 PM #29Chaplain
- Join Date
- Jul 2013
- Posts
- 467
You could put water effects in one of those trench pieces to make it look like it's flooding. Great idea for a game board, it'll really stand out from the rest.
-
08-29-2013, 01:12 AM #30Scout
- Join Date
- Aug 2009
- Location
- Allen, Texas
- Posts
- 16
about how much time have you put in to it because it looks great

 Reply With Quote


