
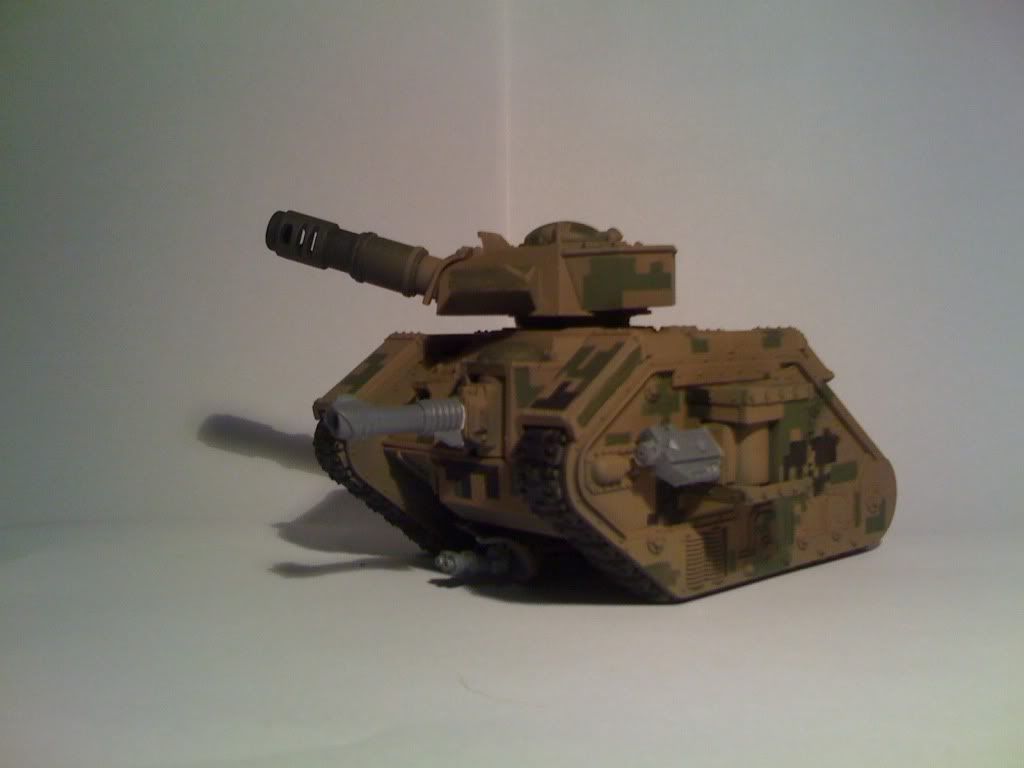
Thought i'd put up a little project log for my first swing at the infamous LRBT. Sorry for the mid-res pictures.
1) Tank was primed black, stencils applied, airbrushed Kemri Brown, more stencils applied, airbrushed Knarloc green then Catachan green. At this point it looks really sterile and high contrast.
2) I applied a "filter". I'm still new at this, but the best way to describe a filter is a glaze of multiple colours mixed into one pot, then applied over everything. It helps to unify the tone of the varying camo colours. In this case, I used a little catchan green, dark yellow (almost brown), glaze medium, water, and flow improver.
3) Next i applied something between a glaze and a wash, using vallejo "smoke" and "black ink" with added glaze medium and very watered down. Vallejo smoke is really cool as it has particulate matter in it that helps to dirty up the tank a little.
4) Next, in prep for using some basic oil paint techniues, i applied a gloss varnish, as it allows oil paints to flow over nicely without disrupting work i've done.
Next step will be the fun part: applying some black and umber oil paints. Black-lining will also be done using black oil paint. More to come.
BoLS Lounge : Wargames, Warhammer & Miniatures Forum
Results 1 to 10 of 15
Thread: My first Leman Russ Project Log
-
10-13-2009, 09:33 PM #1Battle-Brother

- Join Date
- Oct 2009
- Location
- New Haven, CT
- Posts
- 33
 My first Leman Russ Project Log
-
10-13-2009, 10:03 PM #2Librarian
- Join Date
- Jul 2009
- Location
- VANCOUVER BC
- Posts
- 845
Nice, like the digital camo.
"STUPIDITY, If your going to do it, go for GOLD!"
-
10-14-2009, 09:47 AM #3Brother-Sergeant
- Join Date
- Aug 2009
- Location
- Munich, Germany
- Posts
- 86
Interesting camo style, you don't see that very often on IG tanks. I like the look and the step-by-step, although I'd personally prefer a denser pattern.
I also suspect that your pictures don't do the effect of all of all the described steps justice.
-
10-14-2009, 06:46 PM #4Battle-Brother
- Join Date
- Oct 2009
- Location
- New Haven, CT
- Posts
- 33
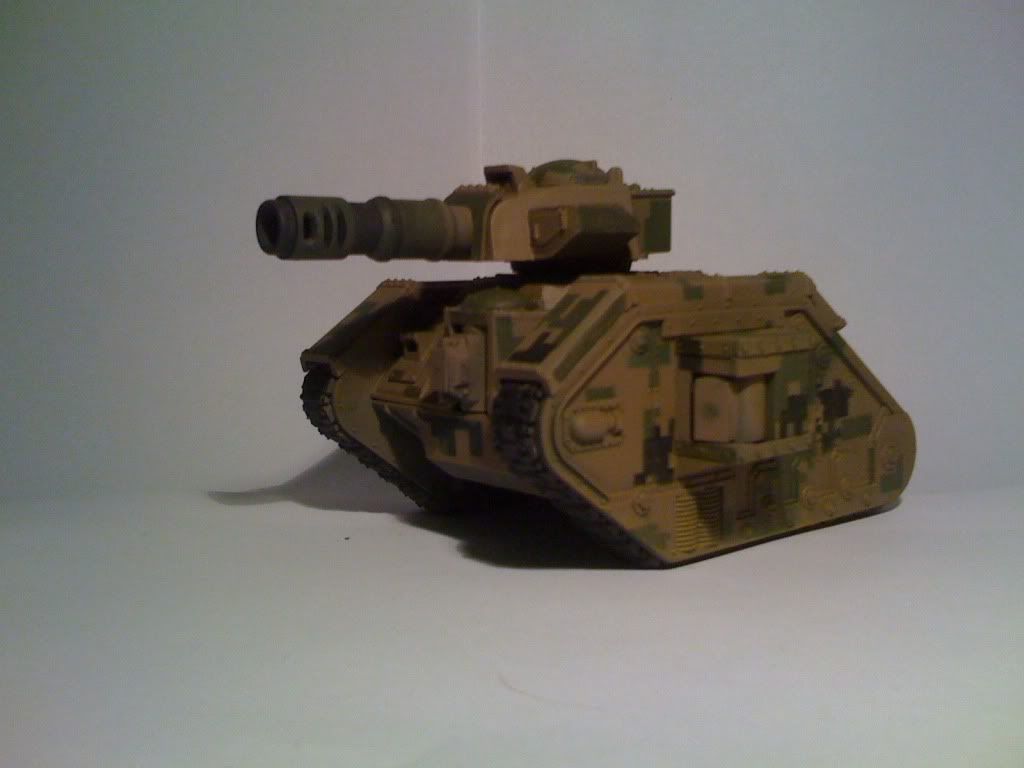
So oil paints really are the fun part. The next part is two steps:
1) Put little dots of umber anywhere i think muck or grease will accumulate or drip from
2) Take a thick brush wet with a little turpentine, and drag the pait down. Really easy, and if i mess up the paint comes right off with more turpentine.
3) Black-lining with thinned black paint is a snap

Next step: adding bare metal and the details
-
10-17-2009, 04:25 PM #5Battle-Brother
- Join Date
- Oct 2009
- Location
- New Haven, CT
- Posts
- 33
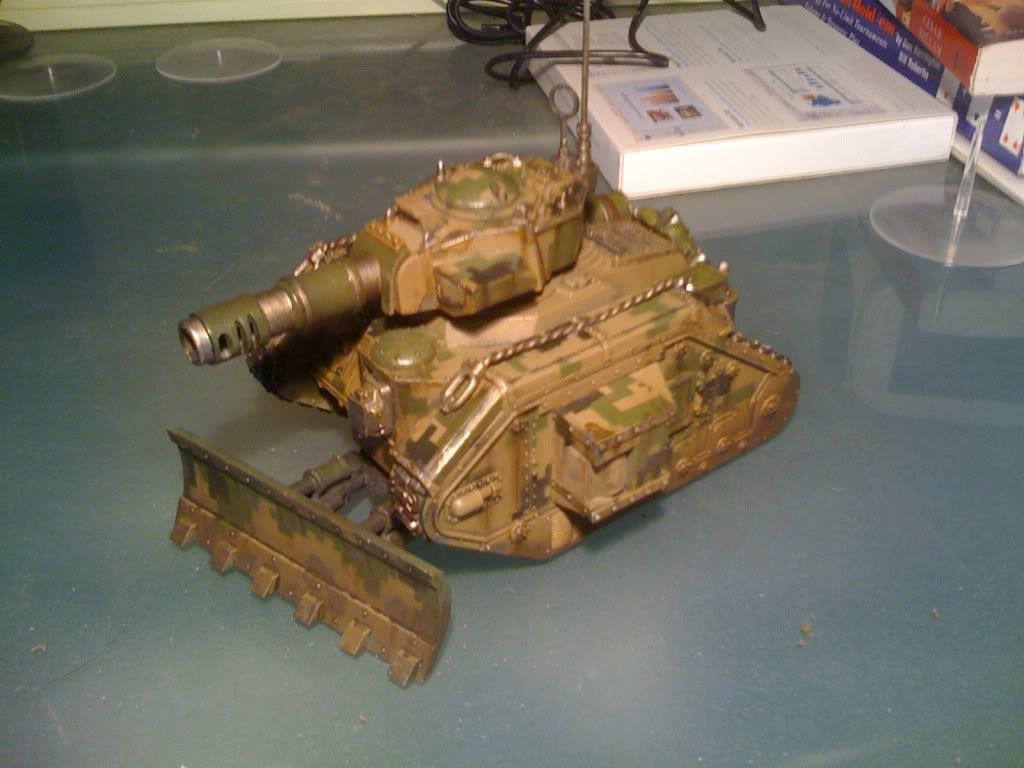
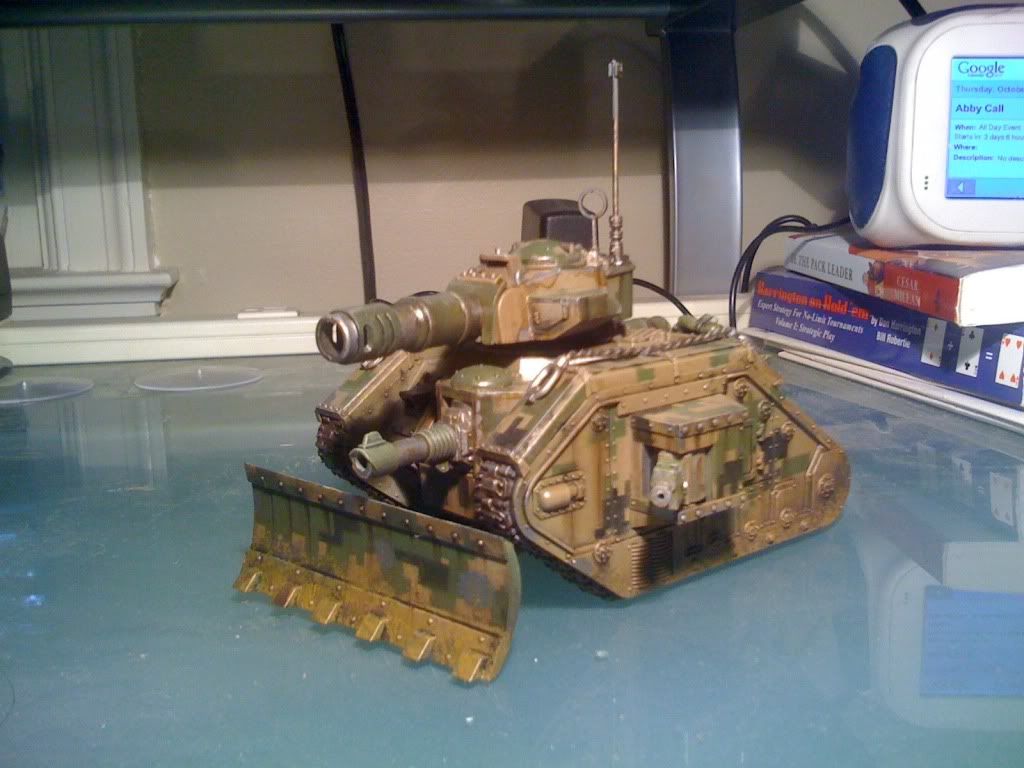
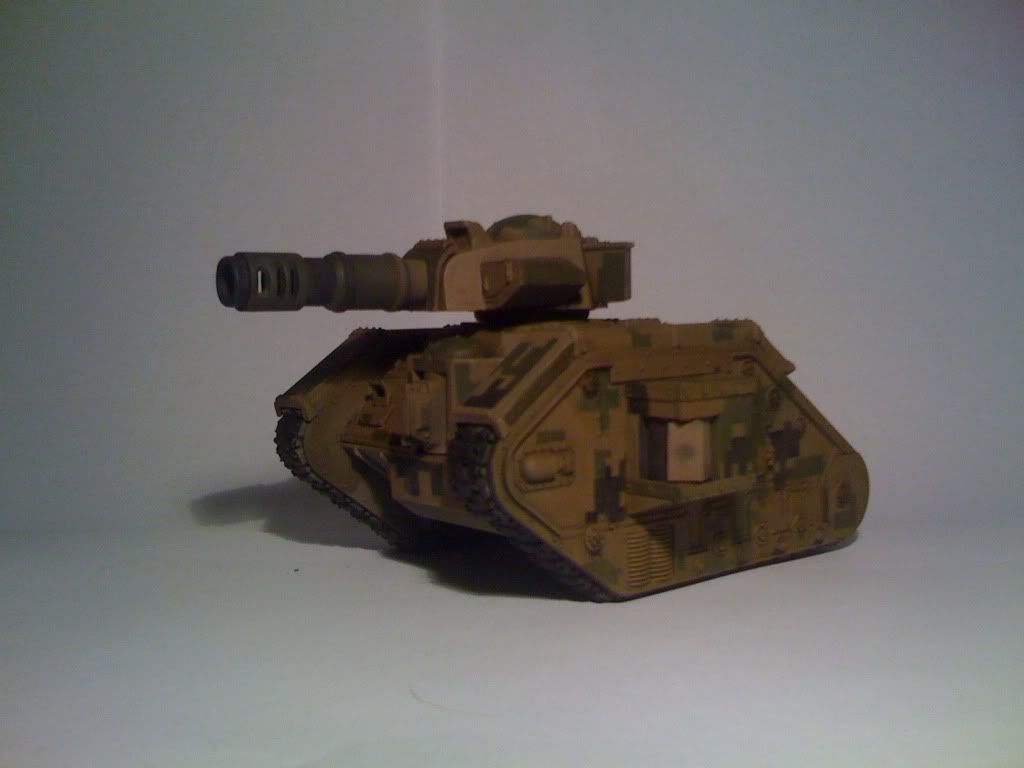
Boltgun time. I applied dark grey patches to high-ware areas of the tank, then sparingly stipled boltgun metal to the areas. At this point i finished bolt-gunning other metal parts. Baggage was also applied at this point. TO keep the boltgun from being to shiny, i gave it a thin wash of vallejo "smoke".
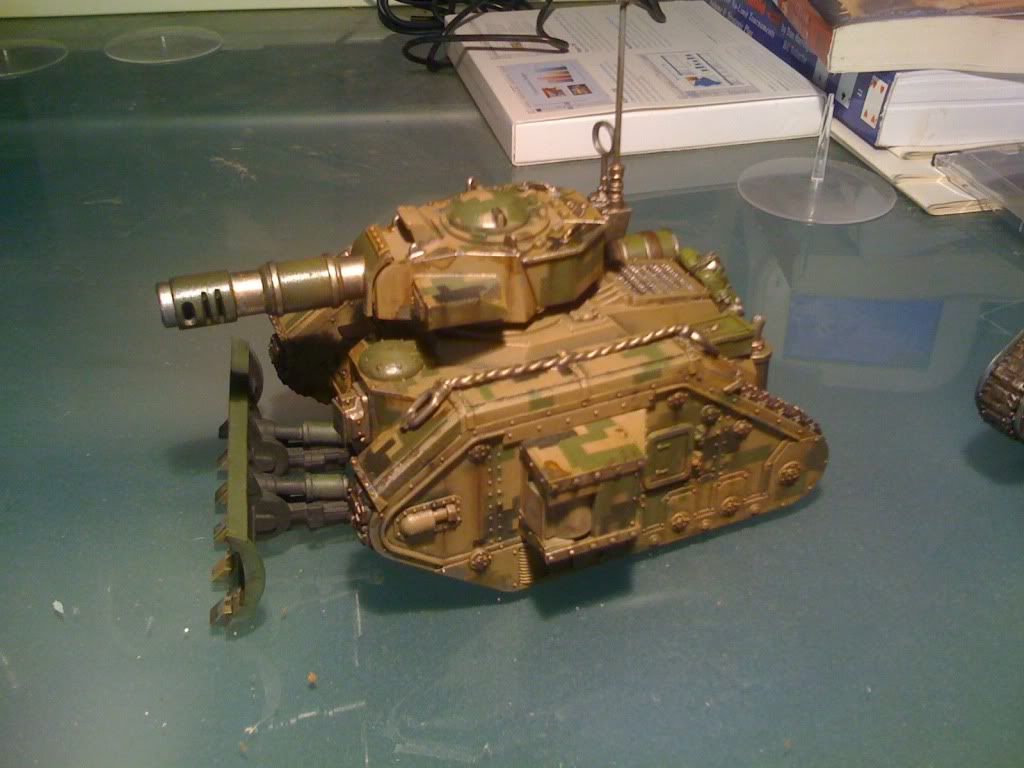
Next up: airbrushing on some mud.Last edited by MunDMC; 10-17-2009 at 04:28 PM.
-
10-17-2009, 04:47 PM #6Battle-Brother
- Join Date
- Oct 2009
- Location
- New Haven, CT
- Posts
- 33
The attempt at a white back-drop clearly wasn't helping with the other pics.
Bestial brown has been lightly airbrushed on. Fresh mud will be with snake-bite leather.
-
10-18-2009, 10:35 AM #7Librarian
- Join Date
- Jul 2009
- Location
- VANCOUVER BC
- Posts
- 845
Cant wait to see wome mud on this tank.
"STUPIDITY, If your going to do it, go for GOLD!"
-
10-18-2009, 01:01 PM #8Chapter-Master
- Join Date
- Aug 2009
- Posts
- 2,736
Its just not working for me Im afraid. The paint works Okay, its the scheme itself..........
To a New Yorker like you a hero is some kinda weird sandwich, not some nut who takes on three Tigers!
-
10-18-2009, 03:13 PM #9Chaplain
- Join Date
- Oct 2009
- Posts
- 464
I'm with person person, I really like the digital camo and I agree with Ithmaril that I too would like to see MORE camo patter. Not much about 20% more I think.
But really, looking good.
Are you going to try and put the same scheme on the foot troops!?!
-
10-18-2009, 03:29 PM #10Battle-Brother
- Join Date
- Oct 2009
- Location
- New Haven, CT
- Posts
- 33
Thanks for the feedback, both positive and negative. Digicamo looks pretty wierd on one tank, but with more armour, the pattern begins to melt in a little. MarshalA-> Digicamo on guardsmen, while possible, doesn't really pay off as the eye (/ occiptal cortex) will naturally blend all that work in to make one colour. Most US GI infantry fatigues are now digital, and they just look grey-green-beige to passerby's.
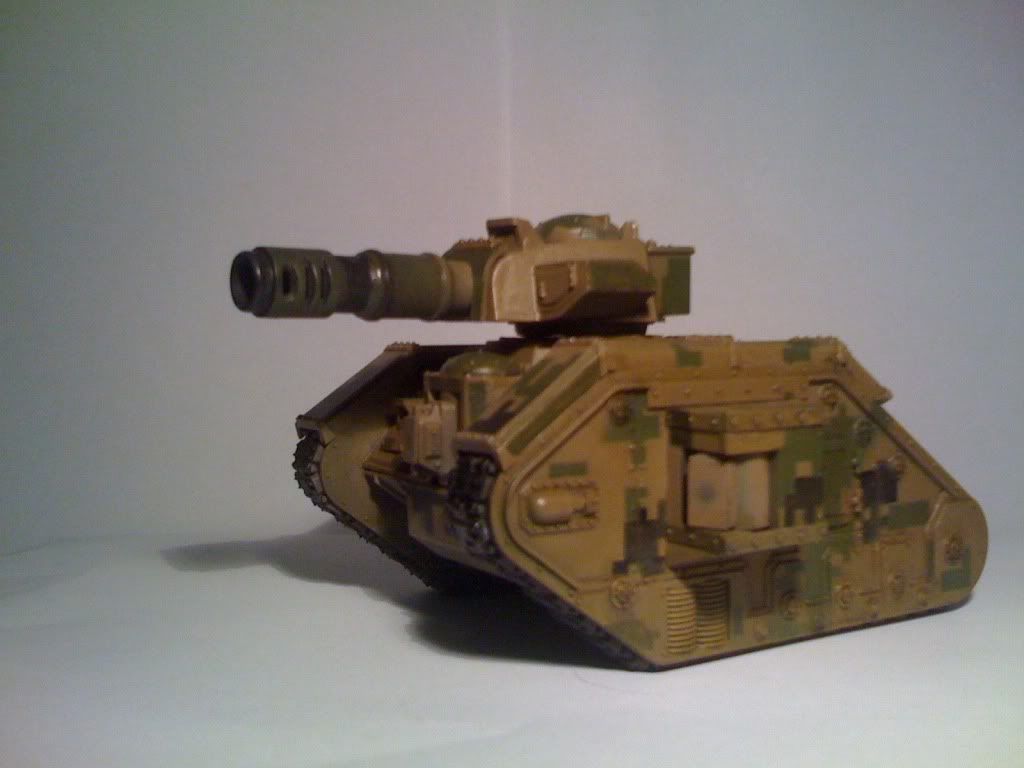
Below are the last pics in the series. Snakebite leather was used as "fresh" mud over the bubonic brown "dried" mud. The hull was also drybrushed very very lightly with bleached bone to simulate dust.

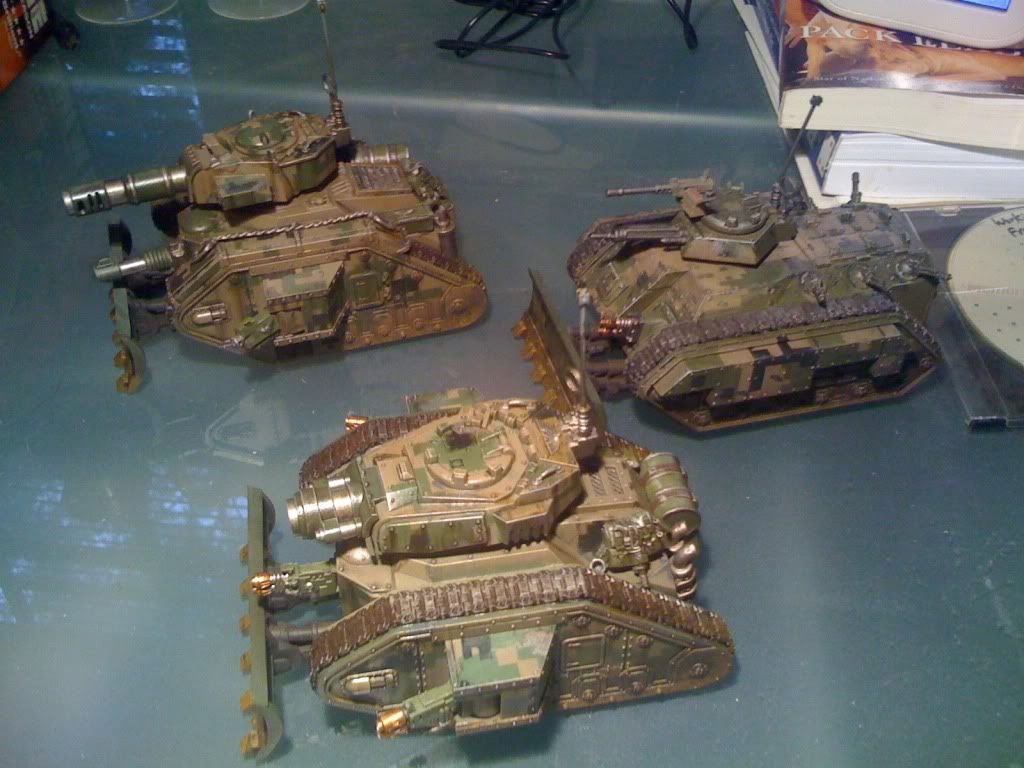
To quote the movie Contact, "Why do one when you can do two for twice the price?" Below is the demolisher kit i did along side the LRBT. In the back is the chimera i proto-typed this scheme on.
Sorry again for the lousy quality of the pics. Hope people out there enjoyed the work-log.

 Reply With Quote


