
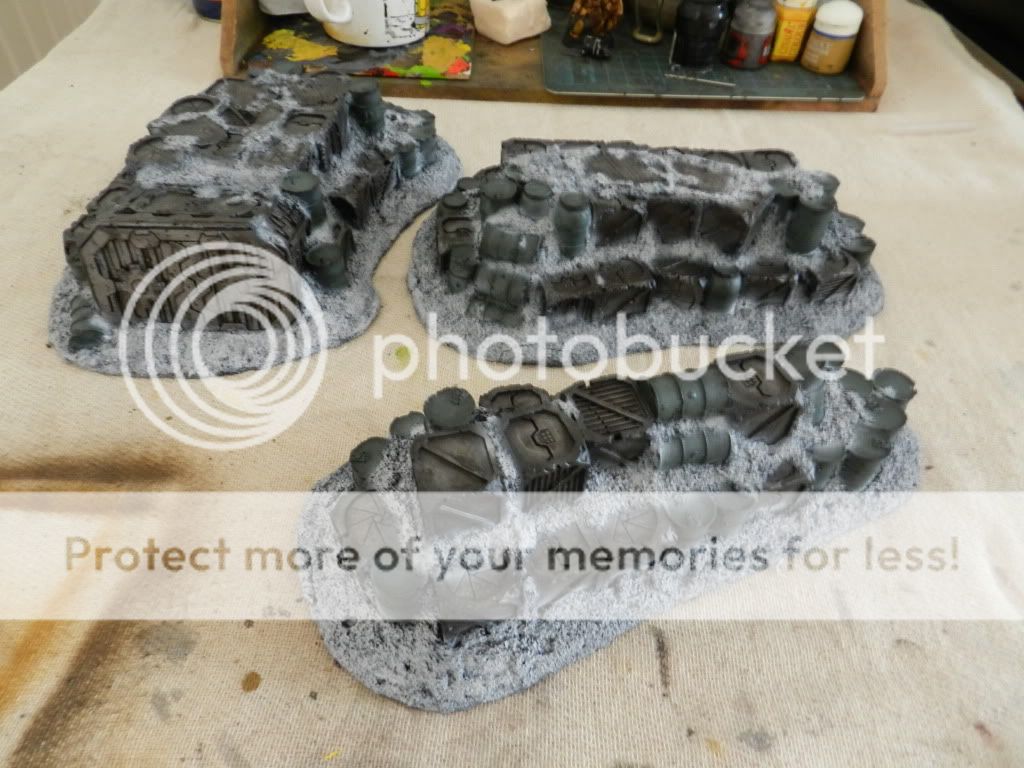
Just a quick update on the scenery.
These are a realy bargain. Under £20 and already come undercoated. They are made of a hard foam so a light and durable. I really like them and I managed to get them painted up really quick.
Cheers!
BoLS Lounge : Wargames, Warhammer & Miniatures Forum
Results 171 to 180 of 273
-
09-17-2012, 01:45 PM #171Veteran-Sergeant

- Join Date
- Oct 2009
- Location
- UK
- Posts
- 195

-
09-19-2012, 02:18 PM #172Battle-Brother
- Join Date
- Jul 2009
- Posts
- 26
Where did you get those terrain pieces? Originally Posted by shaw3029

-
09-19-2012, 05:20 PM #173Veteran-Sergeant
- Join Date
- Oct 2009
- Location
- UK
- Posts
- 195
Micro Arts Studios.
[url]http://www.shop.microartstudio.com/crate-heap-set-p-455.html[/url]
-
09-21-2012, 12:54 PM #174Veteran-Sergeant
- Join Date
- Oct 2009
- Location
- UK
- Posts
- 195
I've done loads of painting this week! I have finished both Tactical Squads and will probably finish up both dreadnoughts tomorrow night. Consider myself inspired by Forge Worlds announcements.
Unfortunately It is a little dark to snap photos now but I've got a few of one tactical squad for you all and will do my best to get some of the others soon. I also snapped some WIP shots for the weathering so will get a guide up for you all soon.
Hope you all like the look.
Cheers!
-
09-22-2012, 11:58 AM #175Veteran-Sergeant
- Join Date
- Oct 2009
- Location
- UK
- Posts
- 195
Thanks guys! I'm glad you persuaded me to weather them. I'm really happy with the look and glad you think they look well worn and fit to stand infront of the walls of the emperors palace.
I have put together a guide on the weather techniques I have used. Obviously I am weathering over Yellow but this can easily be applied to any other colour. I used it to great effect on my Iron Warriors vehicles. Its my new favourite technique! Although it sounds complicated as it uses some unfamiliar mediums it is actually very easy.
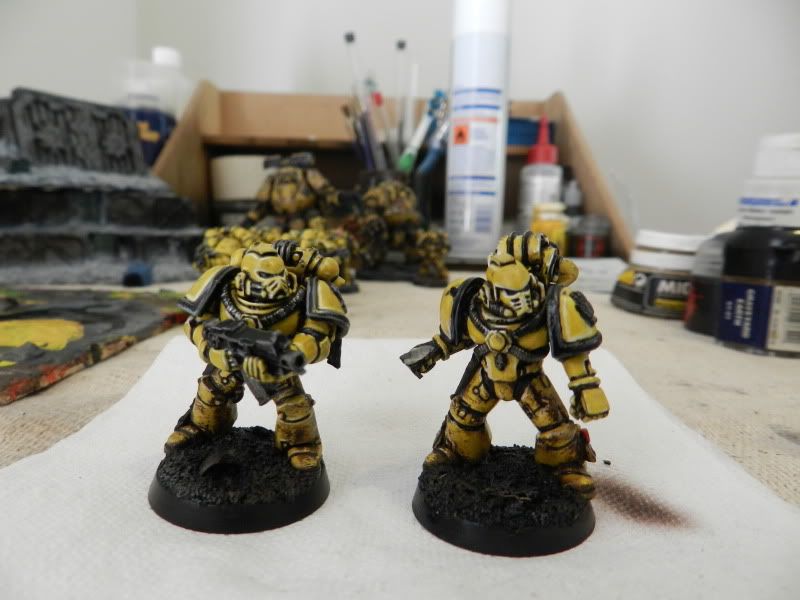
Stage 1
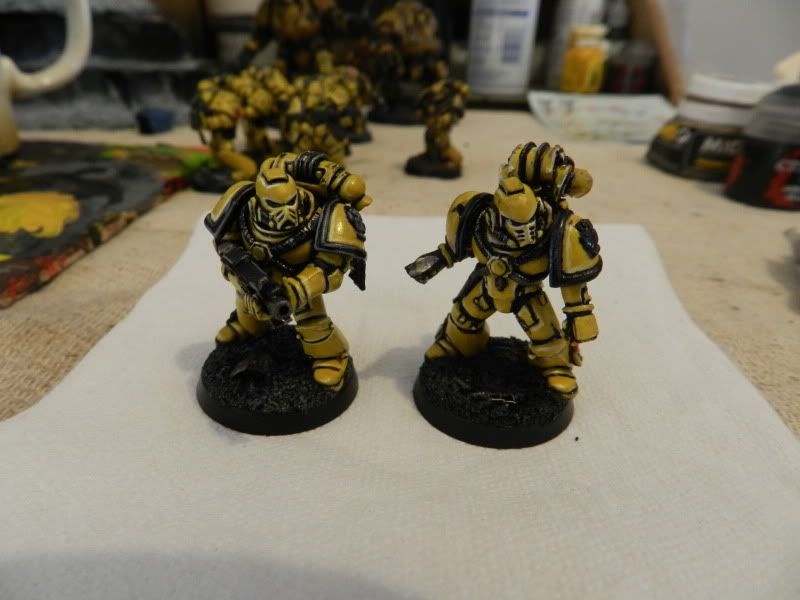
Paint the whole model to your usual standard.
Stage 2
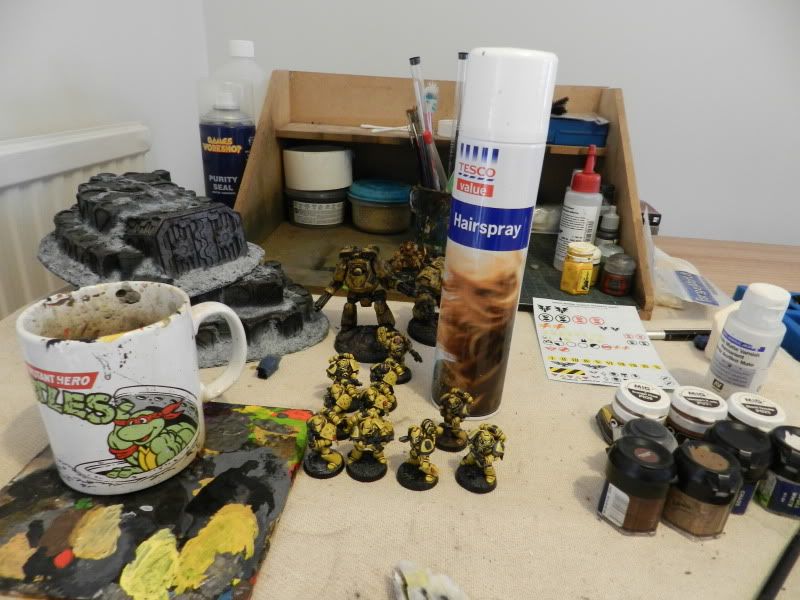
Liberally spray the whole model with hairspray. Theres not need to buy the expensive stuff. I picked up a bottle of Sainsburys own brand for 37p.
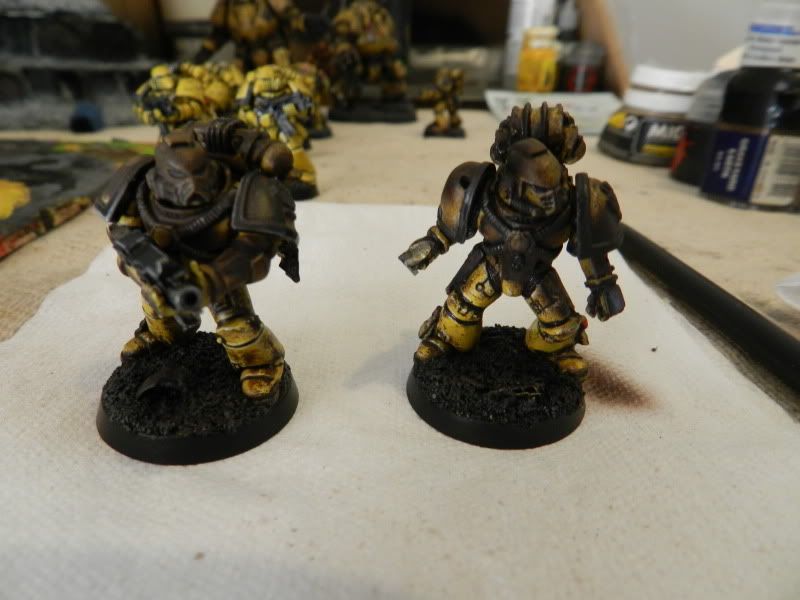
Stage 3

I mixed up scorched brown, graveyard earth and chaos black and sprayed it onto the lower half of the model using my airbrush.
Stage 4
While the paint is drying boil up some water and grab your large drybrush. You can then dissolve the hairspray, wiping off the excess onto tissue paper. Leaving on or taking off as much of the paint as you see fit.
-
09-22-2012, 11:59 AM #176Veteran-Sergeant
- Join Date
- Oct 2009
- Location
- UK
- Posts
- 195
Stage 5.
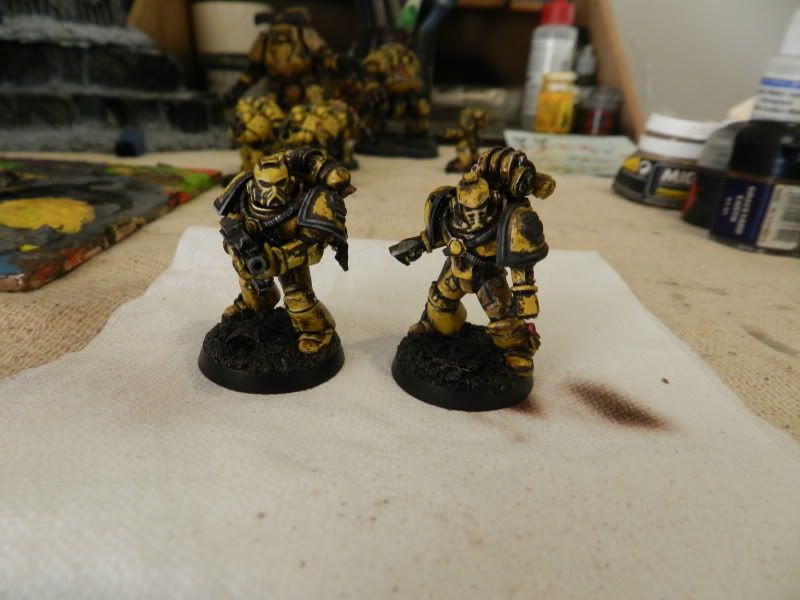
I then resprayed the middle section of each model with hairspray and repeated the previous steps. Once dry I then did some light sponging with Chaos Black over any areas that needed a little extra.
Stage 6.
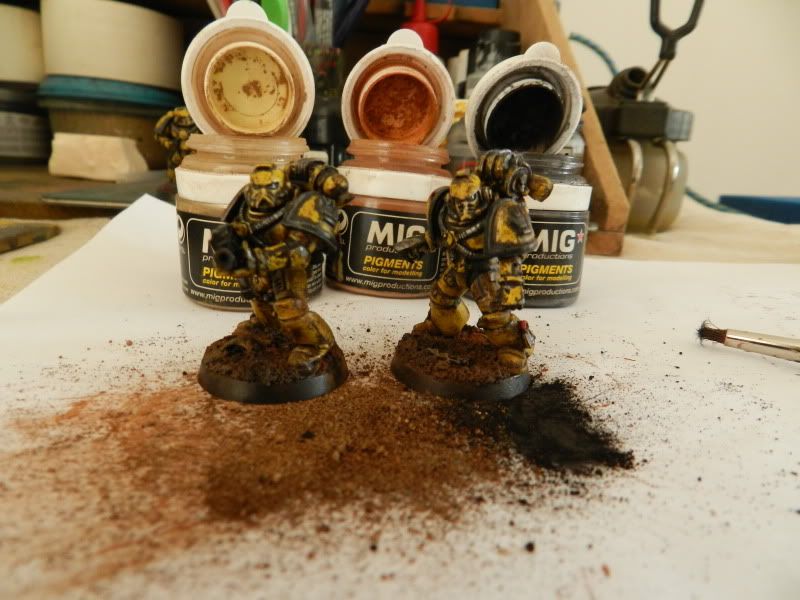
Take your weathering powders. Here I used MIG Pigments. Vietnam Earth, Europe Dust and Black Smoke. You can apply these using your large drysbrush cover the base and sections of the model.
Stage 7.
Spray the model with Matt varnish as soon as you've finished with the weathering powders. Otherwise your find your have a mess of powder everywhere. Once you've sprayed the Matt varnish, pick out the eyes and apply a light drybrush of grey to the base.
DONE!
If you just did the one model at a time you could spray the whole model at once and not need to re spray the hairspray. I did this with the second squad. But you've got to be quick with dissolving the hairspray. I hope that helps and some of you are tempted to give it a go!
Cheers!
-
09-24-2012, 12:50 PM #177Veteran-Sergeant
- Join Date
- Oct 2009
- Location
- UK
- Posts
- 195
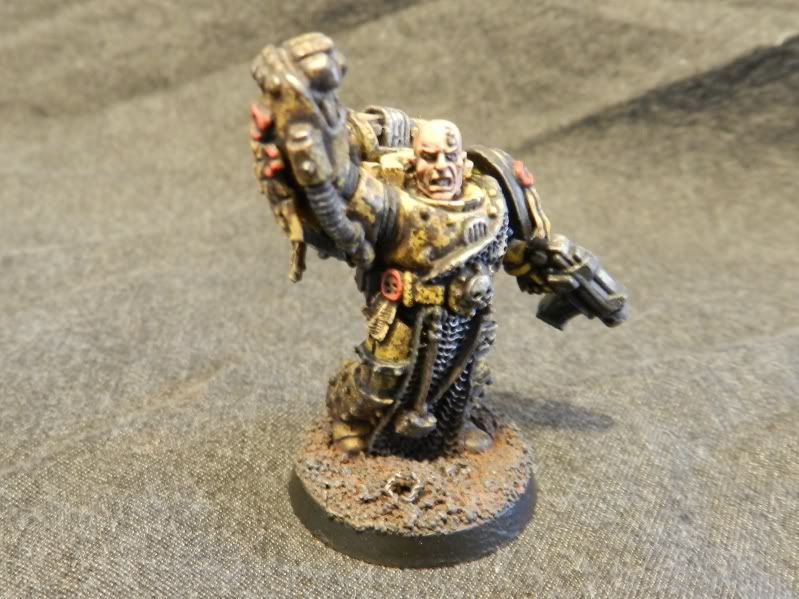
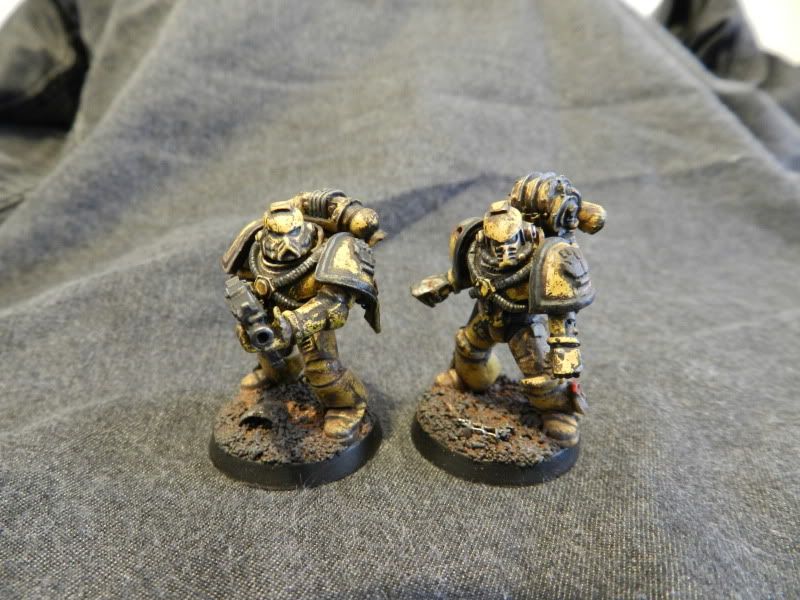
I sat down and got some photos done this evening with the tripod.
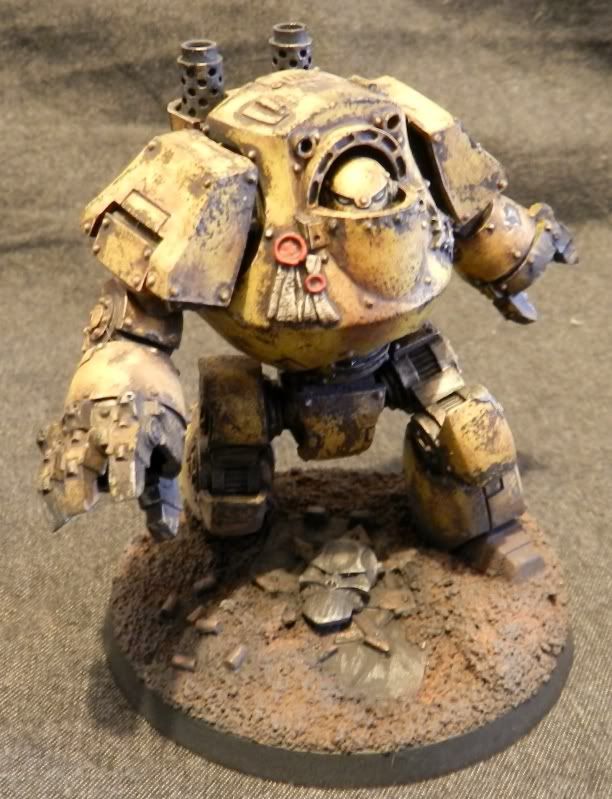
I know I have shown off the contemptors several times before but I have done some minor changes and they are now completely finished. I applied some extra weathering powders and re did the bases.

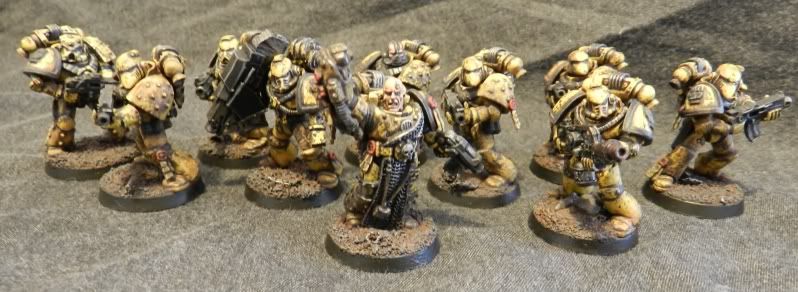
And now the previously seen tactical squad with some close ups.
Last edited by shaw3029; 09-24-2012 at 05:49 PM.
-
09-24-2012, 12:51 PM #178Veteran-Sergeant
- Join Date
- Oct 2009
- Location
- UK
- Posts
- 195
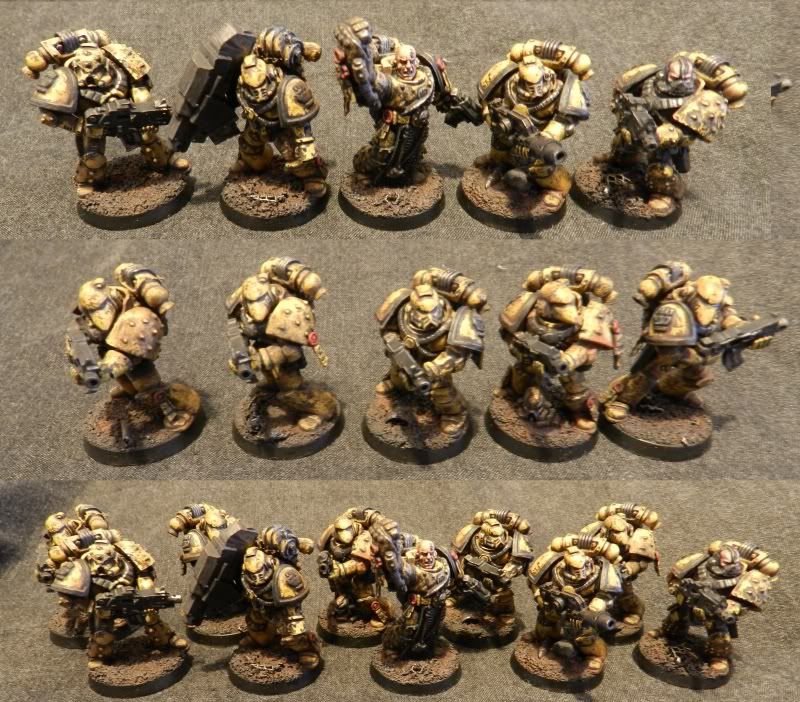
And the new tactical squad!
Last edited by shaw3029; 09-24-2012 at 05:50 PM.
-
09-24-2012, 12:51 PM #179Veteran-Sergeant
- Join Date
- Oct 2009
- Location
- UK
- Posts
- 195
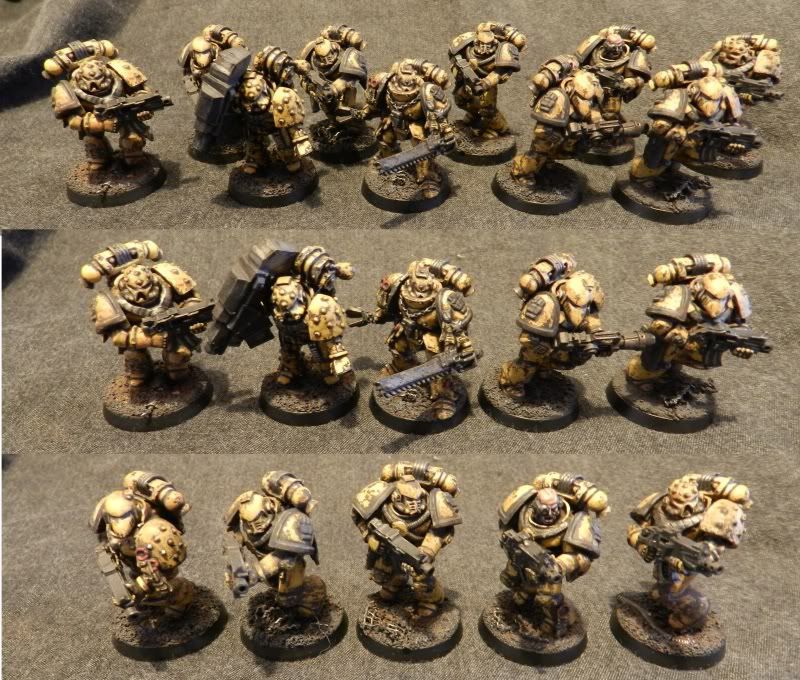
And a shot of everything painted so far.

And a nice close up.

Cheers!Last edited by shaw3029; 09-24-2012 at 05:50 PM.
-
09-24-2012, 02:13 PM #180Chaplain
- Join Date
- Aug 2011
- Location
- USA
- Posts
- 457
Wonderful effort and great look! Hat's off mate.

 Reply With Quote
