
First of all, I'd like to start this log off by saying WUB WUB WUB SKSSSSSSHHHHH WUB WUB!!!!
With that obligatory bit of dubstep out of the way, welcome to what more than likely will amount to a failed attempt at greatness. The addled manchild mind that brought the world Horny Latin Crimson Fists and a Land Raider Brothel will now be attempting to build the most eye-catching army ever. My intention is that, when I'm finished, my Tau army will, flash, pulse, strobe, smoke and play dubstep music, and also boast a ridiculously high-energy color scheme based on this purple monstrosity that I saw on the GW website:
This log will be rather slow moving because as of right now I'm deployed to Saudi Arabia, which means that I have to order the various components and bits and then they get shipped through fifteen intermediaries before sitting on the docks in Jeddah for a week until someone finally decides to ship it to my unit, and then a certain fat guy decides to get up and go on the weekly mail run and...well...it's complicated. So, things arrive when they arrive, and I'm currently waiting on a lot of the components for the LEDs and fiber optics I will be using. I haven't sourced a micro-scale smoke compound yet, but that's okay. Smoke will be later in the project and only one or two models will have it as a feature. In the mean time, though, I am prepping my battlesuits for my own individual variants on the "Tael" pattern suit that's become popular among Tau enthusiasts, as well as prepping individual components for the wires and cables and such that will have to be threaded throughout the model.
Another post will follow with some of my preliminary work once my phone (my primary camera) finishes downloading the photobucket app.
Until then...Let there be Light.
BoLS Lounge : Wargames, Warhammer & Miniatures Forum
Results 1 to 9 of 9
Thread: Dubstep Tau!!
-
06-04-2013, 11:31 PM #1Scout

- Join Date
- Jun 2013
- Posts
- 11
 Dubstep Tau!!
-
06-05-2013, 10:56 AM #2Scout
- Join Date
- Jun 2013
- Posts
- 11

ALright, I did some initial cutting, chopping and green stuffing along with some drilling on a few pieces to the standard Tau crisis suit. The first thing I did was hack apart the jet pack assembly and do it up as a Tael style single thruster. There's a little bt of extra GS work that needs to be done and some sanding, but that can wait til the GS is fully cured.
Here's a WIP pic of some of the parts I'm putting together. The half-assembled suit is my test mannequin, and the parts are barely secured with a tiny dab of glue so I can break it apart when I need to do some more conversion work to the components.

The phase shields are an idea I had. A lot of the new Necron bits are very compatible with the Tau aesthetic if you file off a few of the glyphs. I'm going to see if I can get a freaky hovering effect with those two shields. They're going to go on the Support Suit in a Farsight squad, and I want them to look like a floating, autonomous point defense system. I'll go into more detail later on how I want to accomplish that effect.
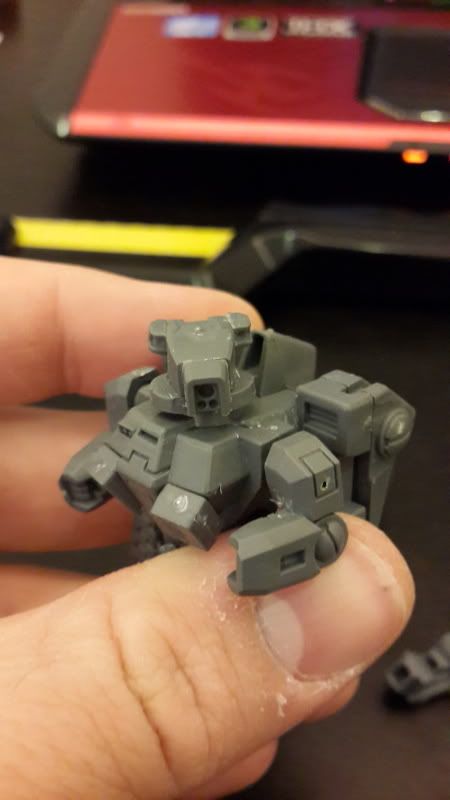
Here's a close up so you can see the detail of my take on the Tael head design. I call it the Teddybear. This is my first attempt at the Tael style head and I'll likely try a few different designs across the whole squad.
Now, here's the fun part:
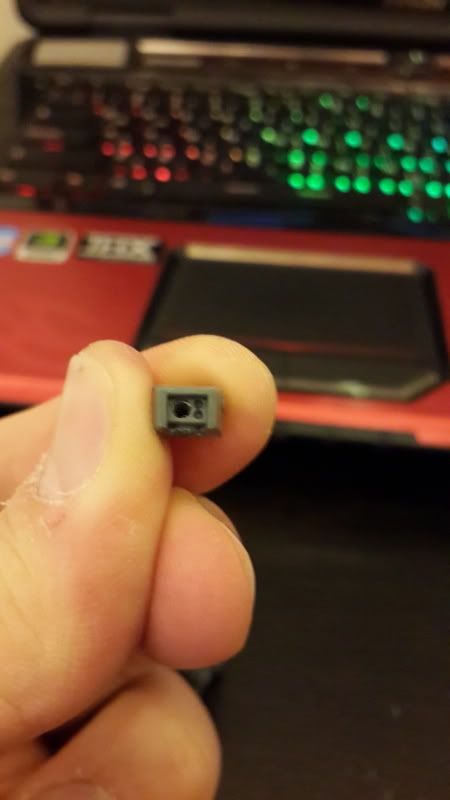
This is a test piece on a spare crisis head that was rolling around in my bits box since who knows when. I've drilled out the main eye on the head so that I can snake some fiber optics up into it.
And here's another angle so you can see the extent of the excavation I did. Fiber optic wire is pretty stiff and can break easily if you try to force it into a sharp angle, so what I've done is drilled up into the head from below, meeting up with the channel I drilled through the front. Once they were connected, I used my blade to carve out a much shallower arc.
On most attempts at LED modding, you see the power source and everything hidden in the base of the model But I'm going to try putting the whole mess inside the torso of the crisis suit, because look at how much space there is in there:
[url]http://i10.photobucket.com/albums/a119/BossFearless/20130605_075504_zps919075ab.jpg[/url]
Well, that's where I'm at for now. Got a couple of reposed arms and some other prep work done, but its all pretty boring stuff. Still waiting on most of my electronic components to arrive, along with a bunch of other fun toys.
On the docket right now is the Farsight squad, a Riptide when it eventually arrives. I had a friend pick up that and a bunch of other stuff from my LGS in Tampa right when the Tau launched, and she still hasn't gotten off her *** and mailed it yet. Screw it. I'll order the rest direct from GW instead of trying to support my LGS, if only because it actually gets here in a timely fashion.
-
06-06-2013, 03:22 AM #3Veteran-Sergeant
- Join Date
- Apr 2013
- Location
- London, UK
- Posts
- 171

Love the thought of the project! Good luck with it all and look forward to seeing the finished product!
Also good luck over there!Trying to build a tau army
How long will this take
-
06-06-2013, 03:39 AM #4Chapter-Master
- Join Date
- May 2010
- Location
- Plymouth, England
- Posts
- 6,729
Looking promising. Hope to see more soon!
Autarch, Shas'o, Chaos Lord and Decadant Lord of the Webway. And a Doctor!
http://drlove42.blogspot.com/
-
06-06-2013, 08:04 AM #5Initiate
- Join Date
- Jun 2013
- Posts
- 1
Well depending where you are deployed i know of one hobby supply store in Al-Khobar, but that was a quite a few years ago. Good luck with the project and the Saudis and have a shot of sid.

-
06-08-2013, 10:47 AM #6Scout
- Join Date
- Jun 2013
- Posts
- 11
@Ghoul: I'm out in Al Hofuf, and I'm already way ahead of you on the sid
 Jarir, Saco, and other general goods stores have carried most of the tools I needed. The only trick has been getting ahold of the LEDs and other specialized components themselves. Honestly, trying to source those locally through the language barrier would have been a nightmare.
Just noticed that my laptop has made it into a lot of the pics. It's the MSI Dragon Edition if anyone cares (I have to brag, it's a beast). As for the project itself, small update today, just a single pic that sums up what I've been working on. I've been carefully (so very carefully!) drilling deep in the barrels of the guns for my battlesuits using a pin vise and a 1mm drill bit I bought at Saco (local walmart type of store). I've set up the picture so you get an idea of where I'm drilling from:
[url]http://i10.photobucket.com/albums/a119/BossFearless/20130608_172311_zpsdc27749b.jpg[/url]
The guns will be illuminated using fiber optic cable, which will be snaking up through the arms into the torso where the LED is going to be housed. There are two things to note about my approach here. First, the plasma guns are going to be side mounted, while the fusion guns are going to be underslung. This will hopefully explain the angles I've drilled at for the astute modeler. The second thing is that in any place where the fiber optic cable will be bending, I have hollowed out as much room as possible to give it a nice shallow angle so as not to put unnecessary stress on the cable. The twin barrels of the fusion gun presented an extra difficulty, and I had to solve the problem by cutting the gun in half to give me a better angle for drilling. I was eventually able to confirm that both of my channels met up with the larger cavity I hollowed out, and that I will be able to slide them all the way up and out of the main body of the gun, into the arm.
There are currently 2 plasma guns done, not just the one in the pic. You should have seen me sit there and try to quintuple check the sides I was drilling from. I knew that this was exactly the sort of thing I would make a mistake on, and I would have felt incredibly stupid later on if I had messed that up. But in the end, I wound up with a right side and left side gun. The fusion gun is currently unique, even though the suit will have 2 of them. I'm waiting til all my components arrive so that I can assemble the gun and confirm that my design is sound before proceeding.
So here's hurdle number one, born from eagerness and lack of forethought. When I assembled the Teddybear head, I hadn't thought too much about getting the fiber optics in there. I'm hoping that I haven't screwed the pooch on this one by assembling the whole head before drilling it out. Won't be able to give it a go til tomorrow since I'm on shift now and I already know I'm going to be dead tired by the end of it. Weekend in Bahrain took it out of me. Giggity. Once I figure out if I can drill that out, I'll start on the next two heads to round out the trio of battlesuits I currently own.
-
06-09-2013, 01:17 PM #7Scout
- Join Date
- Jun 2013
- Posts
- 11
Alright, so I went back and drilled out the Teddybear head to allow me to snake the fiber optic wire up and into the eye piece. Let me tell you, this was a pain in the *** to try and do with the head all assembled. I accidentally drilled out the back of its head, so that needs to be patched with GS later. Actually I could have done that earlier when I was doing some GS work but I forgot. Okay, so, the lesson I would take away from this is that when you are drilling out the head of a crisis suit for your glow wire, you should do it -before- the head is fully asembled but -after- you have put the target lock bit onto the front (part of the Tael conversion). I would also recommend triming down the neck ball-joint to allow for you to create a shallow channel under the chin with your drill and knife.
-
06-10-2013, 10:28 AM #8Scout
- Join Date
- Jun 2013
- Posts
- 11
For whatever reason, a post I put up a couple days ago never showed up. Fine, whatevs. Here's the picture I had uploaded then that never made it to the log:
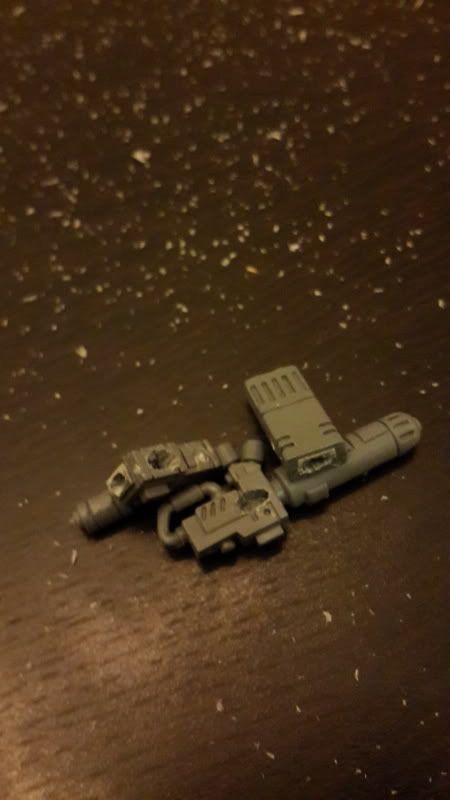
That's just a quick shot to show you how I was proceeding with the weapons. I wanted to show the angles that I was driling and cutting from to get the holes ready for the fiber optic wire. The plasmas are going to be side-mounted on the outside of the arms, and so I have carved a channel into the side of the gun, which intersects with the hole I drilled down the barrel, allowing for a smooth insertion of the wire. The fusion guns are a bigger pain to try and light up because they have two barrels and are longer than the drill bit I was using. So I driled most of the way through, starting from the muzzle of the gun, then sliced the gun in half and hollowed out the barrel part way. This let me create a wide channel for the wires to run through, especially where they have to be bent to follow the channel. The fusions are going to be underslung, so I went in through the top of the gun. I only did one fusion gun so far, because I need to see how well this works when I go to reassemble the weapon, and also so I don't mix up the pieces and wind up with halves that dont quite fit together.
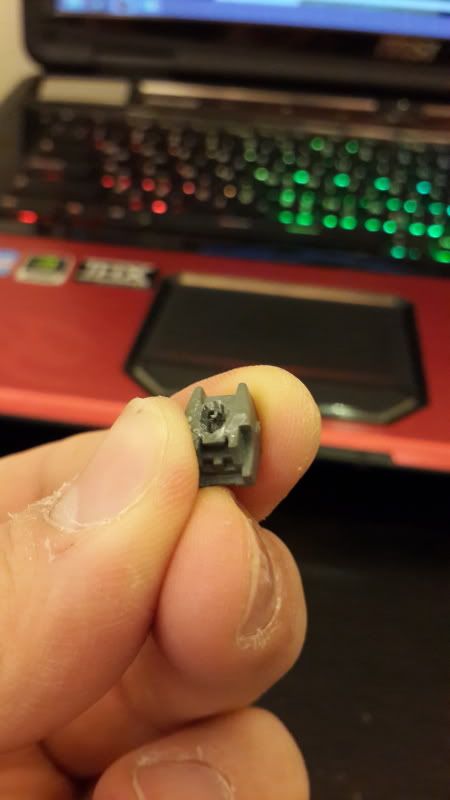
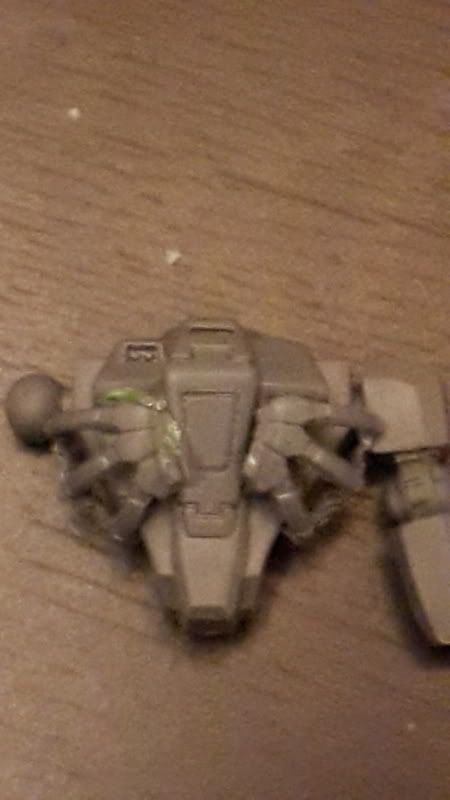
Okay, on to some new stuff. Here is the second head I have built for my crisis team:
[url]http://i10.photobucket.com/albums/a119/BossFearless/20130610_153834_zps6b01ff5f.jpg[/url]
I took the pic with my Galaxy S4, in case anyone was thinking of getting one. The camera on that thing actually has been taking great pics of models so far, and I can tap the screen to get it to focus on the right part of the model. The resolution is so high that it showed me some minute defects that I had not noticed, and have since gone through and corrected a bit. As you can see, this is much closer to the normal Tael-style head, and you can see the hole drilled through the central eye, where the fiber optics will protrude. When I get my components in, I plan to experiment a bit with the wires to see if I can get a decent light from all three lenses. That would be pretty sweet. My worry right now is that I will have drilled too wide a hole and the wire will be left wiggling around loose. I'll figure it out when it arrives.
Remember when I said that Tau and Necron parts tended to work together? I've been having fun scavenging from the Lychguard sprue, and have come up with a great use for these odd rib cage bits that arch up over the necron's back:
Needless to say, a lot of cleanup will be required, but I took this while the GS was still curing. Had to go to work but wanted to share. In the end, I really like how this looks, kind of a reinforced exoskeleton for the existing suit frame. When you get the piece off the sprue, both sets of ribs are connected. I cut the piece in half, then reoriented the halves so they fit more naturally around the suit's chest. While I was testing out the design, I stuck some arms on it and even tried it with both kinds of jetpack assemblies to see how it looked with either one. I think that I'm going to have my Fusion gunners wear the standard twin-packs, while the plasma gunners will have the single packs.
Speaking of jet packs, let me tell you something. WHen you're building one of these single engine jetpacks, you should assemble the two halves before cutting. It makes it a little harder to cut, but you wont make the same mistake as me and have lopsided pieces that don't fit together or leave huge gaps. I also may have cut the pieces with very poor technique, so...yeah. A lot of GS will be crammed into those gaps and smoothed over to fix it.
That's all for right now. Mail came today, and with it a few different bits that I ordered, but still no electronic components. Maybe next week I'll be lighting things up.
-
06-11-2013, 10:56 AM #9Scout
- Join Date
- Jun 2013
- Posts
- 11
Okay, for whatever reason my posts aren't appearing whenever I include pictures. It's starting to really piss me off. At this point I think I may just call this a bust and pack up my log, move it to another forum somewhere. I guess if you're interested, look for this same thread on Warseer. I'm just going to copy and paste my posts to date and try to remember what I wrote for the ones that didn't show up.
Last edited by Alex Aggro; 06-11-2013 at 10:59 AM.


 Reply With Quote
