

Painting Area.
So now I've talked a bit about Airbrushes and the different types available, different air sources and paint choices. I'm now going to talk about where we're going to paint and some of the things that will make our airbrushing that much easier.
1st off if your going to airbrush inside your home, it has to be very close to a window. You need ventilation when airbrushing and please no kiddies or pets nearby when you do. My set up is a desk directly under a window which gives two advantages. Great natural light and ventilation. Never airbrush with the window shut, it's bad for your health. You can buy airbrush booths, with extractors. I don't have one. Open windows good enough for me. Obviously you want to be facing said window.
So we have decided where our painting area will be, what else could we use to make things go easier and safer for us.
1. Paper, this is to test your airbrush on as you paint. Whenever your painting away you will get used to having to give your brush a quick blast on the paper to make sure your paintings flowing nicely out of your brush. I always test my airbrush on paper before painting anything.
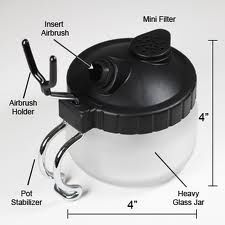
2. Airbrush stand or cleaning pot. When your not holding your airbrush, where are you going to put it ? You don't want to just lay it down as any paint still in the airbrush will pour out and make a mess. Some compressors even come with a place to put your airbrush when your not painting. Some don't. Get a stand or even better an airbrush cleaning pot. They look like this.
As you can see you can stick your airbrush securely in the rubber ringed hole nice and safe, and if you need to flush out your airbrush you can use this pot too. Just add water to your airbrush insert your airbrush into the hole and spray out any paint and water before switching colours.
3. Latex Gloves, not really necessary but handy to have. I wear one to hold the piece I'm painting on its cork (see below). Airbrushing does produce overspray and your hand will end up getting paint on it, I call it Goth hand, especially if your painting black. Fortunately the paints we use are easy to wash off but these gloves are good.
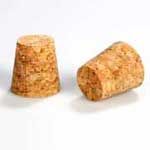
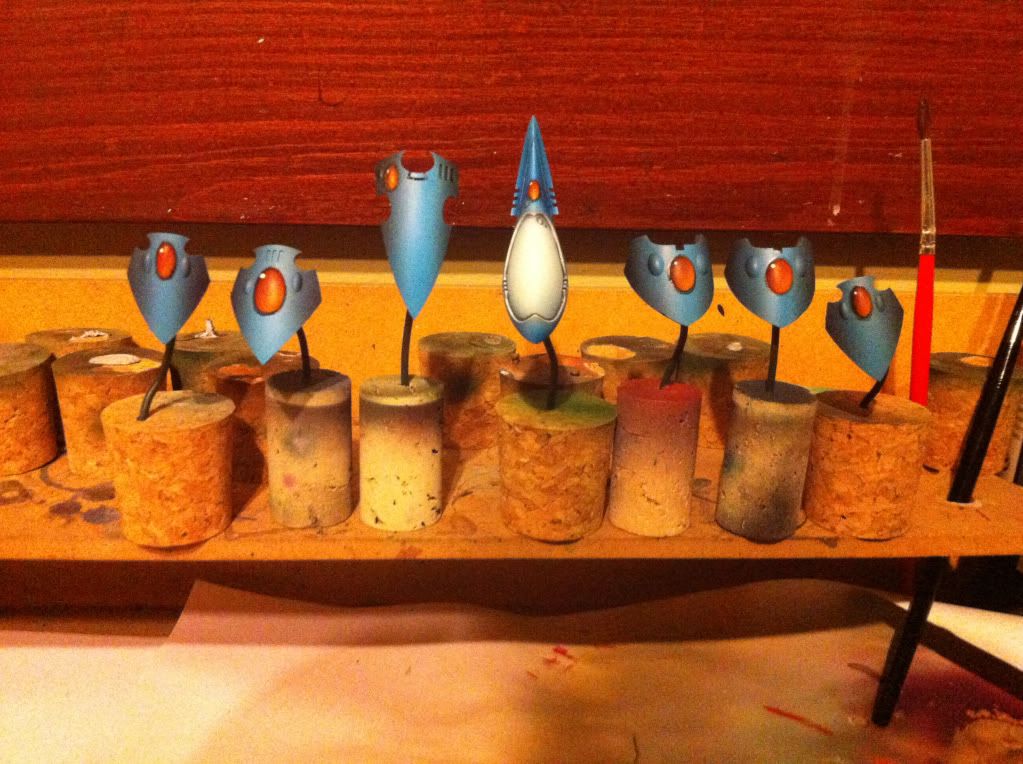
4. Cork caps like this,
and some blu-tac. I use these to put models on when painting. Use anything really, old paint pots or anything you have to hand. I use these because you can also stick paper clips in them. If your airbrushing say a space marine bolter. You can stick one end of the paper clip in the cork, the other to the bolter and airbrush it without getting your fingers in the way.
I should add that if you embrace airbrushing as I have you will start clipping your smaller model parts like heads and guns out of the sprue thinking about how you can leave it partially attached to some sprue for you to hold whilst painting.
Here's a picture of how I used cork caps to paint parts of my Wraith Knight
5. Desk lamp, self explanatory for any miniature painter really.
6. Clean water, to flush out your airbrush when switching colours. Not difficult. Just pour the water into the airbrush, place in your cleaning pot and squirt until clean.
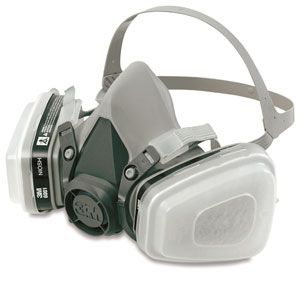
7. Face mask, this is a must. Breathing in all that paint is bad for you. Wear a mask. Plus they look cool and you won't get multicoloured bogies or snot.
Doesn't have to be a fancy one like this, but get one.
8. Cotton buds (q-tips) and paper towel. You will find as you airbrush you will accumulate rather quickly a build up of paint around your needle tip. This can cause paint to splatter onto whatever your painting. Keep an eye on your needle and give it a wipe every now and then to prevent this.
9. Obviously your paint of choice.
Other things like masking tape, airbrush cleaner and lube, patterned templates and more come later. They aren't 100% important to have yet. We're just starting out.
Next post, were going to talk about actually using our airbrush connecting to the compressor and having some fun.
BoLS Lounge : Wargames, Warhammer & Miniatures Forum
Results 11 to 20 of 47
Thread: Deadlifts Airbrush experiences.
-
11-05-2013, 01:03 PM #11Iron Father

- Join Date
- Sep 2010
- Location
- Vancouver Island, BC
- Posts
- 4,970

Last edited by Deadlift; 11-06-2013 at 02:21 AM.
http://paintingplasticcrack.blogspot.co.uk
-
11-05-2013, 04:49 PM #12Chapter-Master
- Join Date
- Jul 2009
- Location
- Cloudsdale, Equestria.
- Posts
- 26,074
Has this made the front page yet?
If not, why not?
However the process of robo-insemination is far too complex for the human mind!
A knee high fence, my one weakness
-
11-06-2013, 03:05 AM #13Iron Father
- Join Date
- Sep 2010
- Location
- Vancouver Island, BC
- Posts
- 4,970
Just a quick one before my next post. I have a spare box of tactical marines that haven't been painted (old style ones) if any of you guys and gals have a specific colour scheme or chapter you would like an airbrush recipe for then send me a PM or post it here. I will then post a step by step painting guide on here with pictures of the asked for schemes after I have finished with my mini tutorials. For those who aren't marine players don't worry, send your colour requests anyway and I will use the marines as an example for you to transfer to your own models.
http://paintingplasticcrack.blogspot.co.uk
-
11-06-2013, 03:20 AM #14First-Captain
- Join Date
- Jul 2009
- Location
- London U.K
- Posts
- 1,924
Great idea

-
11-06-2013, 04:23 AM #15Iron Father
- Join Date
- Sep 2010
- Location
- Vancouver Island, BC
- Posts
- 4,970
Let's Paint
Right then all the previous posts have been leading up to this. The fun bit.
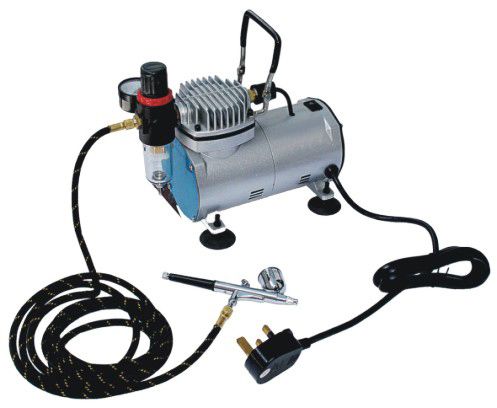
Before we start painting we will need to connect the airbrush to your compressor. What ever type you bought it should come with instructions on how to do this. If you can tie your shoes then you can do this. One end of the hose screws onto the compressor, the other to underneath your airbrush.
It will look something like this.
Now sit down at your painting area and lay out you paper in front of you, have some paper towel, cotton buds, water, maybe a brush, airbrush holder or cleaning pot nearby and of course some paint. Stick on your mask and open that window.
Switch on your compressor and you will hear it start to pump air into the tank. Look at the gauge on the top of your compressor and set it to 30 to 25 psi. Wait for the compressor to stop ticking away and your tank is full.
Right then 1st I would flush your airbrush out. It's new and it's best to do this and it takes no time at all. Pour a little bit of water into the airbrush and either spray the water out onto some paper towel, or into your cleaning pot. Once you stop seeing or hearing the water come out, lower your psi to 20ish and grab your paint or primer, give it a good shake then add to your airbrush, 2-3 drops will do.
Grab that paper and practice on it.
Just play with it, draw lines and patterns and see how the airbrush works for you.
Something like this.
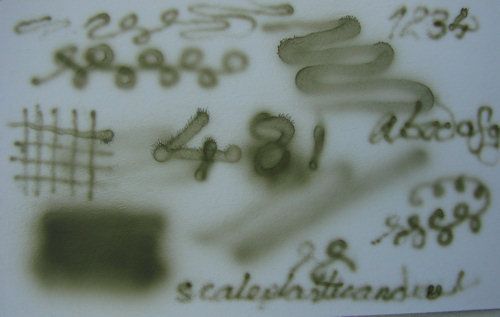
If you bought a dual action airbrush you will see the further back you pull the trigger, the more paint will come out and the thicker the lines. We don't want to go mad, less is more. Remember just like normal painting, thinner multiple coats of paint are better than one thick one. Some of the practice numbers and letters on this paper have a "spider" effect around the edges. We don't want this. This is caused usually by having your paint too thin and or water still in the airbrush from the previous clean or flush out. If this happens to you don't worry just spray out the remaining paint in your brush and start again. This is where having paints already premixed for airbrushes is a distinct advantage, they won't be too thin. If you start to notice a splatter effect in your paint, have a quick look at the needle of your airbrush. Your most likely to see a build up of paint. Cotton bud in water, give it a wipe to get rid of the build up and your good to carry on.
As your playing don't be surprised if you hear the compressor come back on again, that's normal. It's just topping up your tank to keep your psi at your set level.
If it switches off entirely then you've been painting for ages and overheated your compressor. Don't worry it will sort itself out. Go make a cup of tea or cup of coffee, have a biscuit and wait for it to cool down. To be honest this rarely happens. But always good to take a break every now and then.
Congratulations, your airbrushing.
Next post were going to actually paint a model
Last edited by Deadlift; 11-06-2013 at 04:28 AM.
http://paintingplasticcrack.blogspot.co.uk
-
11-06-2013, 05:15 AM #16Iron Father
- Join Date
- Sep 2010
- Location
- Vancouver Island, BC
- Posts
- 4,970
Painting a model.
We're going to start off with something large and flat with this. We all know painting tanks is a pain in the bum. Not with an airbrush. Something that could take you hours will take far less time, when you have practiced airbrushing you can do the main bodywork of a tank to a good tabletop standard in minutes. No I'm not joking either.
We're going to be using various colours here so between colour changes, a quick drop or 3 of water into the airbrush, spray onto kitchen towel until clear then add your next colour. Always test on paper 1st to make sure your paints running nice and smoothly. Always give your paints a good shake too.
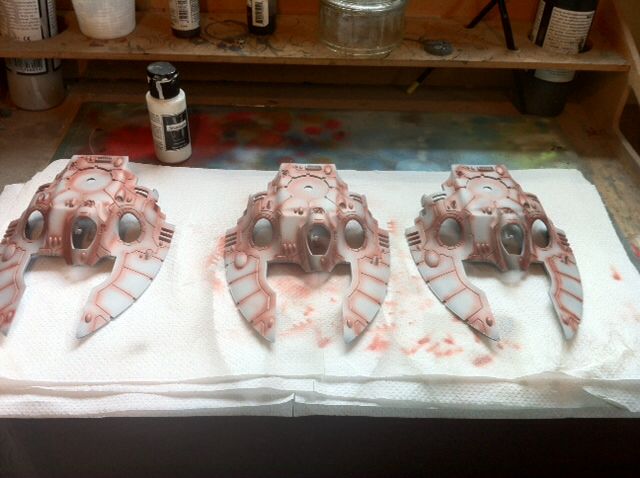
If you've read my Iyanden painting posts you will have seen these pictures before. I think they are good to demonstrate painting a tank, and also a technique called pre-shading.
You will notice I didn't completely build these wave serpents before painting, sub assembling your models when airbrushing is crucial really and makes life a whole lot easier.
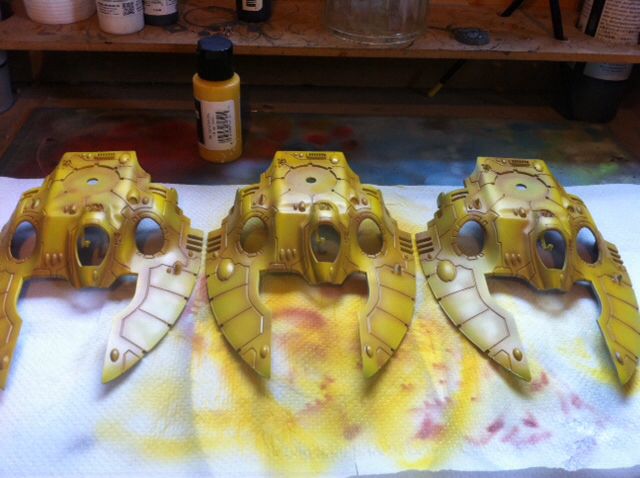
Right then, these 3 Iyanden wave serpents were primed in Vallejo grey airbrush primer. I then grabbed a colour darker than the yellow I would be using to "pre-shade" or paint the areas I wanted to appear, where shadows would be or recesses in the lines of the armour plates. You could use black or dark grey but I felt with yellow a dark brown red would be better. In this case bloodstained earth by Minitaire.
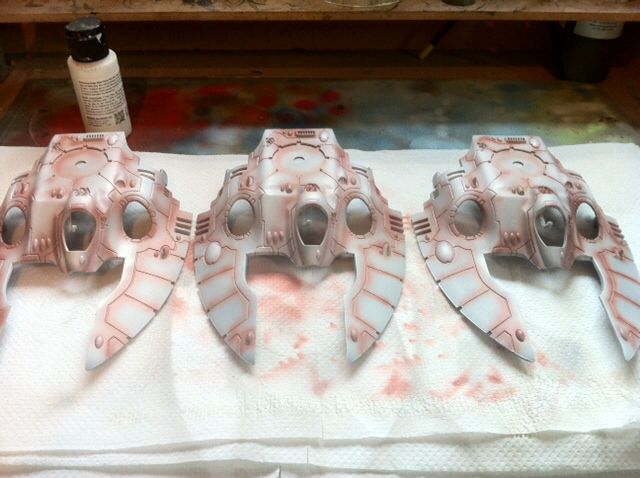
Once that was done, I then grabbed some white paint and airbrushed the areas I wanted to appear slightly lighter. Some of the edges on the top of the wave erpents. "Pre-highlighting" it's subtle but the hulls then looked like this.
Now the yellow, called Craven by Minitaire. Airbrush your paint in smooth even lines all over your tanks surface, don't paint in one place for any length of time or you will get a build up of paint, we don't want that. We want a nice smooth even coat. Imagine your watching car sprayers and how they go back and forth. Do the same with your airbrush. Also keep checking for build up of paint on your needle and occasionally give it a test on some paper. Once you have done some nice even coats you will end up with something like this.
I should add never, never spray over a wet layer of paint, it gets nasty and you will lose you smooth finish. If your in a rush and can't wait for your model to dry between coats, a hair dryer will help speed drying time up. However to be honest airbrush paint usually drys so quickly it won't be an issue for you.
Once your models dry you could start to use masking tape and airbrush templates to create stripes and patterns on your models, masks areas off and have some fun. Don't forget that airbrush over spray though, make sure you cover anywhere you don't want getting contaminated with other colours. I use a low tack masking tape by tamiya. It comes in various widths and won't peel paint of your models. Just make sure the areas your sticking the tape to are completely dry. Have fun with it and see what you can create. I should add as with any painting, if your trying to paint lighter paint over a dark base it will effect your colours. Like painting yellow over blue will get you green etc etc.
Eventually my Waveserpants ended up like this. Still need a little work but here they are 95% done.
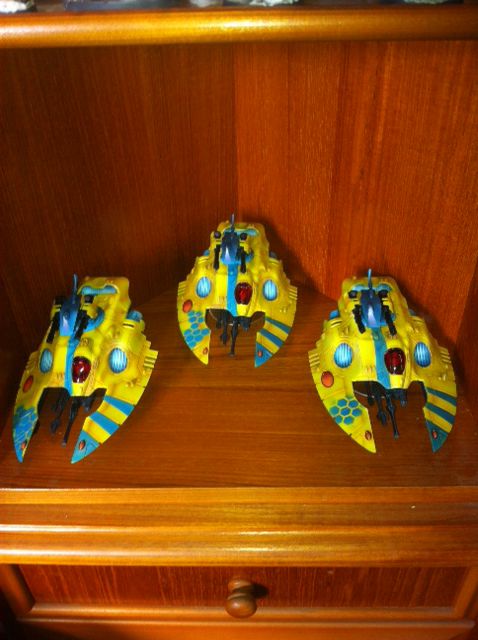
I sub assembled all three, painted parts as I went along and then used humbrol clear red to tint the glass. I even masked off the gems and airbrushed those too. All in all from start to finish these 3 took a morning. Sure they aren't golden daemon or anything like that but as gaming pieces they do the job.
Maybe I shouldn't tell you this but I have sold tanks painted to a similar standard on eBay for a £100. Not bad don't you think. Oh and don't ask me for commissions, get airbrushing and you will have cool looking minis too.
Next up, Cleaning and maintaining our Airbrush.Last edited by Deadlift; 11-23-2013 at 09:11 AM.
http://paintingplasticcrack.blogspot.co.uk
-
11-06-2013, 07:45 AM #17Alpha Legion Operative
- Join Date
- Sep 2012
- Location
- North East England, UK
- Posts
- 292
Seriously considering the same compressor you have, and a decent airbrush to make some real headway into my goal of completing a full chapter of Blood Angels. Originally Posted by Deadlift

Painting detail I love, and by hand is satisfying for single mini's, but with the sheer volume I need, I'd be really interested to see if you can do a bright enough red for my taste using the model air range (which I have easy access to). In my head, I can imagine a grey primer, white 'pre highlight', and the scarlet red (is this the brightest model air?) would probably give me the bright, clean look I'm after, but if you're able to test this, I'd love to see how it comes out!
Thanks for all the info in this thread so far, Larry needs to see this and get it on the frontpage!
-
11-06-2013, 08:04 AM #18Iron Father
- Join Date
- Sep 2010
- Location
- Vancouver Island, BC
- Posts
- 4,970
Thanks for the feedback, Blood Angels will be added to the list of models I will paint examples of. As for this little series making the front page, don't worry BigReds been in touch.
Blood Angels certainly would be best with a light grey or white primer. I would still look at doing some preshading in the darker areas. Leaving the heads off of models that will have yellow, gold or blue helmets as some Blood Angels do would make airbrushing the helmets nice and easy too. I will likely be showing how to airbrush faces too. I am moving house at the moment so please be patient with me.Last edited by Deadlift; 11-06-2013 at 08:11 AM.
http://paintingplasticcrack.blogspot.co.uk
-
11-06-2013, 08:25 AM #19Chapter-Master
- Join Date
- Jul 2009
- Location
- Cloudsdale, Equestria.
- Posts
- 26,074
Do us a Blood wolf
However the process of robo-insemination is far too complex for the human mind!
A knee high fence, my one weakness
-
11-06-2013, 10:24 AM #20Scout
- Join Date
- Jun 2011
- Posts
- 9
I've been playing with an airbrush for about a year now myself and have had a lot of fun with it. However one thing I still haven't worked out: is there a good way to paint black using airbrush? I've tried a couple of different approaches, but so far none of them has worked to my satisfaction. Any ideas? My own custom marine chapter is mostly black and while I have most of the minis for the whole chapter (some rhinos and scouts are still missing), painting all that black by hand isn't very tempting.
I wish very very much that when I started building my chapter back in the Rogue Trader days, I'd come up with a main colour that was anything other than black. Now, with multiple companies already painted, it's a bit late to change it...

 Reply With Quote


