
With my mojo back on track the next thing on my tyranid terrain list is some Capillary Towers. Having made my Bastion, a stretch from my straightforward defence line I'm now going to refine those skills with some Capillary Towers. Having already utilised them in the 'compass points' of the Bastion I thought I'd just get six done as I'd speculated they were easy to make from the foamboard templates I'd already made.
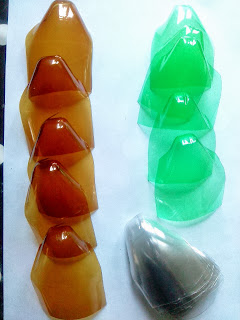
So first up was cutting a bunch of chitin plates from the bottom of pop bottles:
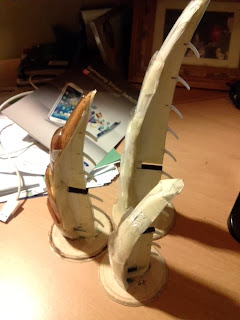
Then some foamboard spines to fit them to:
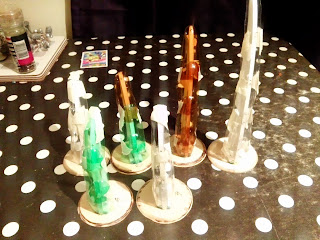
Then attach the spines to plywood discs and add the chitin plates using pins
More progress soon, but here's more info and pics: [url]http://40kaddict.blogspot.co.uk/2013/10/nids-part-106-scratchbuilt-tyranid.html[/url]
BoLS Lounge : Wargames, Warhammer & Miniatures Forum
Results 1 to 10 of 18
-
11-07-2013, 03:39 PM #1Chaplain

- Join Date
- Nov 2010
- Posts
- 402
 Scratchbuilt Tyranid Capillary Towers.
-
11-07-2013, 04:58 PM #2Brother-Captain
- Join Date
- Aug 2009
- Location
- Perth, Australia
- Posts
- 1,220
Which way around are the chitin plates attached? It's hard to tell on the photos because they're transparent. Are they stuck ends down on the long outer side of the spine?
Kabal of Venomed Dreams
-
11-08-2013, 12:44 AM #3Chaplain
- Join Date
- Nov 2010
- Posts
- 402
Yes, just imagine the brown ones in the first picture running up the left hand side of the spines in the second picture with the bulby bits pointing up. Originally Posted by Morgrim

-
11-12-2013, 05:08 PM #4Chaplain
- Join Date
- Nov 2010
- Posts
- 402
Started padding out the interior of the Chitin plates

Added on some curtain hooks for spikey bits.
Progress is happening on these quite quickly, I've already managed to prep them ready for sculpting but in the mean time some more info and pics here:
[url]http://40kaddict.blogspot.co.uk/2013/11/nids-part-107-scratchbuilt-tyranid.html[/url]
-
11-14-2013, 05:34 PM #5Chaplain
- Join Date
- Nov 2010
- Posts
- 402
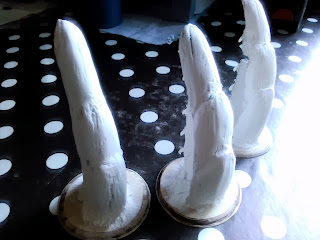
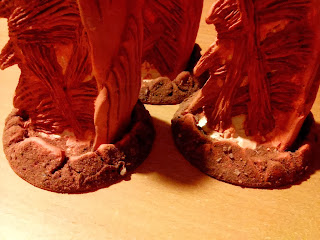
Started 'icing my cakes'. It seems these are looking extremely phallic, G.O.D. help us when I start doing the Chitin plates!

After coating them with a rough layer of adhesive tile grout I then needed to sand them back. The grout makes the plastic and PVA'd tissue paper more rigid and gives the next layer of DAS air drying clay something to stick to.

More pics and info should you need it: [url]http://40kaddict.blogspot.co.uk/2013/11/nids-part-108-scratchbuilt-tyranid.html[/url]
-
11-21-2013, 05:03 PM #6Chaplain
- Join Date
- Nov 2010
- Posts
- 402
Pretty much all the tiers of Chitinous Plates have been done now, here's the progress:

All 6 are starting to look like the ones that formed the compass points in my bastion
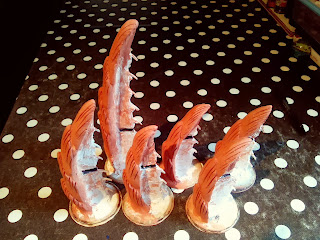
And I've even started work on the fleshy musculature that forms the inside of the capillary tower
Next step is to cap all the curtain hooks into spikes. My bastion used spinefists to give it that Tyranid feel, this time I'll be sculpting them all on. Not quite sure what I'm going to do but we'll see soon it enough. More pictures and details are here:
[url]http://40kaddict.blogspot.co.uk/2013/11/nids-part-109-scratchbuilt-tyranid.html[/url]
here:
[url]http://40kaddict.blogspot.co.uk/2013/11/nids-part-110-scratchbuilt-tyranid.html[/url]
and here:
[url]http://40kaddict.blogspot.co.uk/2013/11/nids-part-111-scratchbuilt-tyranid.html[/url]
-
11-22-2013, 01:10 AM #7Librarian
- Join Date
- Dec 2012
- Location
- United Kingdom
- Posts
- 508
Looks great.

"Let them come. We shall smite them down where they stand" Warsmith Vorax of the 15th Grand Battalion.
-
11-28-2013, 08:37 AM #8Chaplain
- Join Date
- Nov 2010
- Posts
- 402
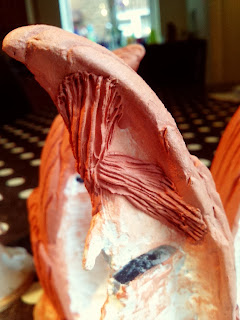
The next update brings more fleshy musculature to the inside of the Capillary Tower, but first i capped all the curtain hook spines. The weren't quite as lethal as the 'scything talons' I'd envisaged but the sculpting turned out OK and they will bprobably be less prone to break given their bulkiness

I'd planned on using Milliput for the fleshy bits but decide to just continue using DAS air drying clay. Even though I'd bought 5 packs of Milliput I'm glad I continued on with my cheaper/quicker options. There is still a question mark over durability. The clay can be carved with ease once dry but I think even if these were to chip or break I could just repaint them as ddamged towers.

The additional concern is just how stuck to the core the clay is. You wet it and press it on but it's not like Milliput which has real adhesive qualities, once again we'll just have to see in the end.

That's the first 2 'fleshed out' just the remianing 4 and to do their bases, add some fleshy sacs to the 'female' towers, and some vine tendrils and they're done, probably no more than a weeks worth of modelling left!
Point your cogitators here for more pics and info: [url]http://40kaddict.blogspot.co.uk/2013/11/nids-part-112-scratchbuilt-tyranid.html[/url]
-
12-06-2013, 04:19 AM #9Chaplain
- Join Date
- Nov 2010
- Posts
- 402
based all the towers now:
And added some fleshy sacs to the 'female' towers

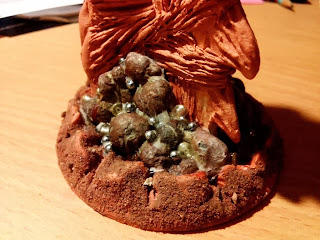
Next up some tendril vines and then I can think about painting
For more info on construction and pics point your cogitators here: [url]http://40kaddict.blogspot.co.uk/2013/12/nids-part-114-scratchbuilt-tyranid.html[/url]
-
12-28-2013, 12:34 PM #10Chaplain
- Join Date
- Nov 2010
- Posts
- 402
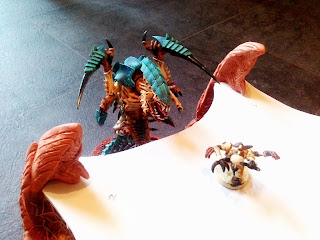
Turns out I had bigger things on my mind with my Capillary Towers afterall - they in fact form part of my modular Tyranid Skyshield Landing Pad

Fingers crossed the other days rumour that the new Codex will deny Tyranids access to Fortifications was a load of old guff

For more info on construction and pics point your cogitators here: [url]http://40kaddict.blogspot.co.uk/2013/12/nids-part-117-project-y-scratchbuilt.html[/url]


 Reply With Quote

