
I will be posting WIP/tutorial images for my wraithguards here.
I calculate:
1 wraithguard =
6 1/16 x 1/32 magnet
7 1/8 x 1/32 magnet
I have 15 wraithguard/blades so thats:
90 1/16 x 1/32 magnet
105 1/8 x 1/32 magnet
if I want all wraiths to be able to sport all options.
Order will be placed on friday for the magnets and then handcramps and pictures will ensue
BoLS Lounge : Wargames, Warhammer & Miniatures Forum
Results 1 to 8 of 8
Thread: Magnetizing wraithguard/blades
-
12-03-2013, 03:06 PM #1Veteran-Sergeant

- Join Date
- Aug 2012
- Posts
- 108
 Magnetizing wraithguard/blades
-
12-06-2013, 04:47 PM #2Scout
- Join Date
- Nov 2013
- Location
- IL
- Posts
- 7
You better post picks Im paying attention!
I dunno what Im going to do with mine. I have 13 old metal WG so I have plenty of WC armed models. I glued together 5 new models with D-scythes. I have 5 more models to do that I was just going to do as swappable Wraithblades and not worry about more Wraithguard.
-
12-06-2013, 05:15 PM #3Veteran-Sergeant
- Join Date
- Aug 2012
- Posts
- 108
lol. I will be, the magnets should arrive monday and I will be taking step by step pics.
Im also going to do the same for my wraithlords and wraithknight. I have a lot of experience magnetizing rhinos and warmachine jacks
-
12-06-2013, 06:15 PM #4Librarian
- Join Date
- Jun 2012
- Posts
- 745
I've magnetized all my wraith___. Lords are pretty easy to do. The knight isn't too bad, the arms required small pins to hold them up to the right rotation (you don't really need to do them though, especially if you don't bother using the sword), but the rest was pretty easy. Guard/blade arms are easy, I did the heads too, but if you want all weapon options you have to do the wrists which can be done but is a pain. I tried to do the wrists and most of them came out fine but it was kind of a pain and they rotated fairly easily, the smaller magnets didn't hold well so I put a paper clip into the hand and drilled a hole just big enough for the magnet up the fore arm and pushed a magnet to the end so it holds the end of the paperclip. I'd be interested to see how yours turn out though.
-
12-07-2013, 12:20 PM #5Scout
- Join Date
- Nov 2013
- Location
- IL
- Posts
- 7
I've magnetized the weapons on my wraithlord so far and two war walkers. Those things are pretty easy with the right sized magnets. I like to use 1/8" long and 1/16" round for them and sink them nice and deep and it adds a little strength as well.
When I do the wraithknight I planed on using the pin and a magnet so it wont rotate.
-
12-09-2013, 03:45 PM #6Veteran-Sergeant
- Join Date
- Aug 2012
- Posts
- 108
In order to magnetize your wraithguard/blades you will need:
1/8" x 1/32" magnets ([url]https://www.kjmagnetics.com/proddetail.asp?prod=D201[/url])
1/16" x 1/32" magnets ([url]https://www.kjmagnetics.com/proddetail.asp?prod=D101-N52[/url])
A pin-vise or dremel with a LOW speed setting
a 1/8" brad point drill bit (the brad point is important)
a 1/16" drill bit (wasn't able to find a brad, don't think they make them)
a hobby knife
flush cutters (optional)
[URL=http://s1369.photobucket.com/user/me51/media/Mobile%20Uploads/37B62280-2A42-46A0-983A-CF3D2907854A_zpsurqiywlb.jpg.html]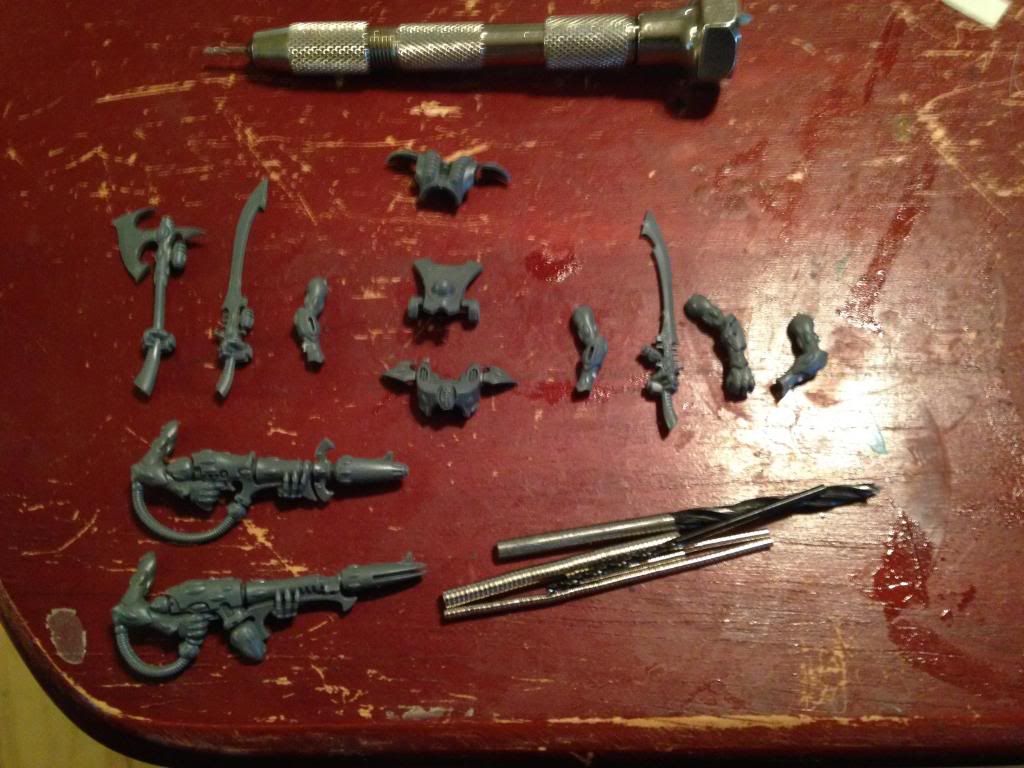 [/URL]
Take the center part of the torso, and shave off the raised area on the shoulders:
[URL=http://s1369.photobucket.com/user/me51/media/Mobile%20Uploads/4C868A67-452B-4177-B1B4-76E1660DA26A_zpsyi6hbsoe.jpg.html]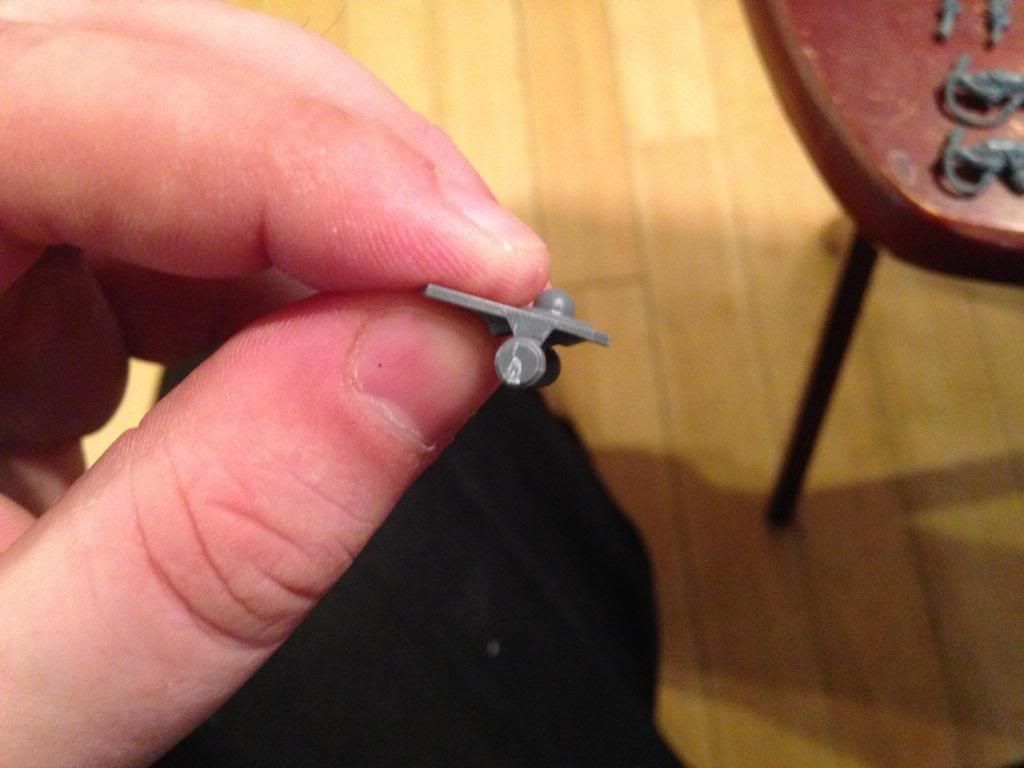 [/URL]
using your hobby knife make a divot in the exact center of the shoulder, then place the brad-point of your drill bit into the divot and make a SHALLOW hole, we want about half of the magnet to be sticking out.
after this is done, put a dot of glue in the hole and place a magnet in it, trying not to glue yourself to it. also note that this is THE ONLY MAGNET who's polarity does not matter. seriously, if you want the parts to be cross compatible then the polarity has to match from here on out, even on other models.
[URL=http://s1369.photobucket.com/user/me51/media/Mobile%20Uploads/0FD5B6C6-F8B6-42B0-B637-EB22B787AF57_zps7rfzjdl2.jpg.html]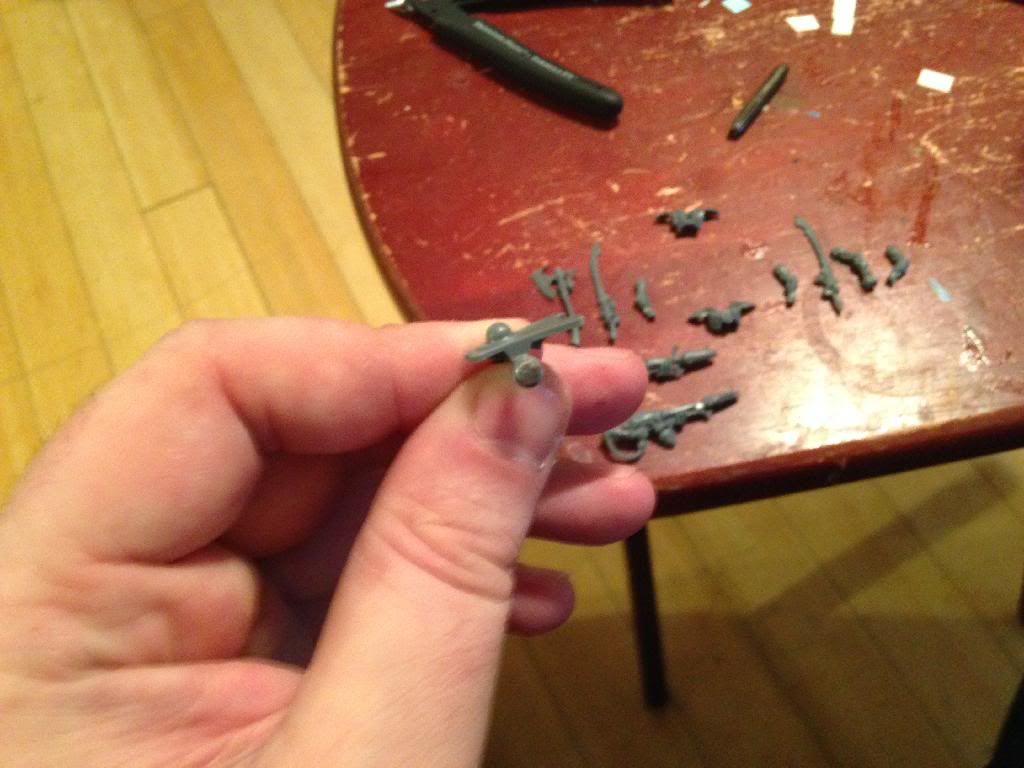 [/URL]
wash rinse and repeat on the other side, making sure that the polarity is the same, ie if the other side was positive out, this side needs to be negative out. The two magnet should attract each other from opposite sides of the torso
Now drill out and magnetize the arms, making sure that the polarity matches the correct shoulder BEFORE you glue it, it is very difficult to get the magnet out after it has been glued as you need to go a bit deeper to make sure that they are flush and not raised. This is why the brad point drill is important, it removes far less material and leaves a (mostly) flat hole. I was able to drill deep enough without having the point exit the other side of the arm.
[URL=http://s1369.photobucket.com/user/me51/media/Mobile%20Uploads/6E15A7F0-36E7-4391-A18B-CCBB921D947E_zps9hvnqefw.jpg.html]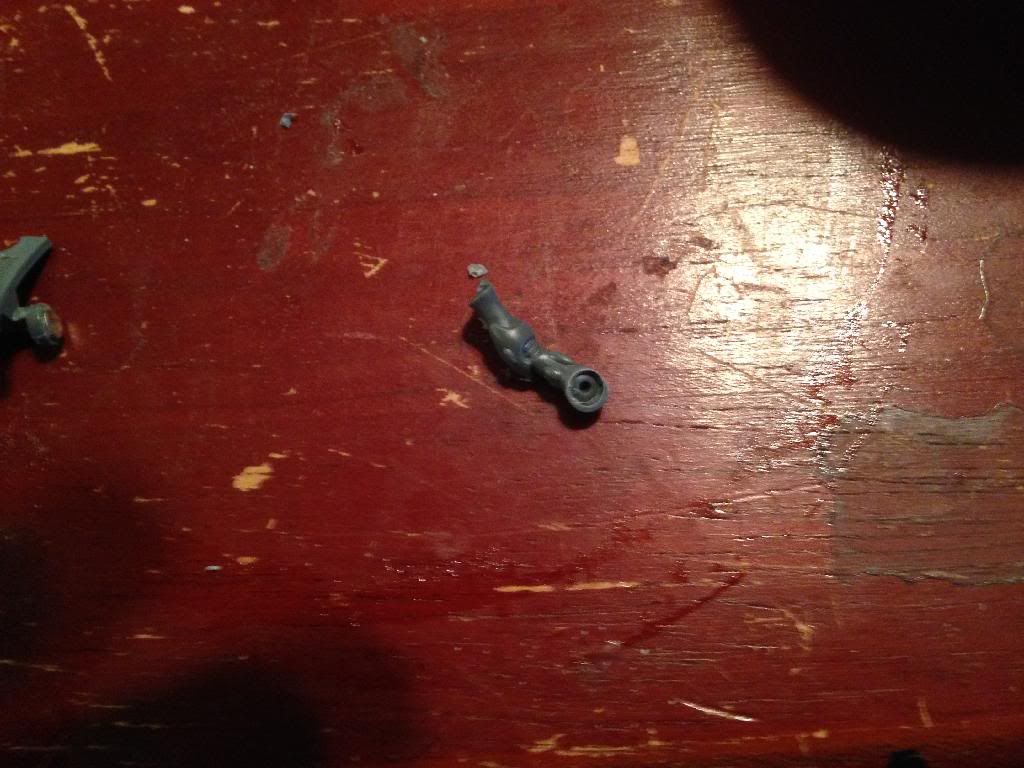 [/URL]
-
12-09-2013, 03:53 PM #7Veteran-Sergeant
- Join Date
- Aug 2012
- Posts
- 108
Keep drilling and magnetizing all the arms, as I said, checking polarity all the while.
now, for the small magnets. drill a hole at the end of each of the handless arms with your 1/16" drill, which should go pretty quick. I lied earlier, this one to, polarity doesn't matter, but it sets the stage for all the other models.
I found that its easiest to use the butt of my aluminum hobby knife to press in the 1/16" magnets as it allows me to get a flush joint without the magnet sticking to the knife. If your knife is ferrous, you will have difficulty with this.
Do the same to the melee weapons, only this time you want to trim off the "stub" of the wrist and drill only slightly into the hand to give the magnet a good hold. Do the same with the gun arms, which also has a "Wrist stub"
[URL=http://s1369.photobucket.com/user/me51/media/Mobile%20Uploads/5861DD7D-54C9-495B-AA74-A951BE727C26_zps59ollns3.jpg.html]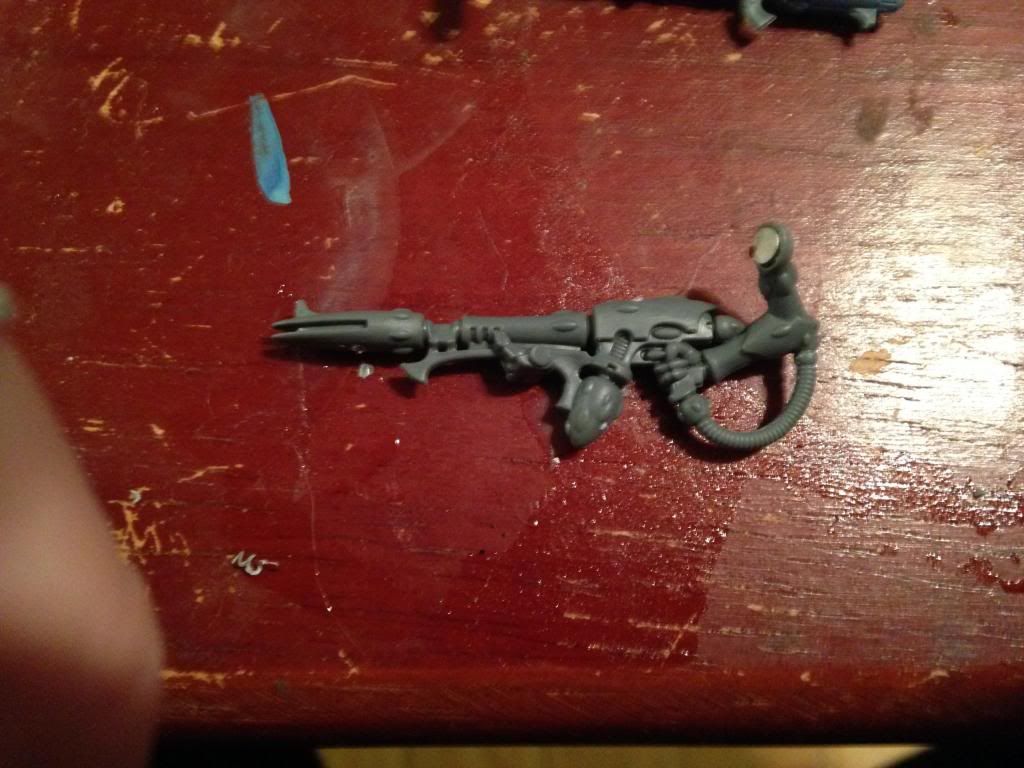 [/URL]
And with that, your done. Provided that you kept the polarity straight all pieces should be swappable with their appropriate sides, and not grab where they shouldn't.
[URL=http://s1369.photobucket.com/user/me51/media/Mobile%20Uploads/F1F6DCEC-5566-4C7C-B763-7435FD9E5392_zps86eftdom.jpg.html]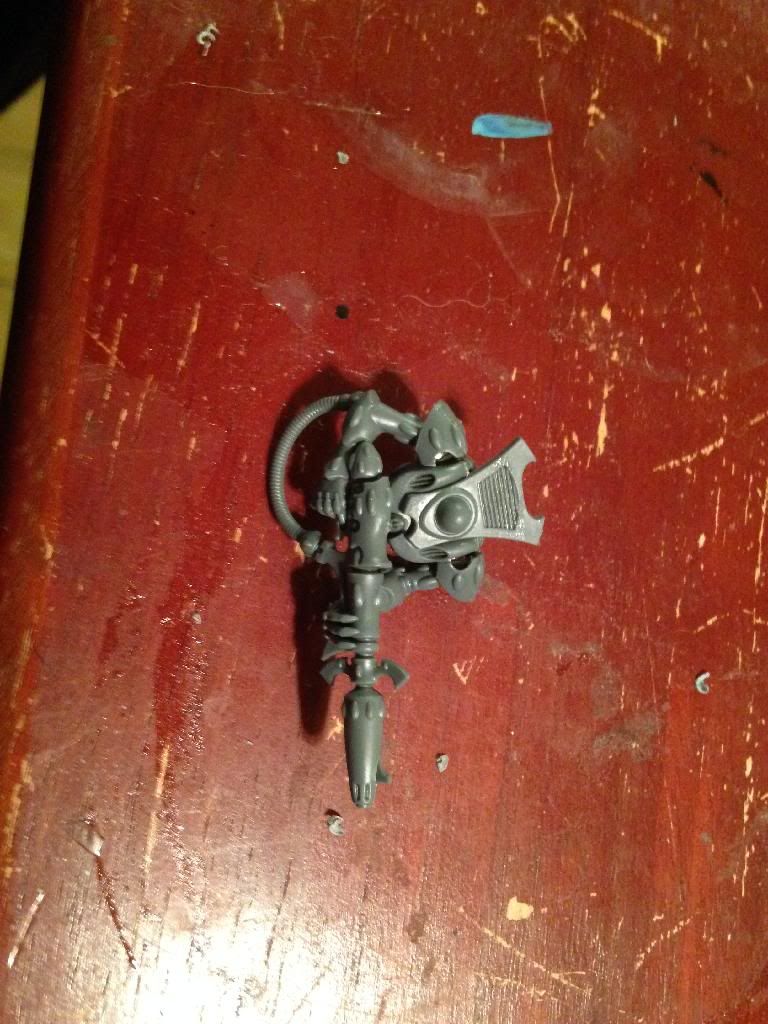 [/URL]
[URL=http://s1369.photobucket.com/user/me51/media/Mobile%20Uploads/FCF2C21C-E6F5-4D65-B97E-1471A2B05BE3_zpsfepxylkg.jpg.html]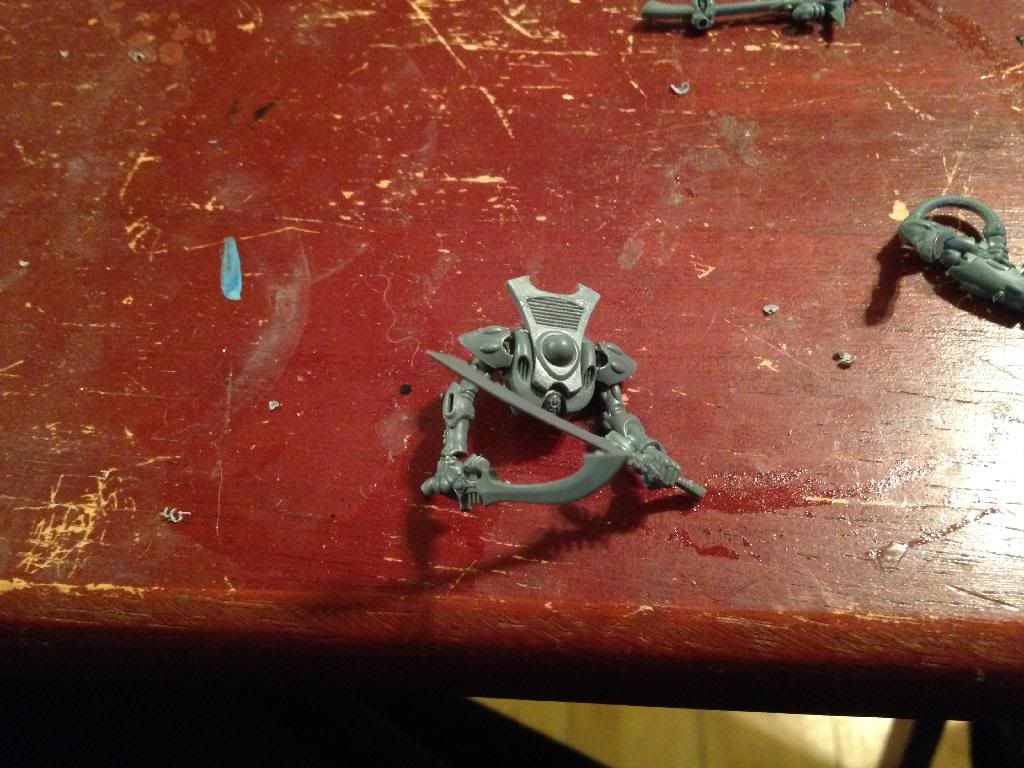 [/URL]
[URL=http://s1369.photobucket.com/user/me51/media/Mobile%20Uploads/CBAF0FB4-B908-4552-B1DB-83C80327CAF4_zpsbtiy7lzc.jpg.html]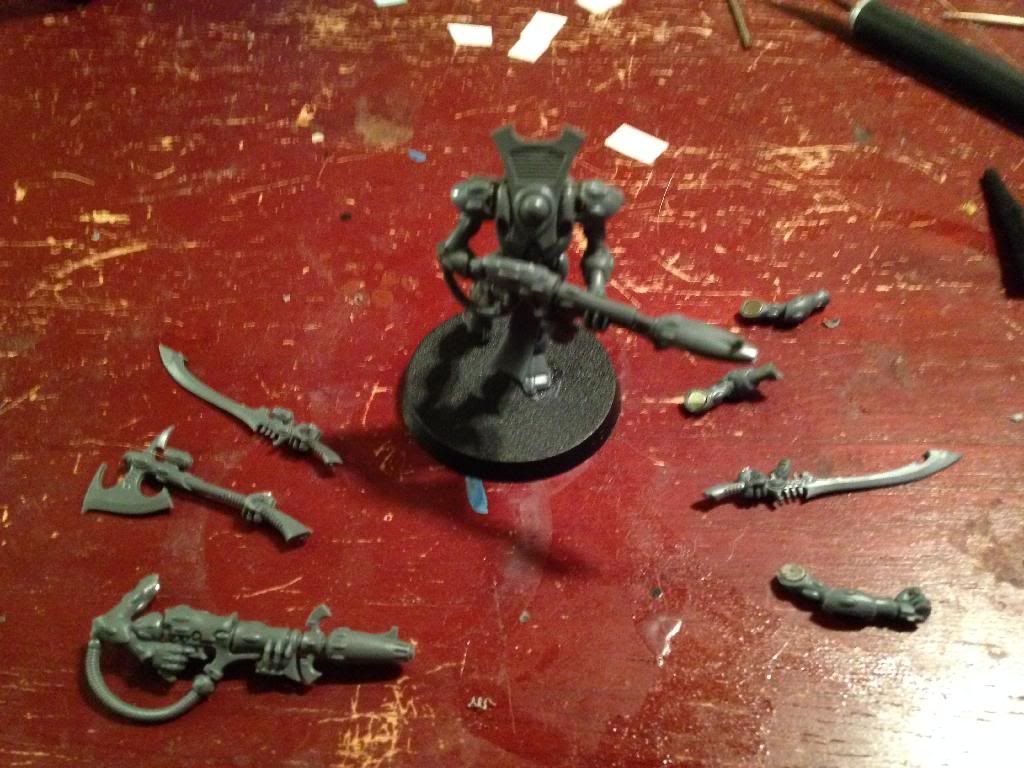 [/URL]
-
12-10-2013, 05:39 PM #8Veteran-Sergeant
- Join Date
- Aug 2012
- Posts
- 108
In stead of drilling out the shoulder joints, I have taken to cutting them off and just placing the bagnet in the depression on the torso, the arms on the guns fit cleaner this way.

 Reply With Quote