

So as I may have said numerous times in the past, I suck...
Loads of promises that take forever to fulfil if at all, however I have been doing some bits and pieces, although still need to finish off the banshee/wyche I've been doing.
In the meanwhile I felt this was appropriate as Tyranids are nearly upon us, I figured I'd show you some very quick and easy way to convert spore mines (as it seems you can only use the old spore mini models at present).
So to begin with, any good sculptors lays out his plan of attack (minimising all accidents and failed ninja skills with scalpels):
First stage: find artwork, doesn't matter if you use it or not, get an exceptionally clear idea of what you want to sculpt and what it should look like, for myself I've gone with the artwork from the current (soon to be last) Tyranid codex, as you have at least 13 spore mines on the front cover artwork, each one different and wonderfully organic in design.
Second stage: coffee break.
Third stage: Pick an appropriate putty, in this instance green stuff is ideal, its super sticky quality is ideal for loads of pushing, pulling, twisting and dragging actions to give some good organic and squishy shapes for the spore mines.
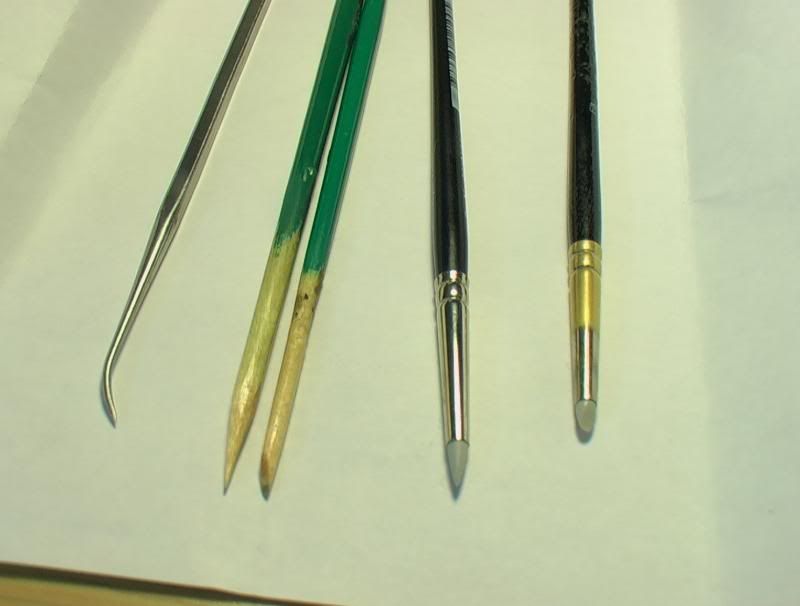
Fourth stage: The business end of sculpting tools, normally I can guess which tools I'll be needing with this project.
Fifth stage: Getting down to actually doing something (I know, I'm as shocked as you are).
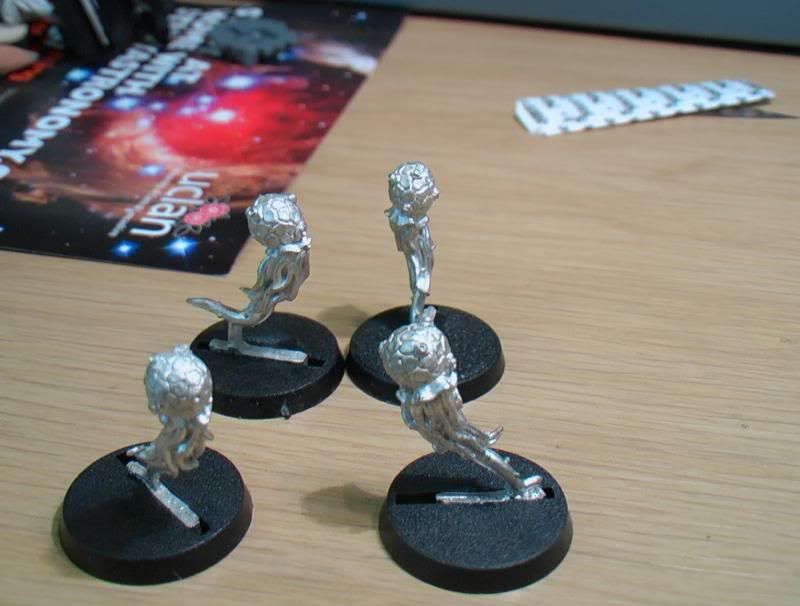
So for this stage because I'm lazy and also want to actually make use of some old minis that I have, but don't like (no offence to the original sculptor, but they just don't do anything for me or fit what I associate with the mines themselves). So I will be using this as a dolly, or close enough, it saves loads of time in making armatures by providing me with a nice solid base to work over, it also means I can complete an entire spore mini in one sitting, no drying time before doing more bits, no waiting around.
BoLS Lounge : Wargames, Warhammer & Miniatures Forum
Results 1 to 7 of 7
-
01-05-2014, 01:38 PM #1Chaplain

- Join Date
- May 2011
- Location
- Under your bed
- Posts
- 297
 Make your own spore mines (TUTORIAL).
Every saint has a past, every sinner, a future.
Make your own spore mines (TUTORIAL).
Every saint has a past, every sinner, a future.
-
01-05-2014, 01:45 PM #2Chaplain
- Join Date
- May 2011
- Location
- Under your bed
- Posts
- 297
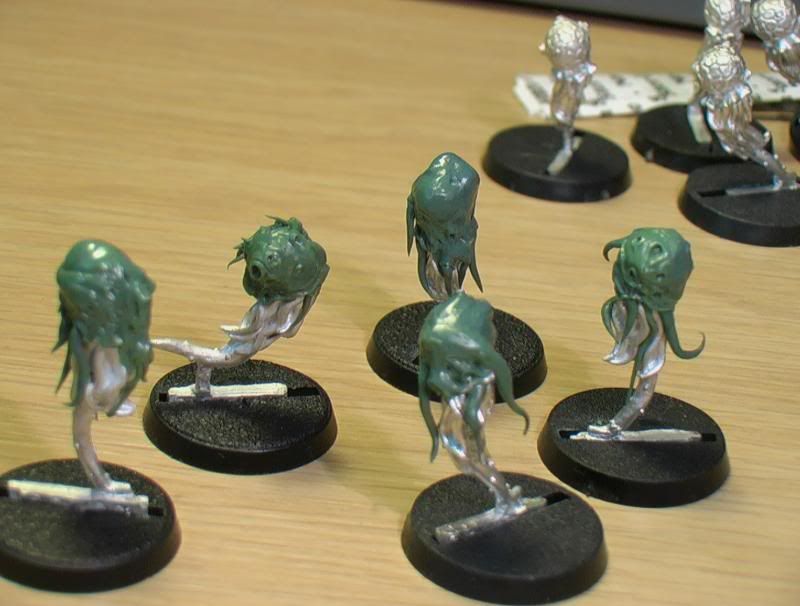
And in the words of every Blue Peter presenter ever, here's one (five) I made earlier...
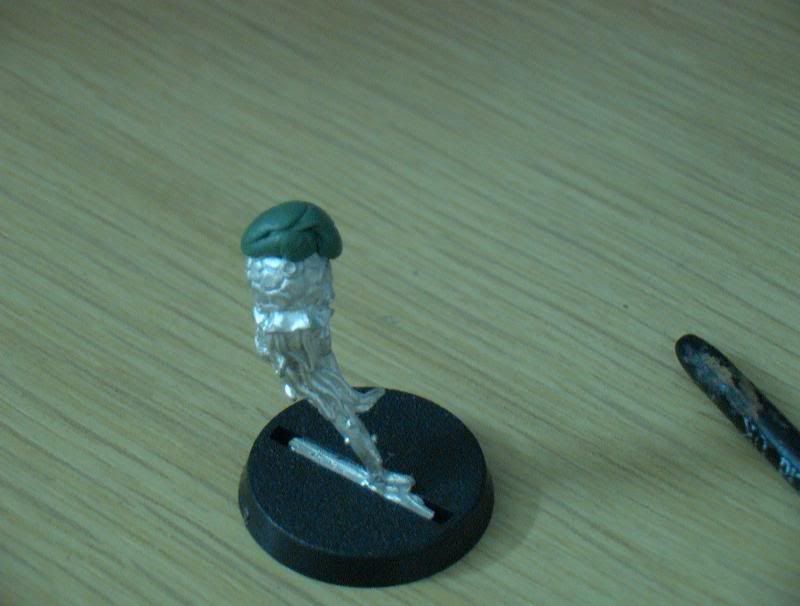
Sixth stage:
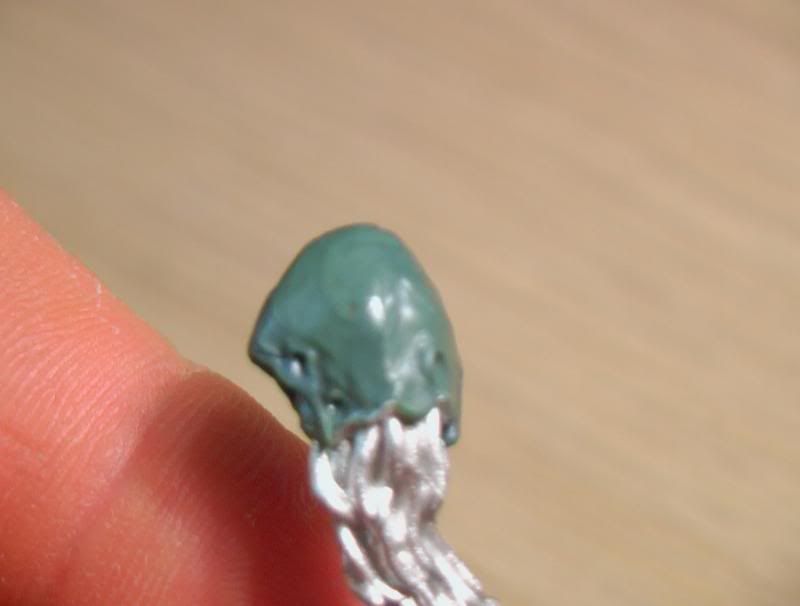
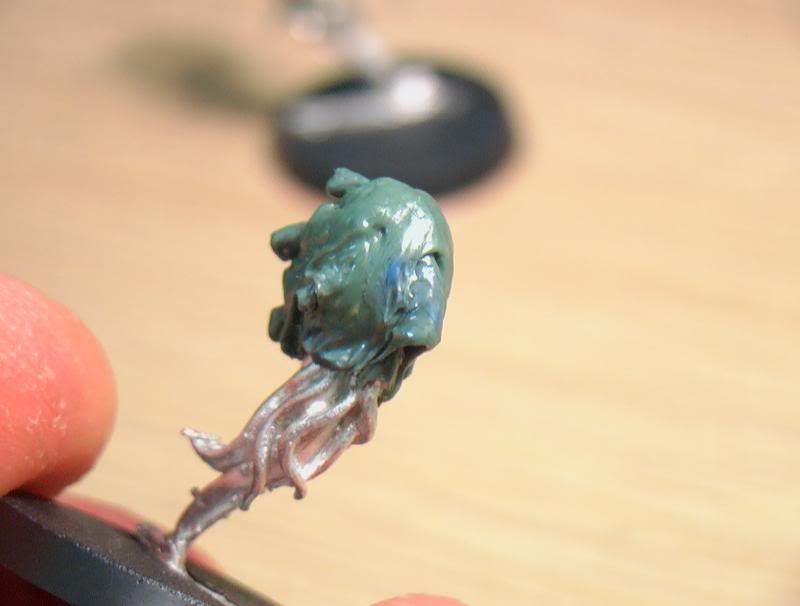
First thing is first, cover the old mine bodies over with green stuff, I start from the top of the mine and push the putty downwards to towards the tutu (ok so it's probably supposed to be some sort of membrane, but I don't care, it looks like a tutu and I'm looking at making a swarm of giant, evil space bugs, not misunderstood, overgrown insects with a penchant for Swan lake and a desire to overcome their insecurities and come out of their collective shells.
/rant
Anywho...the advantage for pushing down is you can better judge the area of work and organise the overall shape of the mine more effectively, before adding detail and realising you've made a terrible mistake. The other advantage of this is, by using a flat tipped clay shaper and the green stuff, is the push/pull motions will actually begin to make texture, especially if you're overly zealous with the motions.
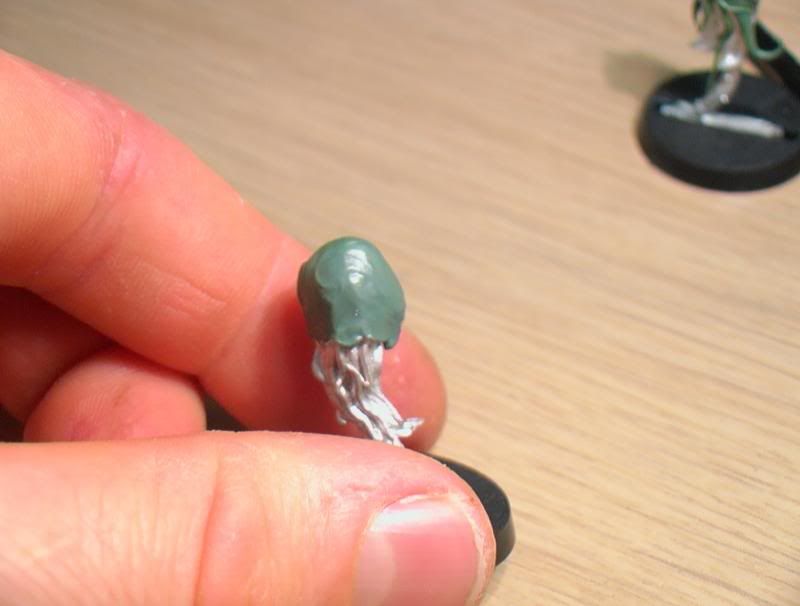
After this, I then use a bullet tipped clay shaper and the metal tool that looks remarkably similar to the ones dentists are fond of sticking in your gums before telling you, you don't floss enough to push in holes to the material. It's not as simple as just poking it, it's always worth pulling on the inside of the holes to create a raised edge and pressing lightly around the outside to define the area (and make a little more texture).
 Every saint has a past, every sinner, a future.
-
01-05-2014, 01:46 PM #3Chaplain
- Join Date
- May 2011
- Location
- Under your bed
- Posts
- 297
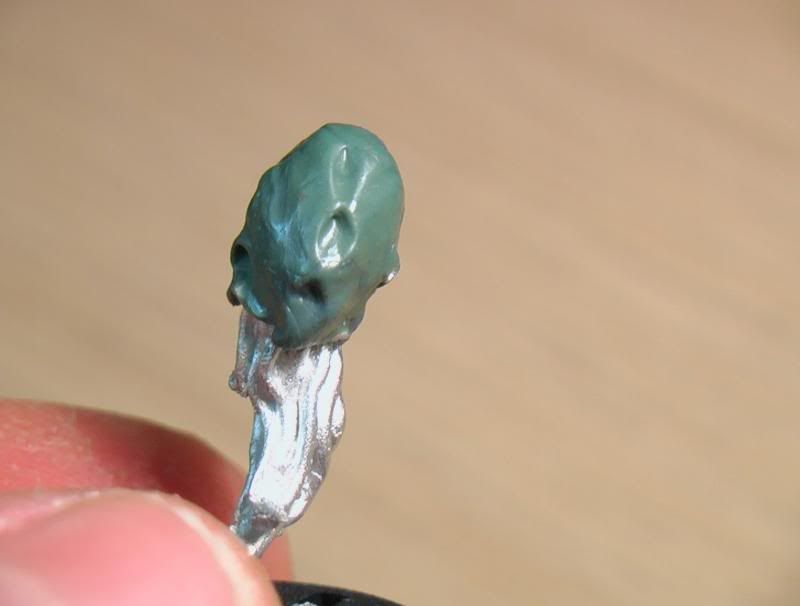
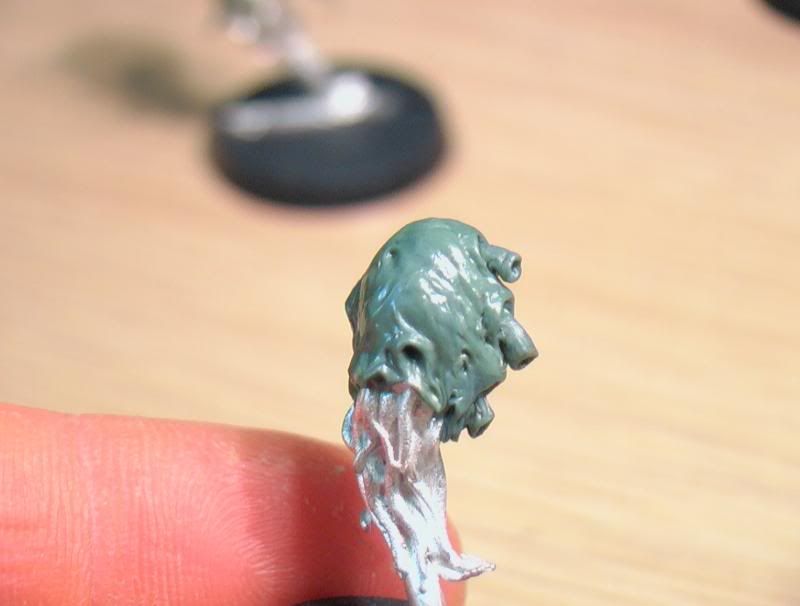
Even at this stage (particularly if you're in a warm environment) the green stuff will be slowly beginning to harden and will certainly be more sticky, this is a blessing, use it. Ways of doing this include actually using the clay shaper to lift folds and funnels and pull it away from the body to create new shapes.
From here on, once you've gained a little more shape, you can then start using the thin metal tool to really begin to create finer detail and shape. I even push small sausage shaped pieces of green stuff into the larger holes to create breathing like appendages or propulsion systems.
 Every saint has a past, every sinner, a future.
-
01-05-2014, 01:47 PM #4Chaplain
- Join Date
- May 2011
- Location
- Under your bed
- Posts
- 297

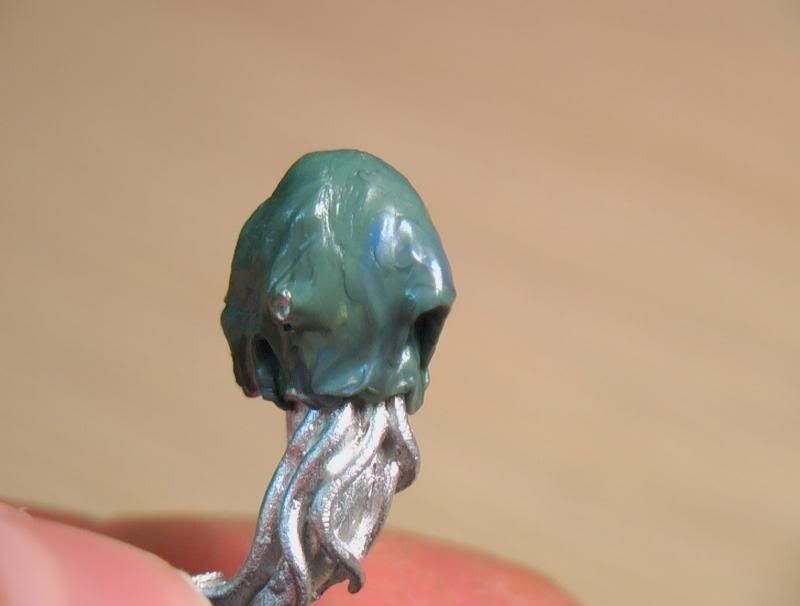
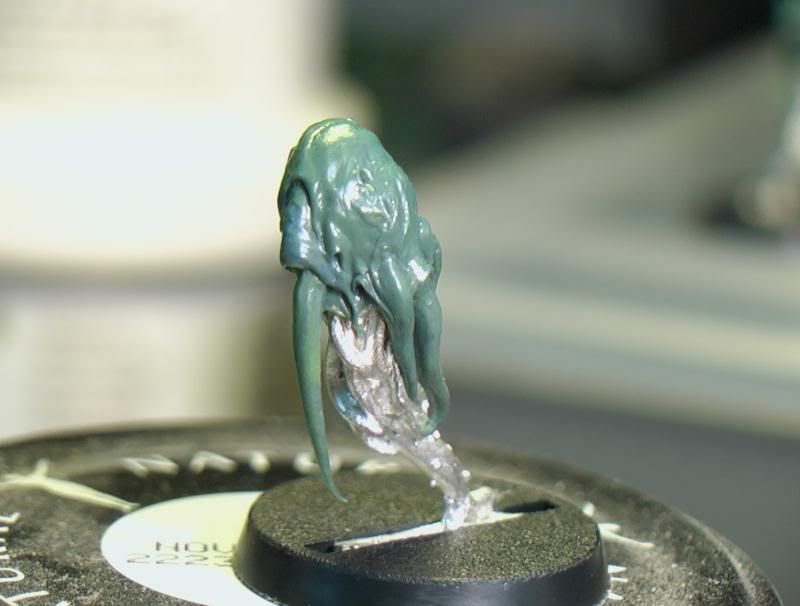
Now follows an extension of the previous stage, with some of the larger holes along the back I add much longer tubes and press the narrow ends in, leaving the wide ones facing outwards as this allows me to make holes and pits in them.
Now is the time for finishing the piece by adding in large tentacles/proboscis/weird droopy thingies, this is to add a little more variety to the overall model and to hide/blend the mix between them and the metal ones already there (so it doesn't look like some horrific cut and shut). This is also an opportune time to play a little more with the green stuff and use the tools above to play a little more with shapes and textures (you never know what you can do until you give it poke with something sharp).
I particularly like the wooden tools for this sort of work as it's perfect for bone, growths, organic textures, teeth, horns, etc. It's a happy medium between metal tools and clay shapers as they're easy to make (mine done from old paintbrushes), I just use some corse sand paper to make suitable shapes and then a layer of varnish to hold everything together.
 Every saint has a past, every sinner, a future.
-
01-05-2014, 01:49 PM #5Chaplain
- Join Date
- May 2011
- Location
- Under your bed
- Posts
- 297
[url]http://img.photobucket.com/albums/v697/N-large/Tyranid%20Gribblies/AUT_1909_zpsbb812b04.jpg[/url]
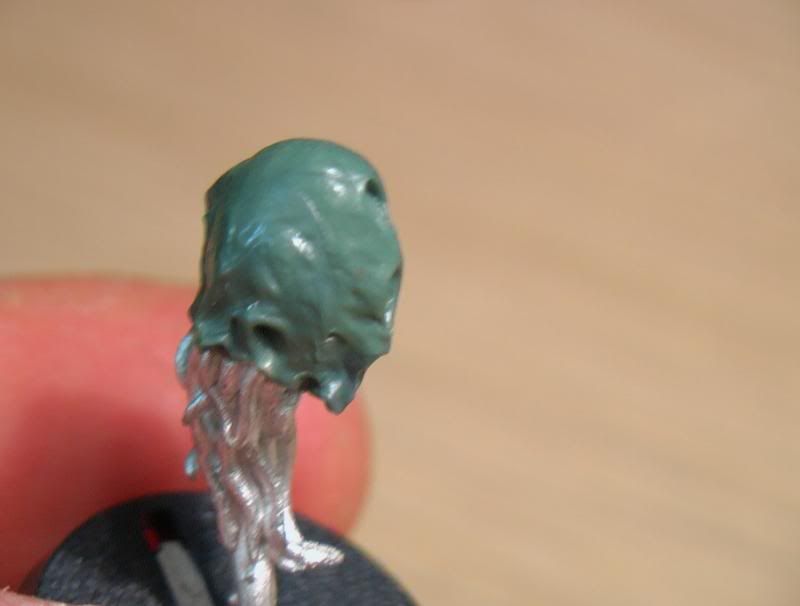
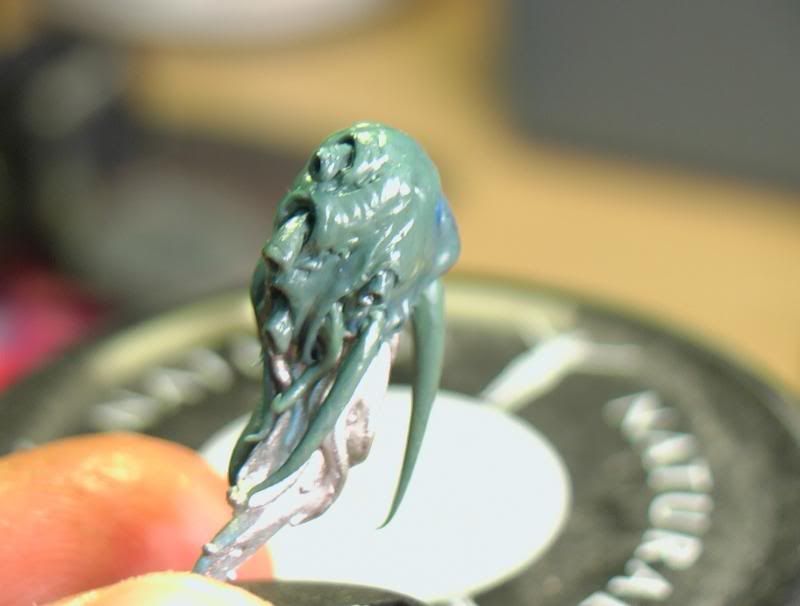
As I mentioned earlier, the benefit of the source artwork I've been using as at least 13 different spore mines on it, all of which I've already incorporated into these six. It's also exceptionally easy to do and sculpting just the one I've done here has taken me 27 minutes and that includes pausing to take the photos above as well as diving to get to my camera as it makes that ominous "beep" "beep" or "I'm going to switch off before you can get to me" noise.
[URL=http://smg.photobucket.com/user/N-large/media/Tyranid%20Gribblies/AUT_1910_zpsed2ca52b.jpg.html]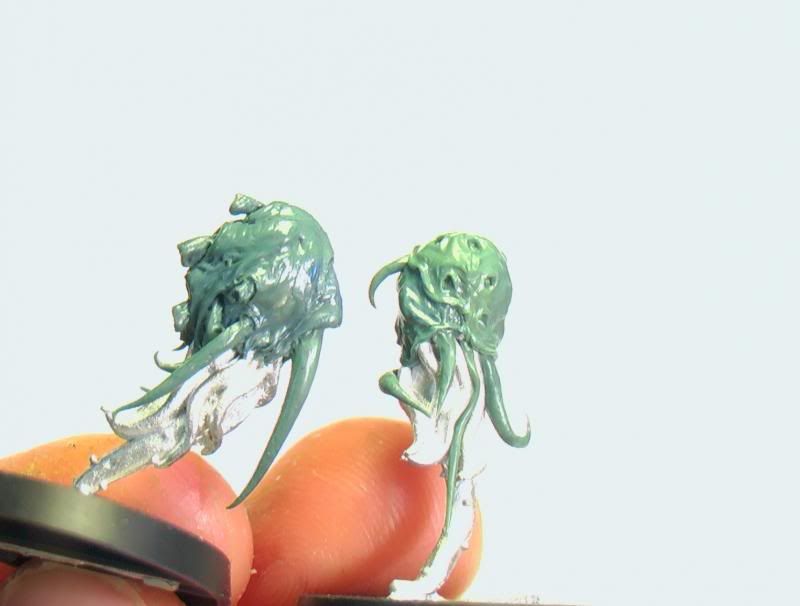 [/URL]
[URL=http://smg.photobucket.com/user/N-large/media/Tyranid%20Gribblies/AUT_1912_zps6d51c7a3.jpg.html]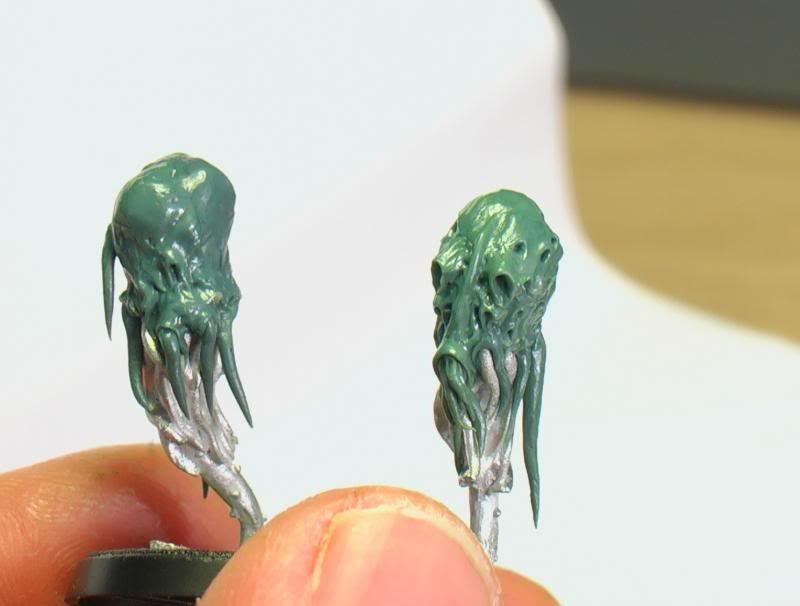 [/URL]
[URL=http://smg.photobucket.com/user/N-large/media/Tyranid%20Gribblies/AUT_1911_zps8a92b72a.jpg.html]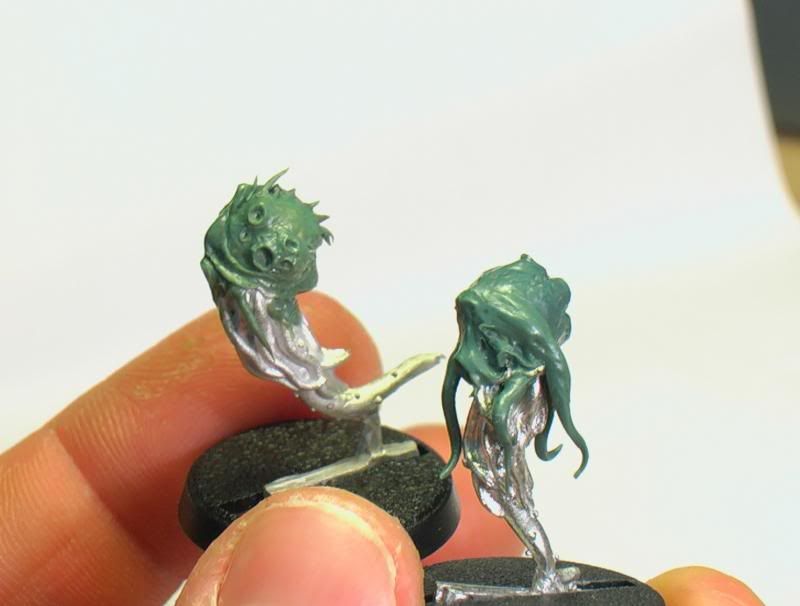 [/URL]
Last edited by Build; 01-05-2014 at 03:18 PM.
Every saint has a past, every sinner, a future.
-
01-05-2014, 02:45 PM #6Chaplain
- Join Date
- Mar 2012
- Location
- Stratford Ontario
- Posts
- 309
Your not allowed to say you suck!
Those are some nasty looking Tyranid snotballs, I love how you brought the art to life.
Also interesting to turn old paintbrushes into tools. Do you just sand/chizel/carve them into the shapes you want?
-
01-05-2014, 03:17 PM #7Chaplain
- Join Date
- May 2011
- Location
- Under your bed
- Posts
- 297
Just bog standard sand paper from your local store (grade 120) cheap as anything and very good at quickly shaping, though I would recommend using a high grade (240) at the end, just to smooth out the tool a little.
Every saint has a past, every sinner, a future.


 Reply With Quote
