

A Beginner's Guide: How To Scratchbuild a Servo Arm
Ahoy-hoy, ladies and gentlemen. Apparently I'm back with another one of these.
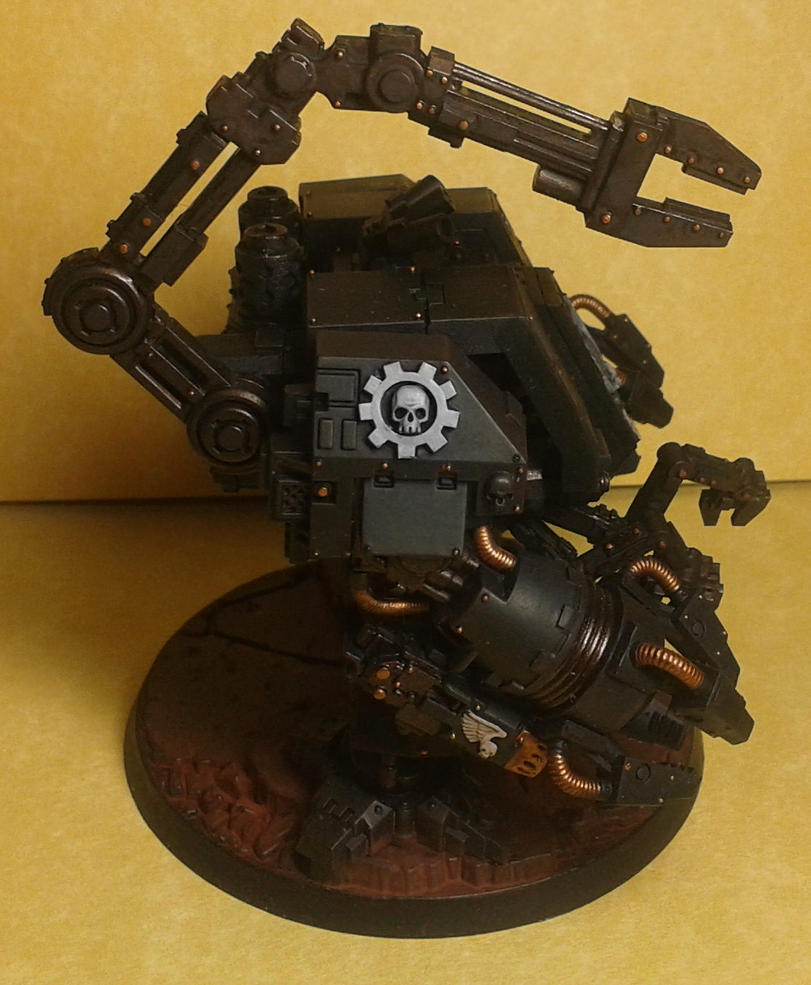
As you may know, I am in the process of creating a Preheresy Iron Hands army using only GW components and scratchbuilding because I love Heresy-era stuff and FW prices are bonkers. So, this week's Beginner's Guide to Scratchbuilding is going to be of use to Iron hands players, as well as those of you who fancy yourselves Mechanicus Magi and Big Meks. I will be showing you what is literally one of the simplest scratchbuilds you can do: a Servo Arm. It takes under fifteen minutes to get the core piece built (although obviously, greebling will take longer) and once you've made a few, you can start to adapt the design for all sorts of things everything from bionic limbs to walker legs. I've used it when scratchbuilding some AdMech Castellax, so trust me when I say it's a versatile design.
The Tools You Will Need.
This week it's incredibly simple:
- Poly Cement.
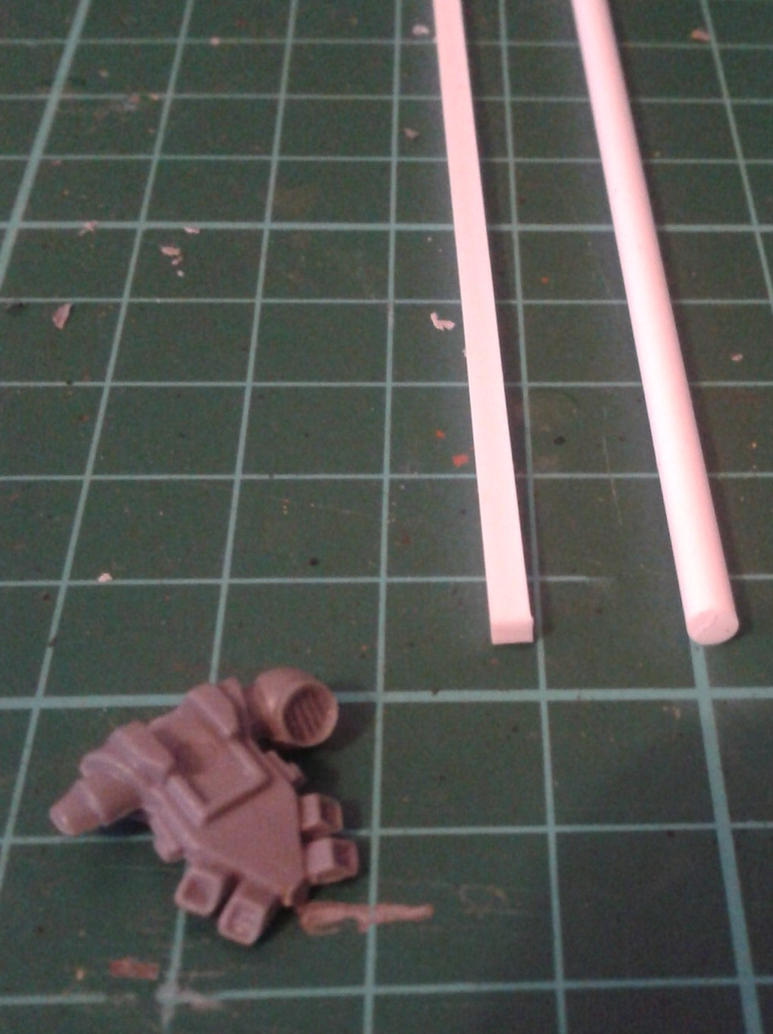
- A length of square styrene rod, about 3mm x 3mm.
- A length of cylindrical styrene rod, about 5mm diameter.
- Other thicknesses of styrene rod for greebling and sundry details.
- A small piece of thick plasticard.
- Your craft knife.
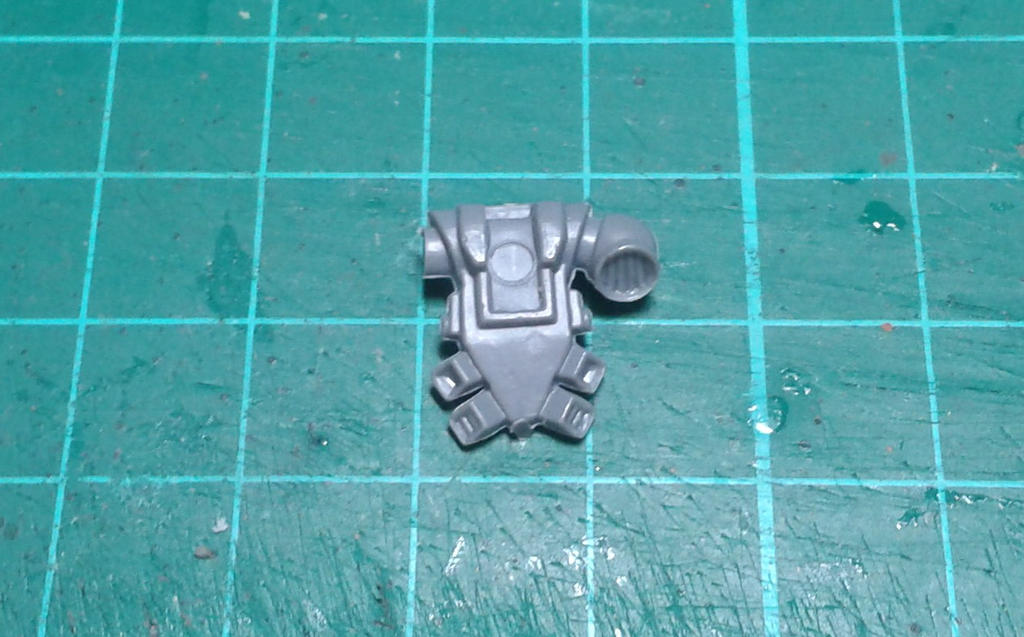
- A Space Marine backpack (if you want to make it for a Techmarine). I've used one of the missile launcher ones I had going spare, but honestly any backpack will do.
How To Scratchbuild a Servo Arm
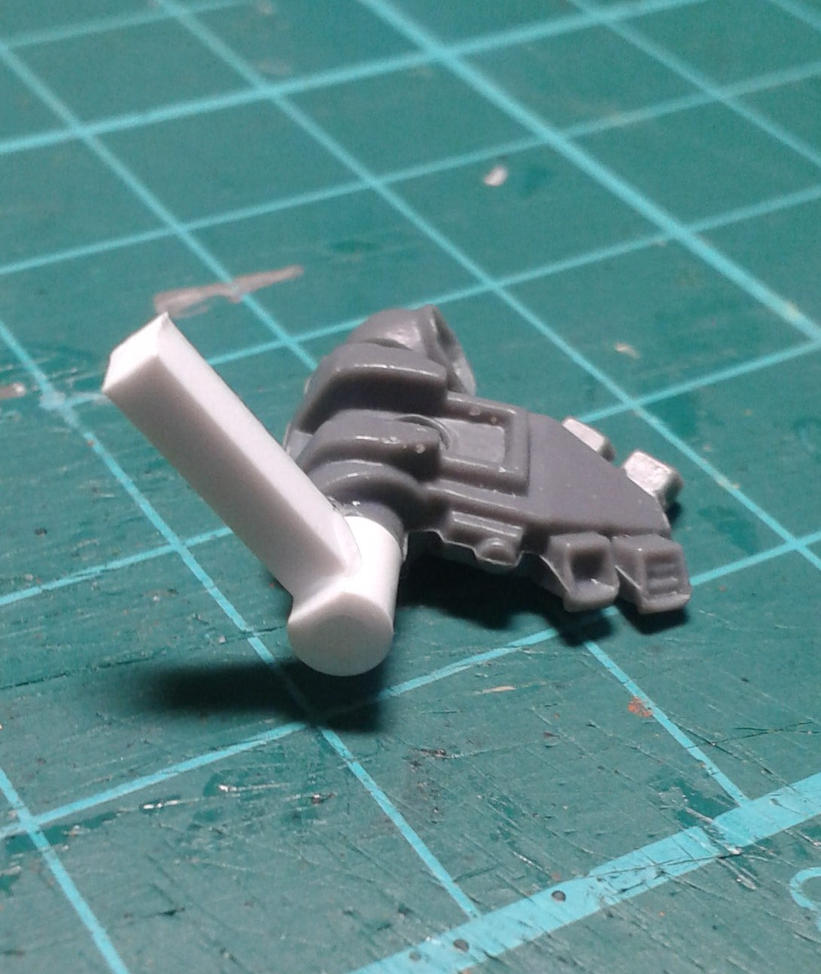
Cut one of the vents off your Marine backpack.
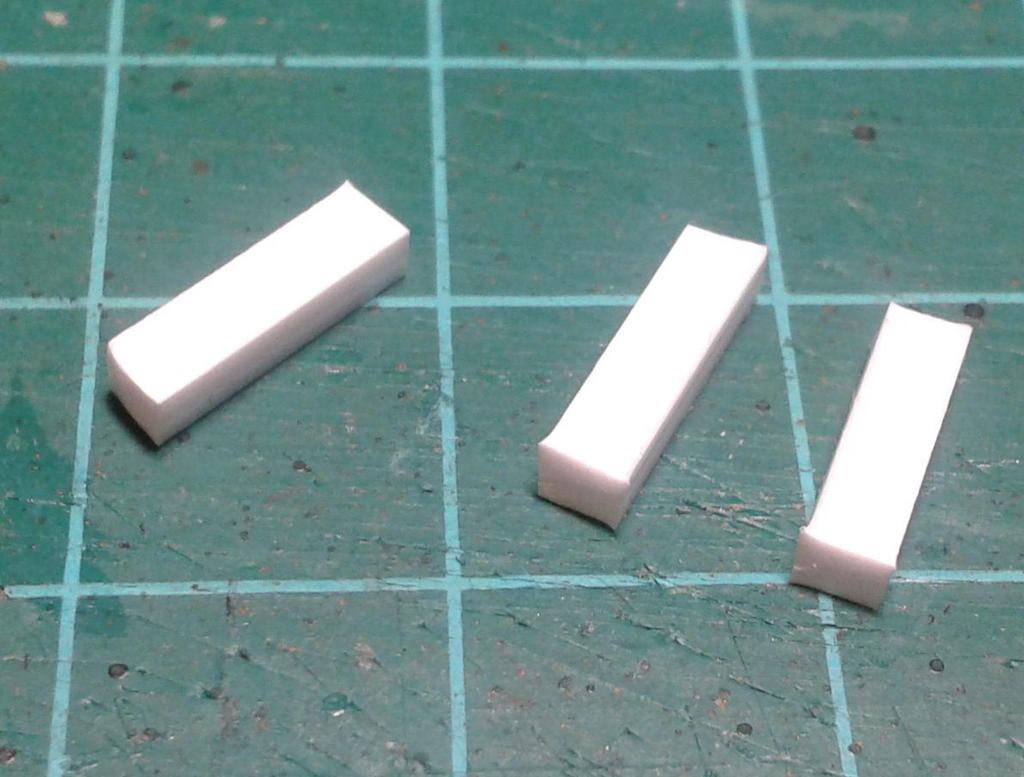
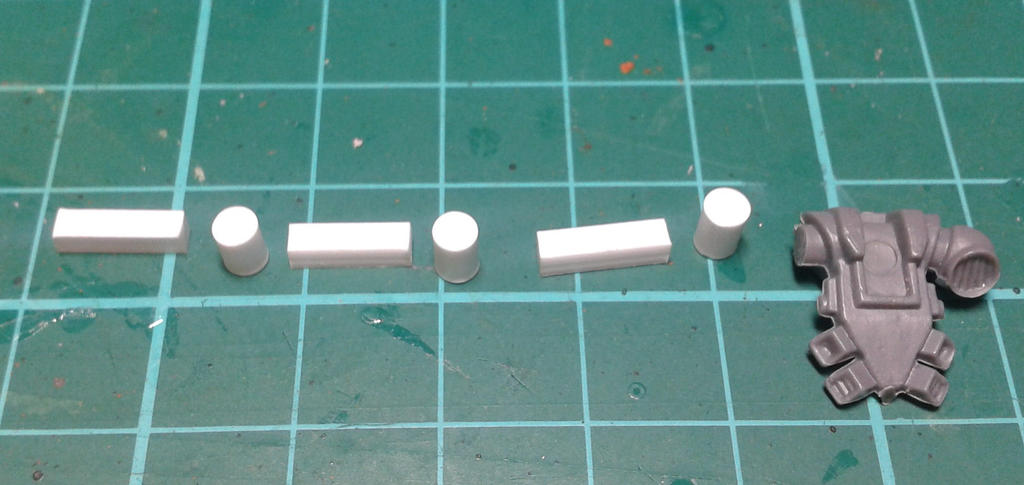
Cut three lengths of the square rod. They should be about 8mm or so long if they're going on a Marine.
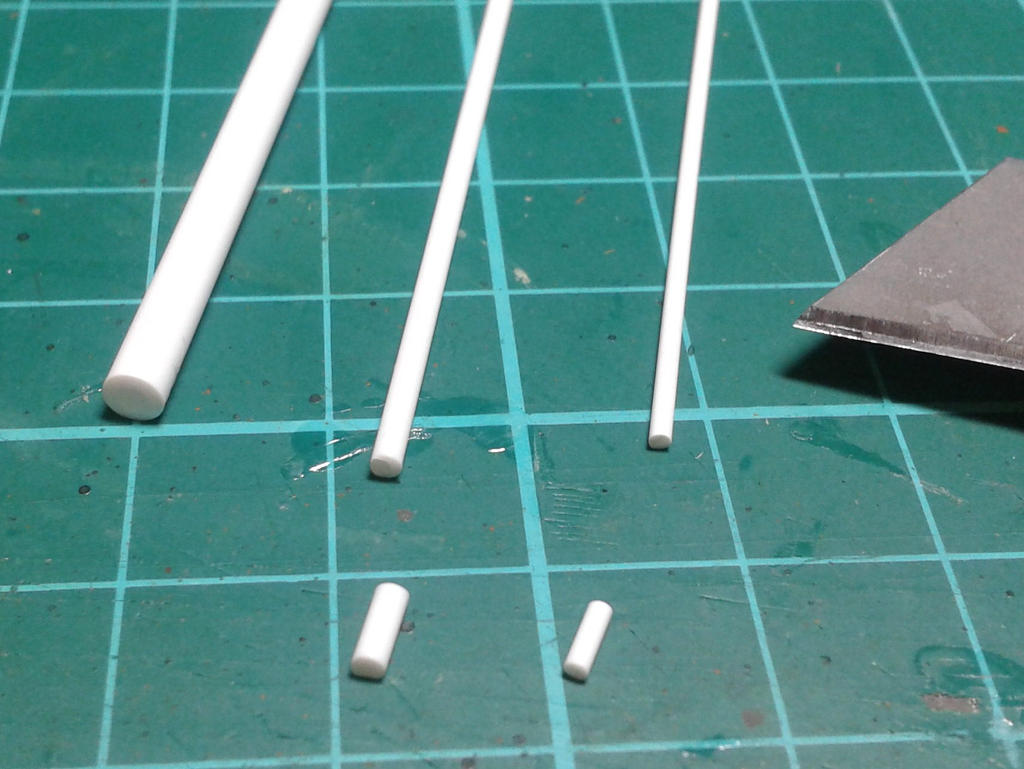
Using the 'roll score crack' technique we learned during my Heavy Bolter tutorial, cut three lenths of cylindrical rod. They should be only slightly thicker than the width of the square rod.
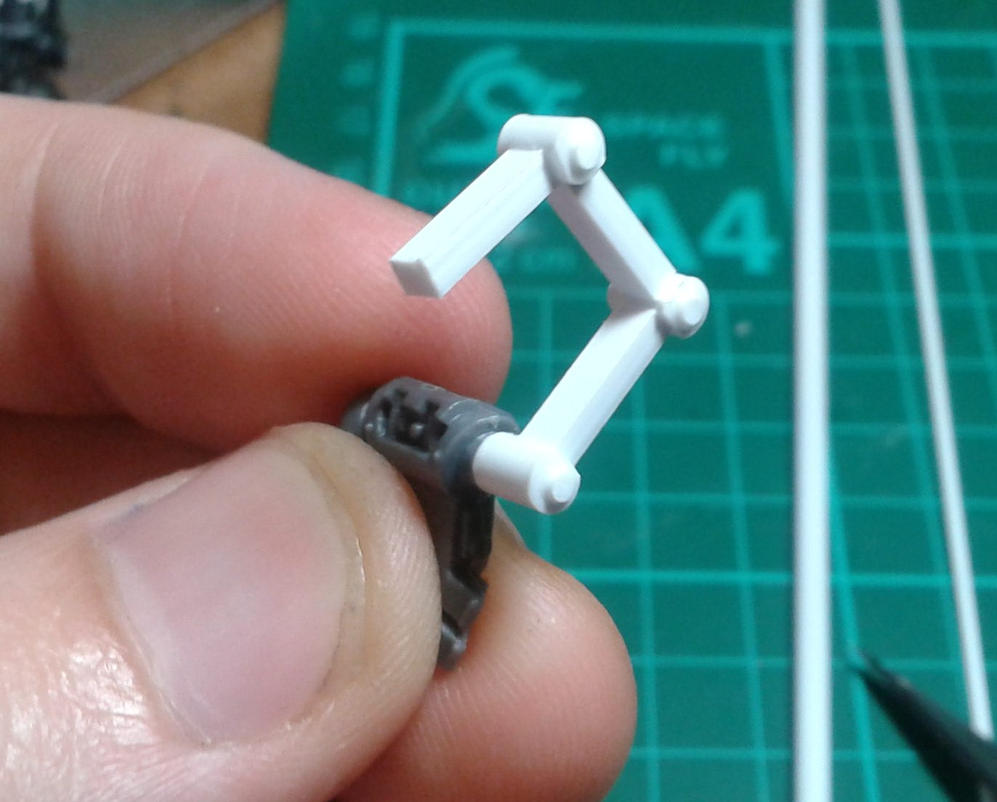
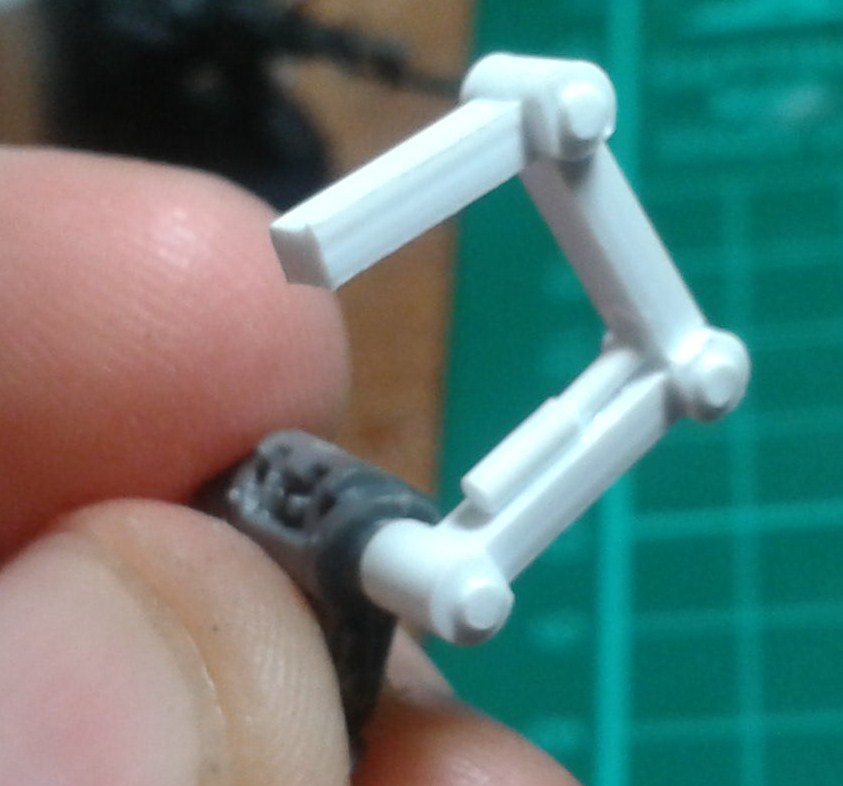
Arrange your pieces I'm sure you can see how this is going to work already.
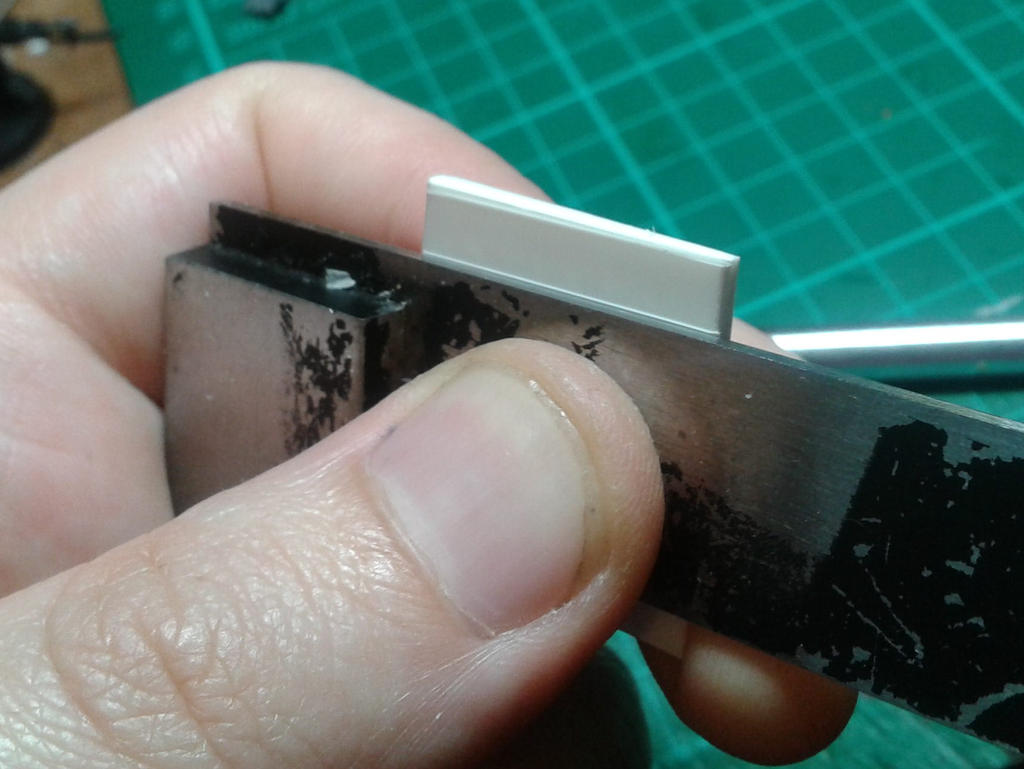
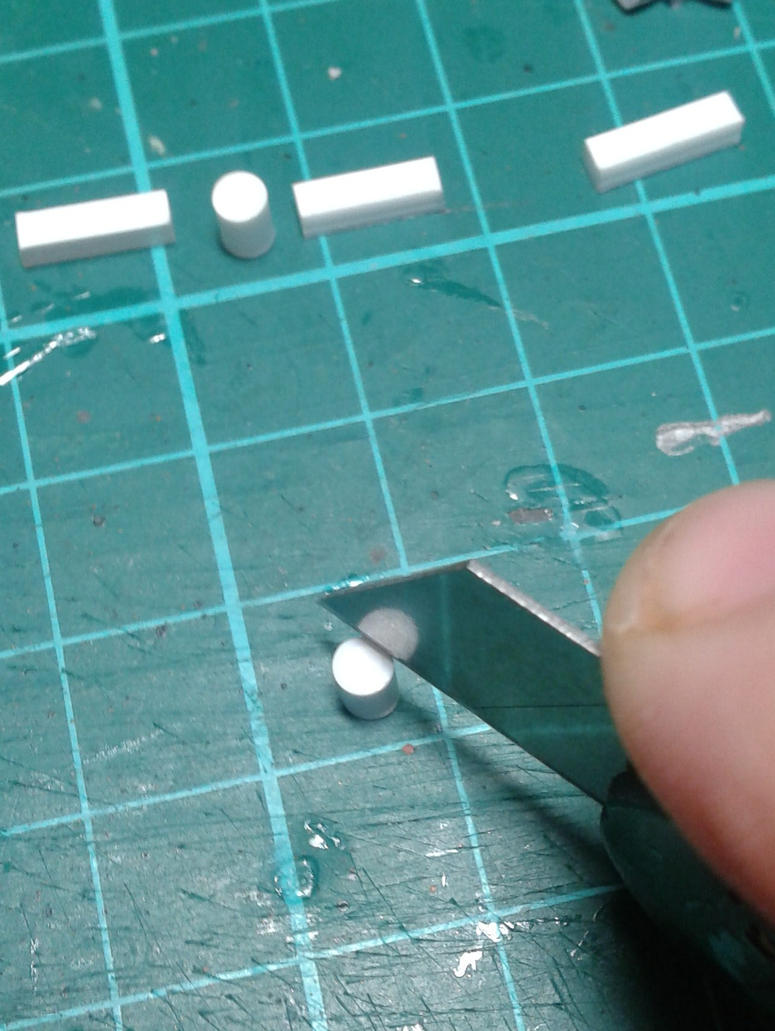
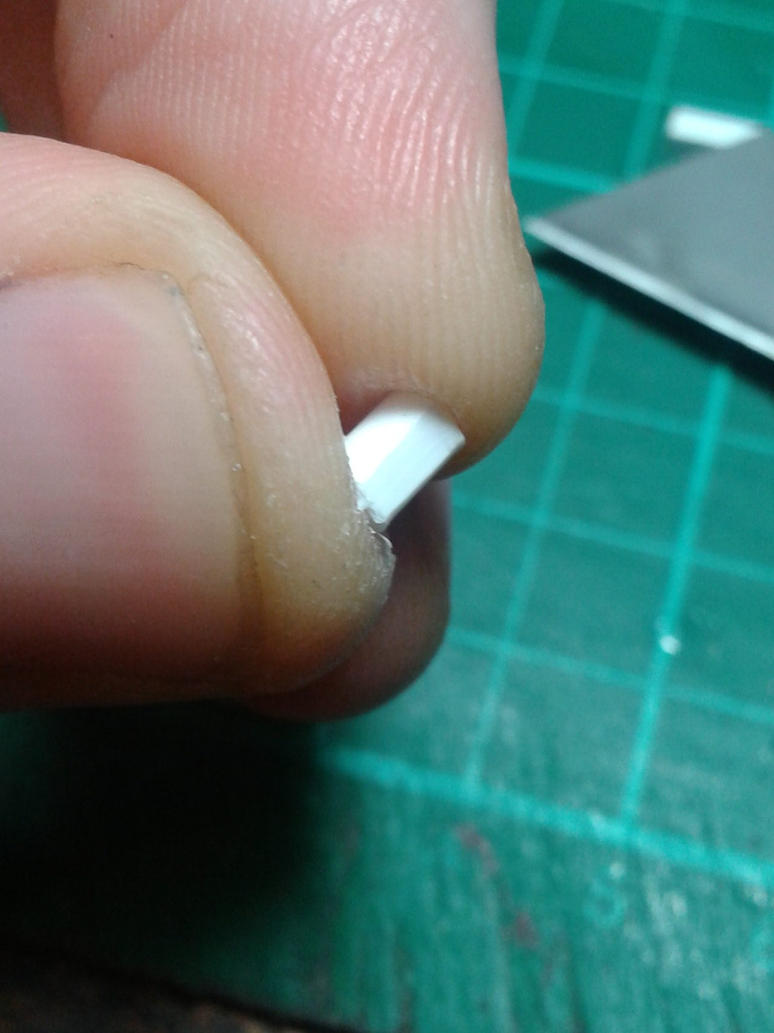
Next, carefully shave down on your cyclindrical pieces like so. USE BOTH HANDS! As always, the photo is to show you the position your blade should be in. I cut using both hands. Remember to always be cautious with what you cut away here it's better to cut a little and take away more than to cut away too much and have to start again. Less wasteful too.
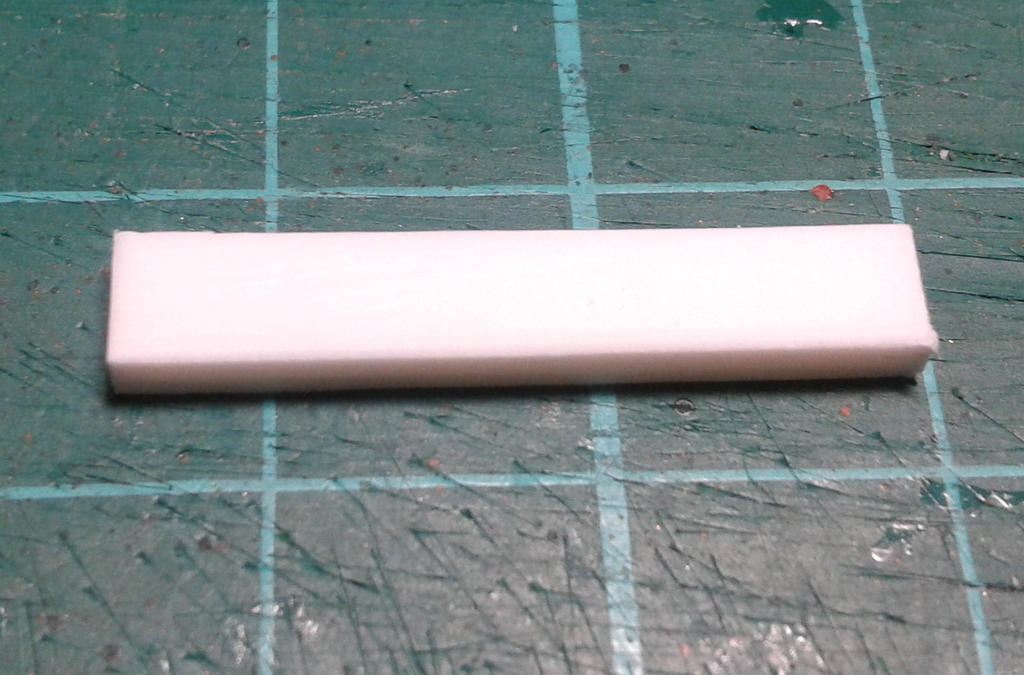
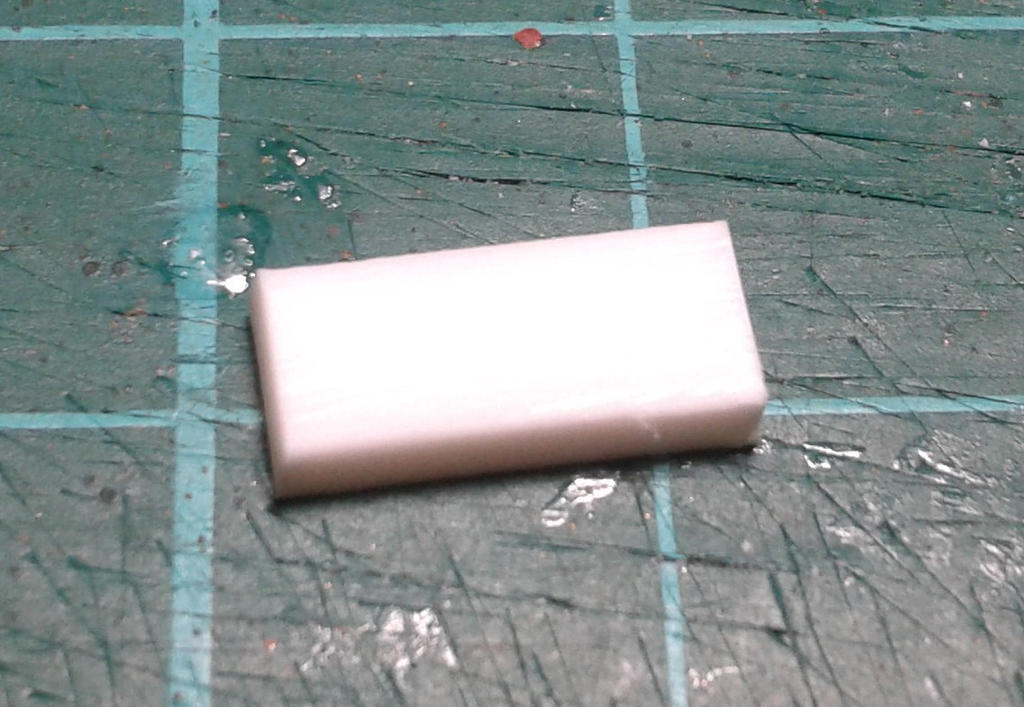
Here's the kind of flat surface you want. You may have to use the 'blade sanding' technique we learned in the Heavy Bolter tutorial to get it flat and level.
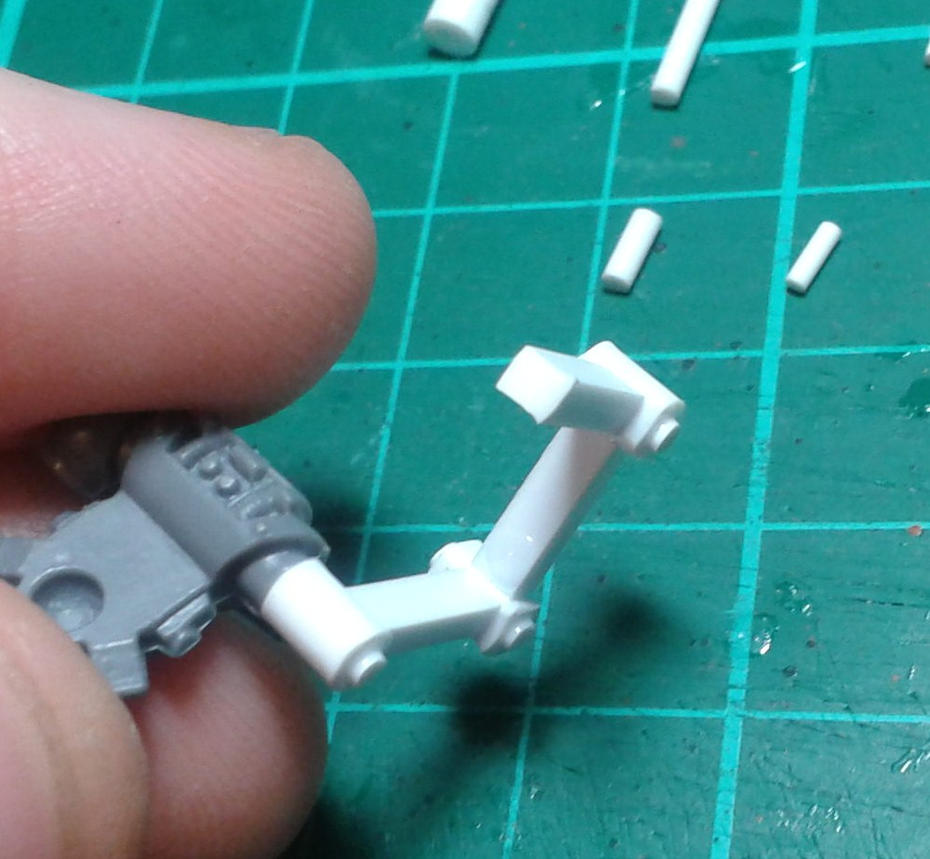
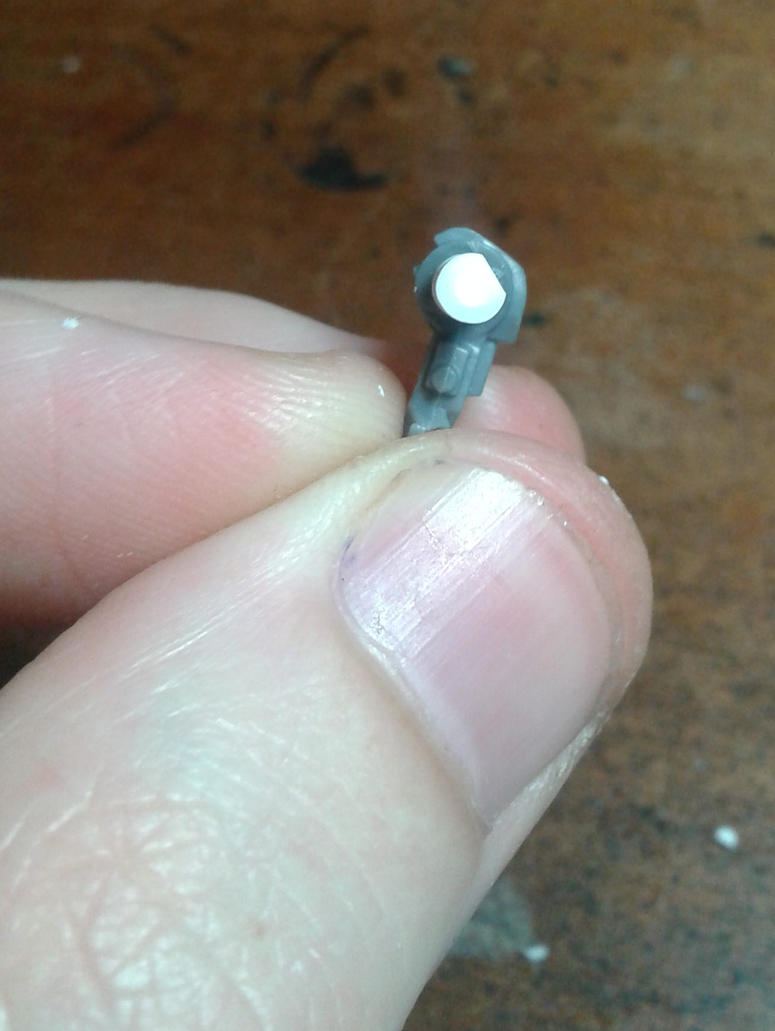
Next, glue it in place:
As always - more when I get a reply!
BoLS Lounge : Wargames, Warhammer & Miniatures Forum
Results 1 to 10 of 18
-
05-22-2014, 10:22 AM #1First-Captain

- Join Date
- Dec 2012
- Posts
- 1,997
 A Beginner's Guide: How To Scratchbuild a Servo Arm
AUT TACE AUT LOQUERE MELIORA SILENTIO
A Beginner's Guide: How To Scratchbuild a Servo Arm
AUT TACE AUT LOQUERE MELIORA SILENTIO
-
05-22-2014, 01:51 PM #2Occuli Imperator
- Join Date
- Jul 2009
- Location
- Mercia
- Posts
- 18,062
Moar!
Fan of Fuggles | Derailment of the Wolfpack of Horsemen | In girum imus nocte et consumimur igni
-
05-22-2014, 01:56 PM #3Veteran-Sergeant
- Join Date
- May 2013
- Posts
- 216
I was beaten to the punch! =)
-
05-22-2014, 02:08 PM #4First-Captain
- Join Date
- Dec 2012
- Posts
- 1,997
Gentlemen: my thanks to you both.
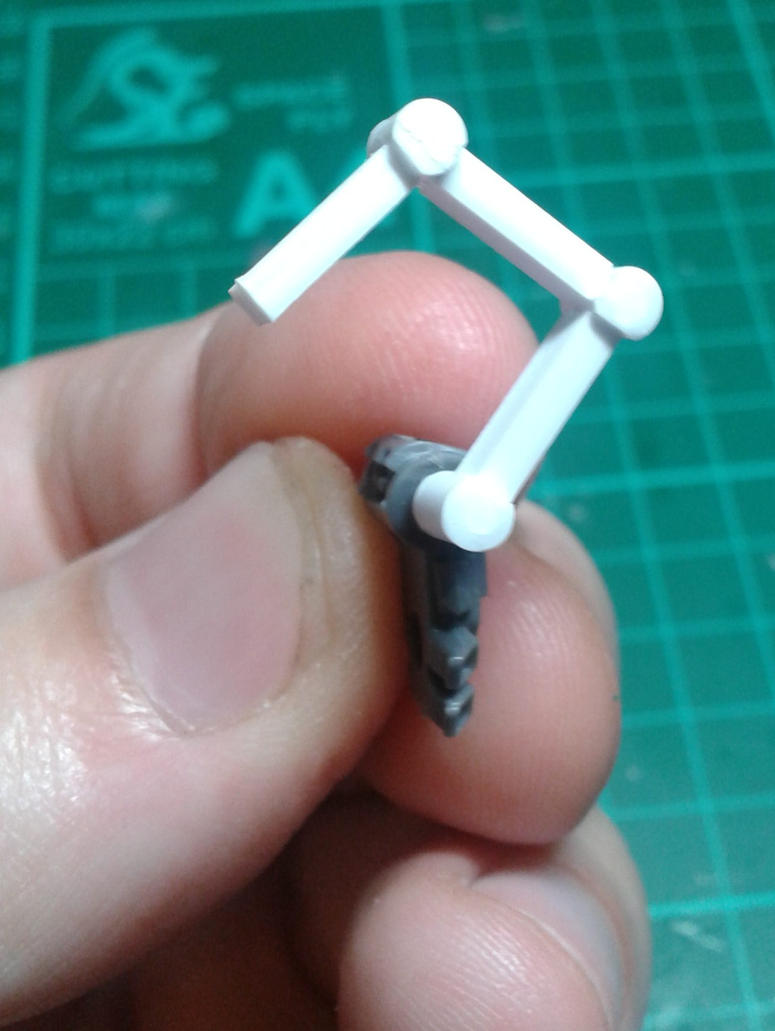
And attach the first 'arm' section.
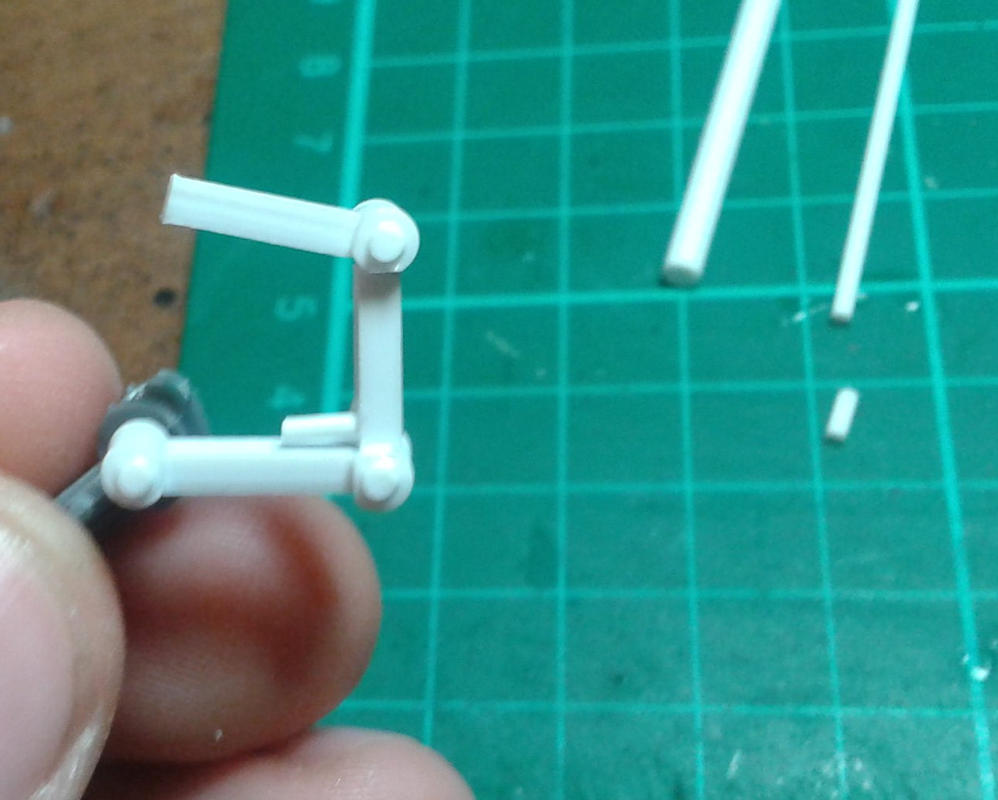
Carefully shave down the other cylindrical sections, taking care to do two for each rather than one, and assemble your arm! Remember where you place the flat sections will affect the final position of the arm. I find it best to keep the flat sections between 90 and 120 degrees or so, but you might have your own ideas. If so, go with what you like. Obviously
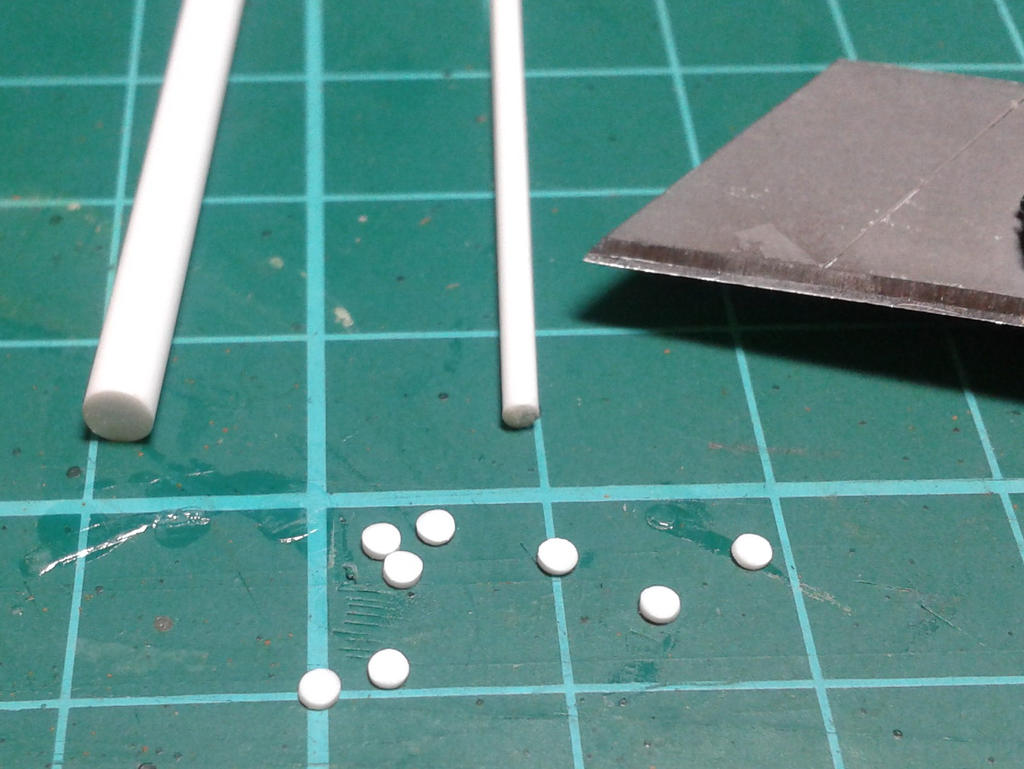
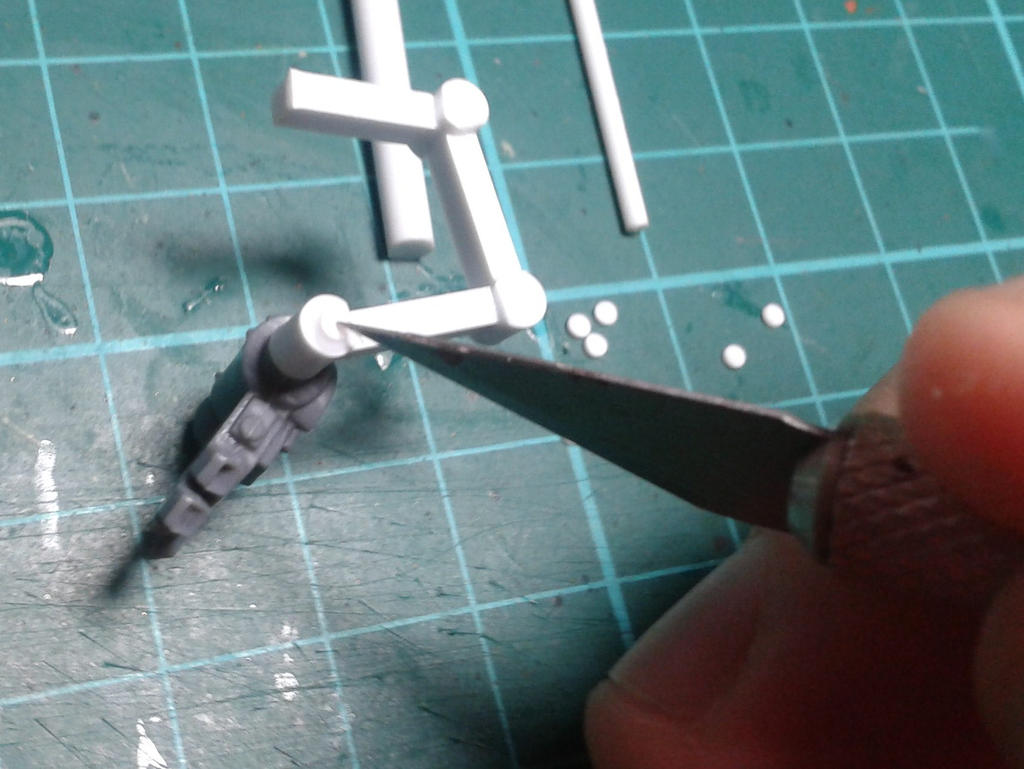
Next, a little greebling it's not necessary, but I like to use this technique, as it maintains the illusion that the 'joints' are still cylindrical. Cut a few 'cucumber slices' off a slightly narrower piece of styrene rod
Then, using your scalpel, apply them to either side of the joints as a kind of cap.
Here's the finished piece so far as you can see, the little detailing just adds a little more suggestion of robotics.
Now, you may want to add a piston here you don't have to, but they look pretty good.
To do so, you'll need two different thicknesses of cylindrical rod each thinner than the 'joint' rod. Cut off two short sections like so:
Next, add a dot of glue to the underside of the middle 'arm' piece, like so:
Place the tip of the thin rod into the glue don't worry about getting it perfect.
More when there are replies!AUT TACE AUT LOQUERE MELIORA SILENTIO
-
05-22-2014, 02:14 PM #5Brother-Sergeant
- Join Date
- Jul 2009
- Location
- Las Vegas
- Posts
- 71
More details, dammit! We must be shown the PPPrecioussss servo arms!
-
05-22-2014, 02:19 PM #6First-Captain
- Join Date
- Dec 2012
- Posts
- 1,997
I am happy to provide.
Glue the thicker piece as shown, and use the tip of you scalpel to move the pieces around until they are straight, level, and looking like a piston.
Now to make the claw. You can basically add anything to the end of these arms, but the claw is the classic look, so that's what we're going to do now.
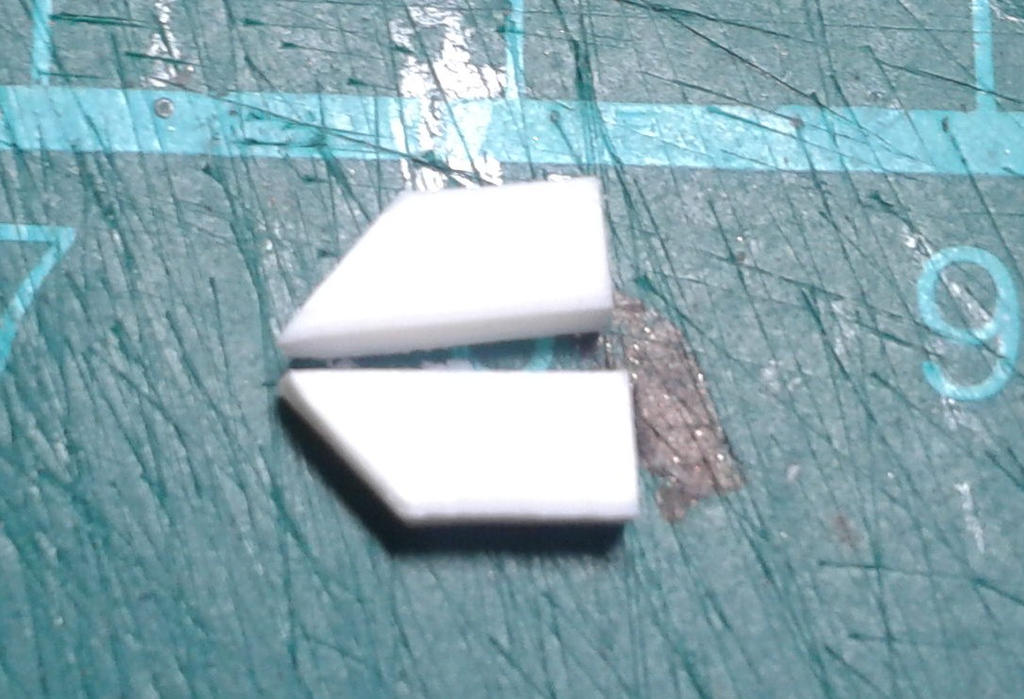
Start by measuring your small piece of thick plasticard you're going to want to get a rectangular piece about 3mm high x 10mm long:
Next, measure 3mm or so from opposing ends, like so:
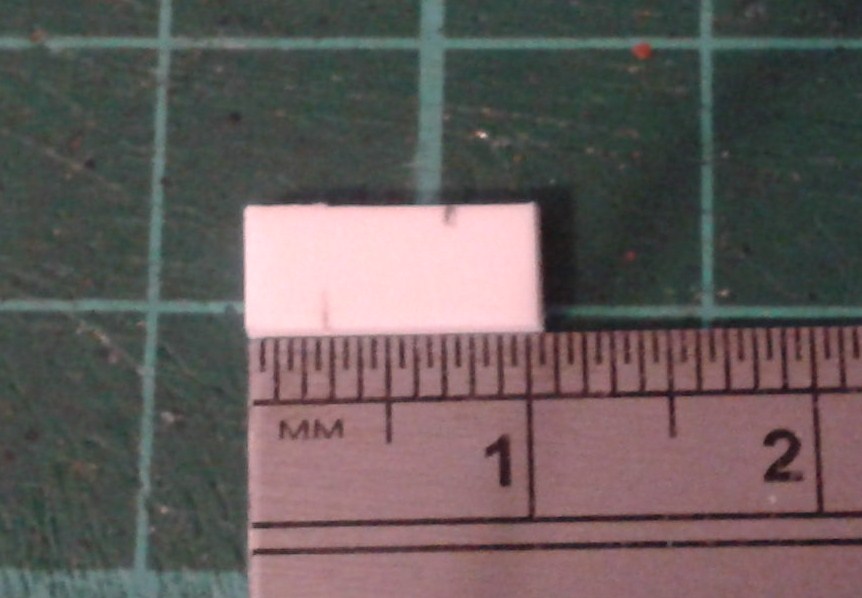
The aim is to create a diagonal!
Once you've measured, place your blade so that it touches both marks, and cut.
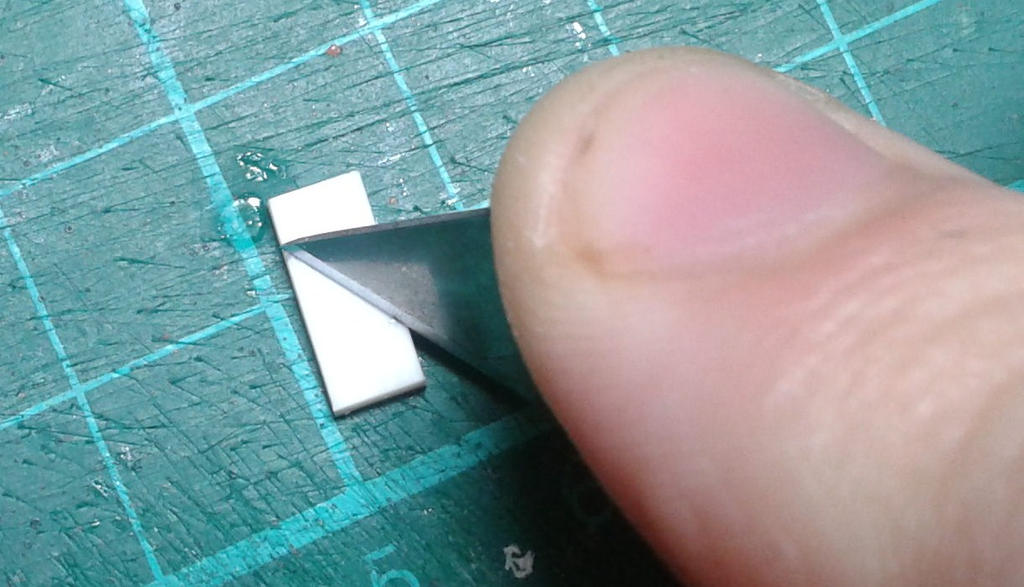
You may find that one 'claw' is a little longer than the other just trim them down so they match.
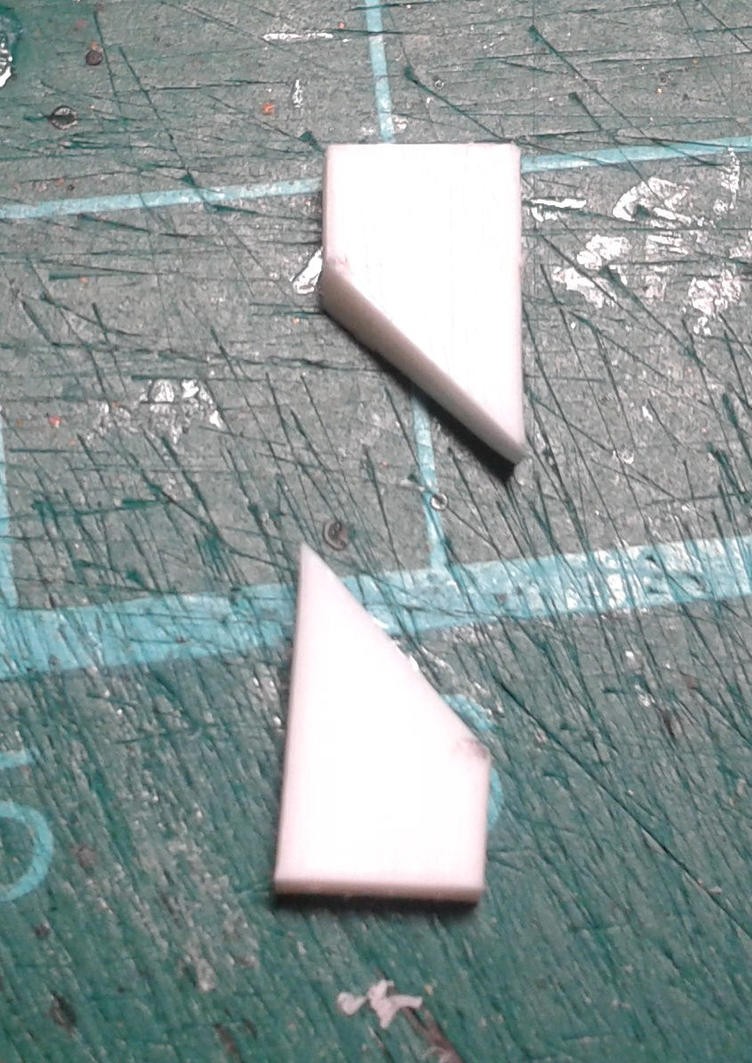
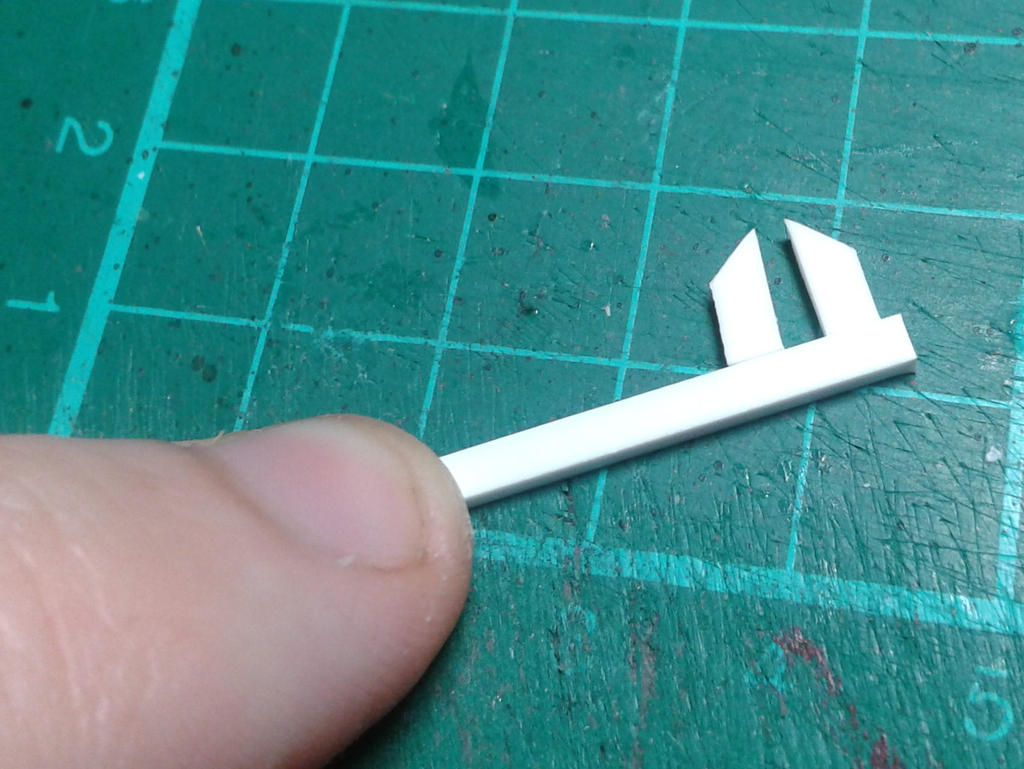
Place them against the square rod, and roughly work out how much you need to get the look you like. Once you've worked it out, cut the rod, and glue on the claws.
Here's me working out where to cut
(Only one bit left!)Last edited by YorkNecromancer; 05-22-2014 at 02:22 PM.
AUT TACE AUT LOQUERE MELIORA SILENTIO
-
05-22-2014, 02:46 PM #7First-Captain
- Join Date
- Aug 2011
- Posts
- 1,725
I look forward to seeing how you squeeze all the detailing into only one more step.
-
05-22-2014, 02:58 PM #8First-Captain
- Join Date
- Dec 2012
- Posts
- 1,997
How to detail was covered in my previous tutorials, so I left it out here - it seemed redundant. This will teach you the basic structure. I'm planning a separate tutorial on Advanced Greebling for some time in the future. At the moment I'm trying only to include very basic new information - it's for beginners. However, if you'd you'd like the details from earlier guides, the links are here: [url]http://www.lounge.belloflostsouls.net/showthread.php?44720-Scratchbuilding-a-Heavy-Bolter-with-Plasticard-A-Beginner-s-Guide[/url] and here [url]http://www.lounge.belloflostsouls.net/showthread.php?44988-A-Beginner-s-Guide-Scratchbuilding-an-Assault-Cannon-with-Plasticard[/url].
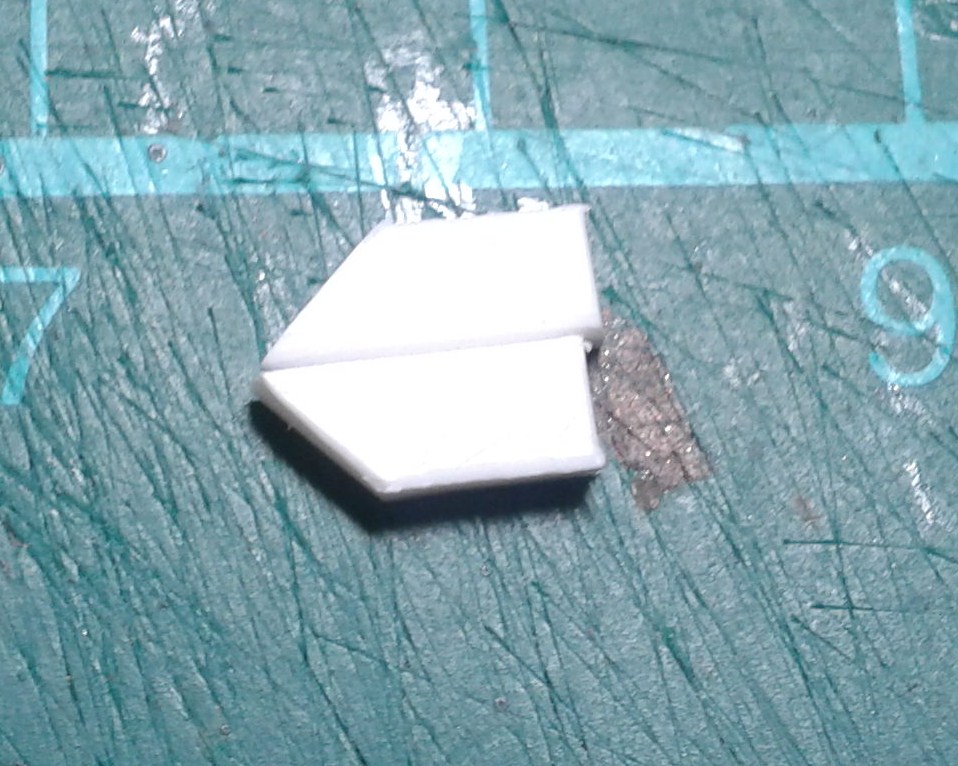
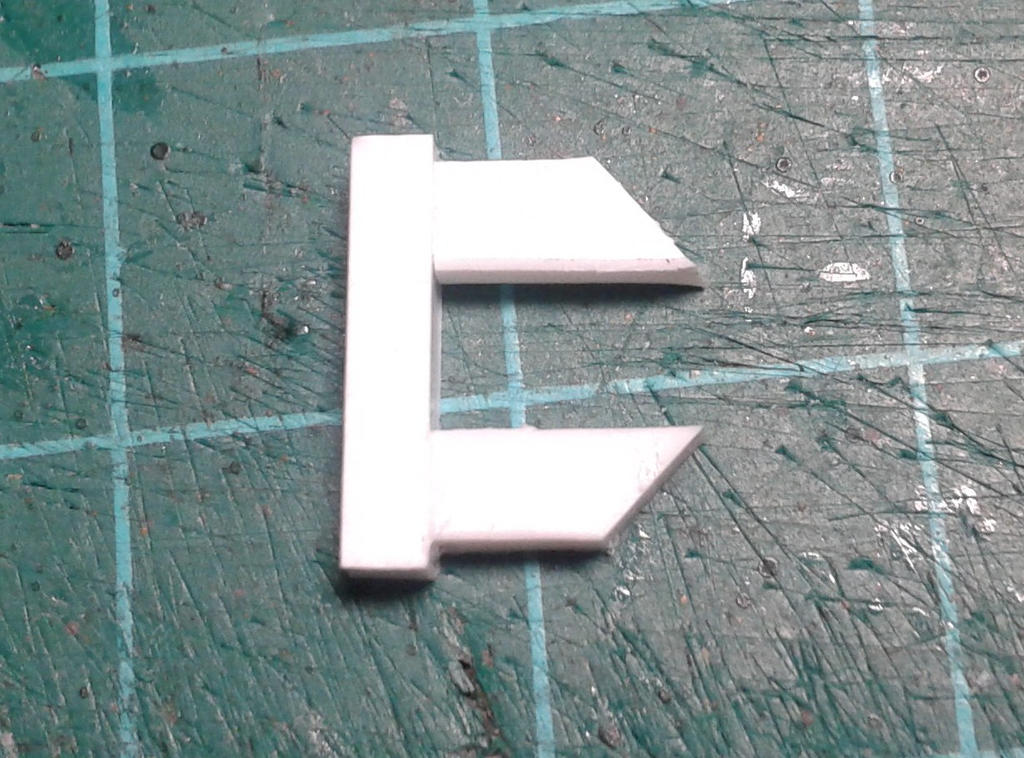
and here's the finished claw.
Then all you need to do it glue it, and bar any greebling you might wish to add you're done!
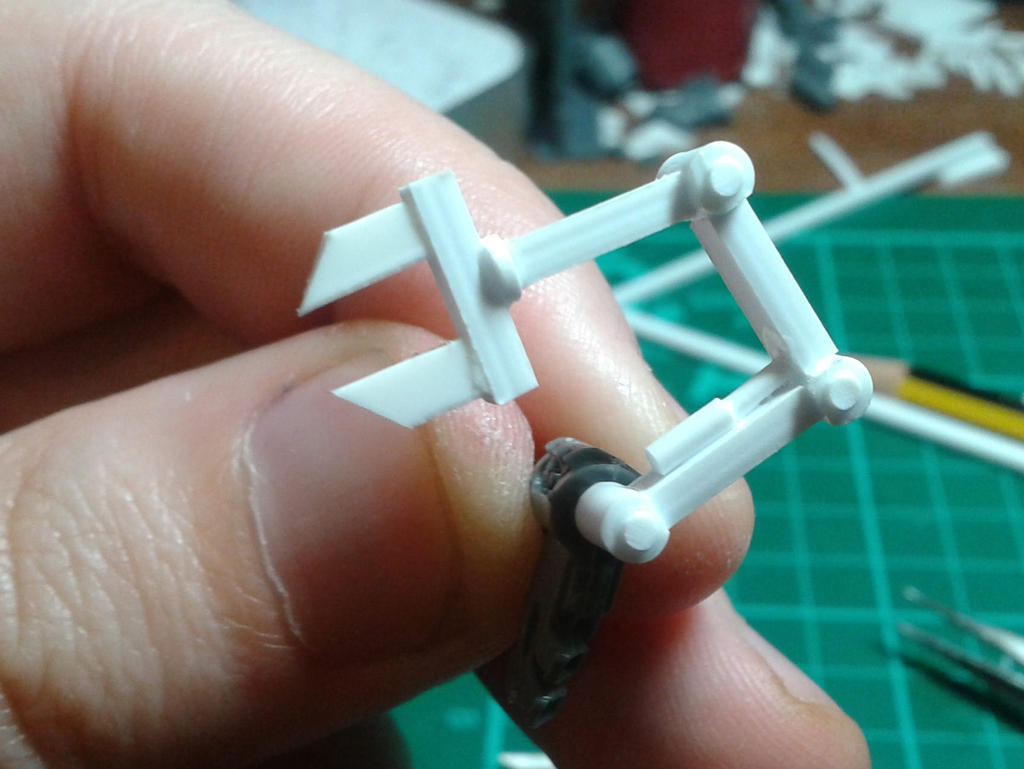
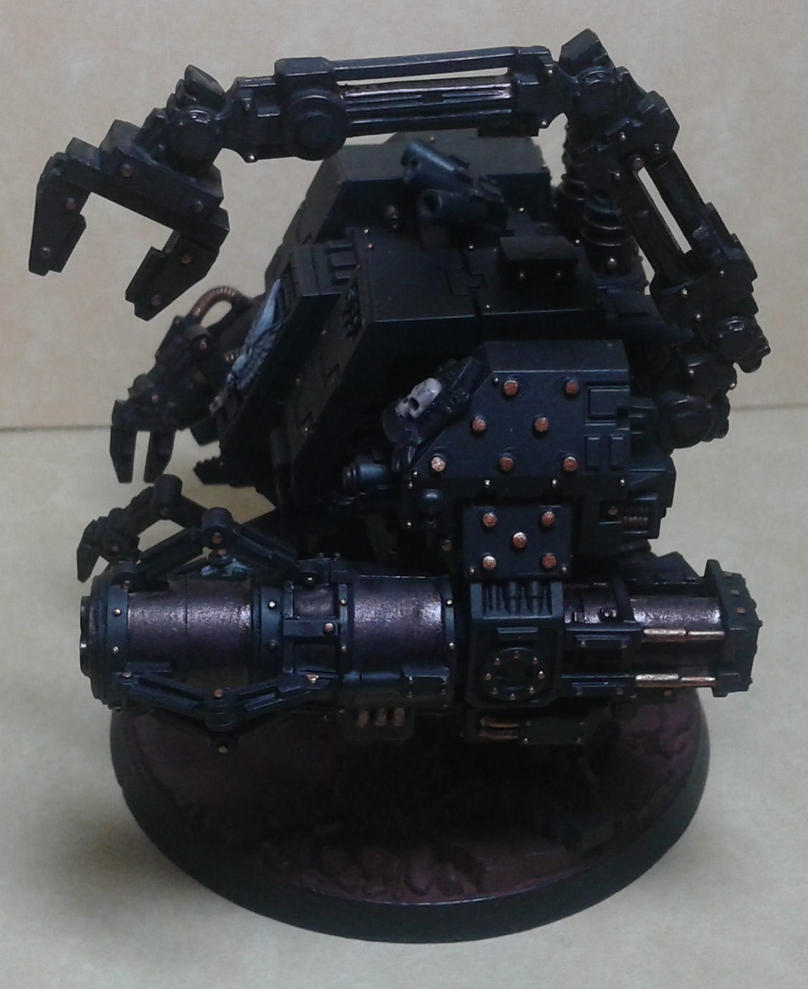
Now, the above example is simple and ungreebled but you can go crazy with this:
So, that's the end of another Beginner's Guide. Thank you for taking the time to read, and if these articles have inspired you to give scratchbuilding a go, please post what you've created I'd be fascinated to know if they've actually got anyone involved in what is easily the most creative and exciting, yet most unsung part of the hobby!AUT TACE AUT LOQUERE MELIORA SILENTIO
-
05-22-2014, 04:29 PM #9Veteran-Sergeant
- Join Date
- Jun 2013
- Posts
- 136
Gods above! I've been trying to figure out how to make a servo arm for a kitbashed techmarine. Thank you so much!
-
05-23-2014, 11:12 AM #10Scout
- Join Date
- May 2011
- Posts
- 9
GREAT tutorial. Thanks for taking the time!


 Reply With Quote


