
Ive been doing a lot of snow bases and terrain lately, and I've always wanted a gaming table. We recently got a new dining room table and I immediately saw the solution to my lack of gaming table problem. Now I have drying in my garage, a 6' x 4' snow field.
You will need:
A table. just shy of 6' x 4', unless you happen to be lucky enough to find one exactly these dimensions (hit craigs list or free-cycle).
3 2' x 4' x 3/4" pieces of hardboard/particleboard
A drill/driver
a handfule of 1 1/2" Screws (i used self tapping screws, I highly reccomend this so you don't have to drill pilot holes
1 gallon Rustoleum deck/concrete restore 10x
1 1/8" nap roller
My table was split for a leaf, which made finding the center of the table really easy. mark the center of one of the boards and align it with the center of the table, and pop some screws in the corners, in my case 7" in from the short edge of the board and 1" in from the long edge.
after the center board is in place slap the other two beside it, lining up the corners and screm them in. again making sure to hit the table underneath.
Painting. I started with the paint pan, but this was REALLY slow going. the rustoleum is super thick and I wasn't getting very good coverage. so I started just pouring the paint directly onto the surface and pushing it around. much better
painting the whole thing only took about 20 minutes, making sure to get good random patterns and good coverage (no brown showing through)
and a close up of the texture.
When its dry it should have a nice matte finish. The sample in the store was gritty, but not so abrasive that it will grind the paint off of a model should one fall over or get dropped.
Anyway, this was pretty simple, but I hope you found it useful. Now go find a table and get started.
Iamian
BoLS Lounge : Wargames, Warhammer & Miniatures Forum
Results 1 to 10 of 10
-
06-06-2014, 07:45 PM #1Veteran-Sergeant

- Join Date
- Aug 2012
- Posts
- 108
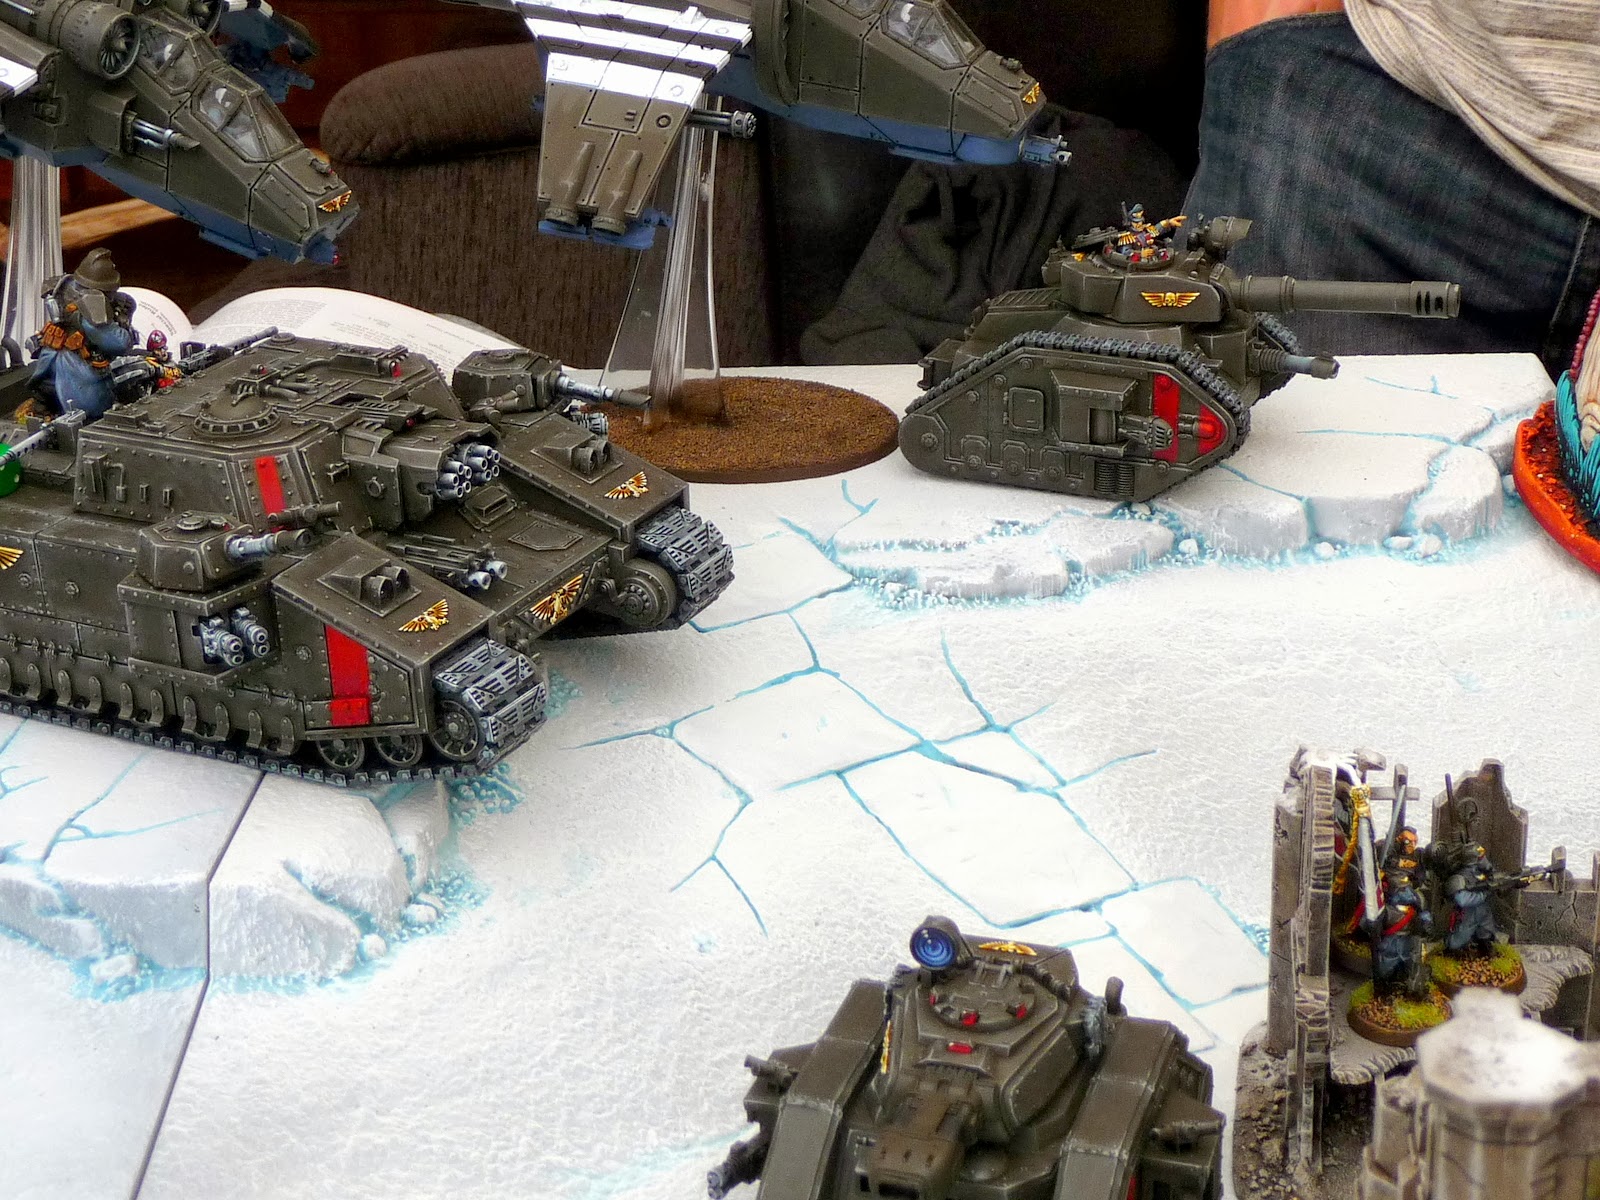
 Winter is coming - Simple snow table
-
06-07-2014, 07:43 AM #2Veteran-Sergeant
- Join Date
- Apr 2011
- Posts
- 204
Are you going to post some more when you finish this up? Its looking good so far.
-
06-07-2014, 07:51 AM #3Chaplain
- Join Date
- Nov 2010
- Posts
- 402
looking at that texture I bet a nice pale blue basecoat and/or grey would have added some extra depth to the board. Laying it down rough, mixing blue and grey in places the bumpy rustoleum would have covered most but allowed the underpainting colours to show through with a bit of variety and depth. You could probably add some after but given the cool effect from the rustoleum, like fresh snow it may not work as well.
My mate's Realm of Battle snow board looks like this:
-
06-07-2014, 03:35 PM #4Veteran-Sergeant
- Join Date
- Aug 2012
- Posts
- 108
Now that its dry, it's playable as is, I am debating hitting it with some more color to add depth. Also I plan on laying down lines to mark out the 2x2 sectors in light blue, and the deployment zones in bright green.
-
06-07-2014, 04:50 PM #5Veteran-Sergeant
- Join Date
- Aug 2012
- Posts
- 108
I decided agains adding more depth, I'll let the terrain break up the monotony. I did, however, add the lines for the 2x2 sectors and pre-marked the deployment zones for standard missions, and a mark in the dead center. Im sure plenty of people will feel that I ruined it, but it makes sense to me.
-
06-08-2014, 12:24 PM #6Veteran-Sergeant
- Join Date
- Aug 2012
- Posts
- 108
Hmmm. I think I did, in fact ruin it with the lines. Oh well, nothing that some spray pain t cannot fix. I will also add the depth while I am at it, pics when finished
-
06-11-2014, 03:18 AM #7Chaplain
- Join Date
- Nov 2010
- Posts
- 402
It may be possible to still keep some of the lines showing one of those terrain mats with the city fight on it uses flares and the different city blocks to demarcate the deployment zones. All you really need to do is tone them down, drubrush ofver the top, make the thickness/density of the lines less obvious. There was a guy over on terragenesis who used to do Battleteck boards which had all the hexes marked in varying degrees. Some where drawn on some where indicated by little stone or flock piles at each juncture. You could easily find a way to illustrate the DZs in a similar way that fits withthe board and doesn't scream "I'm a line!"
-
07-23-2014, 11:11 AM #8Initiate
- Join Date
- Apr 2012
- Posts
- 2
Hello there, I just recently looked at the reviews for Rustoleum deck/concrete restore 10x on amazon, and home depot. Many many people were saying that it chipped after only a few months without much wear. This worries me as after seeing this thread I thought I found the perfect solution for snow that was durable and looked nice. I was wondering have you experienced this at all yet and I wonder if there would be any solutions to keeping it from bubbling or flaking.
-
07-23-2014, 05:08 PM #9Veteran-Sergeant
- Join Date
- Aug 2012
- Posts
- 108
well lizardmen22, we're not going to be standing on it, or hitting it with a hammer or anything, so it should hold up.
Also note, I repainted it. It's no longer a snow table. now its mud and grass.
-
07-23-2014, 11:37 PM #10Initiate
- Join Date
- Apr 2012
- Posts
- 2
Well I didn't mean wear like that. I usually move my boards around in between games and they bump each other occasionally, so what i'm asking is would you recommend this product as I like the way your board came out very much, thanks.

 Reply With Quote