

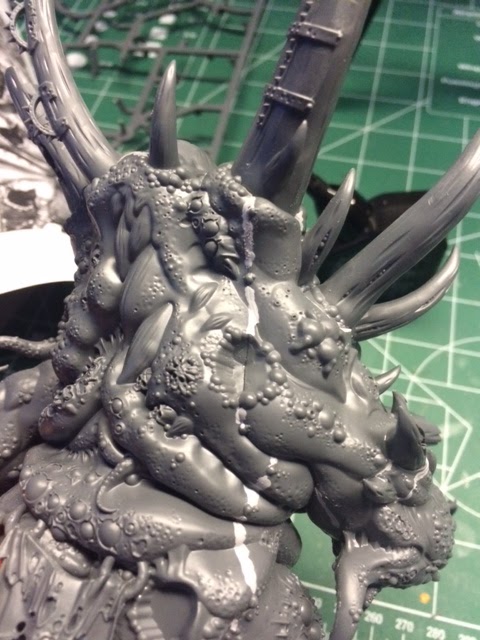
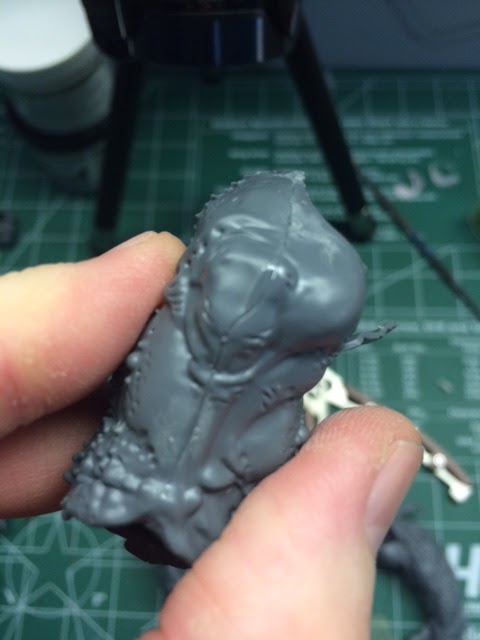
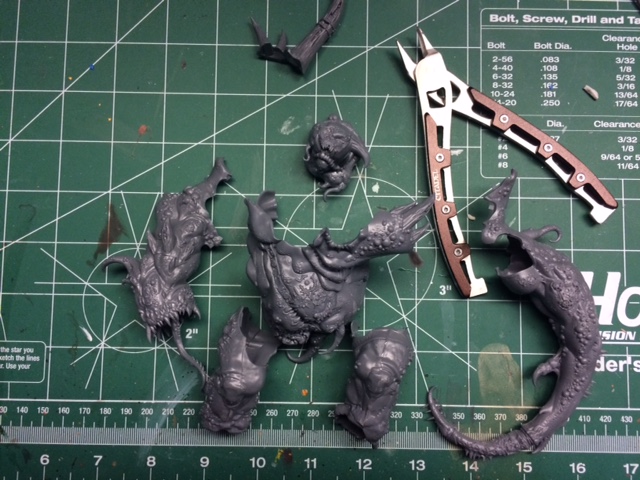
I've been doing mechanical stuff (mostly Star Wars vehicles) for so long, I needed a break, so I'm going in a completely different direction and making the nastiest, most organic thing on my shelf, the Glottkin! This piece is pretty big, and honestly, can't really be done in sub-assemblies. Anything you pre-paint will have to be puttied and sanded at some point if you want to hide the seam lines, and for the most part, the seams on this are NOT well hidden, meaning I can't paint parts and then build...I need to build pretty much all of it, putty the seams, and then paint. And boy, what seams there are:
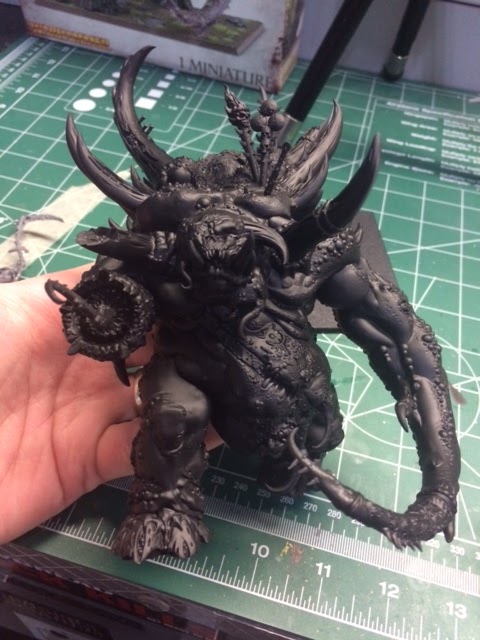
I'm waiting on the glue to dry, but I have a feeling this is going to require actual putty work, which is rare for a GW kit. Good news is, I'm not necessarily relying on each piece as a foundation for the next. I can build the legs, and while the glue dries, move on to the arms, etc.
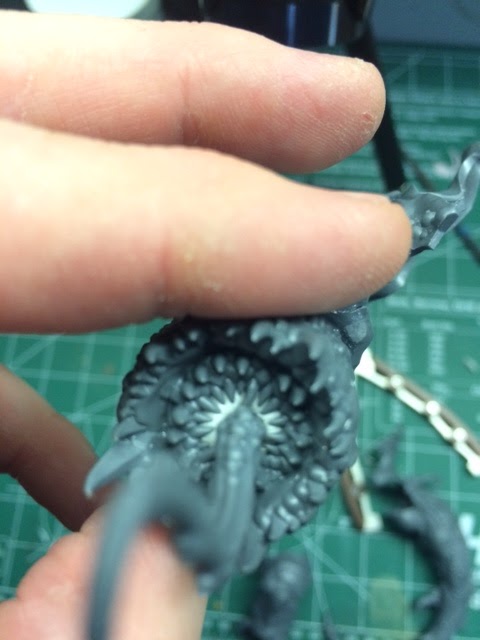
I've also noticed that while building, there are a lot of pieces that join just line to line, instead of being keyed to fit, which has a domino effect if you're even a millimeter off. To hide and larger areas where you can see in the kit because of this (or like the arm, which has a gaping open area where you could see into the arm assembly) I just mix up some putty and glop it in behind the gaps, which fits naturally with this piece:
So, just building it one piece at a time, fully assembling, and on to primer after sanding the lines out of it next! Thanks for looking!
BoLS Lounge : Wargames, Warhammer & Miniatures Forum
Results 1 to 3 of 3
Thread: WIP: Glottkin
-
05-25-2016, 07:25 AM #1Veteran-Sergeant

- Join Date
- Aug 2014
- Posts
- 150
 WIP: Glottkin
Check out the blog of unceasing fun, defiantworkshop.blogspot.com!
WIP: Glottkin
Check out the blog of unceasing fun, defiantworkshop.blogspot.com!
-
05-25-2016, 10:34 AM #2Veteran-Sergeant
- Join Date
- Aug 2014
- Posts
- 150
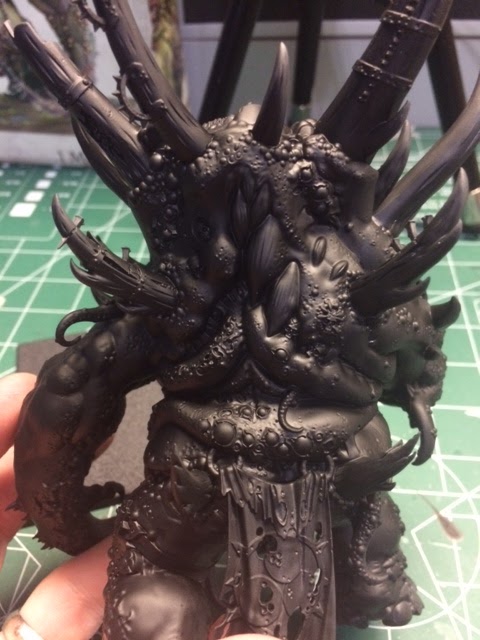
So after assembling the whole thing, there's one major piece that ties all of it together in the back, and I was having trouble with my typical glue/sand combo to remove seam lines, so tried Tamiya's Surface Primer for the first time on it. This stuff is awesome! The name implies its a primer only, but it does a good job of small gap filling as well.
After sanding it down with a round of 300, then 400 grit sandpaper, I primed it with Chaos Black primer, and the seams practically vanished:
So for now, he's primed up and ready for actual paint! I'm considering going against the grain with the box art and doing more of a brown hue for him, but I think it might blend too much with the ivory/brown coloring on the large spikes all over him, so I might stick to the greenish version. Time will tell.Check out the blog of unceasing fun, defiantworkshop.blogspot.com!
-
05-26-2016, 10:50 AM #3Veteran-Sergeant
- Join Date
- Aug 2014
- Posts
- 150
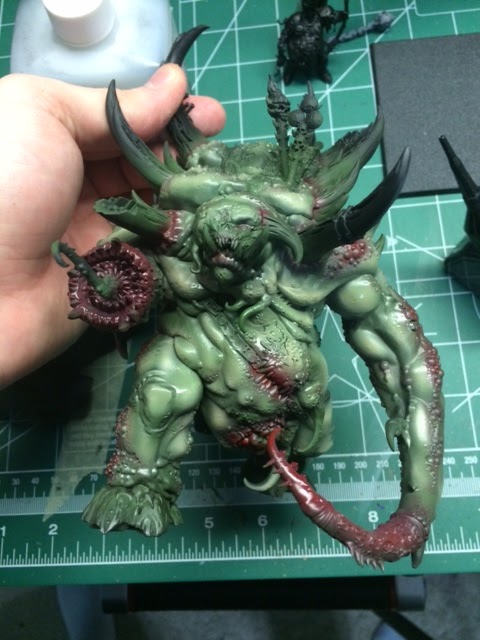
So after hemming and hawing about which colors I was going to use, I finally just bit the bullet and picked Tamiya Flat Green for my base. A rather unsexy pick, definitely. I looked at skewing him more toward a brown hue instead of so "green" like the box, but had concerns with the amount of brown he'd show with the horns all over, and how that would show the irritated skin effect I wanted, so I mixed a few greens as a test to make a sickly color, and lo and behold, it was essentially Tamiya flat green, so that's what I sprayed him. Now he looks like a pustuled army man.
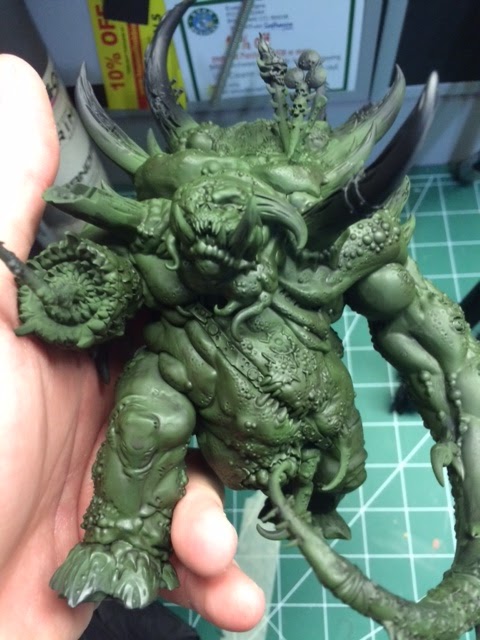
After giving him a quick wash in Agrax Earthshade, I then used the flat green and progressively added more and more Tamiya Cockpit Green, which was more the sickly color I wanted to show, so it was a great highlight. I mixed on up until I was using that color pure as the final highlight. From there, I mixed up a 2:1:1 mix of Tamiya Red/Purple/Hull Red (which is a ruddy brown) for the bruising and irritated areas. I don't really have a "plan" on this kit, per se, as he's got an awful lot going on, and its fun just to wing it as I go on something as gross and organic as this. So anywhere I thought he'd have some irritation, I sprayed this mix, and then topped it off in the center with pure red after the fact to give it some tonal variation:
Finally, I started hand painting the horns. This lets me get a hard delineated line where it joins the body, instead of the gradient effect and overspray an airbrush would get me. I will eventually use that same effect for the tops of the horns with an airbrush, but for now I'm just going to base coat them with Zandri Dust, and possibly even go higher with Ushabti Bone, but for now, this is what it looks like:
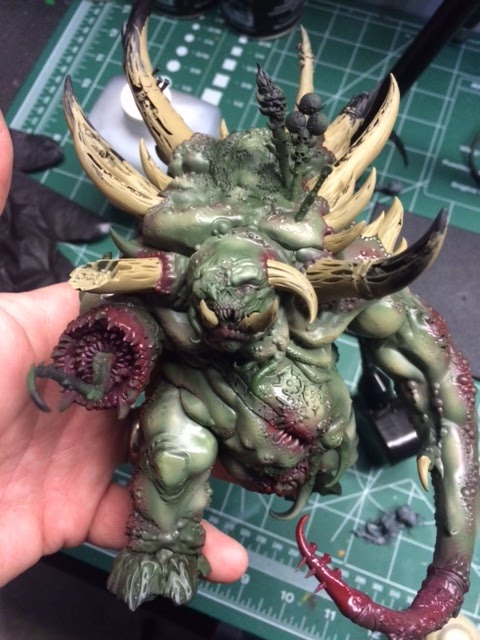
So far so good! I want to do all my airbrushing before really starting to pick out the details. I'm kinda bummed about it because he looks like a big grape right now, but once I start picking out the nasty parts, that will change significantly. Its tough sometimes being patient and seeing the big picture.Check out the blog of unceasing fun, defiantworkshop.blogspot.com!

 Reply With Quote