

Ok, it's time to unveil a new project of mine. The title of this article may have given you a few hints on what it is and I can see your eyes rolling. One more Mordheim table on the internet. I know, I know, it may sound cliché but I still had to do it. So I will skip the whole "kid's dream" chit-chat and go directly to the project itself...
Background
"Malval is one of the more ruined district of Mordheim, the city of the Damned. Only recently, the radiation level of the shattered pieces of Wyrdstone reached acceptable levels for the most fearless adventurers to investigate this district." - Imperial Geography magazine, vol 2017.
Project
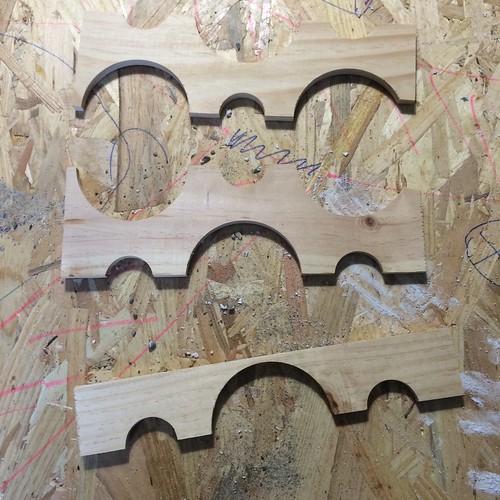
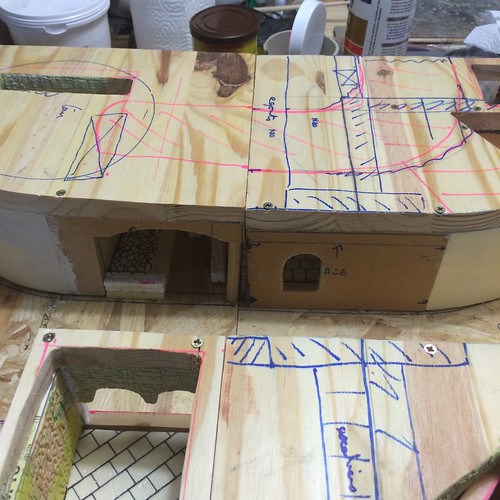
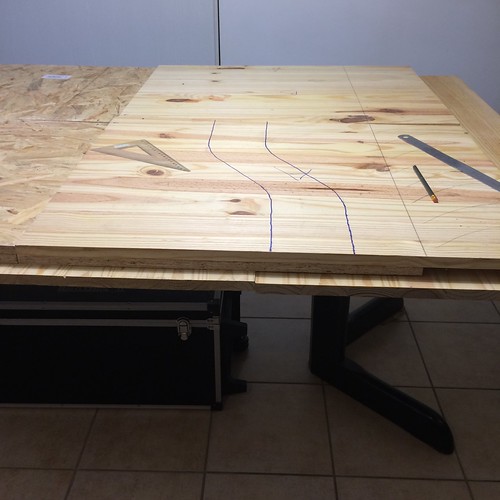
The objective of the project is to build a 120x120 cm (4x4 ft) table on three levels, with a ruined medieval table.
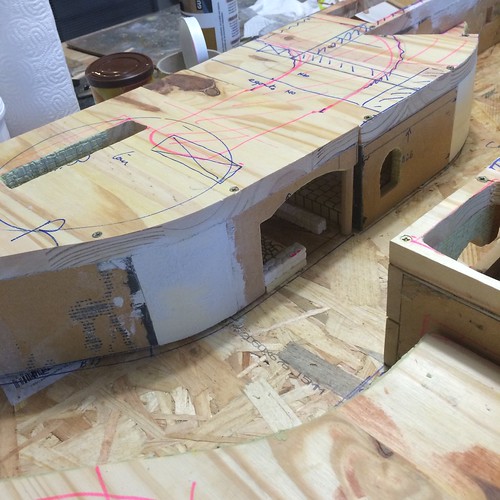
I choose to go for a modular table divided in four squares 60x60 cm (2x2 ft) each. First this would enable me to change the set-up of the board from game to game to keep it fun and diverse to play on it. Second this will also enable me to store it and transport is more easily, as I plan to construct custom-made wood box for this purpose.
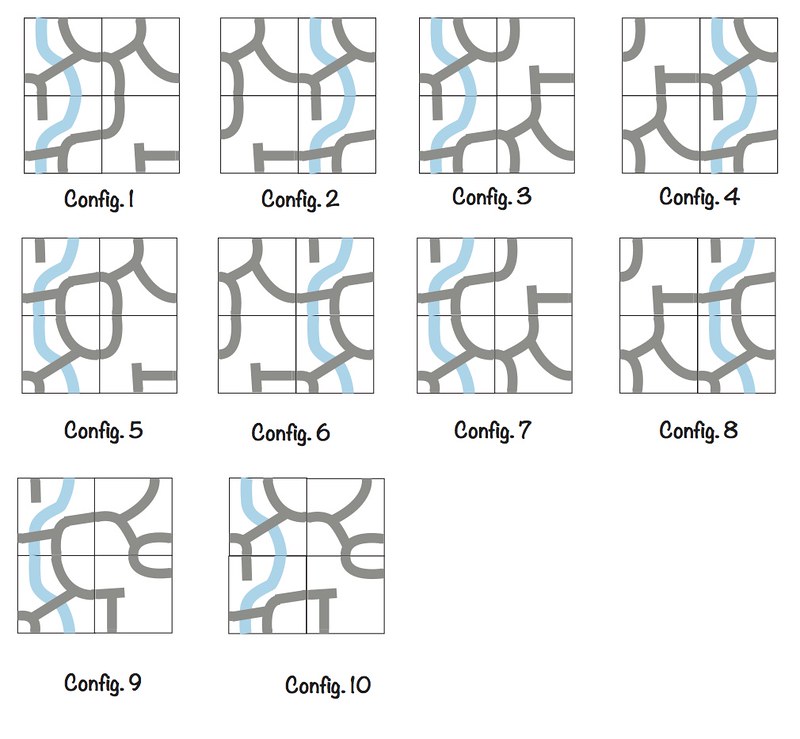
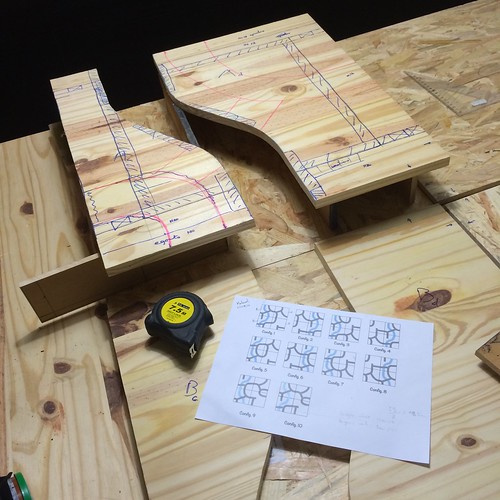
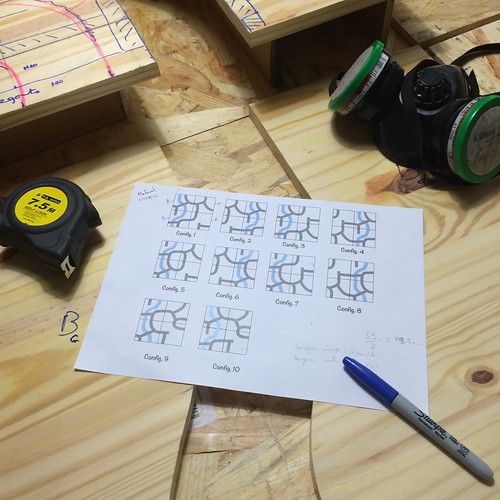
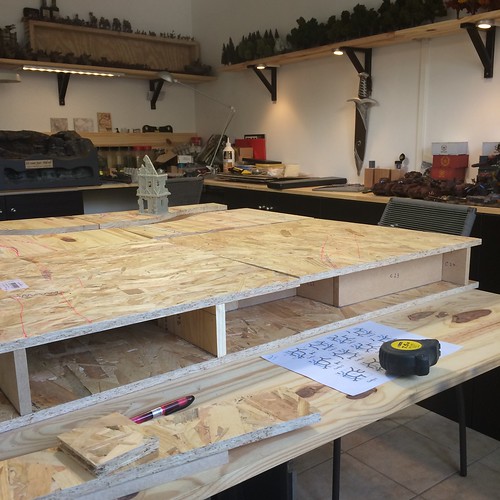
To make sure that the various set-up will fit together, I drew a quick sketch of the table. With this design I could potentially reach 10 differents set-up which should be more than enough to provide countless uniques Mordheim games (or Frostgrave and maybe the new Age of Sigma Skirmish game)
As you can see on the sketch above, in gray there will be a few roads connecting the different modules. In blue, there will be a canal going through the city, heavily inspired by Venice's streets.
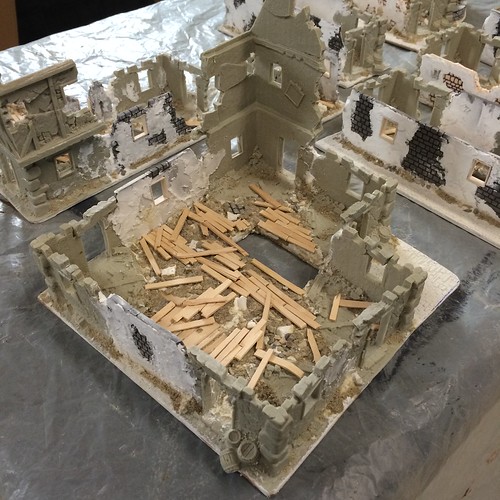
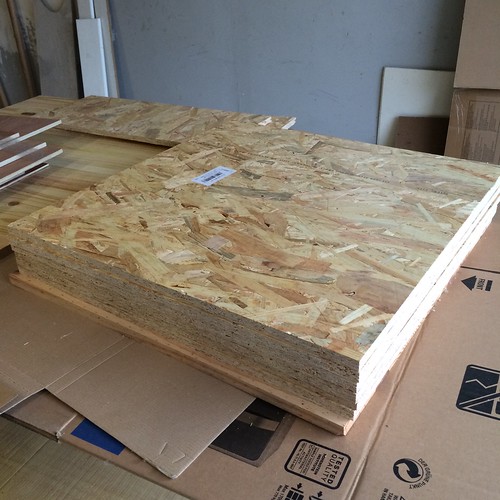
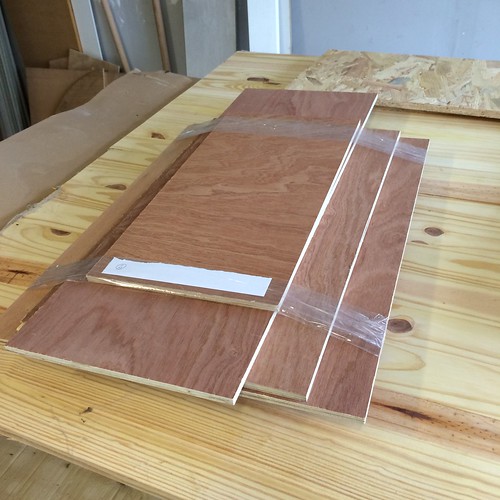
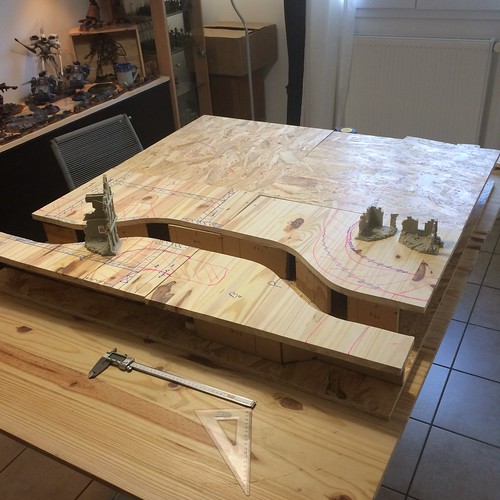
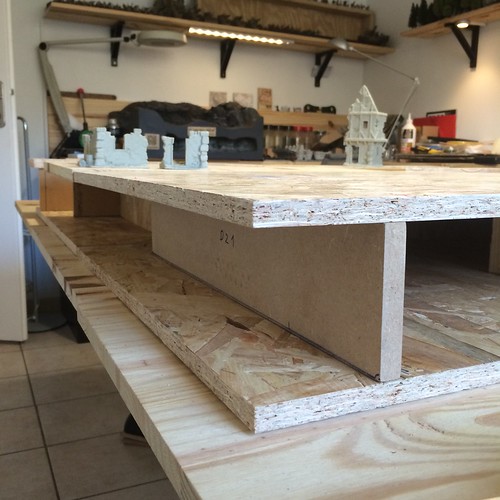
To give you a preview of what it will look IRL, here are a few pictures of the basic wooden structure of the four modules.
So what you think?I would really love to have your comments about this project as I really want it to be a great AoS Skirmish/Mordheim table and it would be great to have your different points of view or ideas to make it so. For more info about my projects, feel free to go to the blog [URL="https://simpleaswar.wordpress.com"]SimpleasWar[/URL].
Kibo
BoLS Lounge : Wargames, Warhammer & Miniatures Forum
Results 1 to 10 of 24
-
05-25-2017, 03:44 AM #1Battle-Brother

- Join Date
- May 2014
- Posts
- 27
 Malval District project - AoS Skirmish/Mordheim table
Last edited by Kibo; 05-25-2017 at 04:06 AM.
#SimpleAsWar
https://www.facebook.com/simpleaswar
-
06-01-2017, 10:40 AM #2Battle-Brother
- Join Date
- May 2014
- Posts
- 27
As every hobby project, the story begins with some shopping on the internet to find the key scenery pieces and bits. Here is my initial selection for the Mordheim table project.
Ruined Basilica
I wanted a central piece of scenery that could be used for highly narrative games. And when I found out this [url=http://fenryll.com/product.php?id_product=217]Roman ruined church kit from Fenryll[/url], I knew I found what I needed.

In term of scale, once assembled, the kit was a little bit smaller than expected (this is true 28mm, not heroic 32mm) but still I was very happy with it.
A scheme and guidelines are provided in the box to facilitate the assembly but I have to mention that gluing was quite challenging because of the nature of the resin used. After the assembly I broke a few parts and I think I will have to pin them eventually.
Doors & Windows
For this project, I'm planning to mainly use commercial resin building kits, essentially to save time, but I also wanted to make a few homemade buildings to give the table a unique feel.
For this purpose, I bought various sets of windows and doors from [url=https://www.antenocitisworkshop.com]Antenocitis Workshop[/url] and [url=http://www.thomarillion.de]Thomarillon[/url]. Both shops are great places for any enthusiastic scenery makers, I highly recommend them!
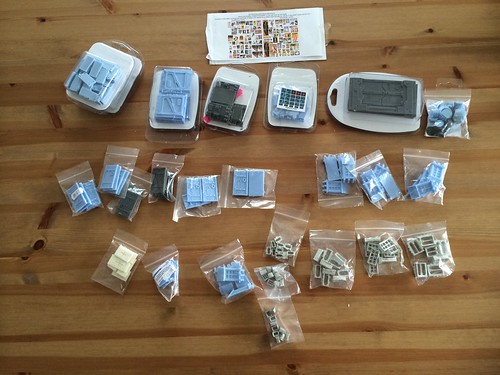
Stairs
The table will be divided in three levels (-1 underground, 0 ground, +1 upstair) and thus it was critical from the start to identify how the miniatures could go from one level to another. For this purpose, I basically choose two type of stairs: wooden and stone stairs.
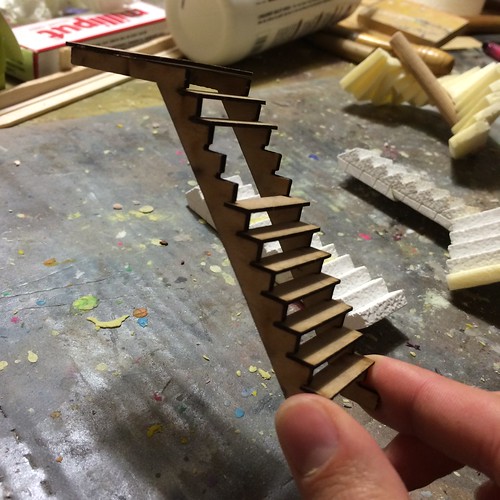
The wooden stairs are from [url=http://www.thomarillion.de/index.php?page=artikel_detail&id=430&origin=%3Fpag e%3Dcatalog%26cat%3Dbits%26slide%3D1]Thomarillon[/url]. This is a laser-cut MDF*kit. The assembly is tricky but in the end, they look great and price is very competitive.
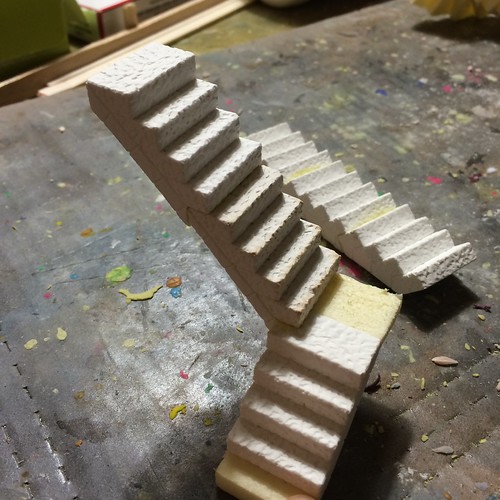
For the stone stairs, I went with the [url=http://www.hirstarts.com/molds/moldscast.html]Hirst Arts Mold #60[/url]. They look very nice and the parts are very modular so you have a great*freedom to make your stair unique. The only drawback is that you have to spend some times molding each part.
Ruined Village
As mentioned previously, I decided to use a commercial resin kit for the majority of the ruined buildings as I*didn't want to spend to much time on this project (and yet ^^).
The ruined kit I selected is the [url=http://escenorama.com/shopping/product.php?id_product=127]Damaged Village set from Escenorama[/url]. From my point of view, this is one of the best resin kit for a medieval ruined city and thus for a Mordheim table! The kits prices are very competitive, especially if you buy them in bulk and the level of details is great even if this is not as detailed as the Tabletop-World's kits. On the other hand, the scale of Escenorama's kit is perfectly right with the usual GW's miniatures (which unfortunately is not the case with the significant lower scale of the Tabletop-World's buildings).
Some people will say that Escenorama's buildings are a little bit repetitive and this is true if you use them as is. But if you customize*them with a few additional walls here and there, you easily distinguish each building. The buildings on the pictures below show you the end result I got.
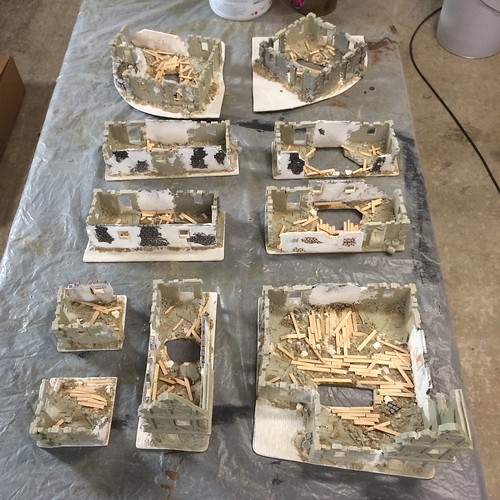
For more pictures, here is the link to the full article on [url=https://simpleaswar.wordpress.com/2017/05/26/malval-table-kits-bits/]SimpleAsWar[/url]
So what do you think of these choices? I would love to here in the comments your recommendations for kits that would fit this Mordheim table project.
Have a nice day,
KiboLast edited by Kibo; 06-01-2017 at 10:50 AM.
#SimpleAsWar
https://www.facebook.com/simpleaswar
-
06-06-2017, 01:15 PM #3Battle-Brother
- Join Date
- May 2014
- Posts
- 27
I started making scenery as soon as I bought my first catachan guards more than 15 years ago. Since then, I made a few progress in term of modeling and painting techniques. But, I was always more drawn to the Nature scenery-making as you could see with my previous [url=https://simpleaswar.wordpress.com/2016/03/18/river-table-details/]River table[/url] or [url=https://simpleaswar.wordpress.com/2015/05/19/north-africa-table/]North Afrika table[/url] project. Thus, when I finally decided to start the Malval project, I knew that I will have to learn a lot of new techniques related to medieval model buildings and more specifically, how to make Stone walls.
I know that a lot of you use the PS foam (styrofoam) carving techniques and I can tell you that I'm highly impress by what you can make starting from this material. In the future, I'am planning to give myself a try with this techniques but today I wanted to share with you an other technique I learned.
I chose to investigate this technique, mainly because I use a wooden structure for this whole Mordheim table and thus I wanted to model the stone wall texture directly on the wood parts.
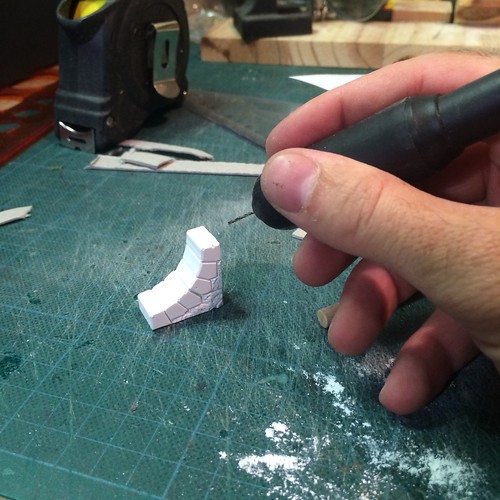
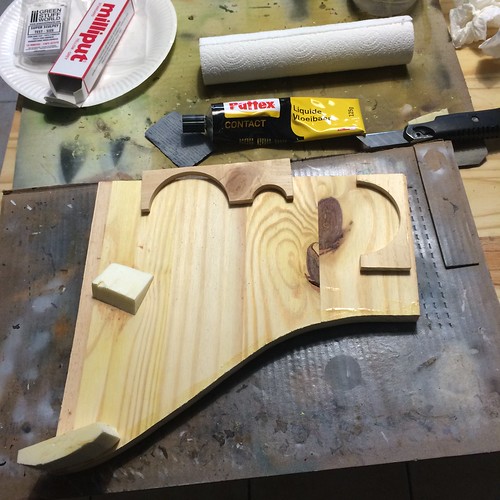
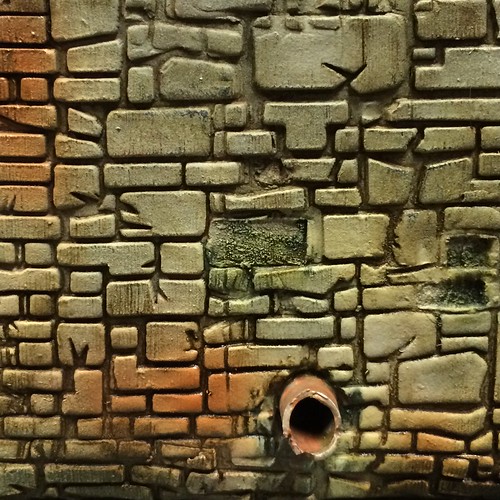
Here is the final result I get with this technique. As you can see, this is a wood pieces coated with FIMO (or milliput) and carved with a roll which has the negative texture of a stone wall engraved on it.
Step-by-step
For those who wants more detail on this technique, here is a quick step by step.
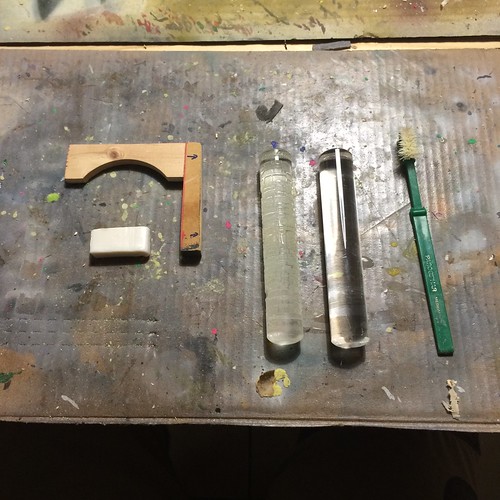
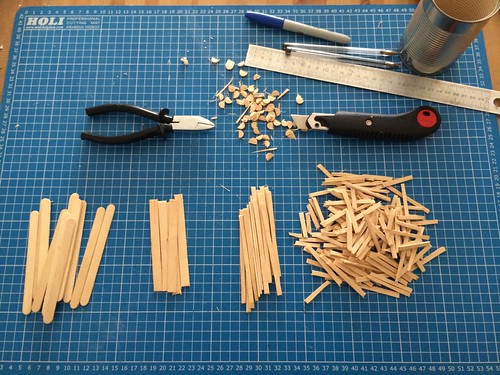
Here are the tools you will need for this technique. The white block on the left is a block of FIMO. Those are easy to find on Amazon or on any Arts & Crafts shop. In my case, I stole it to my wife.
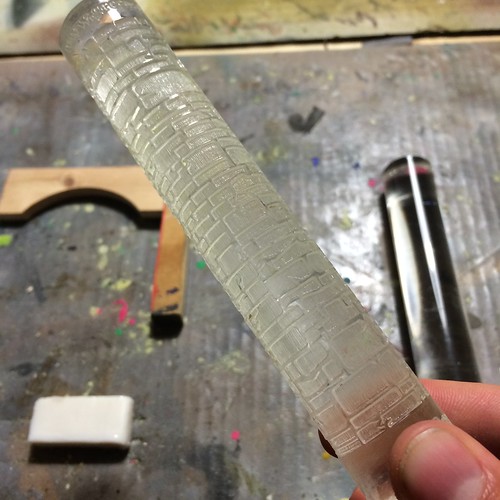
On this close-up you can see the stone wall texture engraved on the roll.
First step is to cover the whole surface with FIMO.
Then use the smooth roll to even the surface. It's very important to have an even surface before using the engraved roll.
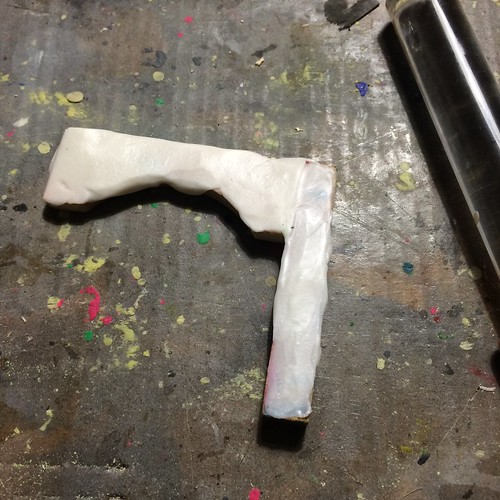
On the other hand, the surface doesn't need to be perfectly smooth and homogenous. Actually, some defects will help to make your stone wall more realistic.
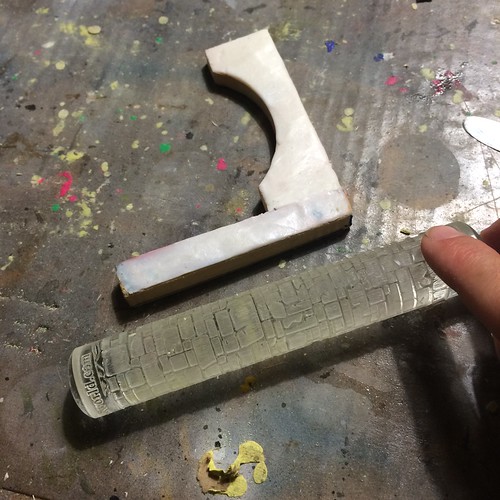
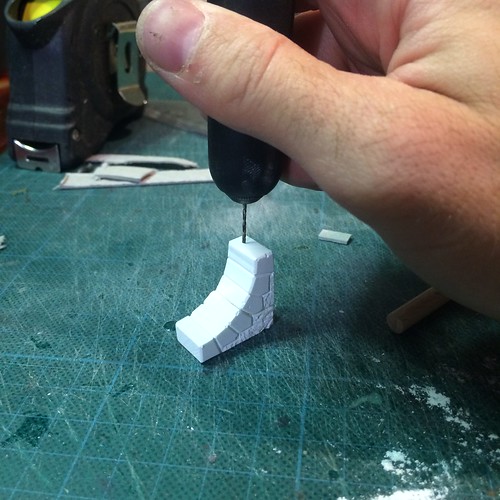
Next, use the engraved roll to texturized the FIMO coating. I would recommend to put a thin layer of water on the roll before rolling it over the surface as this will prevent FIMO to stick on the roll.
Once engraved, put the parts in your oven for 30 min at 110 °C (230 °F). And voila, it's done. After baking, the surface will be as hard as any plastic.
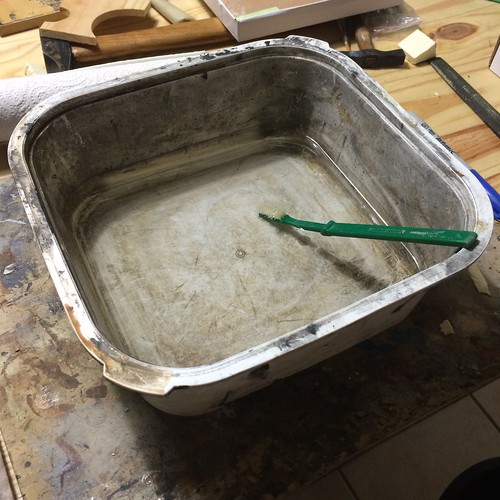
Last step, which is really important if you want to reuse your molding rolls, is to quickly clean your rolls using an old toothbrush and soapy water to remove all the small pieces of FIMO.
For more pictures, here is the link to the full article on the blog [url=https://simpleaswar.wordpress.com/2017/06/02/malval-table-wall-roll-molding-technique/]SimpleAsWar[/url]
So that's it for today. What do you think of this technique and of the end result?
Kibo.Last edited by Kibo; 06-24-2017 at 12:06 PM.
#SimpleAsWar
https://www.facebook.com/simpleaswar
-
06-11-2017, 11:11 AM #4Battle-Brother
- Join Date
- May 2014
- Posts
- 27
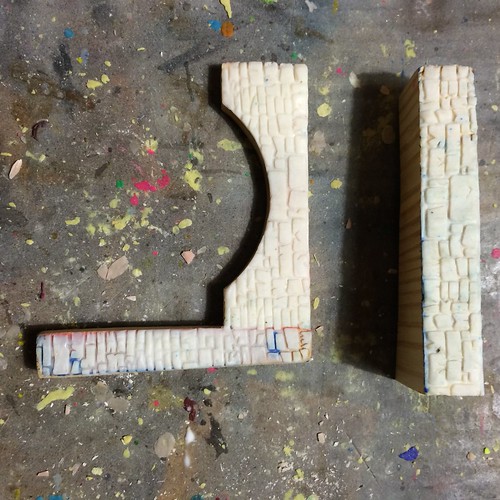
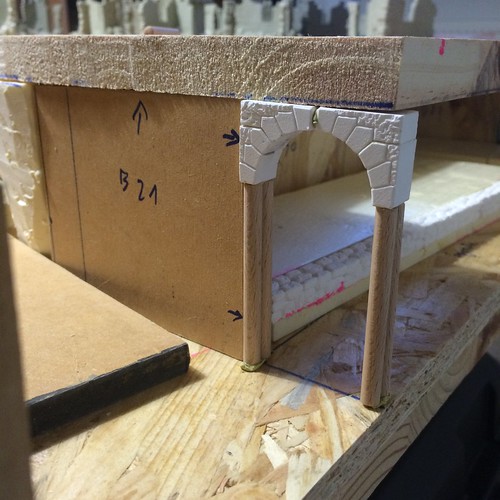
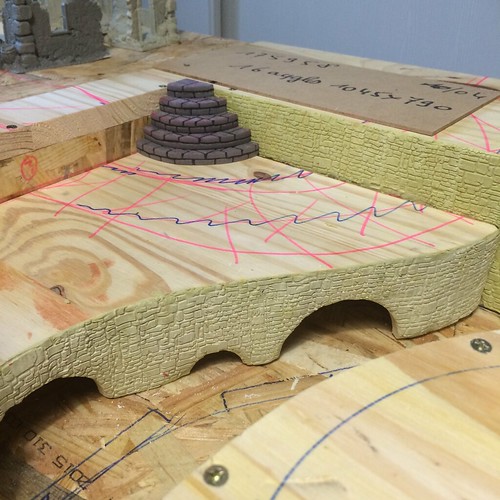
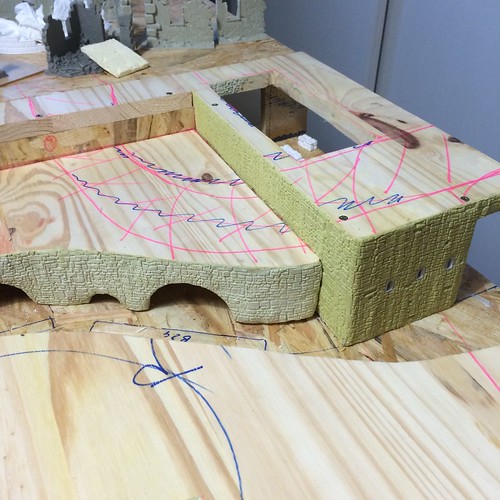
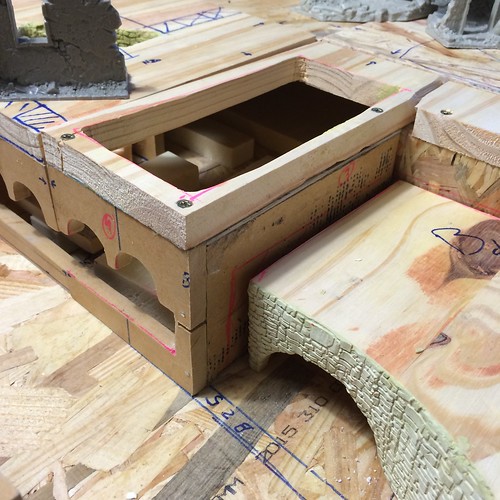
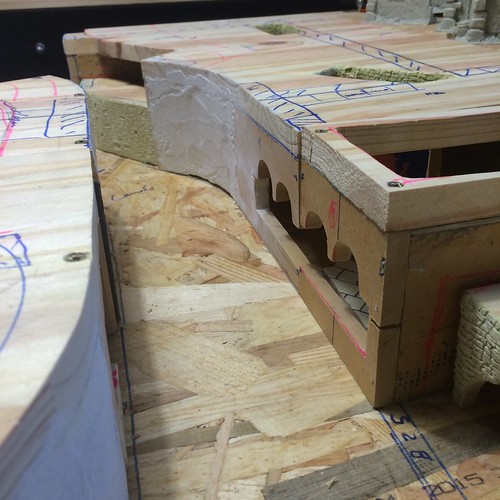
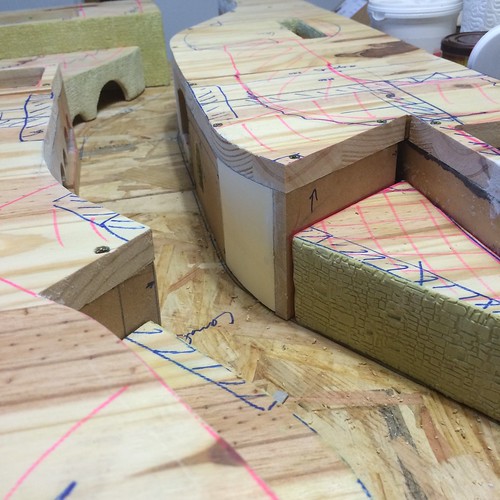
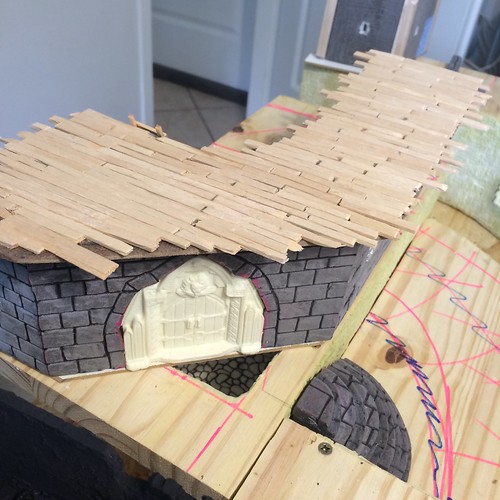
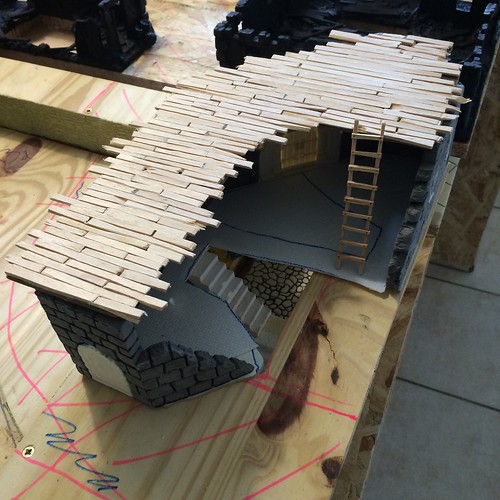
As you know, the thematic I choose for the Malval project is "Ruined Medieval town" but more specifically I also wanted to give it a lakeside/old-Venetian touch, with old canals, wooden piles structure and obviously Italian Roman arches. I know, I know, you are going to tell me that Warhammer mainly draws its aesthetics from Gothic architectural elements but I thought that including some Roman arches will add a more ancient touch to the Malval district. Like if it was even older than the old world...
Anyway, here are a few pictures of the arches I prepared for the underground canal of the table.
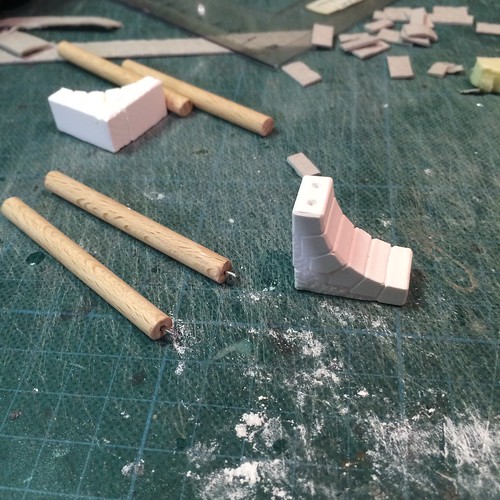
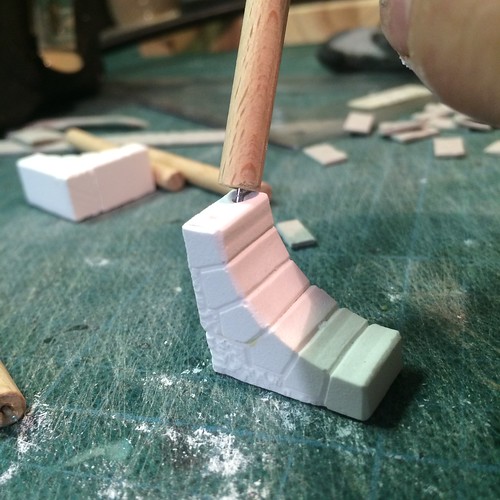
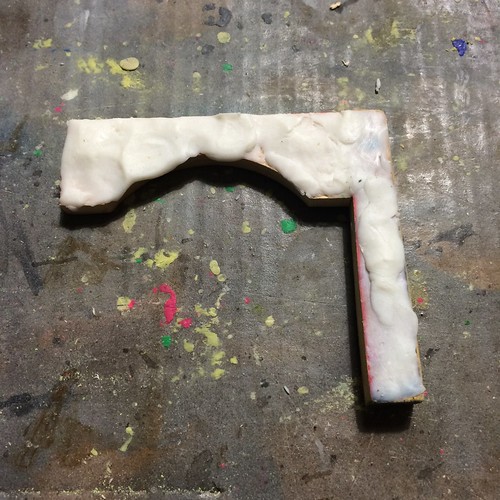
The arches above use Hirst Arts pieces. But I also found a great, easy and cheap way to make Roman arches.
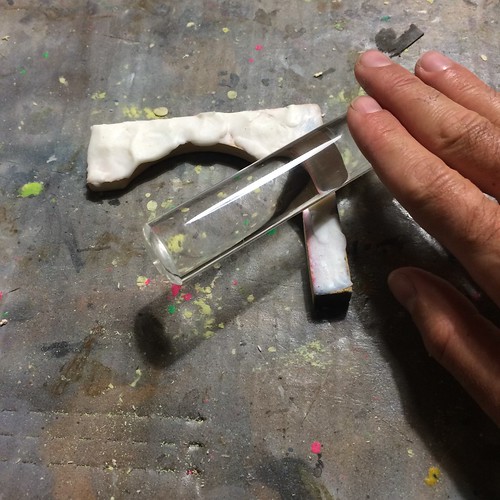
As you can see below, I reused these wood pieces which are used to wedge Wine bootles in their original box.
I simply cut the arches and texturized them using the [url=https://simpleaswar.wordpress.com/?p=4671]Wall "Roll-molding" technique[/url] I presented in the previous post.
For more pictures, here is the link to the full article on the blog [url=https://simpleaswar.wordpress.com/2017/06/09/malval-table-arches/]SimpleAsWar[/url]
Enjoy the rest of your day,
KiboLast edited by Kibo; 06-24-2017 at 12:06 PM.
#SimpleAsWar
https://www.facebook.com/simpleaswar
-
06-24-2017, 12:03 PM #5Battle-Brother
- Join Date
- May 2014
- Posts
- 27
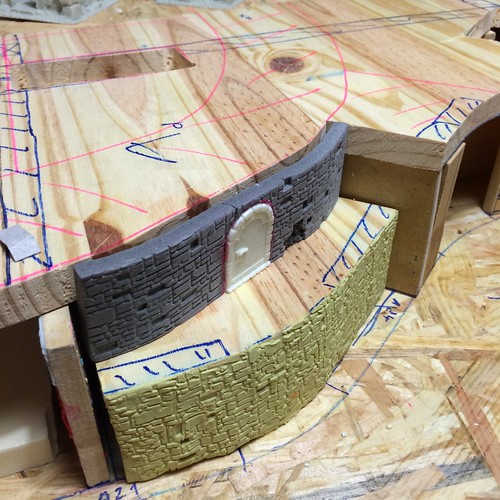
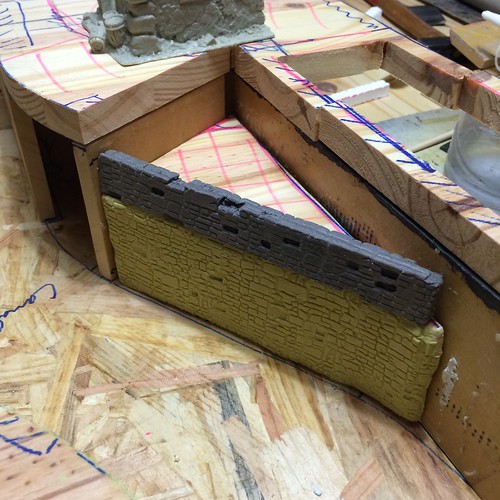
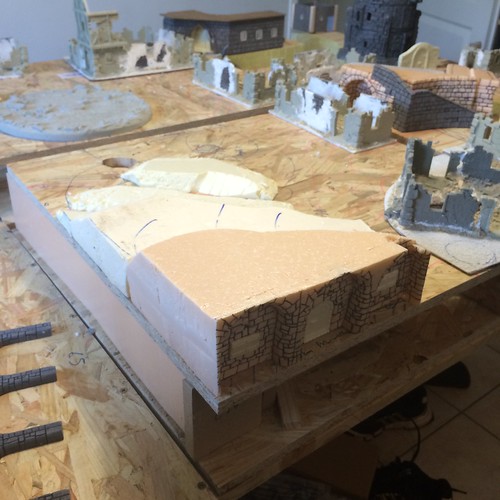
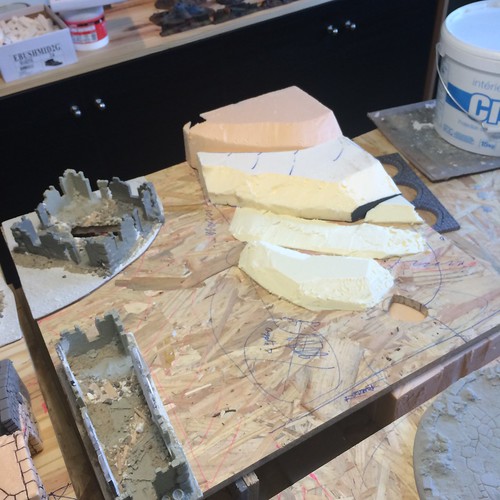
As promised, it's time to take a look at the latest advances of the underground canals of the Malval Project.
*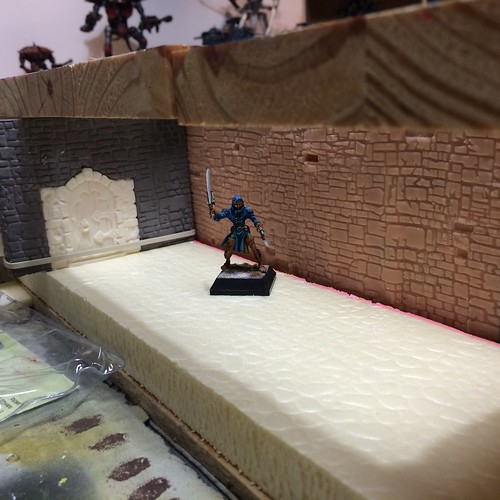

For more pictures, here is the link to the full article on the blog [url=https://simpleaswar.wordpress.com/2017/06/16/malval-table-underground-canals/]SimpleAsWar[/url]
I know, this is still very much Work In Progress but what do you think of table at this point?
Please, feel free to comment and gives me your advices on any aspect you have in mind.
KiboLast edited by Kibo; 06-24-2017 at 12:07 PM.
#SimpleAsWar
https://www.facebook.com/simpleaswar
-
06-25-2017, 04:14 AM #6Initiate
- Join Date
- Jun 2017
- Posts
- 2
This is the most ambitious and cool looking table project I have seen
I wouldn't mind participating in a mordheim campaign with a table like this. Cant wait to see it finished 
-
06-25-2017, 06:51 PM #7Initiate
- Join Date
- Jun 2017
- Posts
- 2
This looks fantastic. This is the most ambitious table project I have seen
Looking forward to see it completed.
-
07-10-2017, 11:24 AM #8Battle-Brother
- Join Date
- May 2014
- Posts
- 27
Quick update today to show you a few pics of the very early stage of the Town Hall and Graveyard. I don't have a clear vision for these two sceneries at this point but I thought it was kind of mandatory for any respectable Mordheim table to have these elements. I would love to have your advices, especially in term of overall look and color palette.
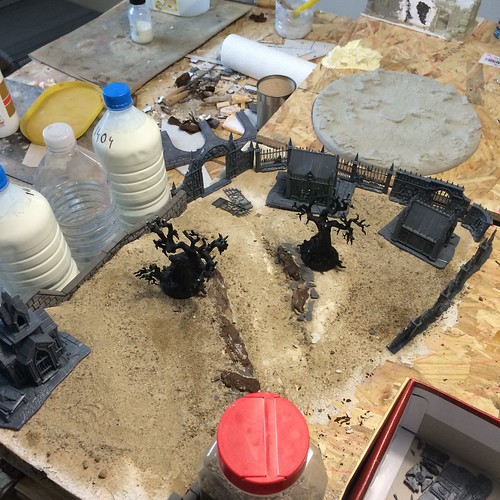
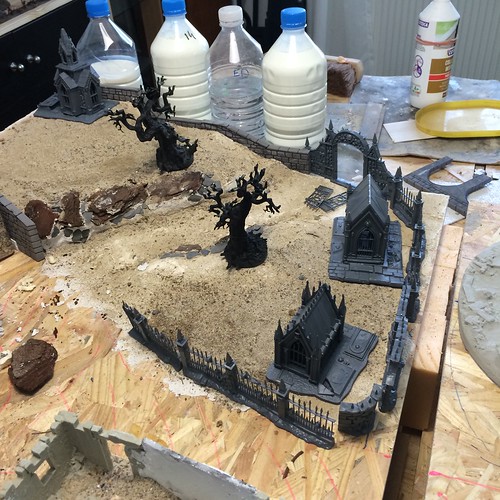
For more pictures, here is the link to the full article on the blog [url=https://simpleaswar.wordpress.com/]SimpleAsWar[/url]
So let me know what you think?
Kibo#SimpleAsWar
https://www.facebook.com/simpleaswar
-
07-13-2017, 12:21 PM #9Battle-Brother
- Join Date
- May 2014
- Posts
- 27
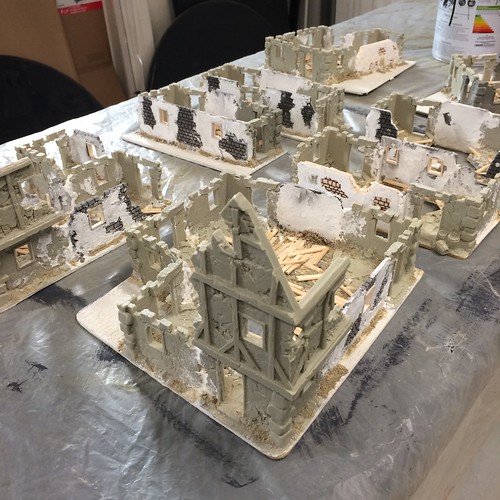
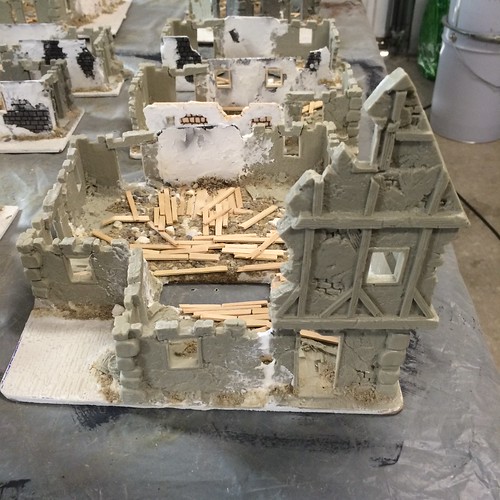
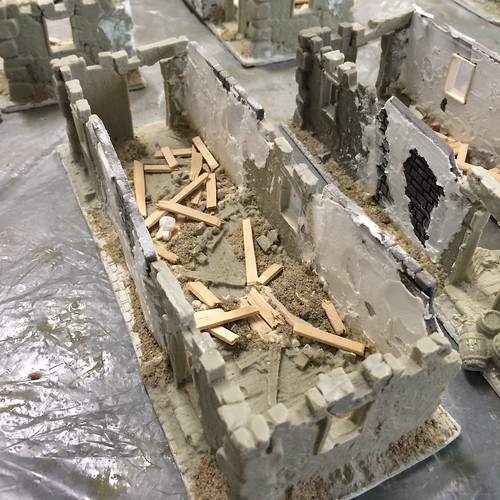
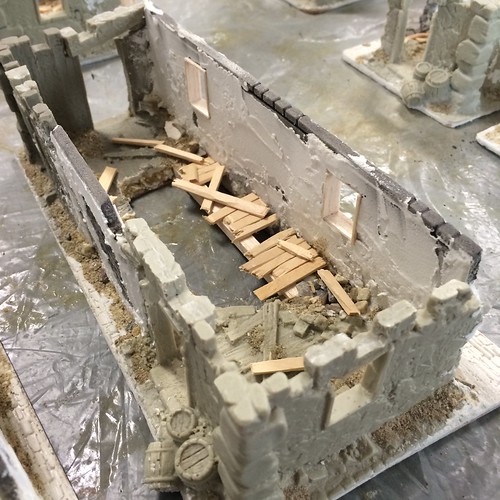
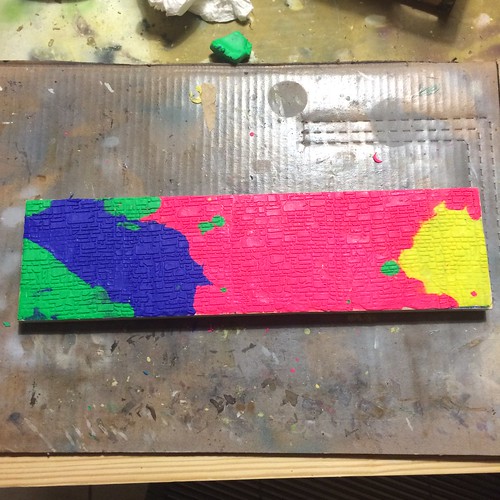
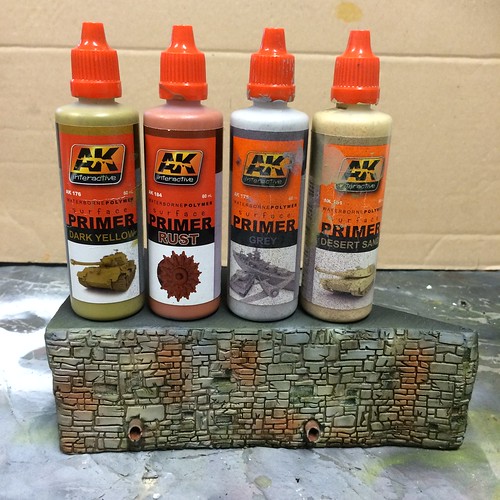
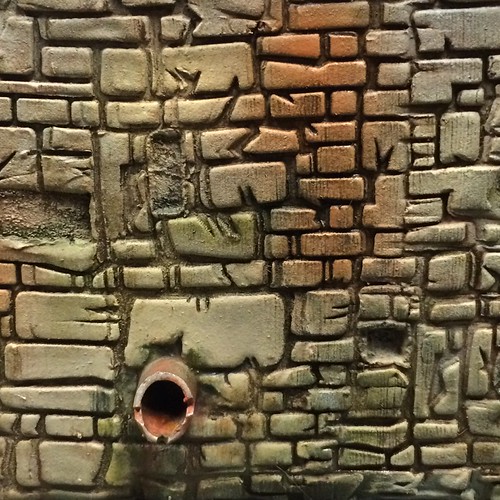
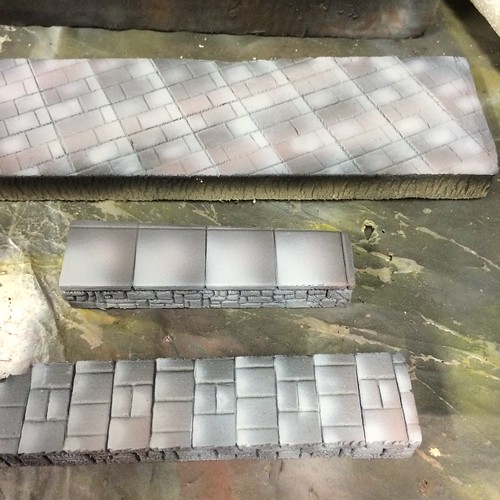
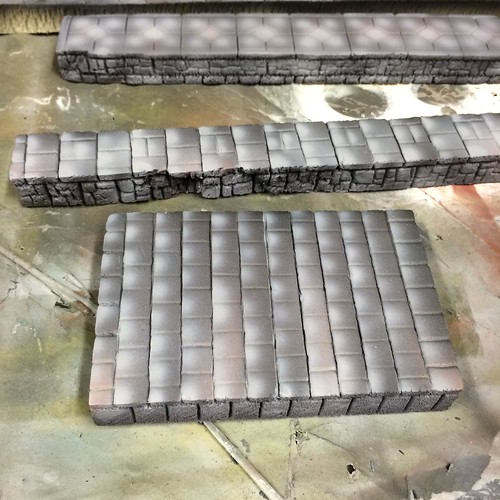
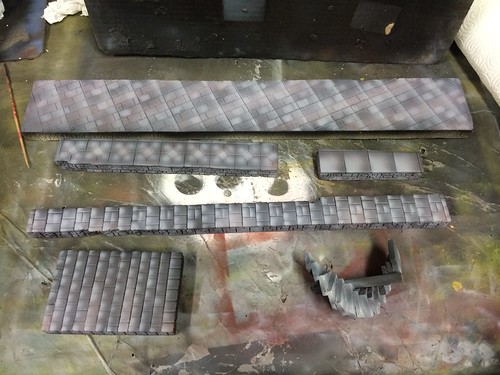
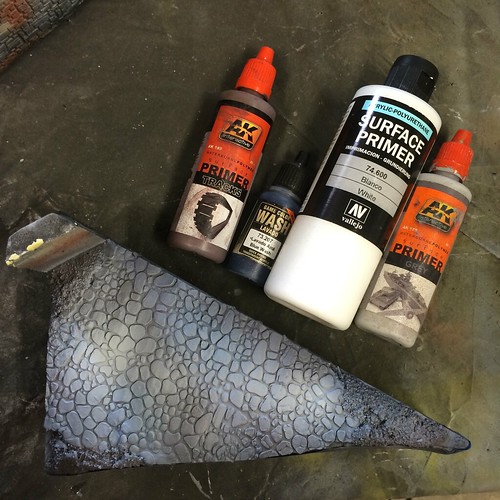
Painting time! I was really excited to finally start this step. Even if it's only for one quarter of the whole Malval table, still it will help me to have a better vision of what the end result will look like. And also eventually correct any mistake I could have made for the first module and not reproduce them for the three remaining modules.
My favorite hobby paint brand is definitely [URL="http://ak-interactive.com"]Ak-interactive[/URL]. Their products fit my use and my tastes in term of color palette. This brand is not really known in the fantasy/sci-fi side of the hobby but more in the military model-making side. The thing I really love in particular is their big 60ml primer bottle, especially for large project such as scenery-making.

For more pictures, here is the link to the full article on the blog [url=https://simpleaswar.wordpress.com/]SimpleAsWar[/url]
Feel free to let me know your thoughts about these painting jobs.
Have a nice day,
Kibo#SimpleAsWar
https://www.facebook.com/simpleaswar
-
07-17-2017, 05:33 AM #10Brother-Captain
- Join Date
- Aug 2009
- Location
- Perth, Australia
- Posts
- 1,220
It's hard to read the bottles in the photos, but is that a brush on or airbrush primer?
Kabal of Venomed Dreams


 Reply With Quote
