

Ahoy-hoy.
Welcome once again ladies and gentlebeans to another tutorial on how to scratchbuild. I recently published a separate comment thread featuring some female Astra Militarum (link for those interested: [url]http://www.lounge.belloflostsouls.net/showthread.php?45369-The-Women-of-The-Bifrosti-121st-Astra-Militarum-Regiment[/url]) and received a number of questions regarding the origins of the women's lasguns.
As a result, this week, we're not looking at a straight scratchbuild, but rather combining scratchbuilt components with extant Games Workshop kits, as I explain the ways I created the custom lasguns you see in the pictures in that thread. Also, because it's half-term, I've had time to go to town on this one, so be warned: there are six separate tutorials below (for, in order: rail mounts, reflex scopes, flash suppressors, sniper barrels, rifle bipods, and telescopic scopes.)
Customising infantry weapons is remarkably easy work, though if you intend to do it on a large scale, it can be very time consuming. I have individually converted every lasgun in my Astra Militarum army over a hundred individual weapons and I feel maintaining consistency is important for any army that isn't Ork. As a result, it you're going to do this on an army-wide scale, be prepared for a significant investment of time.
However, I have only done so because 1.) I hate GW lasguns and 2.) I love converting. If you're not like me, you may want to use these just for your veterans, Tempestus, Sternguard, or other elite choices, to lend them character.
So, without further ado, this week's tutorial.
The Tools You Will Need:
Plasticard sheets you won't need much at all, but you will need various thicknesses. One should be as this as you can get about the thickness of paper. The other should be about 1mm thick.
Plasticard strip you'll need some square rods, about 0.5mm x 0.5mm. You'll need about 400mm or so.
Three styrene rods of various thicknesses one should be about 1mm diameter, the next 2mm, and the final one 3mm.
Poly cement
Infantry weapons while you can scratchbuild your own, we're not doing that this week, so break out some infantry weapons. This is aimed at lasguns, but you can adapt it to bolters, pulserifles and the like. It won't really work with Eldar weaponry (wrong aesthetic), but you could adapt it to the Eldar look easily enough.
So, off we go!
Tutorial 1: Rail Mounts
Modern weapons use rail mounts for additional weapon systems these are easily recognisable as the 'ridged' bars and grips seen on almost every modern American assault weapon system. To quote Wikipedia:
Let's make some for our lasguns!Rail Interface System (RIS, sometimes also referred to as Rail Accessory System, RAS) is a generic term for a system for attaching accessories to small firearms such as pistols, rifles and light machine guns.
Common accessories include tactical lights, laser aiming modules, forward hand grips for improving weapon handling, telescopic sights for medium-ranged or distant targets, and reflex sights/red-dot sights for short to medium-ranged targets, iron sight lines, bipods, and bayonets.
Most RIS equipment is compatible with one or more of the most common rail systems, all of which are broadly similar:
- Weaver rail mount - an early system, still popular in the civilian market
- Picatinny rail (MIL-STD-1913) - standardized US military version
- NATO Accessory Rail - developed from MIL-STD-1913
These are used primarily in the military and by firearm enthusiasts to improve the usability of the weapon, being accessorized quickly and efficiently without requiring the operator to field-strip the weapon.
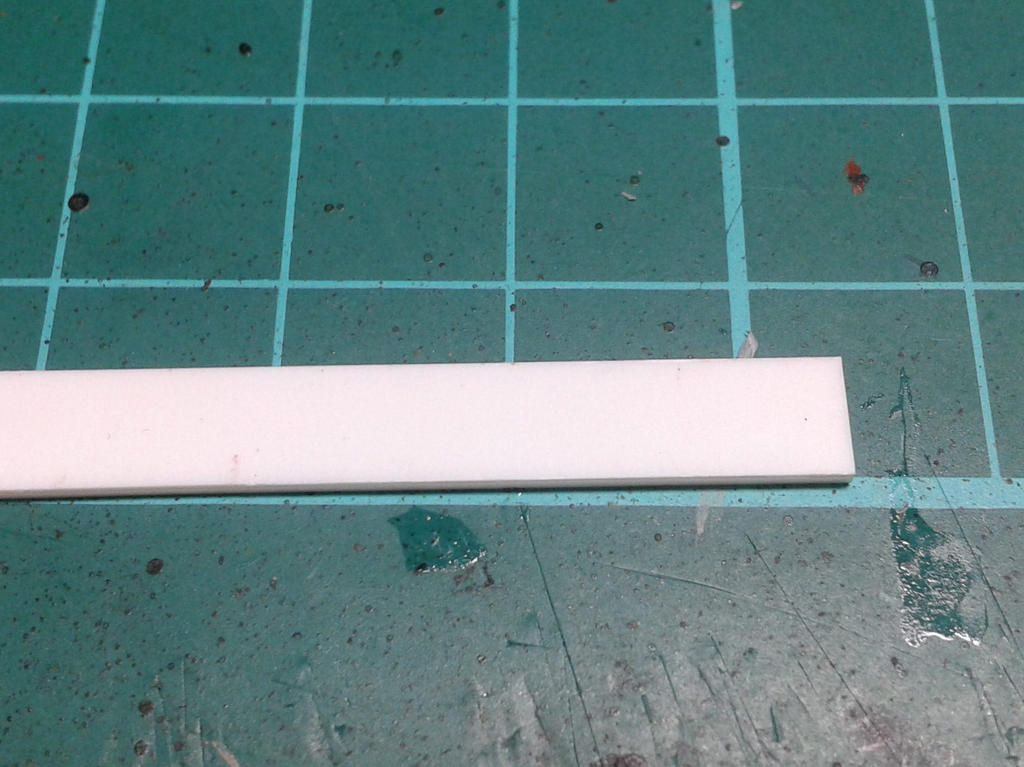
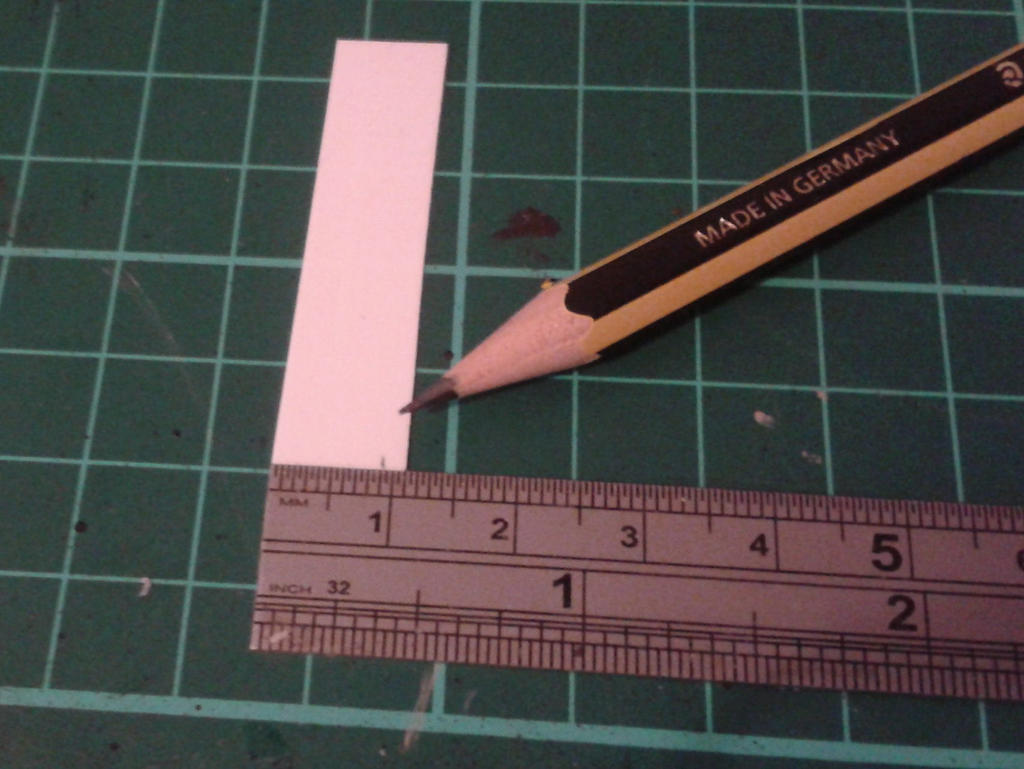
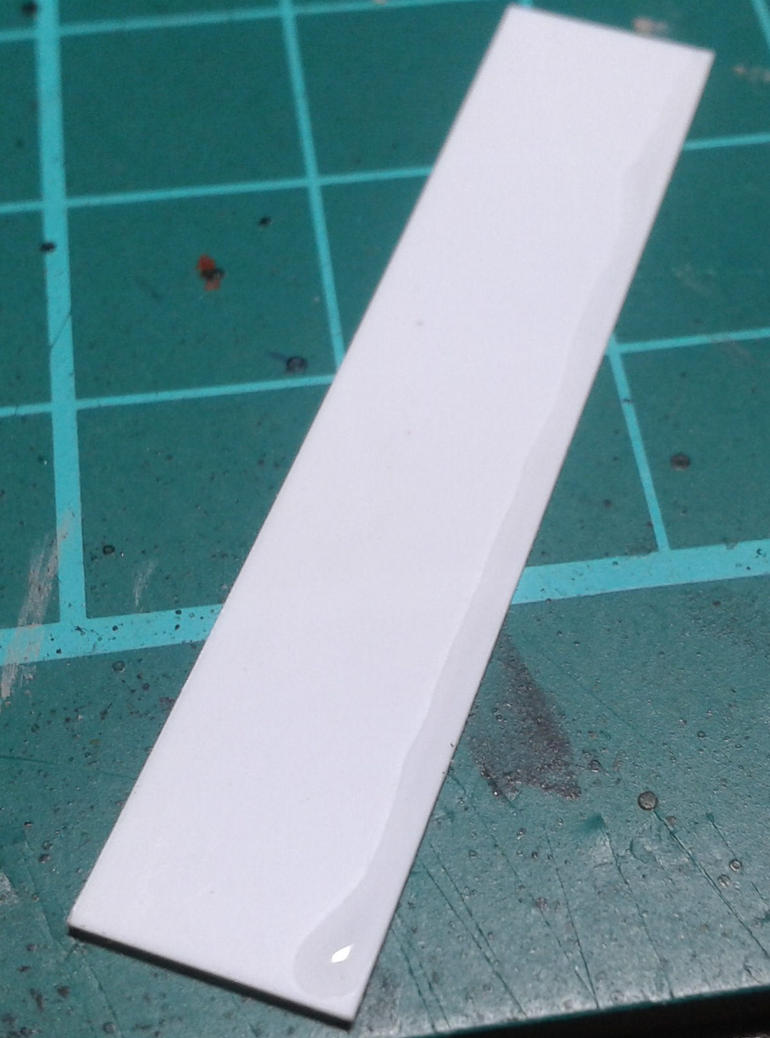
To begin with, you'll need a piece of rectangular plasticard; it should be the thinnest you can get, and about 10mm x 60mm (for a full infantry company.) You'll also need that styrene rod
Measure the piece, so that it is exactly 9mm wide:
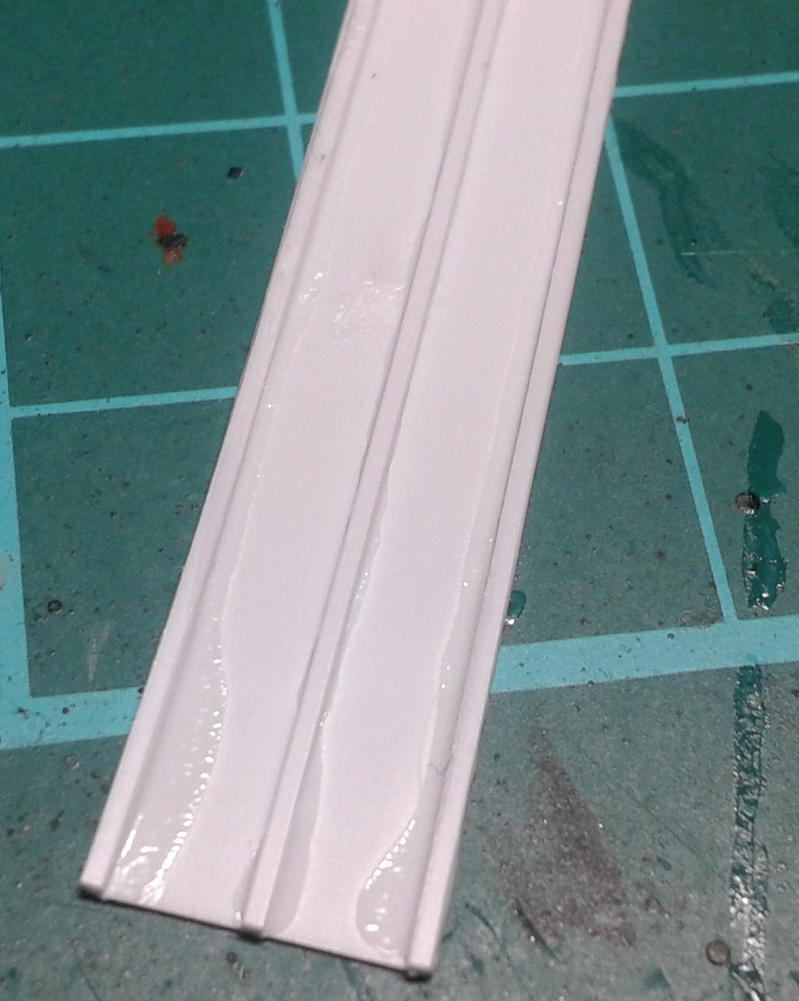
Once you've done that, apply poly cement down one edge
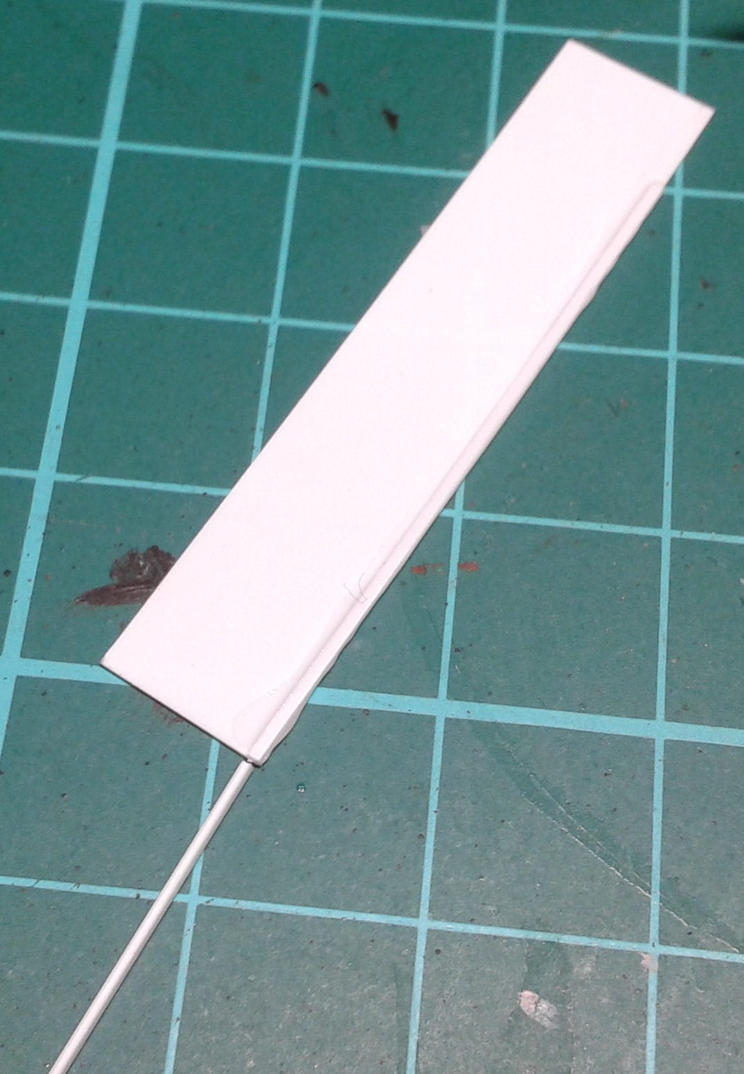
and glue the styrene rod to it, keeping it in-line with the edge of the piece like so:
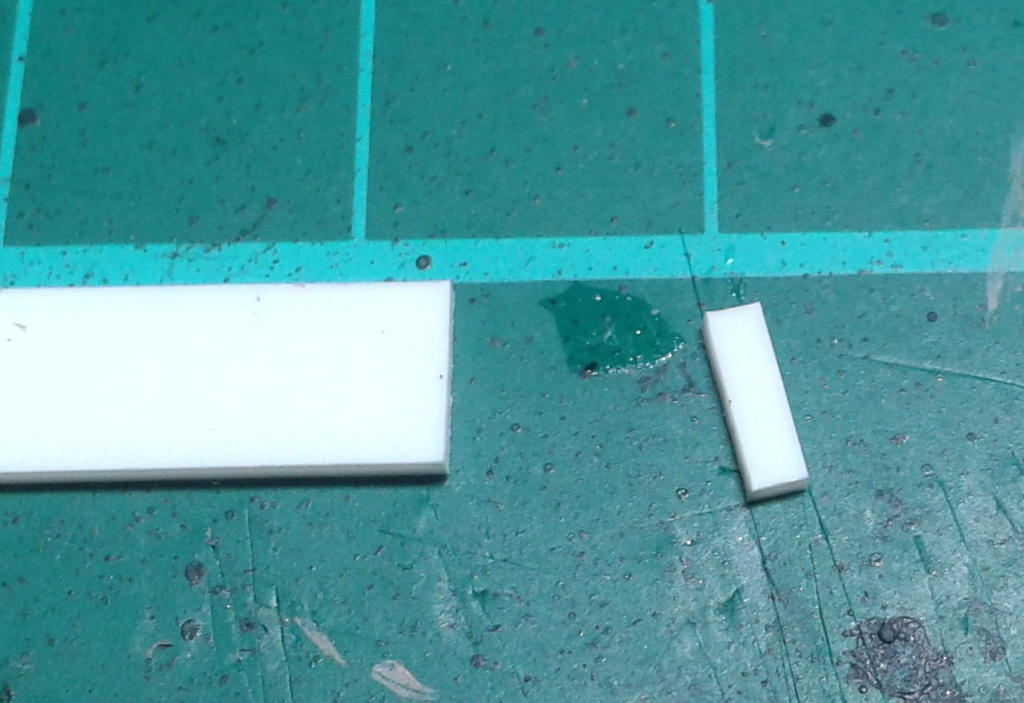
As you can see, once it's glued, clip it off.
Don't throw the bit you've clipped away! You're going to repeat the steps above, only for the opposite edge, like so:
[img][/img]
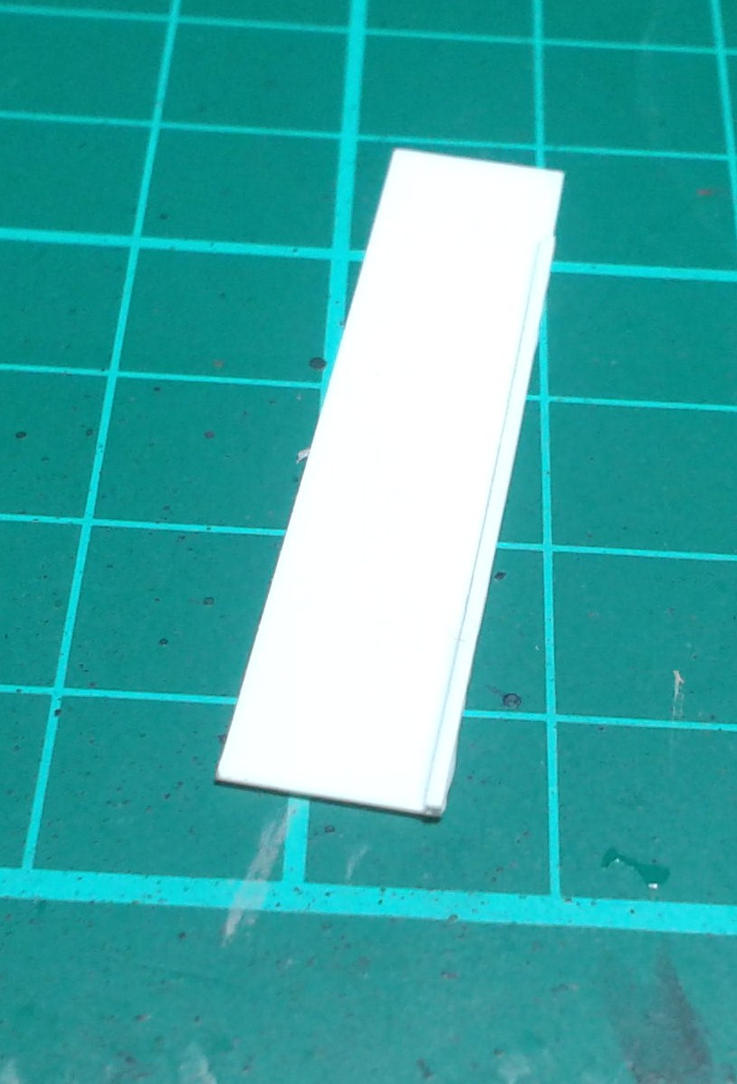
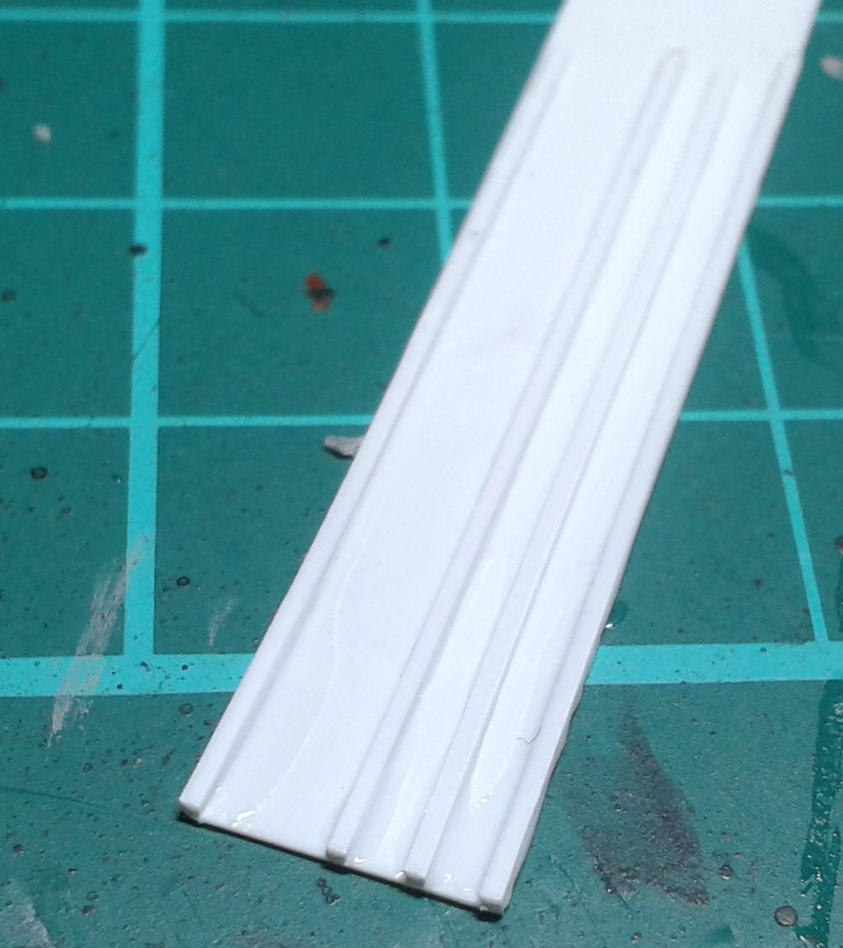
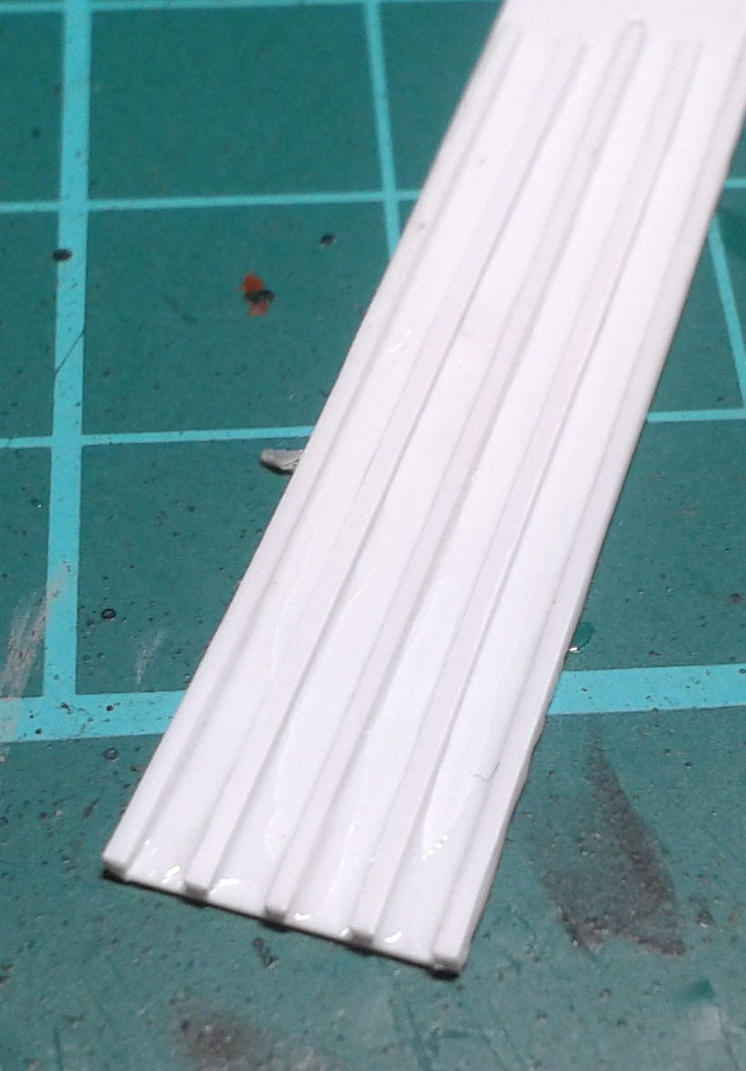
Now, you can measure this bit, but I just judge by eye. Place a thin line of glue down the middle of the piece and, you guessed it, glue that styrene rod down again:
Repeat this step for the gap between the middle piece and the edge piece
and repeat again for the final gap glue that styrene rod between the middle piece and the end piece again. As I say, I judged all of this by eye, but if you prefer to be precise, then measure.
As always, BoLS forums only let me post 10 pics at a time more of these tutorials when I get a reply!
BoLS Lounge : Wargames, Warhammer & Miniatures Forum
Results 1 to 10 of 19
-
05-28-2014, 06:17 PM #1First-Captain

- Join Date
- Dec 2012
- Posts
- 1,997
 A Beginner's Guide: How To Scratchbuild Infantry Weapon Accessories
AUT TACE AUT LOQUERE MELIORA SILENTIO
A Beginner's Guide: How To Scratchbuild Infantry Weapon Accessories
AUT TACE AUT LOQUERE MELIORA SILENTIO
-
05-28-2014, 09:43 PM #2Veteran-Sergeant
- Join Date
- May 2013
- Posts
- 216
Here!
-
05-29-2014, 08:08 AM #3First-Captain
- Join Date
- Dec 2012
- Posts
- 1,997
Thanks Thaldin!
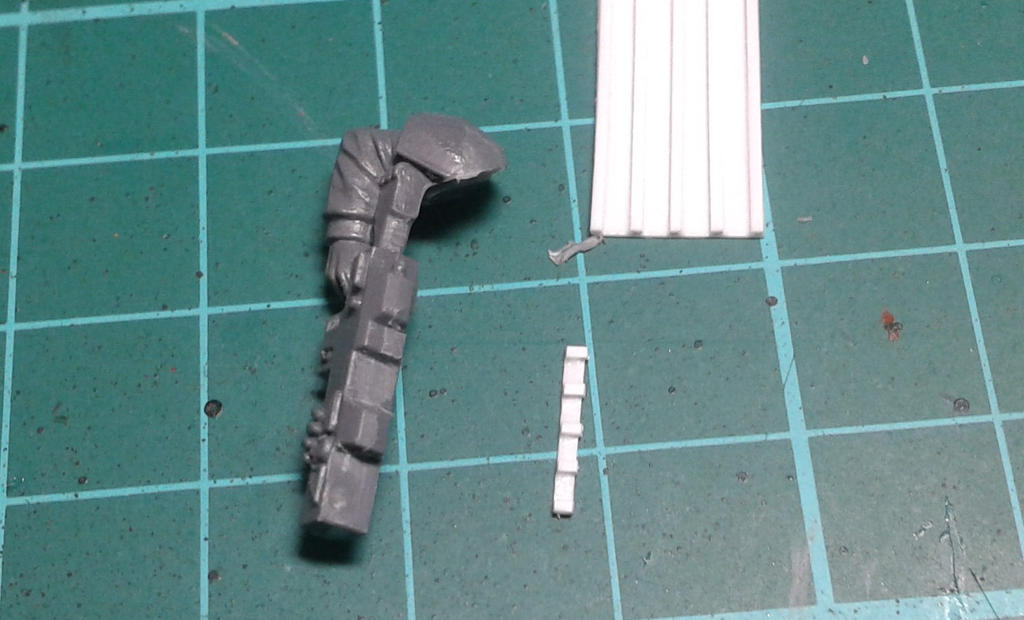
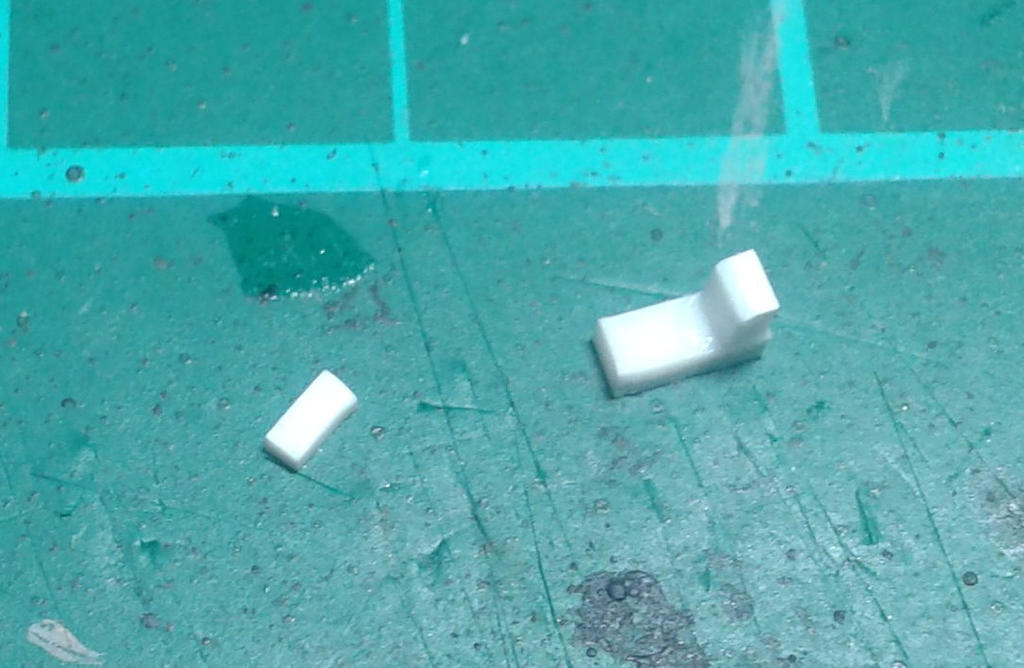
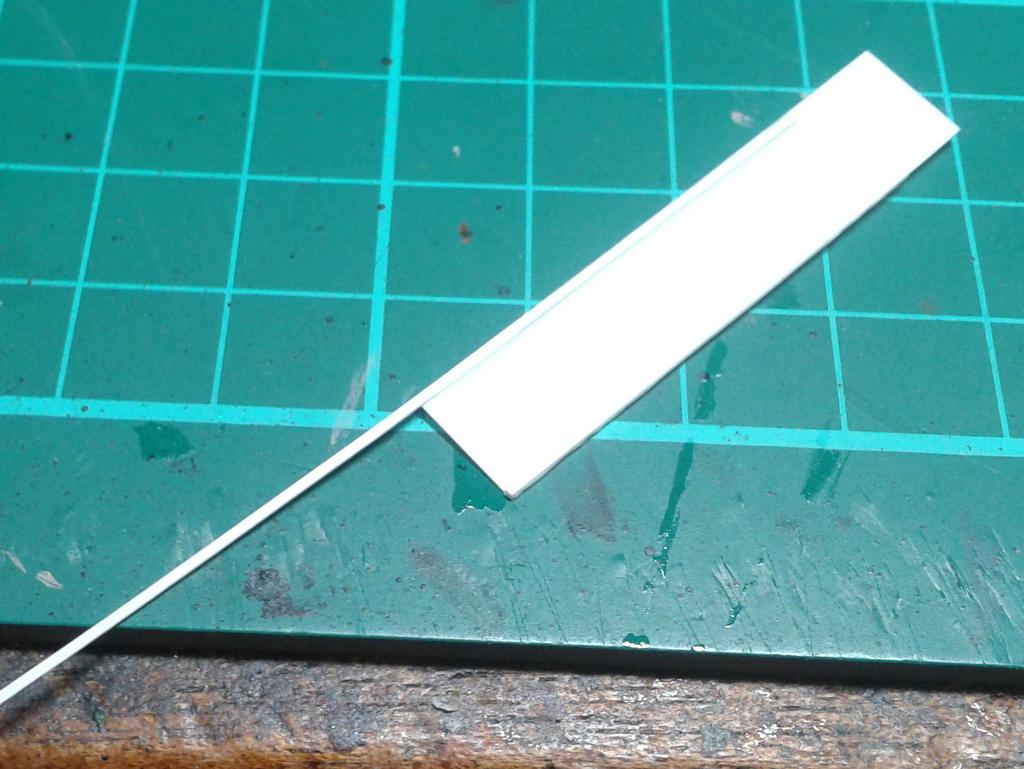
N.B.: As a side note, I often make more rifle rails than I need. I store them afterwards in my bits box. Because of the nature of ploy cement and the thinness of the card, they can curl as in the older piece shown on the right here:
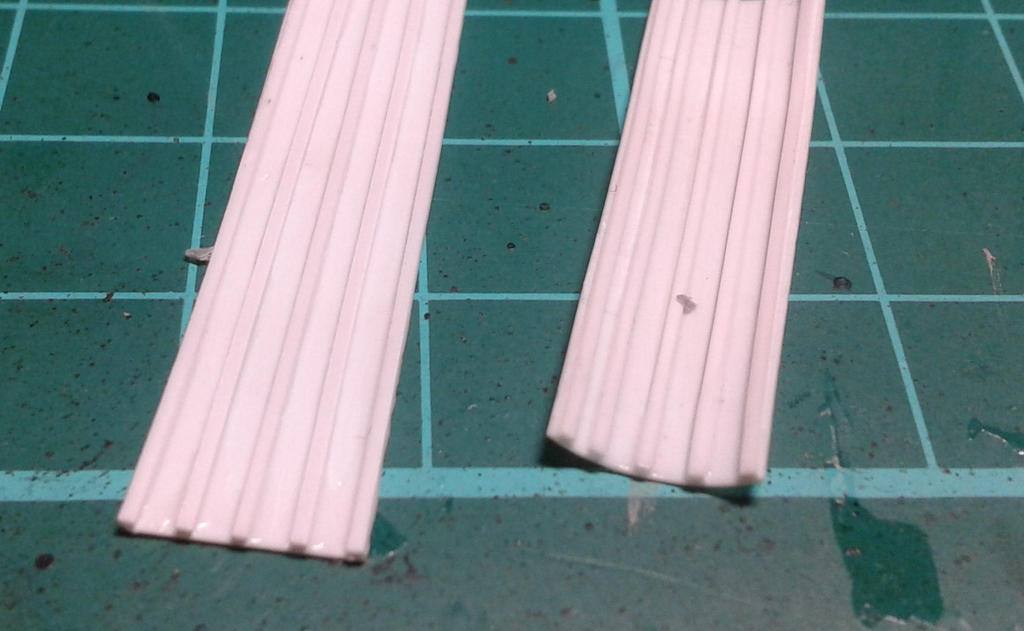
If this happens, it doesn't mean the piece is useless; it just means you need to use superglue to attach the rails to any rifle, instead of the poly cement I use below.
Now, why did I get you to measure 9mm width exactly, when ordinarily I never care about dimensions? Simple:
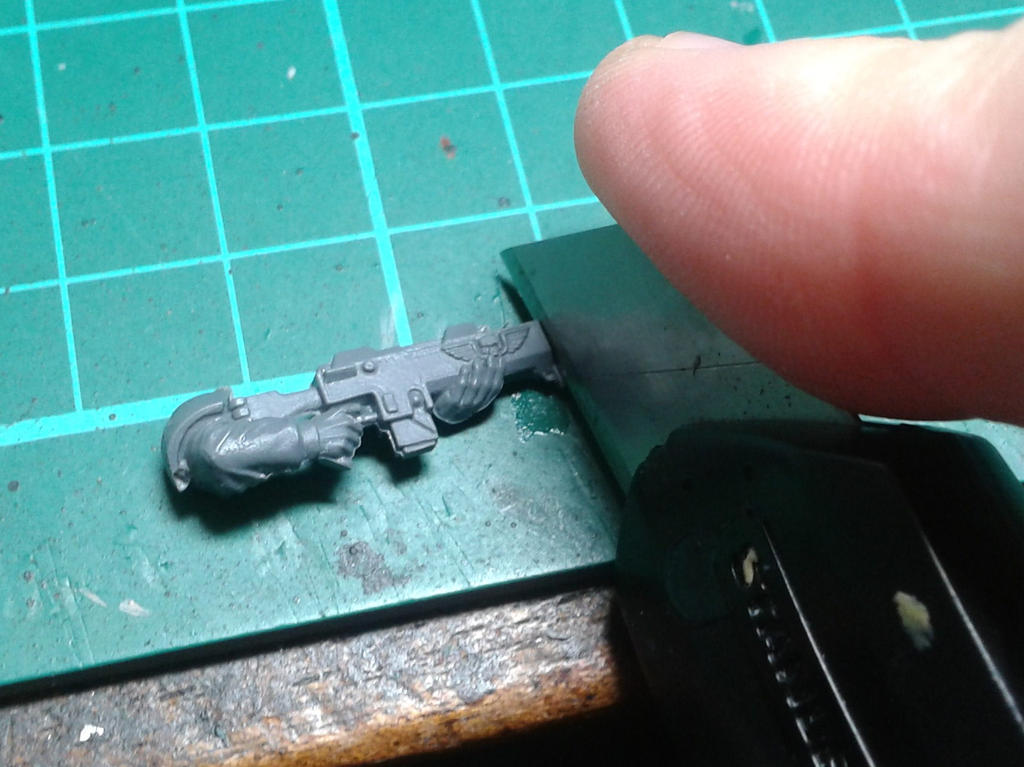
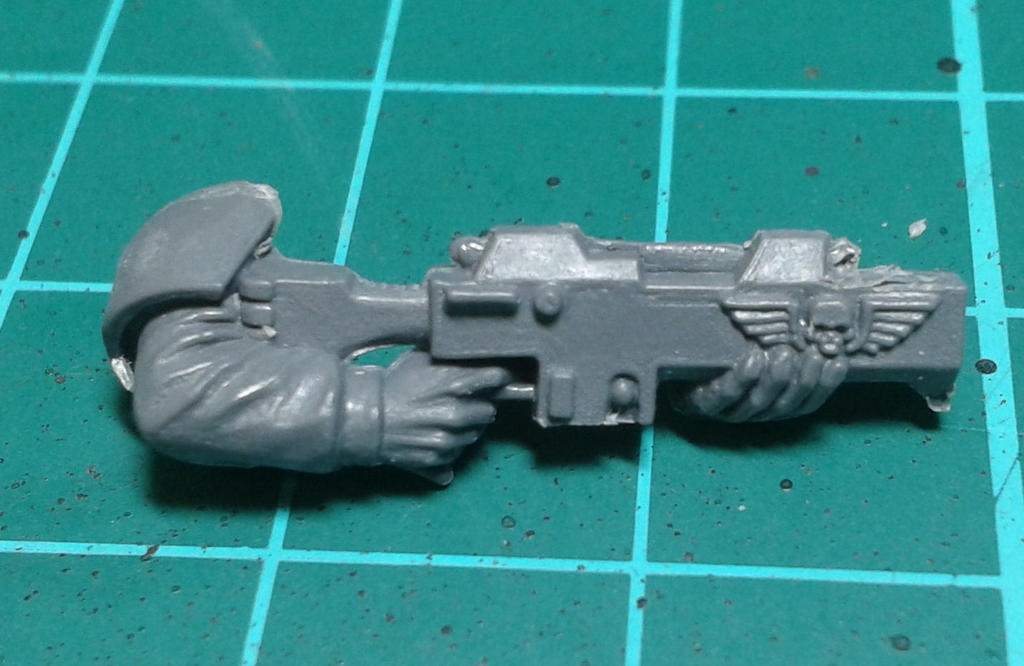
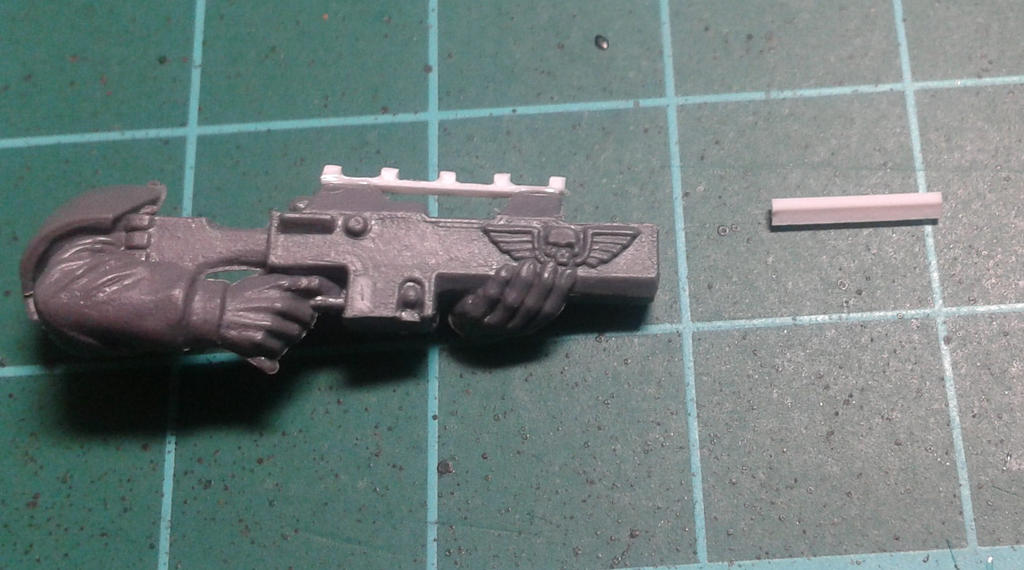
So, here's our lasgun, pre work.

I need to clean this thing up before I do any more scratchbuilding. Using a careful, directly downward push, controlling the blade with my finger, I clip off the barrel. As always, USE BOTH HANDS! I had to use one of mine to show the angle you need here. When I made the cut, I held the gun down with my other hand. SAFETY FIRST!
I then flip the lasgun around and clip off the magazine. I flip it around because it's easier to make the cut, and if I slip (which is all too possible) any damage to the plastic will be on a side which will not normally be visible during gaming.
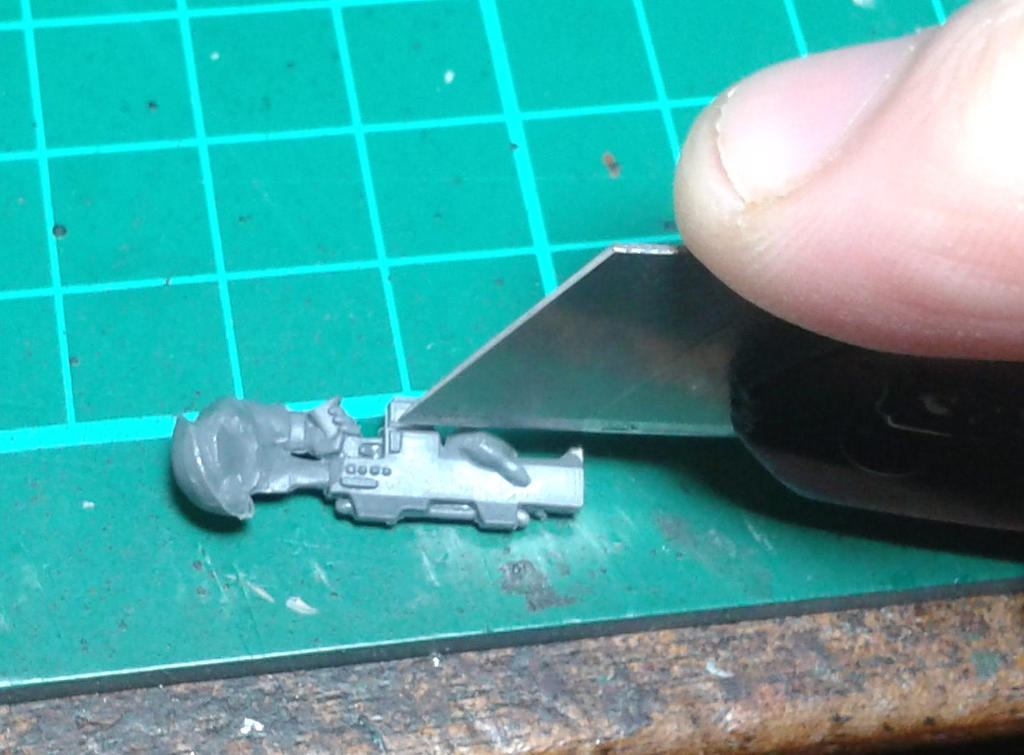
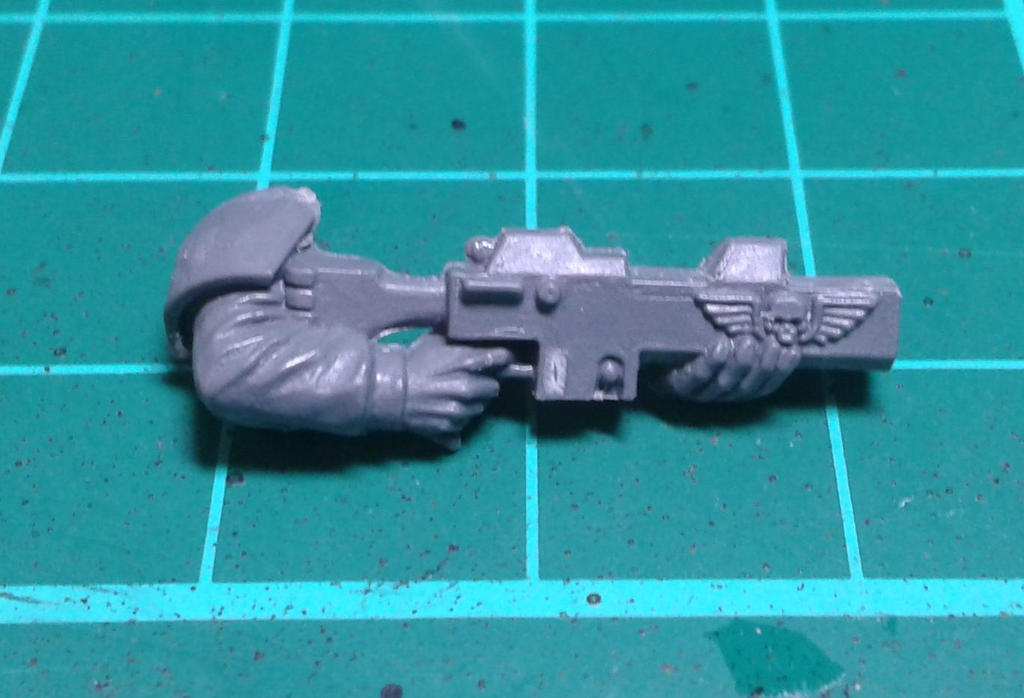
Your lasgun should now look like this:
I then shave off any extraneous details. This is obviously a personal taste thing, so if there are some you want to keep, keep them. If you're following my methodology, you'll have a lasgun which looks like this:
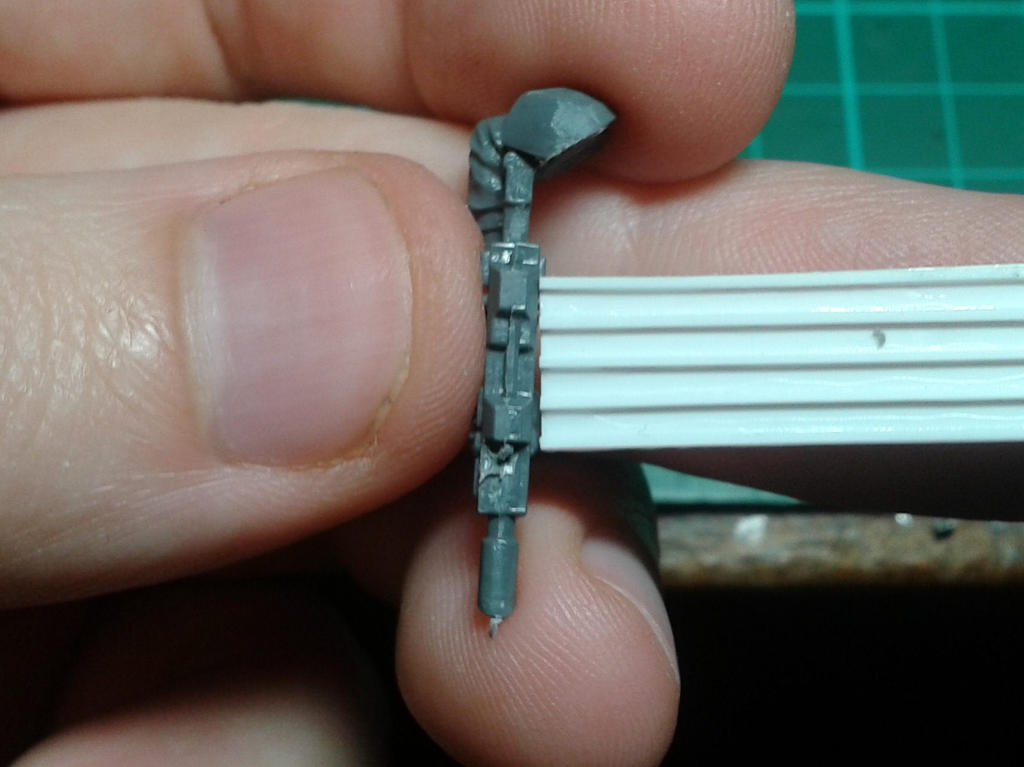
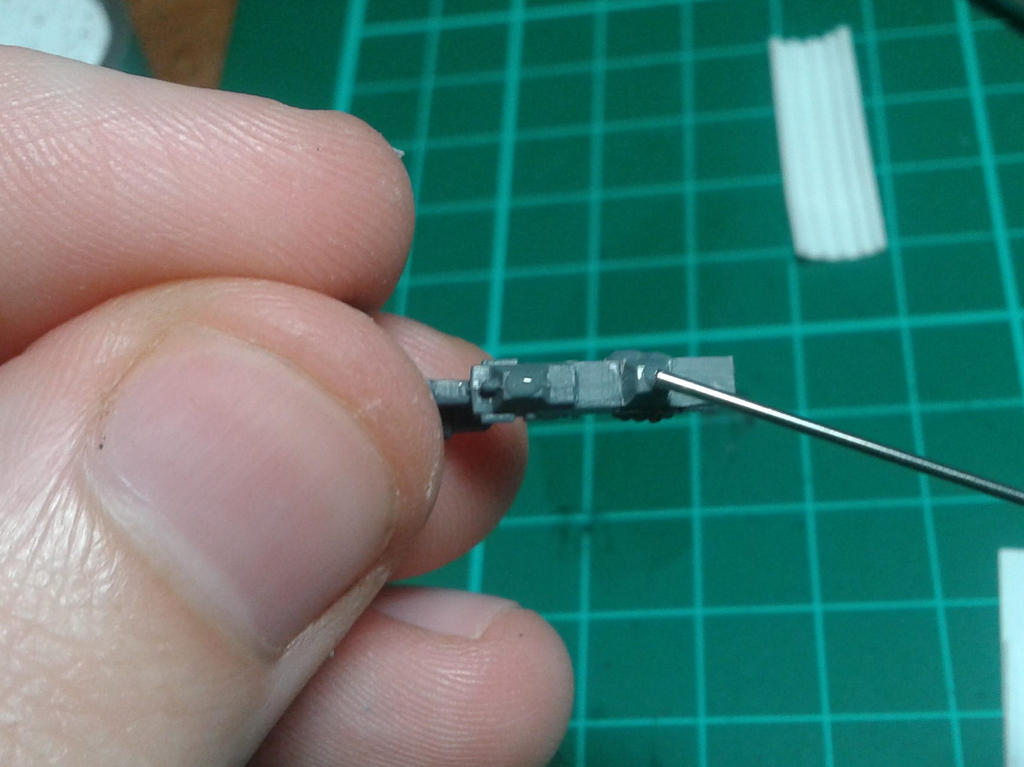
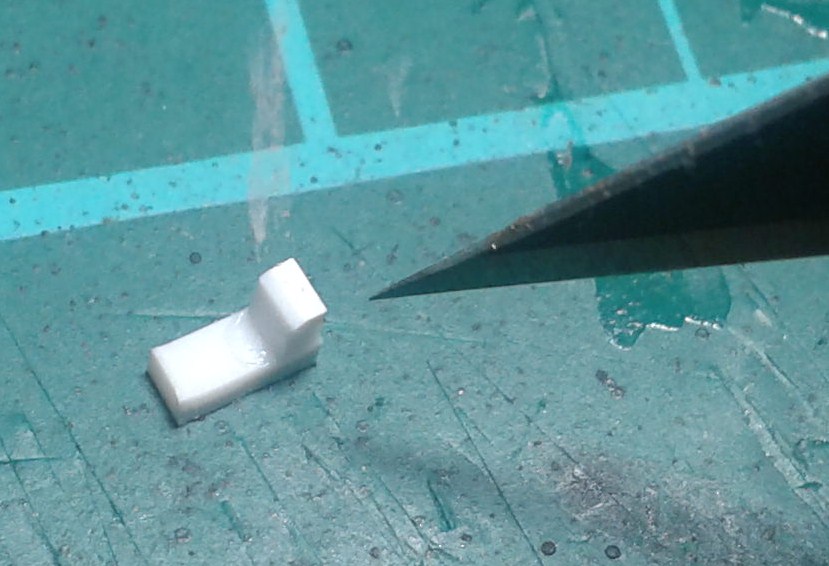
Next, I take my scratchbuilt rail component, and using a single downward cut like you see in the picture, I cut off a piece about 2mm thick:
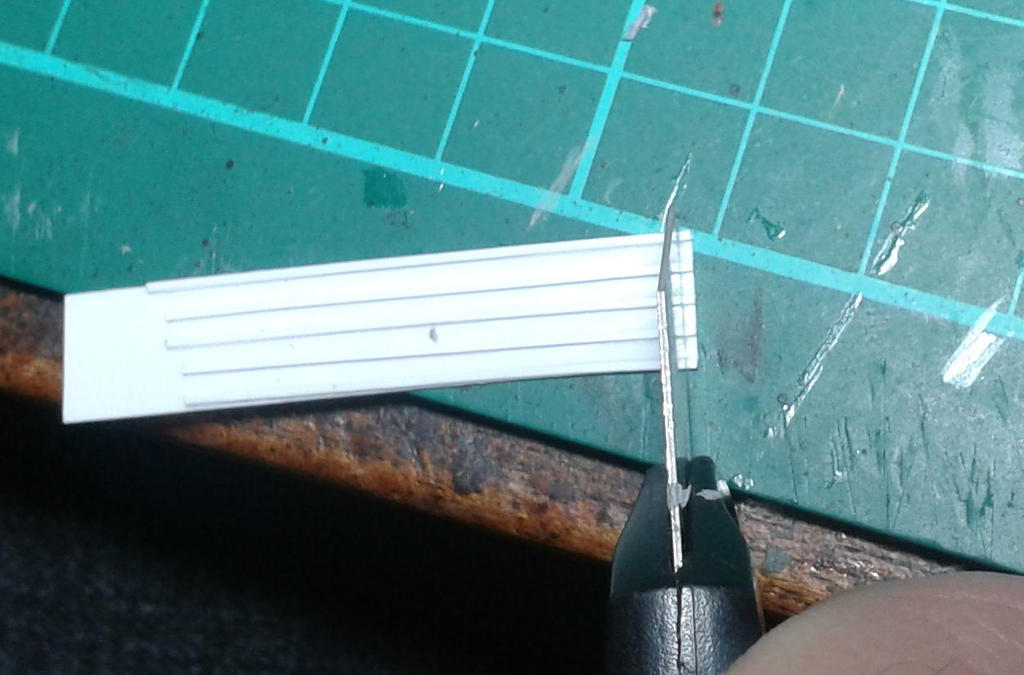
See where we're going here?
I apply glue to the two 'high points' on the top of the lasgun
Last edited by YorkNecromancer; 05-29-2014 at 11:31 AM.
AUT TACE AUT LOQUERE MELIORA SILENTIO
-
05-29-2014, 11:31 AM #4First-Captain
- Join Date
- Dec 2012
- Posts
- 1,997
Wow. It posted without a reply! Yes!
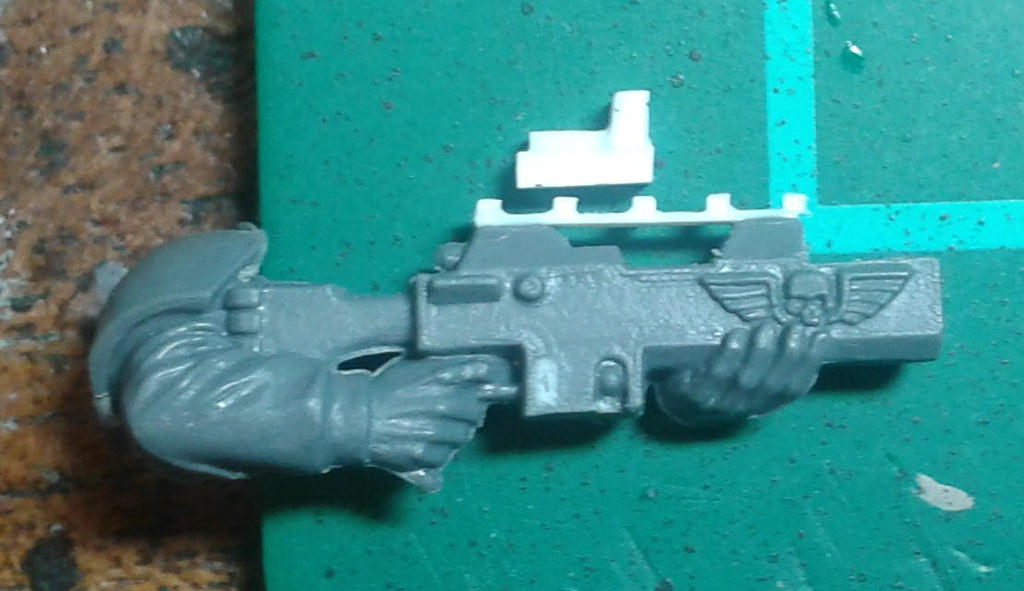
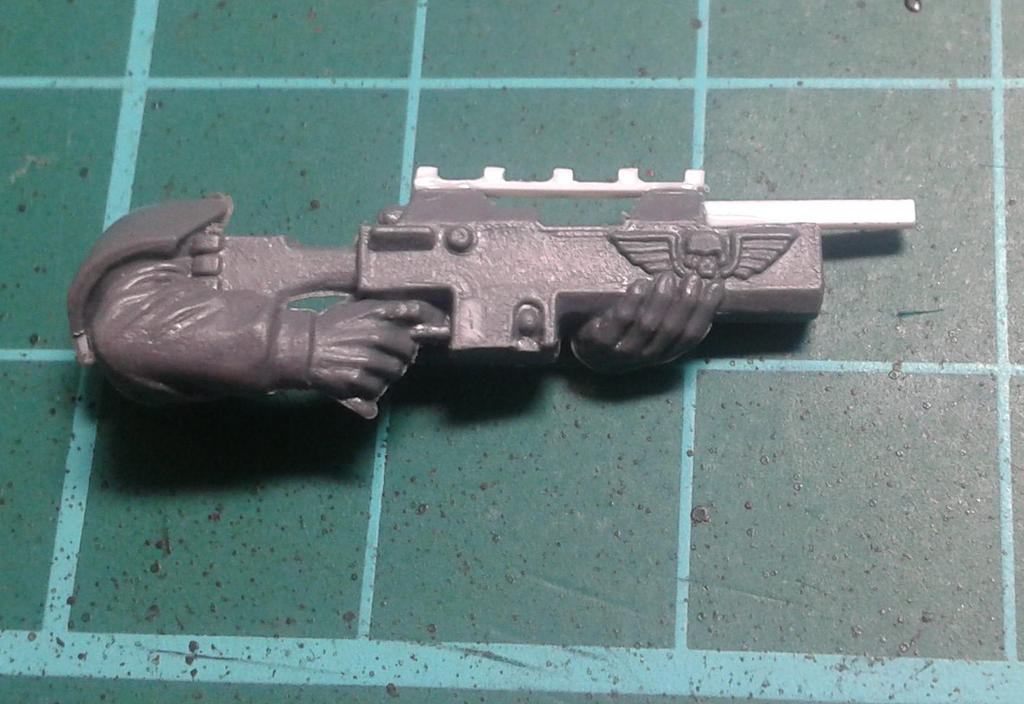
Here's the finished rail:
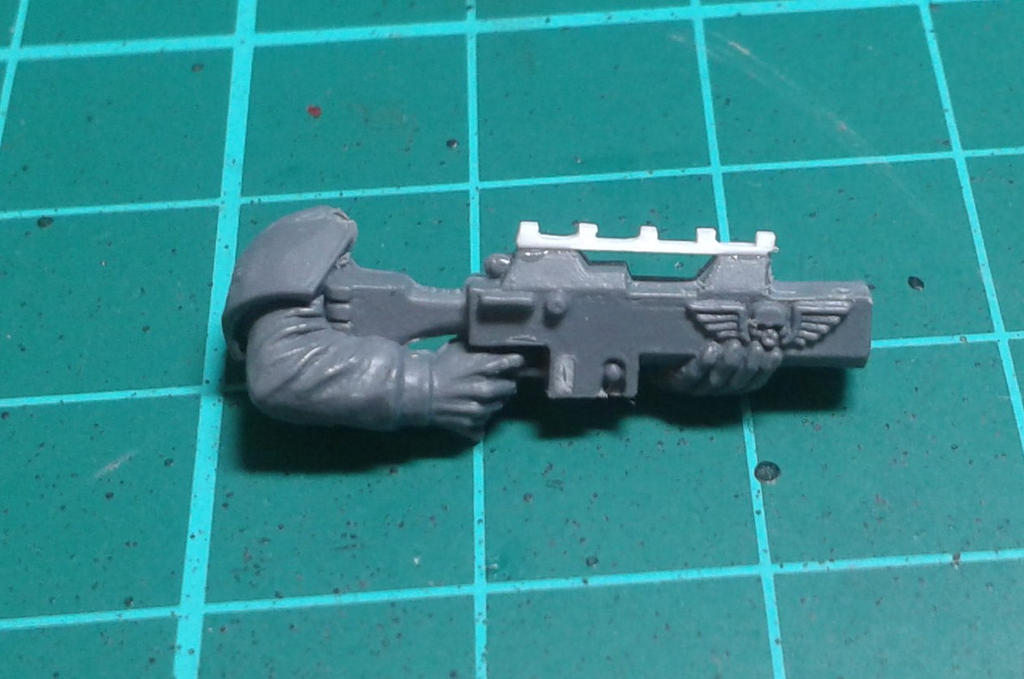
Now, you don't just have to mount these on the top it would be equally appropriate to have one on the side where the Astra Militarum winged skull is, but I quite like that bit of detailing, so I always leave it. There's also the fact that the inspiration for these modifications is the G2A2 Assault Rifle from the first F.E.A.R. game
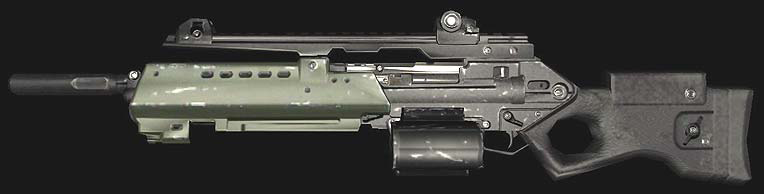
(Monolith games are the best FPS company ever hands down) which has a helical magazine, and a side rail would get in the way of that. Of course, that's a whole personal taste thing, so, as always, go with what is in your heart,
So, that's the rail done. Now we move onto the next bit:
Tutorial 2: Reflex Scopes
A reflector sight or reflex sight is an optical device that allows the user to look through a partially reflecting glass element and see an illuminated projection of an aiming point or some other image superimposed on the field of view.
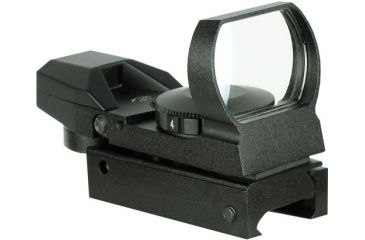
They're in every single FPS nowadays as the most basic scope beyond simple iron sights, and they are ridiculously easy to scratchbuild.
Get a piece of 1mm plasticard; the bit below is big enough for an infantry platoon!
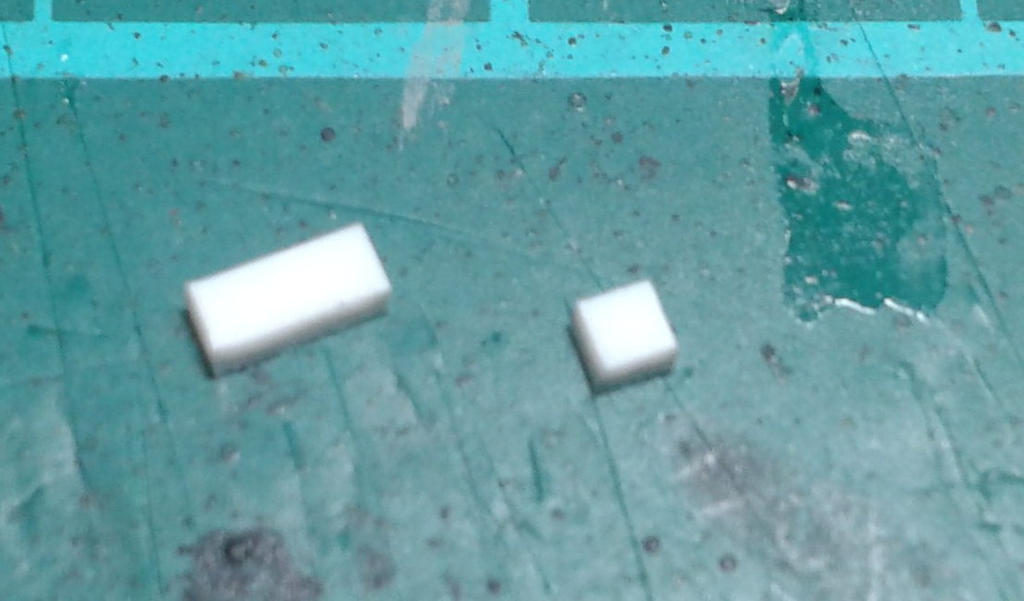
Cut off a 2mm bit.
Cut a third off the end.
Using your scalpel to align it, glue the short piece to the longer one like so:
Cut off a little piece roughly to these proportions relative to the rest of the piece you've made (again, I'm doing everything by eye, not measuring.)
Glue in place like so
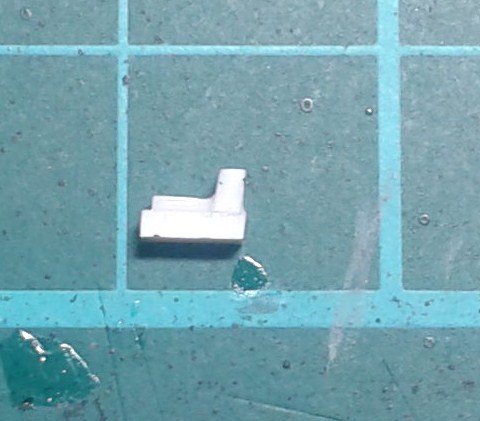
and you're done. It can be affixed to the rifle's rail like so:
Of course, if you want to see the rest of the tutorial and how to make muzzle modifications, I'll need a reply.AUT TACE AUT LOQUERE MELIORA SILENTIO
-
05-29-2014, 12:19 PM #5Brother-Sergeant
- Join Date
- Sep 2013
- Posts
- 54
Here you go!
-
05-29-2014, 12:26 PM #6First-Captain
- Join Date
- Dec 2012
- Posts
- 1,997
Thank you!
Tutorial 3: Flash suppressors
So, as I said, this is based on the G2A2, so I need a thing over the muzzle.
Get that piece of square rod, and get cutting and gluing.
Now, the first kind of muzzle mods you can make are the ones you saw on my ladies' guns, and they're not a scratchbuild, but a kitbash. You'll need a Grey Knight teleporter backpack.
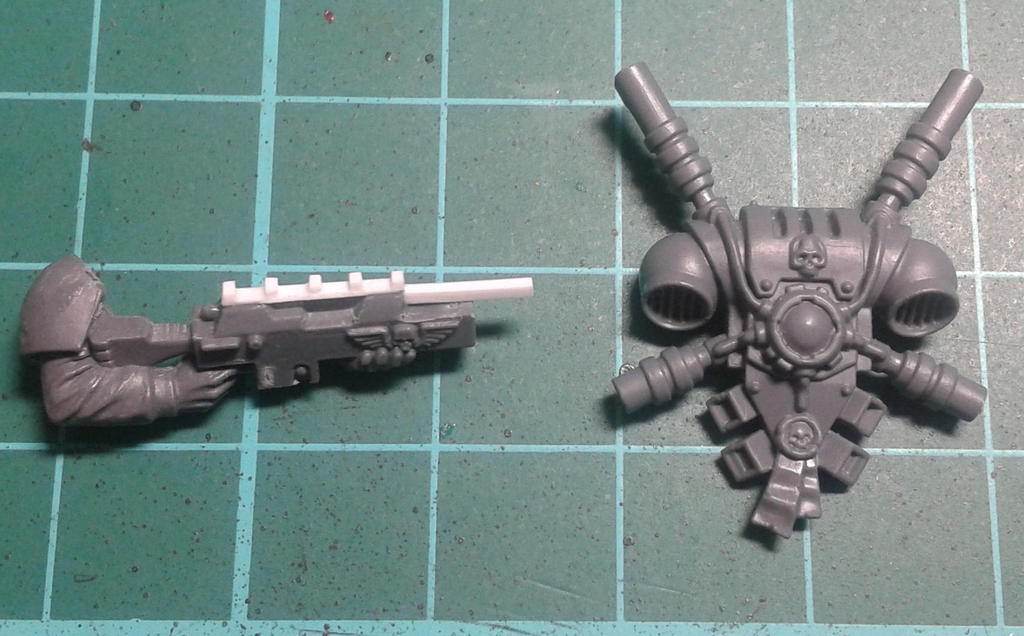
Just clip the teleporter rods off and you're done: instant flash suppressors.
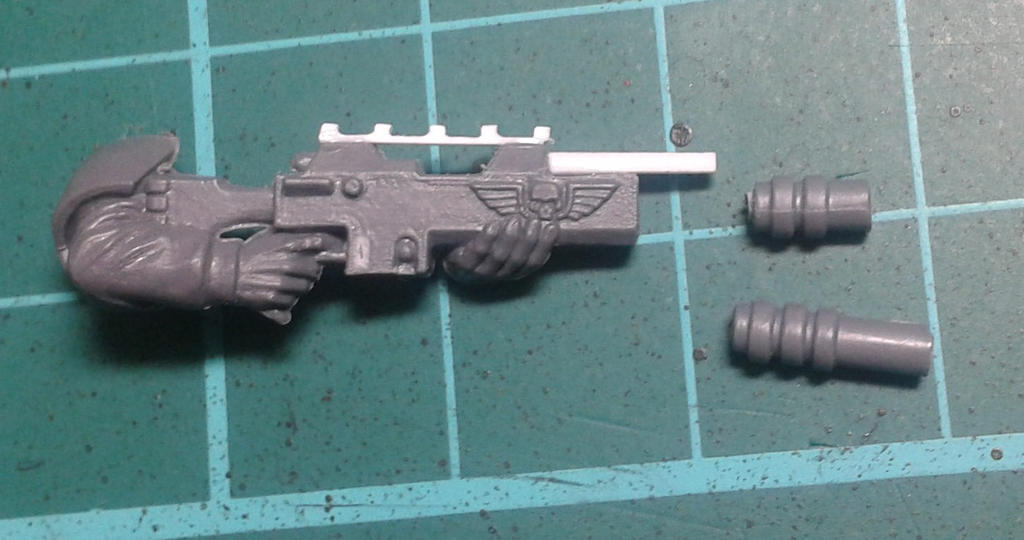
(Of course, if you dont have teleporter backpacks, you could just use thick styrene rod. I just like the extra details of the banding on the teleporter rods.
Now, if you're really interested in doing some unique stuff, we can always go hardcore, and that takes us to our more complicated tutorials.
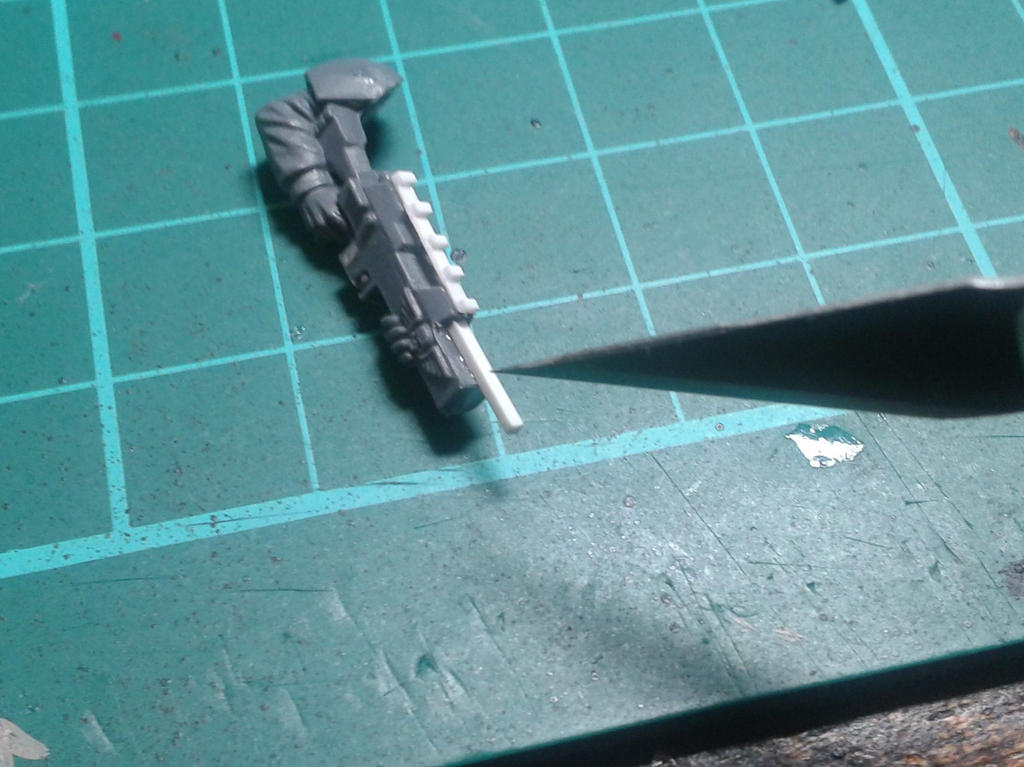
Tutorial 4: Sniper barrels.
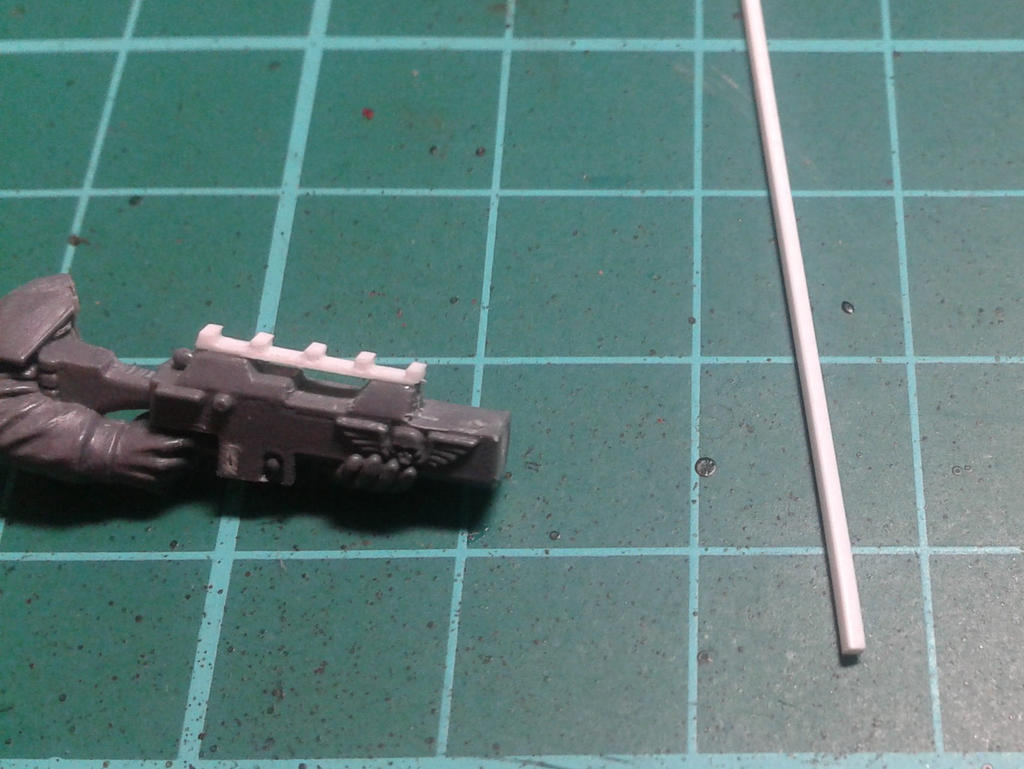
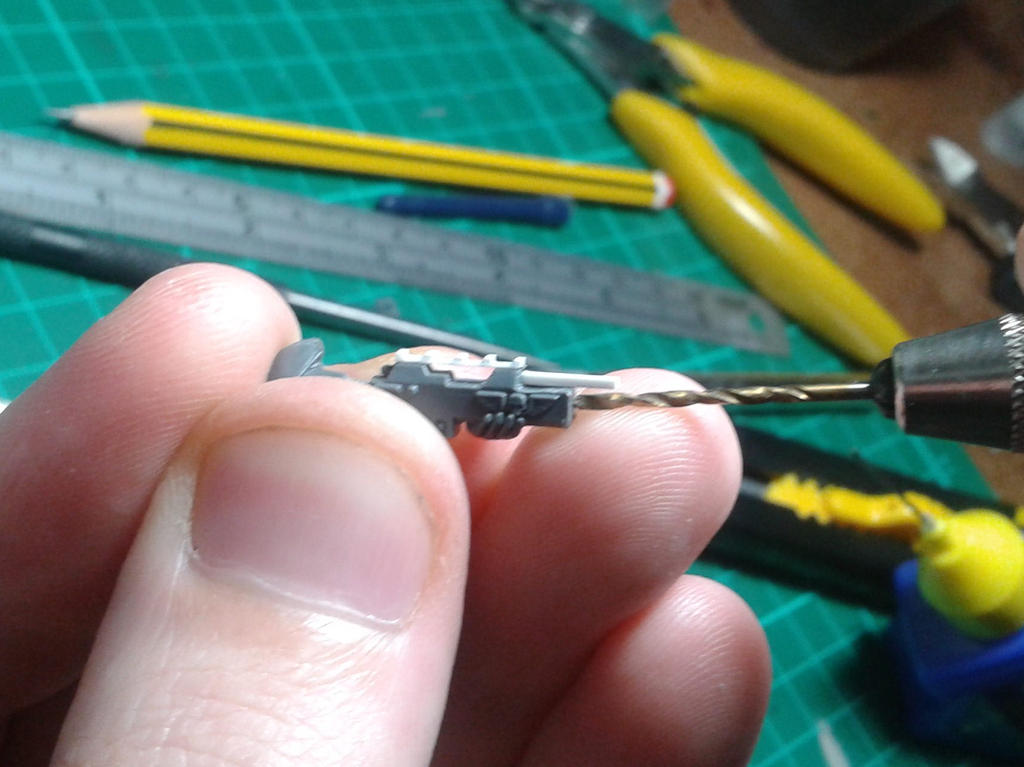
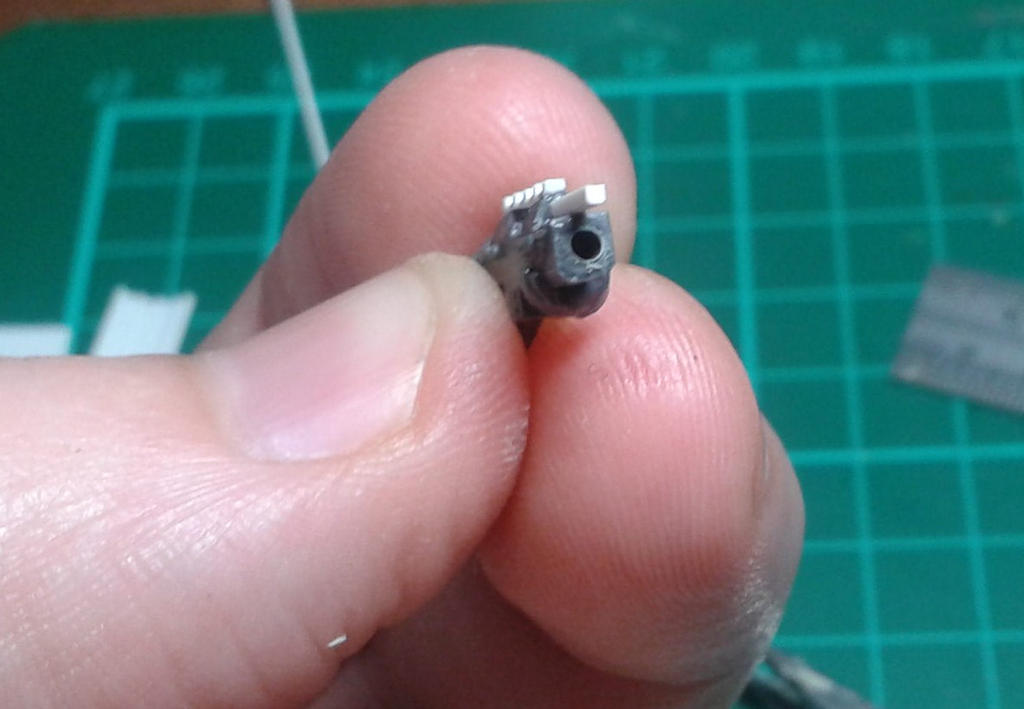
Now, this is where we break out the real modelling kit. You will need a pin vice (a little mini hand-drill) with a 1mm diameter bit. Begin by drilling out the front of the rifle where the barrel will go. TAKE YOUR TIME AND GET THE ANGLE RIGHT. You get it wrong, and the sniper barrel will look wonky and therefore stupid.
Next, put a drop of poly cement into the hole you've just made and slide your 1mm styrene rod into place.
If this reminds you of sex, might I suggest perhaps you're not having enough intimate time with your partner. Don't be alone. If you're in a relationship, go kiss your partner right now and tell them how much they mean to you. If you're lonely, make some time this week to go out and meet people not necessarily for relationships, but just to make connections. You may not meet The One For You this week, but the more people you know, the higher the chance that they'll know someone just right for you. Love doesn't come to you you need to go out and meet it, and you do that by being social, even (especially) when it's scary and embarrassing.
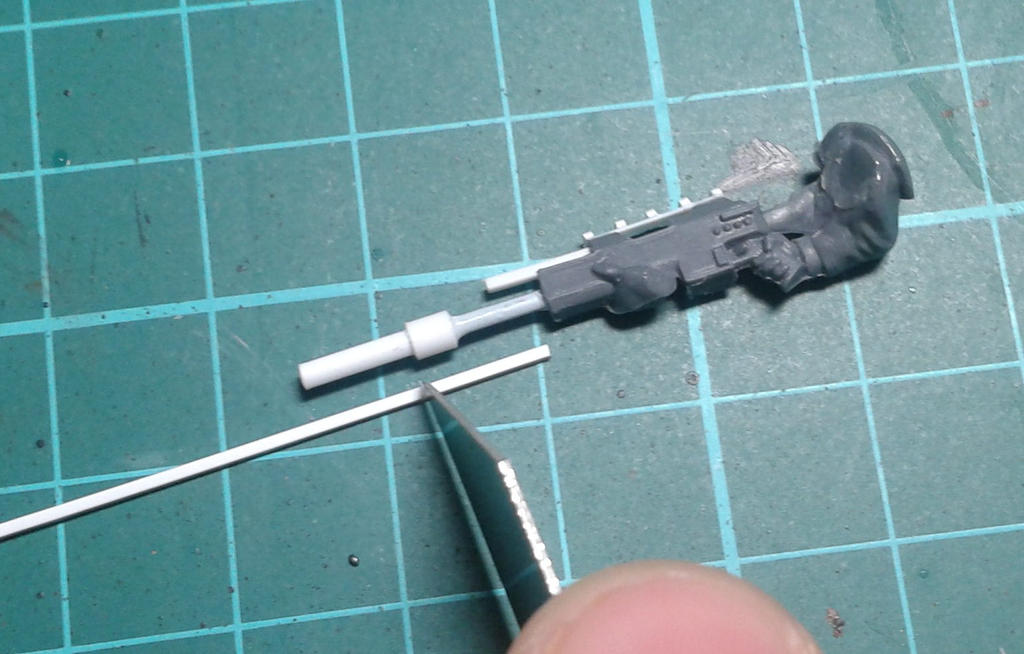
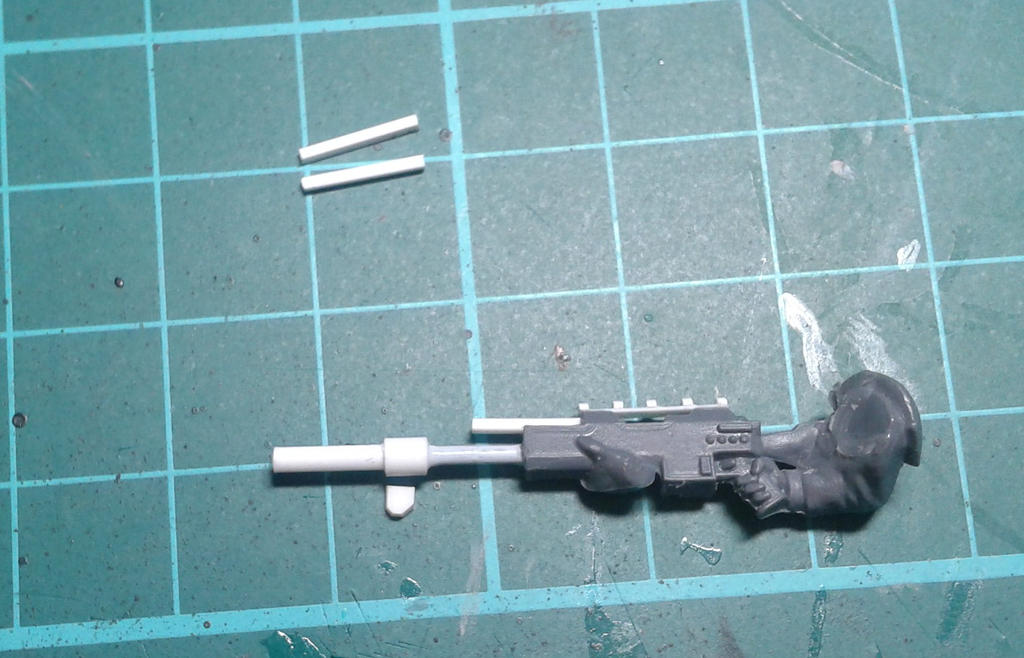
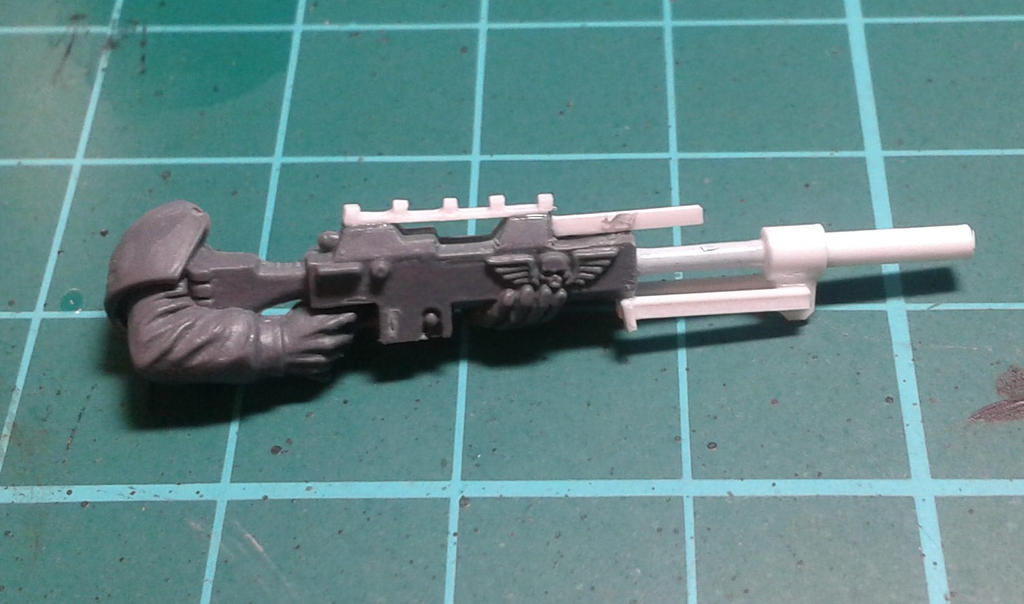
Anyway, back at the gun tutorial, you may note I've got a ridiculously long barrel there; that's deliberate I'm not going to trim it down until I've got the next piece made.
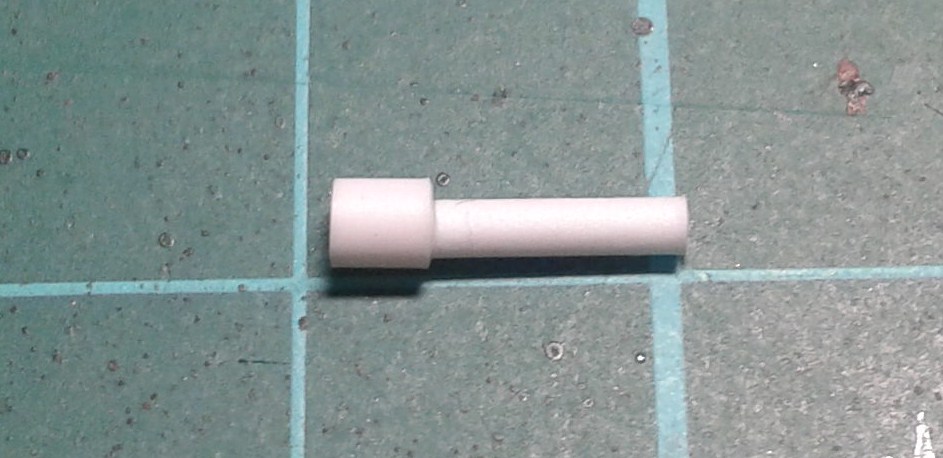
You'll need two pieces of styrene rod like you see below: one thicker and drilled (or, as in this case, pre-hollowed) the other solid and slightly thinner.
Glue them together like so:
And more details when I get a reply!AUT TACE AUT LOQUERE MELIORA SILENTIO
-
05-29-2014, 01:42 PM #7Veteran-Sergeant
- Join Date
- May 2013
- Posts
- 216
Done!
-
05-29-2014, 01:48 PM #8First-Captain
- Join Date
- Dec 2012
- Posts
- 1,997
Cheers!
So, once you've got this suppressor finished, judge how long you want your sniper barrel to be, and clip it down, then glue the suppressor in place the barrel should fit neatly into the hole in the suppressor.
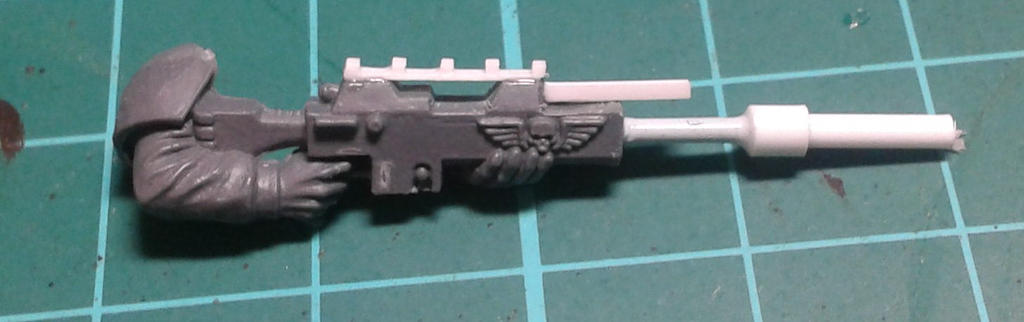
Et viola a completed sniper barrel. If you wish, you might consider a rectangular suppressor to suggest an antimateriel rifle like a Barrett M82 'Light Fifty'; that's certainly what GW's Ratlings currently have!

Tutorial 5: Rifle Bipods
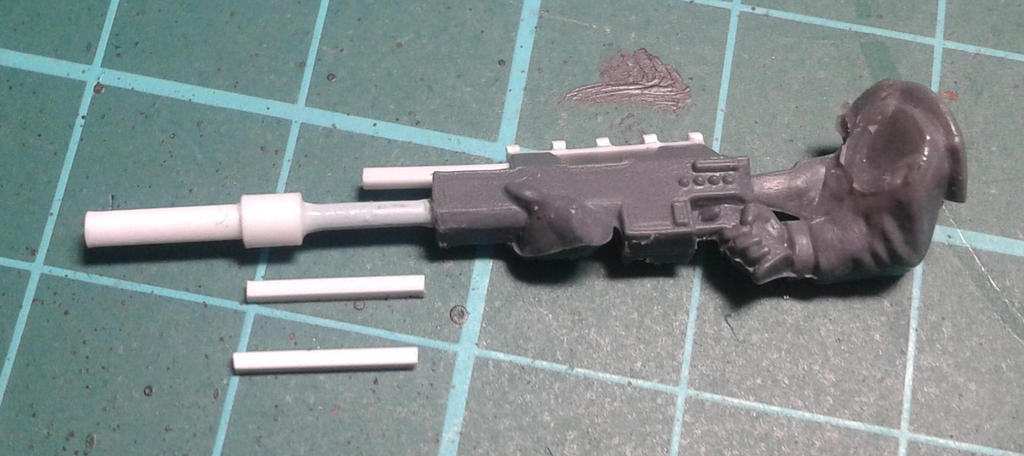
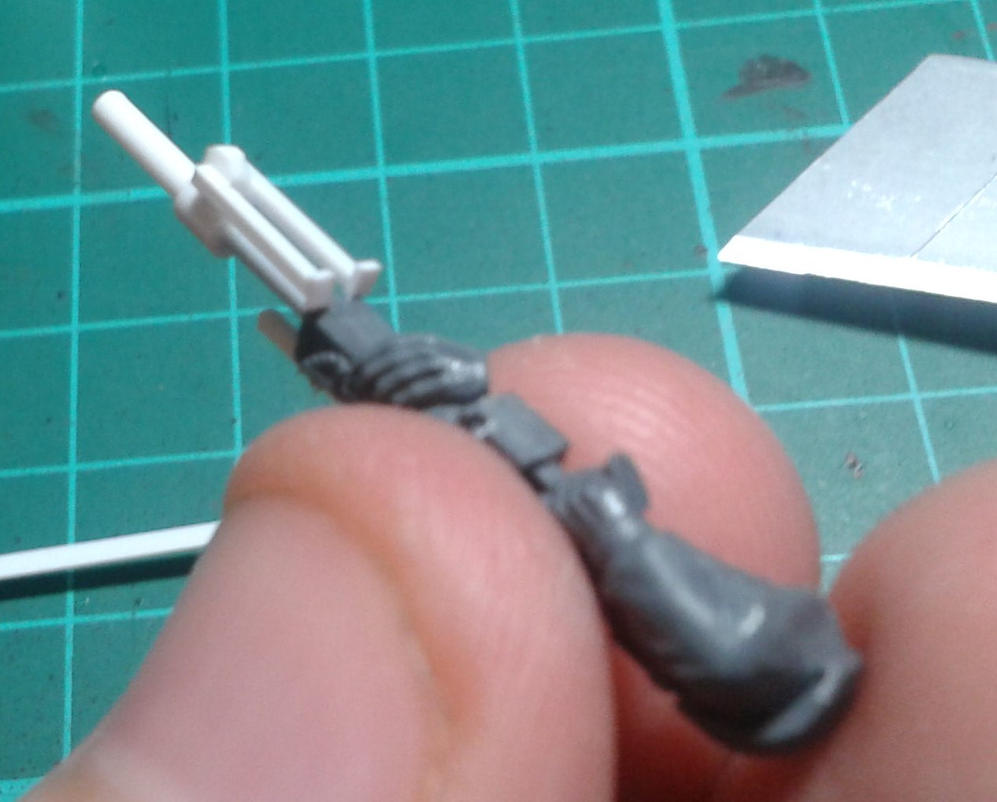
These things are fiddly, but easy. First, you need to make the bipod's legs. Once again, break out good old square styrene rod, and cut, measuring by eye you need two pieces long enough to reach from the widest part of the suppressor to the rifle's body, like so:
You then need a small piece of 1mm plasticard, cut into a roughly 1mm x 1mm square shape here, I've removed two corners to add visual interest.
Glue it at the lowest point of the wide part of the suppressor, then glue the two rods you've made, one on each side. They should be glued to the piece you've just glued on, as well as to the rifle's body.
Now, you could have the legs of the bipod out if you wish, but that's not a beginner's conversion, so I'm leaving that out for this week.
Next, cut two 1mm x 1mm squares from your super-thin plasticard sheet
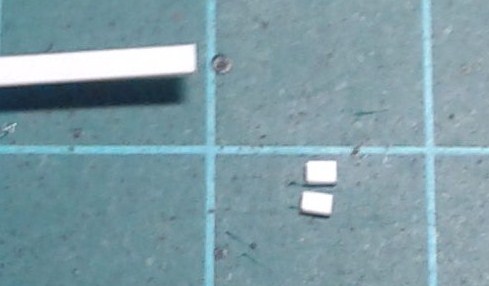
and use your scalpel to glue them onto the bottom of the bipod's legs to make feet
and there you go. A finished bipod.
Tutorial 6: Telescopic Scopes
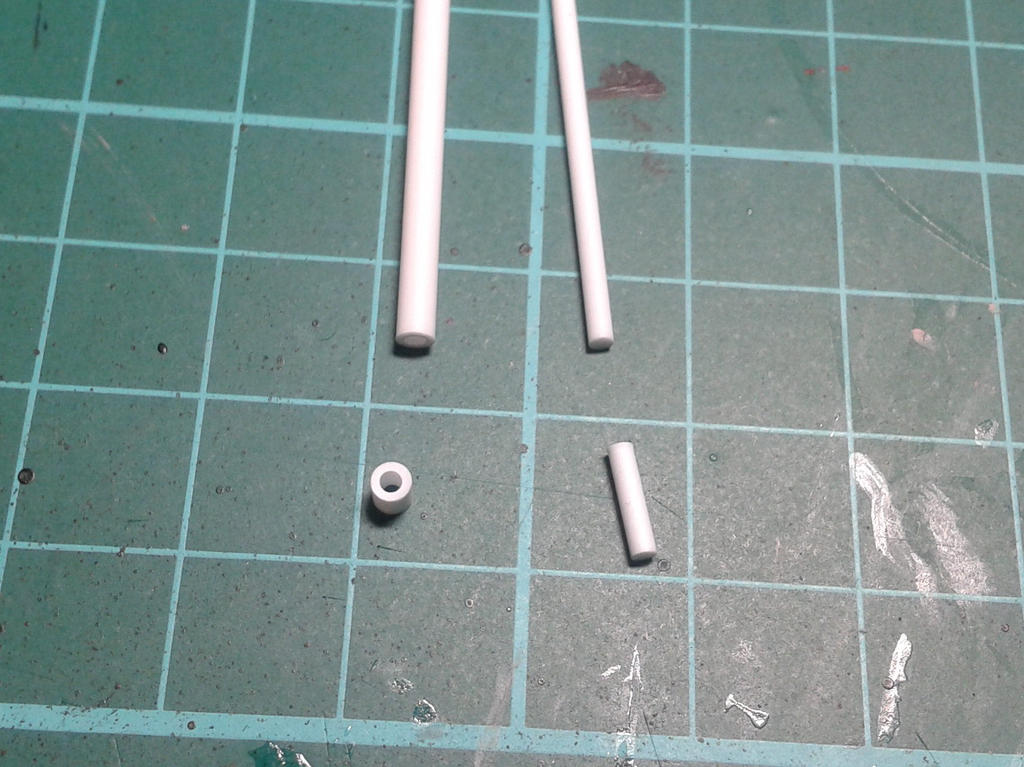
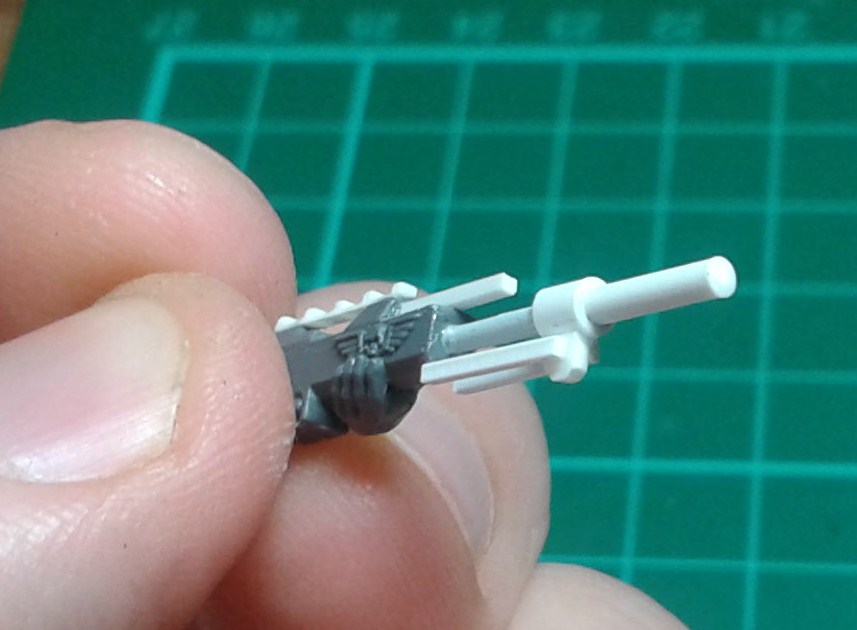
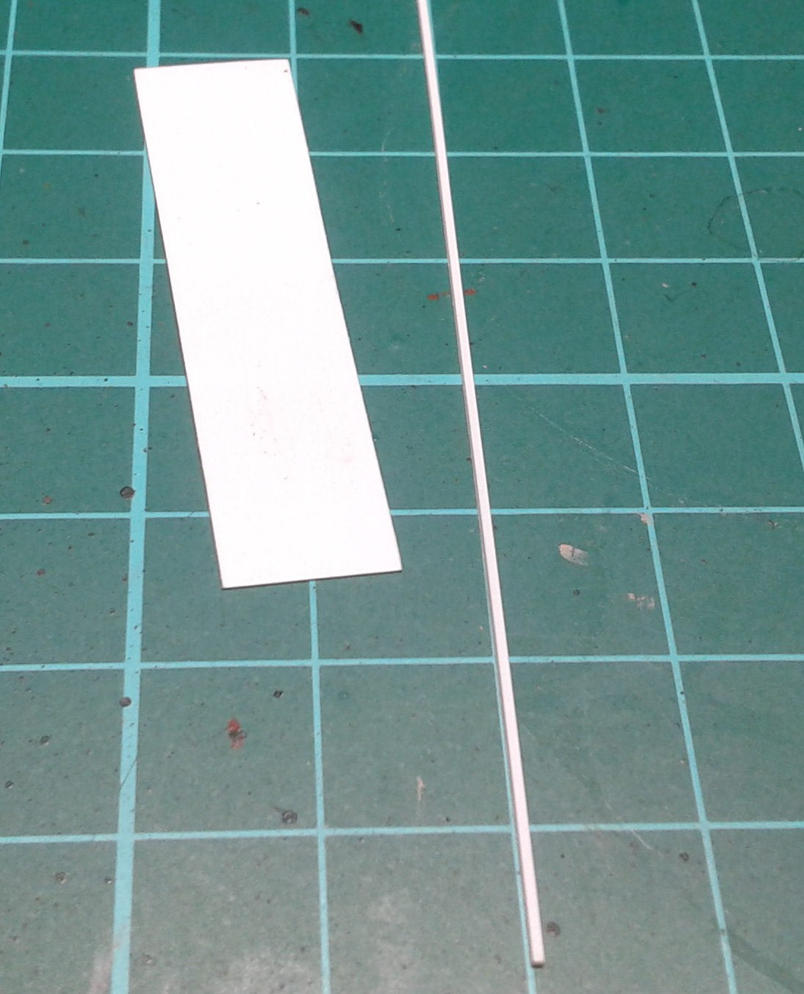
For this bit, you'll need three styrene rods of various thicknesses one should be about 1mm diameter, the next 2mm, and the final one 3mm.
Cut three lengths. The thinnest should be roughly the same length as the middle thickest, with the thickest piece being the longest. The middle thickness piece should also have one end with an angled cut as seen here. You'll also need a tiny piece of 1mm thickness plasticard as seen blow the three rods:
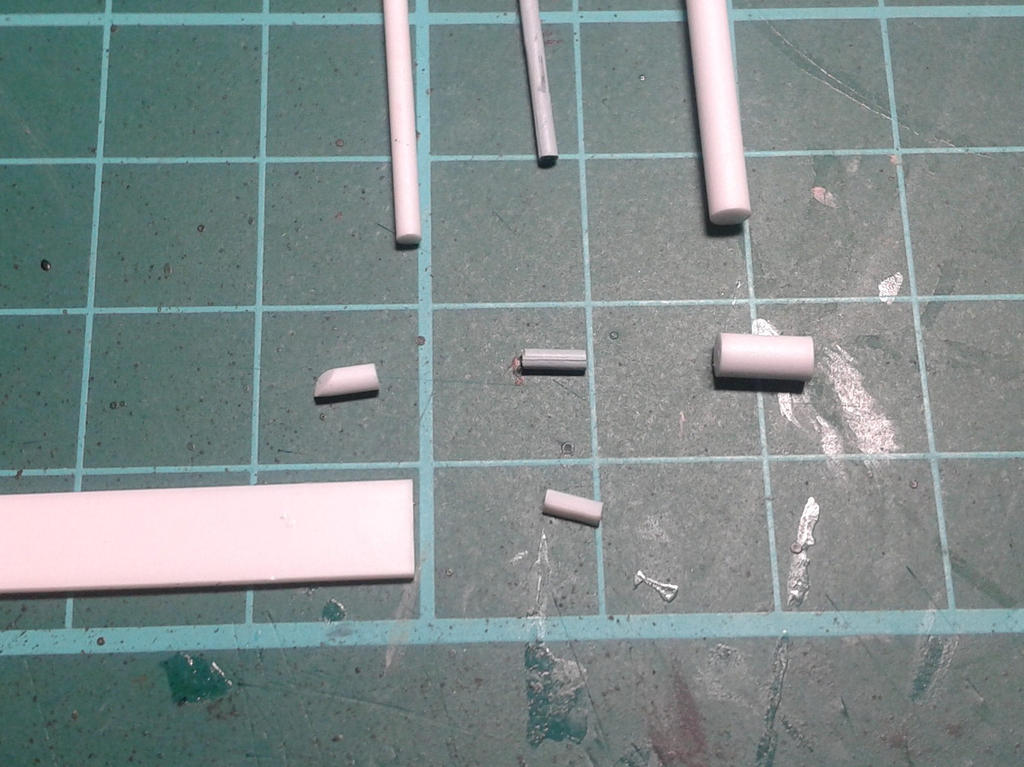
Last bit of the tutorial to come! Replies please!Last edited by YorkNecromancer; 05-29-2014 at 01:52 PM.
AUT TACE AUT LOQUERE MELIORA SILENTIO
-
05-29-2014, 02:06 PM #9Veteran-Sergeant
- Join Date
- May 2013
- Posts
- 216
Back for more!
-
05-29-2014, 02:25 PM #10First-Captain
- Join Date
- Dec 2012
- Posts
- 1,997
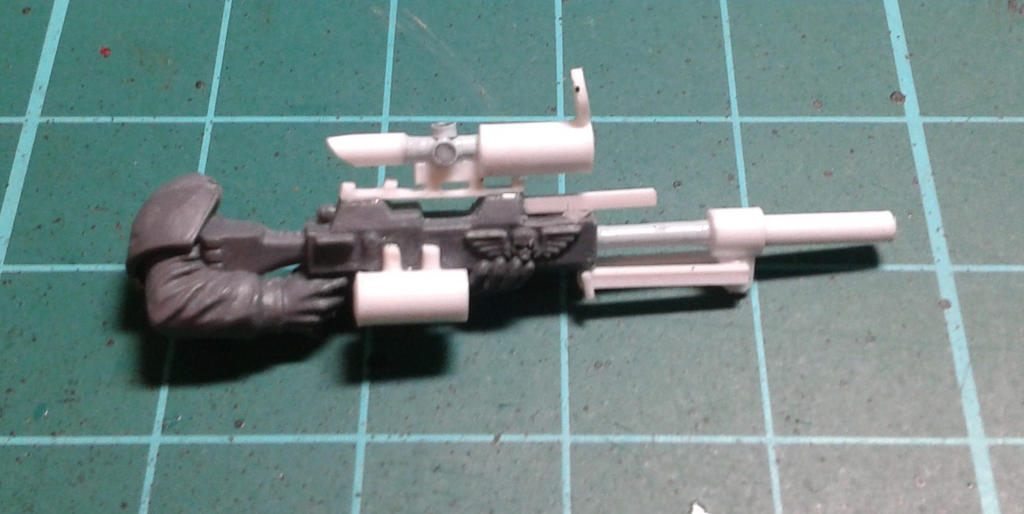
What happens next is kind of obvious really: glue them together like so. The 1mm plasticard rectangle forms the 'base', with the thinnest piece as the middle of the scope. The angled piece is for the sniper, and should be angled as shown, with the thickest piece placed at the business end of the gun.
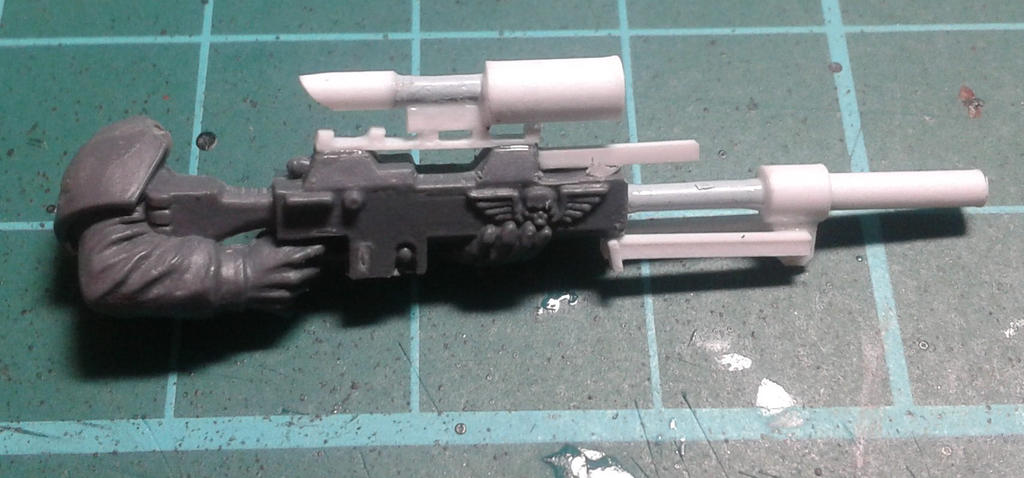
I also like to add focus controls to telescopic scopes. Just cut two plastic 'coins' from the thinnest rod, and glue them to the thinnest part of the scope as shown one on top, one on the side.
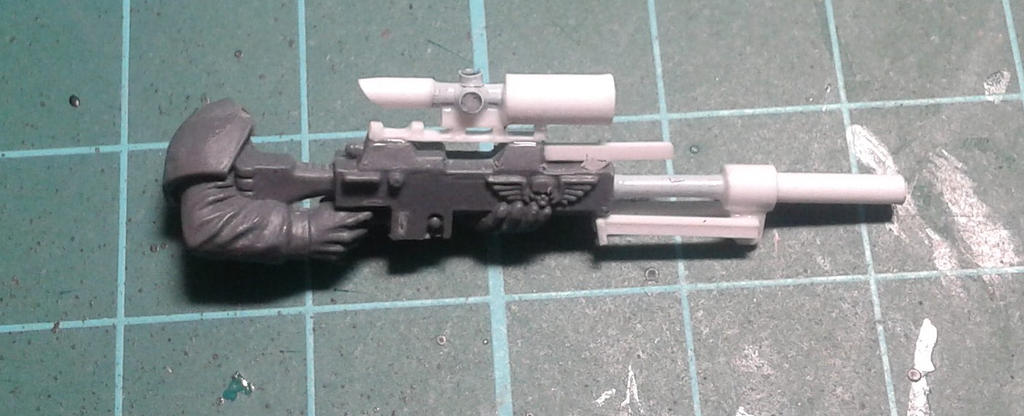
If you really want to go hyperdetailed, you can cut a slice from the thickest rod like so
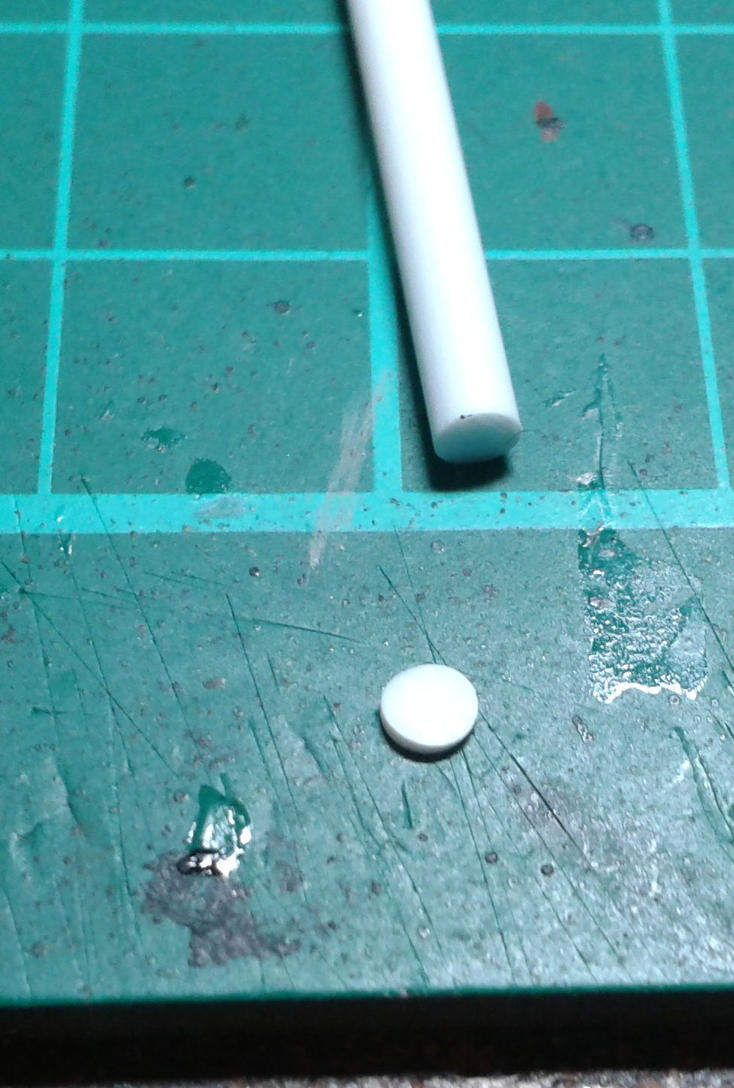
and glue it on top of the scope as a flip-up lens cap:
You may note I also added the helical magazine ([url]http://en.wikipedia.org/wiki/Magazine_%28firearms%29#Helical[/url]); it's simply a piece of the thickest rod cut to length, with two small pieces of our old faithful square styrene rod for detailing.
And there you have it for another week. As always, thank you for taking the time to read, thanks to those of you who helped with replies, and I hope more of you are getting inspired to join me in the calming waters of scratchbuilding. If you've used these tutorials to personalise your armies in any way, please post some photos I'd love to see how people are doing!AUT TACE AUT LOQUERE MELIORA SILENTIO

 Reply With Quote

 Posting Permissions
Powered by vBulletin® Version 4.2.5
Copyright © 2024 vBulletin Solutions Inc. All rights reserved.
Copyright © 2024 vBulletin Solutions Inc. All rights reserved.
All times are GMT -6. The time now is 10:40 PM.
vBulletin 4.0 skin by CompleteVB